


If you have photos of your memorable lifetime moments, you can create slideshows and share them with your family, friends, fans, clients and more. iPad is considered to be a perfect device for presenting any slideshow. In this article we provide you with detailed guides on how to make slideshows on iPad using the best iPad slideshow maker on the entire or web iPhoto for iOS (iPad) .
Part 1: How to Make a Slideshow on iPad Using iPhoto for iOS (iPad)
iPhoto for iPad comes with beautiful interface and excellent editing tools and effects that lets you create and share slideshows of your favorite photos with ease. The program provides you with eight slideshow styles to choose from and several ways to share your photos across social networks.
Step-By-Step Guide on How to Make a Slideshow on iPad Using iPhoto for iOS (iPad)
Step 1
Select two or more photos, video clips, an event or album you would like to use in the slides and tap “Slideshow.”

Step 2
Confirm or change the photos to include in the slideshow:
a. If you are happy with your selection, tap “Selected” to continue
b. Tap “Flagged to create a slideshow of your flagged photos.
c. Tap “All” to make a slideshow of all your photos in the thumbnail grid.
d. Tap “Choose Photos,” or “Each Photo,” and tap “Next” to select a different photo or multiple photos.
e. Select a different range of photos by tapping Choose Photos> Range and then select the first and last photos in the range.
Step 3
Tap “New Slideshow” to create a new slideshow from the selected photos or tap the name of the slideshow under “Slideshows” to add the selected photos to an existing slideshow.
Step 4
View the slideshow by tapping the “Show” then the “Play” buttons. If you want to view slideshow controls just tap a slide while playing a slideshow video.
Step 5
To view the slideshow video later tap “Projects” and to rename a particular slideshow, tap and hold it and select “Rename.”
Part 2: The Best Tool to Make Slideshow for Mac
Filmora Video Editor is the most comprehensive slideshow maker for creating customized slideshows from photos, videos and audio recordings that represents your memorable life events. The program comes with great tools that help you create lifelike, impactful and more detailed slideshow videos. You’ll be able to add clip arts, utilize filter and effect, crop photos, add texts, adjust brightness, add intro & credit, rotate pictures at any angle and do so much more. Every user is entitled to a super personalized and gorgeous slideshow that can excite everyone.
Key features of Filmora Video Editor:
- Repairable portions in a photo can be repaired using the software.
- Pre Audio feature enables you to play an intro in videos and audios.
- You can burn slideshow videos to DVD or share them through multiple platforms that includes online social networks, TV and mobile devices.
- There are over 30 styles/themes to choose from while creating slideshows.
Step-By-Step Guide on How to Create a Slideshow for iPad Using Filmora Video Editor
Step 1 Download and Launch the Software
Using any Mac browser, get online and download the program. Drag the set-up file to “Applications” and once the program is successfully installed on your computer, you can launch it. You’ll then see the main interface that appears like the one shown below.

Step 2 Import photos or videos.
The software is designed with a media browser that enables you to upload videos and photos with ease. When videos/photos are added to the storyboard, drag and drop the specific slides in order to arrange them. In case you want to delete any file from your selection, just drag it out of the program, and it will be removed.
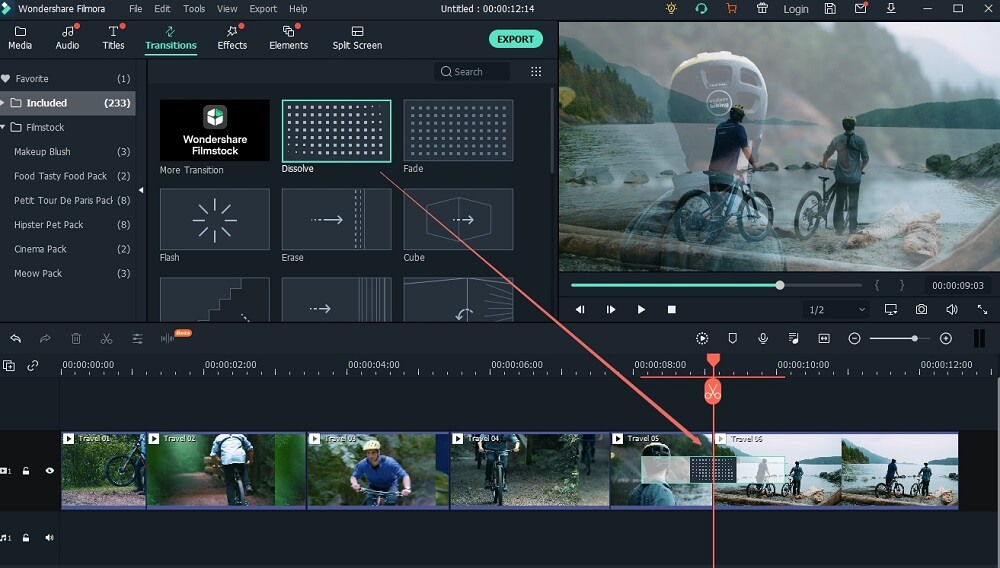
Step 3 Change Transitions
When videos/photos are imported to the project, you can then add transitions to your photo/video slide by dragging and dropping desired transitions to the timeline.
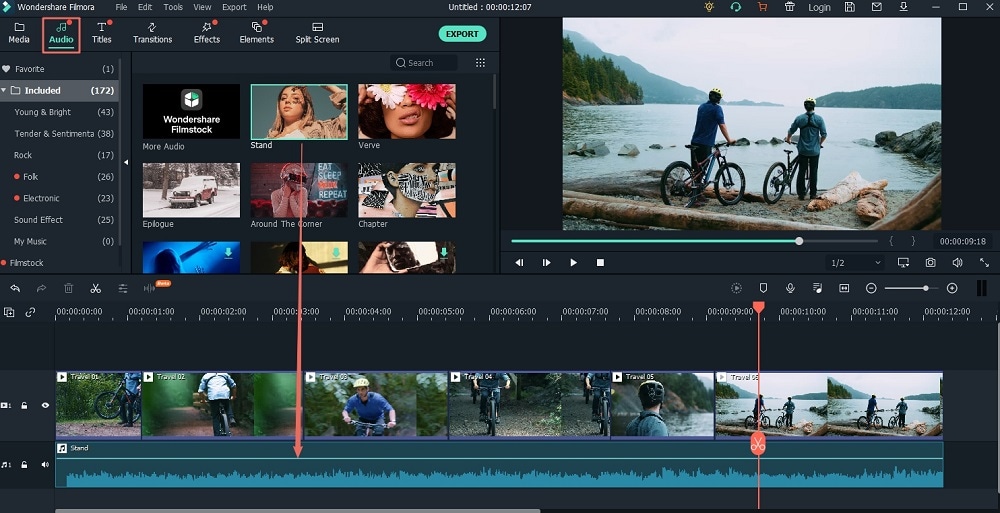
Step 4 Add music
When you add music, several buttons are displayed on the audio bar. Select the “Play” button to preview or select the “scissors” button to cut a portion of the music. You can record your voice and add it to the slideshow by selecting “Voiceover” button that’s located under the “Preview” window.
Step 5 Preview and Share the Slideshow
Preview the output slideshow video and if you feel that it meets your expectations, go to the “Share” menu at the top of the software’s interface or click “Share” button located at the middle left-hand side. You can then export the slideshow to iTunes from where you can watch it using your iPad or select the “share to mobile device” option so as to access it from your iPad.


