


If you're looking for an effective way on how to make picture slideshow with music on Mac, then look no further as you've landed to the right page! Needless to mention, you can now easily make professional looking slideshows even if you don't possess special editing skills. Just with the help of a perfect slideshow maker, you can create a picture slideshow with music, videos, and audios. You can even add music or sounds in the background (if needed). In this context, this article will acquaint you through "the top 4 incredibly easy ways to make a picture slideshow with music on your Mac (including macOS Sierra).
Part 1: Make a Picture Slideshow with Music in Slideshow Maker
The Best Picture Slideshow with Music Software
When it comes to choosing the best software to make a picture slideshow with music - the only name that pops up is iSkysoft Slideshow Maker for Mac (or iSkysoft Slideshow Maker for Windows) This tool allows you to make fantastic movies and slideshows right out of your audios, videos, and photos. It works perfectly with all Mac OS versions including Mac OS Sierra. Plus, this software can even burn the photos and videos into a DVD from your iPhoto files and iMovie files. Thus, it efficiently combines the functionalities of both iPhoto and iMovie.
Pros:
- Make a professional looking slideshow applying tons of wonderful themes & vast editing features.
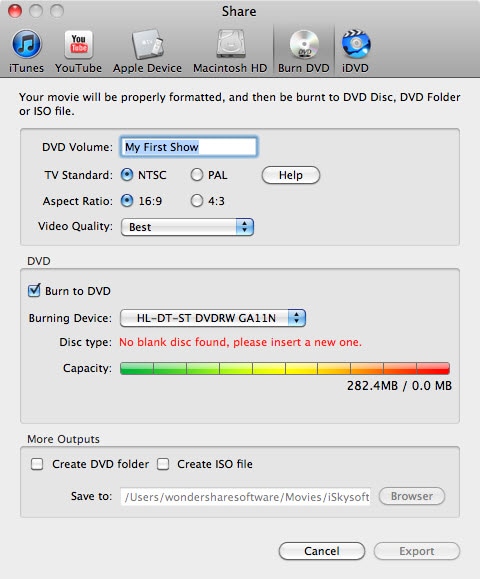
- Burn your slideshow to a DVD with optimum ease.
- Easily share your slideshow on iDVD, iPhone, iTunes, iPad, YouTube, and more.
- Fully compatible with all Mac OS versions.
Steps to Create a Picture Slideshow with Music
This software lets you transform audios, photos, and video with ease. The detailed steps are briefly described below :
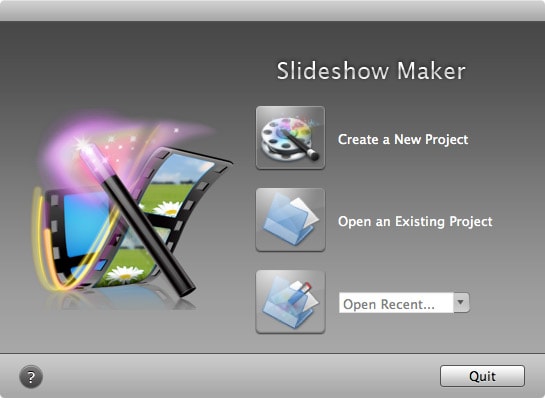
Step 1 Launch the Program
Initially download & install iSkysoft Slideshow Maker for Mac from the official website of iSkysoft. Now, launch the program.
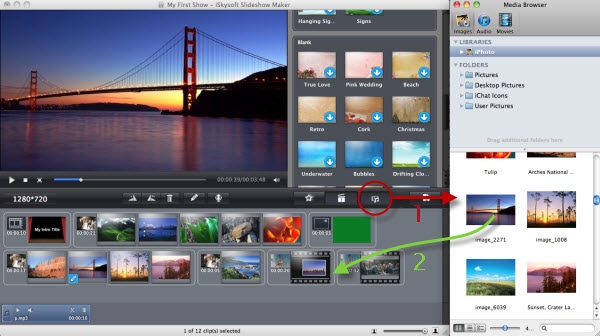
Step 2 Import Pictures
From the main interface, you can easily import images, videos, and audios to your project. When the media content is successfully added to the main storyboard, you can now drag & drop specific slide in order to arrange it.
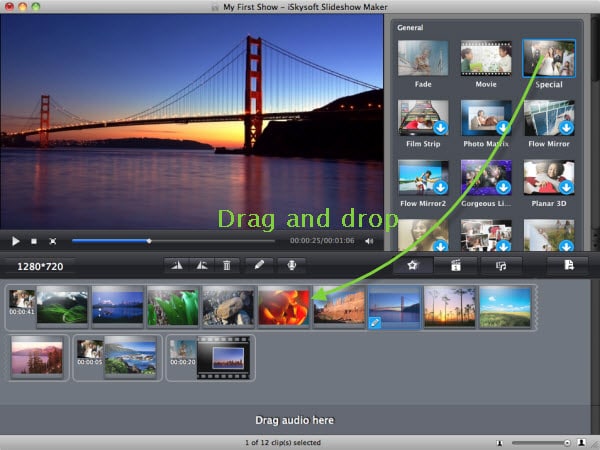
Step 3 Change Styles
When you've already imported photos, audios and video to your project, several random themes will be applied automatically. You can either keep them or you can even change them anytime as you like. More than 30 different styles or themes are included. In order to add a style to any video or photo slide(s), just drag and then drop the desired style and replace the existing one.
In fact, you can also drag video/photo from one particular style to another. To increase the number of clips, hover your mouse over the selected style and then click on the "Settings" icon. You are also allowed to change the duration of any clip. You can even change the background of style. Now, check this option "Apply to all clips" so that all the clips will have the same duration. Otherwise, just right click on any slide, a menu will be displayed, and you can now set the individual duration from here.
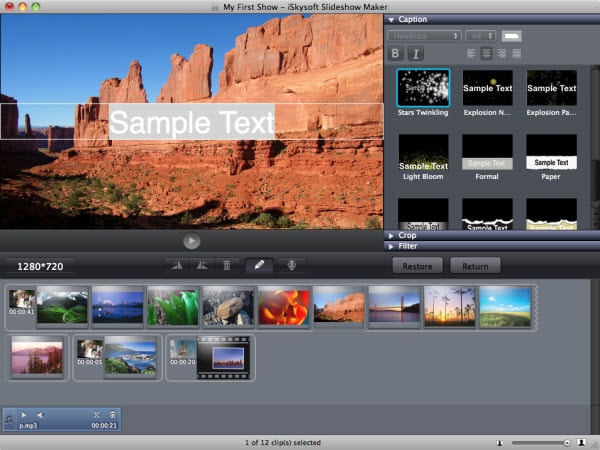
Step 4 Edit pictures and Add Music
This software comes with a wide range of editing tools; thus you can easily customize the slideshow in few clicks. Double click on any photo/video or you can also click on the "Edit" button where you'll see three separate panels, Caption, Filter, and Crop.
Caption : Just select any caption template, enter editing texts, and the caption will be added immediately.
Filter : You can choose and subsequently apply 15+ filter effects according to your requirements.
Crop : It lets you to easily crop any part of the photo in 16:9, 4:3, or any other aspect ratio. Next, click on "Apply" and return to the primary interface.
Editing Music : If you have already added the music contents to your slideshow, you can now see several buttons on the main interface. Click "Play" to preview it or click on "Scissors" button to crop the unwanted part. Click on "Voiceover" button to add a voiceover, insert your narration, start speaking, and finally, click "Stop Recording" to finish it.
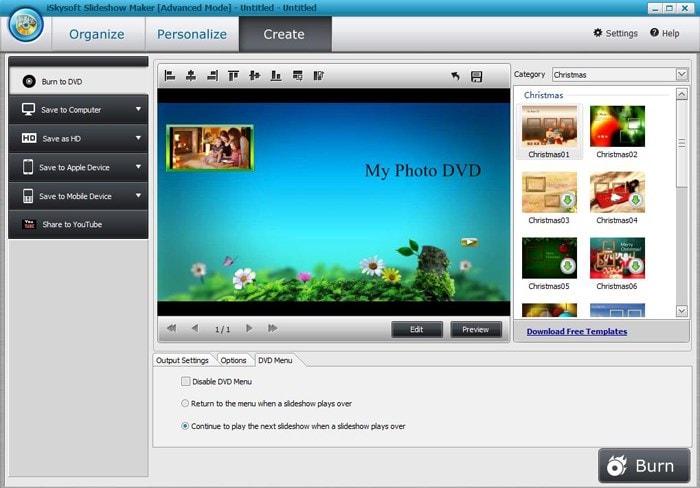
Step 5 Make Picture Slideshow on Mac
Lastly, preview the slideshow you’ve created, from start to end, and if you’re satisfied with it, click the "Share" button at the top to specify how you wish to share it with others or save on your Mac.
Part 2: Make a Picture Slideshow with Music Online
Make a Picture Slideshow with ROXIO PhotoShow
ROXIO PhotoShow is another software that allows you to create a picture slideshow with music online. Here to note, it's a free version online software which allows you to easily create a picture slideshow at anytime & anywhere. But, in order to enjoy unlimited slideshow creation & sharing, you'll need to purchase the premium version.
How To Use It? : The step-by-step guide is briefly described below :
1.Add Pictures, Musics, Or Videos : Visit the official website of ROXIO PhotoShow. Now, you can browse your computer in order to import photos/music/videos.
2.Personalize It : Once, you have added the media contents, a slideshow will be automatically generated. You are now free to customize it until you get the right one.
3.Share : Next, if you're done with customization and personalization, share it instantly with your family and friends.

Part 3: Make a Picture Slideshow with Music in iMovie
This software comes preinstalled with your Mac. Again, you can also download it online. This software comes with various themes, new titles, and video stabilization features which you can use in order to create picture slideshows.
How To Use It? : The step-by-step guide is briefly described below :
1 - Launch the program : Launch iMovie and from the toolbar, create a new movie. An interface will be opened with several themes. So, you can now take your time to choose the best one as per your project.
2 - Open iPhoto Library : From the left-hand side panel, click on iPhoto Library option. It will open various iPhoto albums & events. Even, you can also browse to import your desired photo.
3 - Import Your Photos : You can now import the desired photos into the interface. Just use the built-in cmd key to click & select the photos (you want to import). Once you're done, drop all the selected photos to the timeline.
4 - Select Transitions : The photos will be automatically stitched together. Double-click on them and edit the transition.
5 - Import Music : On the top, you'll find the Import tab from where you can browse and import any music of your choice. Select the desired track & click Import. You've now successfully created a picture slideshow using iMovie!
- The steps are pretty easy and convenient.
- The interface is rich & intuitive.
- You can easily browse and import music & photos to your slideshow.

Part 4: Make a Picture Slideshow with Music in iPhoto
To create a picture slideshow on Mac using iPhoto, perform the following steps.
Step 1 : Open the photos folder, and choose the photos which you want to incorporate into the slideshow. Simply select them by hovering the mouse over those photos.
Step 2 : Next, right-click on the empty space on the main screen, and select the option "new slideshow".
Step 3 : Click Music in order to choose any soundtrack from GarageBand, iTunes, or sample music that are included with iPhoto. Now, click on Settings, make the proper selections, and click on OK.
Step 4 : After that, the new slideshow will be created. You can easily view it just by clicking on the "Slideshows" tab.
Pros:- You can easily create slideshows using the default iPhoto software.
- You can also import both pictures & soundtracks to your slideshow.
- You can also use some default features like Zoom in & Zoom out, apply transitions on slides, adjust slide duration etc
![]()


