Creating slideshows can be a great way of preserving your life memories. You can save the slideshows on your computer or share them online with your friends or family. If you do not want them to take a lot of space on your computer, you can burn slideshow to DVD. There are many applications that you can use to burn slideshow on DVD. If you want to burn them without encountering a lot of problems, you should choose the best DVD slideshow software. Here is the best solution for you.
The Best Tool to Burn Slideshow to DVD on Mac
The best tool that you should consider using for burning slideshow to DVD on your Mac is iSkysoft Slideshow Maker for Mac. It enables you to weave your photos into compelling video slideshows to share online, use for presentation purposes or burn to DVD. It is packed with colorful and professional templates that you can use to create professional looking slideshows. You will have an endless selection of features to choose from when creating slideshows, including a motion tool for adding titles to your videos, trimmer feature for stitching your audio files as per your needs, filter for extracting photos in a more attractive way and pre audio for playing an intro into your slideshows. (iSkysoft Slideshow Maker for Windows is also available.)
Why Choose This DVD Slideshow Software:
- It has a filter and effect function that gives you more personalized audios, videos and pictures.
- It gives you full privilege of sharing the slideshows that you will create online and on different mobile devices.
- It has a wide range of templates to choose from so as to create slideshows that are more appealing to your needs.
- It allows you to rotate pictures so that you can enjoy viewing them from any angle.

How to burn a slideshow to a DVD
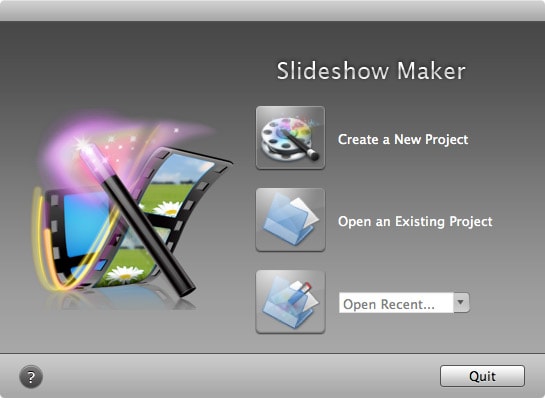
Step 1 Launch the Program
First of all, you will need to make sure that iSkysoft Slideshow Maker is installed on your Mac. To install it, you will need access the iSkysoft website, search for it, download it and then save it somewhere on your computer. Simply drag it to the Applications folder to install it. After that, you can launch it.
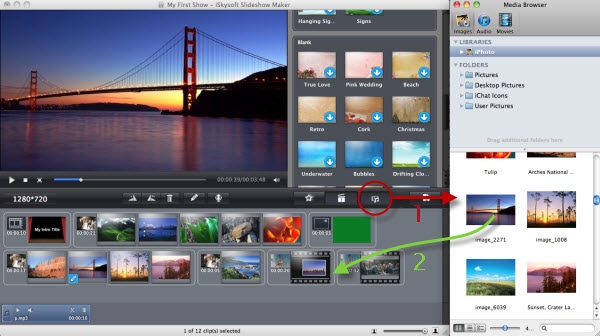
Step 2 Import Photos or Videos to Create Slideshow
After launching the program, you will need to upload the pictures and videos to create the slideshow before burning a slideshow to DVD on mac. The program uses a media browser that allows you to import the files with ease. Locate the browser in the program and make sure that it is turned on. After adding files to the storyboard, you will simply need to drag and drop them to a specific slide to arrange them.
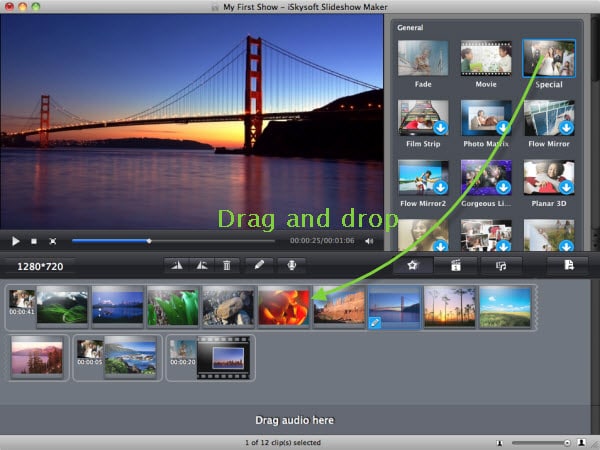
Step 3 Select a Style
After importing the photos and videos, you will need to change the themes and styles. You can also choose to use the styles that will be applied automatically when you import the media. Adding styles is easy. You simply need to drag and drop a desired style to replace the one that is already available.
Step 4 Edit Slideshow
The next thing you will need to do is edit the videos or pictures you uploaded. iSkysoft Slideshow Maker for Mac has a wide range of editing tools that you can use to customize your slideshow any way you want. You simply need to click on the photo or video you want to edit and then click on the “Edit” button after you have selected an item to show the editing dialog. After that, click on Return to confirm the changes or Discard if you do not want to keep the changes.

Step 5 Add Music to Slideshow
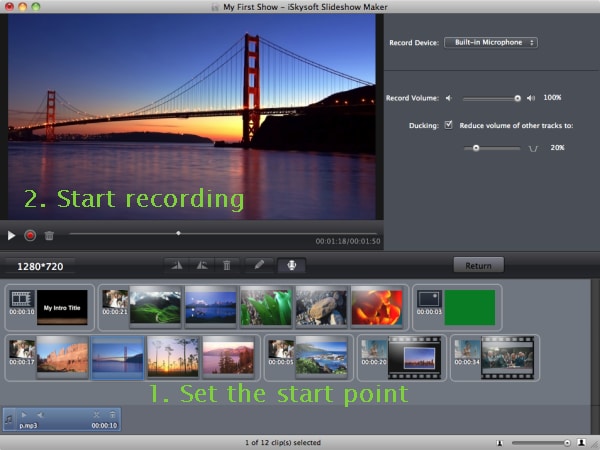
You will need to add music if you do not want the slideshow to play quietly. It is easy. Just right click on the photo or video and choose the music that you want to add from your computer. You can also add voiceover to the slideshow by clicking on the Voiceover button that is located under the preview window.
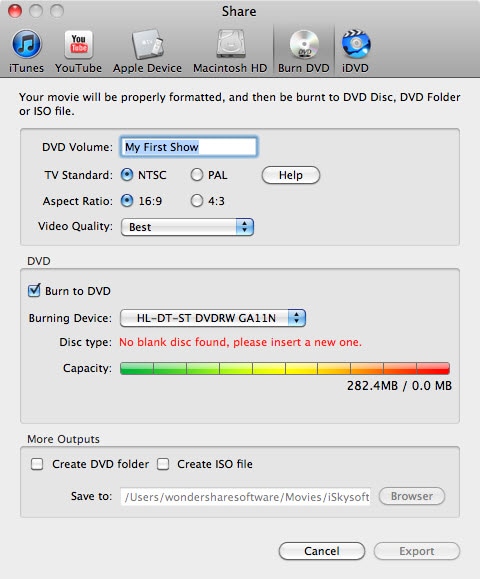
Step 6 Burn Slideshow to DVD on Mac
To burn the slideshow that you will have created, you can use the built-in DVD burning tool. Go to the "Share" tab and click "Burn DVD". You just need to insert a blank DVD into your Mac’s DVD drive and follow the procedures for burning a video file.
You can also use DVD Creator for Mac or iDVD to burn the slideshow to DVD disc.