


Cloning yourself in a video is one among the coolest stuff as far as video editing goes. Whether you want to have a conversation between yourself or simply create your twin in a video, self-cloning is the way to go.
In this tutorial, we’ll be using Filmora as a clone video maker. The steps involved in creating a clone video are quite simple. Follow the steps outlined in this tutorial and you’ll create a realistic clone in a jiffy.
- Part 1. Simple Method: Clone Yourself in a Video using PIP Effect
- Part 2. Advanced Method: Clone Yourself using Green Screen Effect
Simple Method: Clone Yourself in a Video using PIP Effect
The PIP (Picture-In-Picture) effect on Filmora Video Editor imposes one video on another. In sum; you film your clips with a steady camera, save and merge them on the timeline, apply filters to create a uniform background and you’re good to go.
Here are the detailed steps involved in cloning yourself in a video using the PIP method on Filmora:
Step 1: Shoot your footage
While shooting the footage, try to keep the camera steady—mount your camera on a tripod if you own one. Whichever device you choose to use, whether using a dedicated digital camera/your phone, the most important thing is keeping the camera steady in one background.
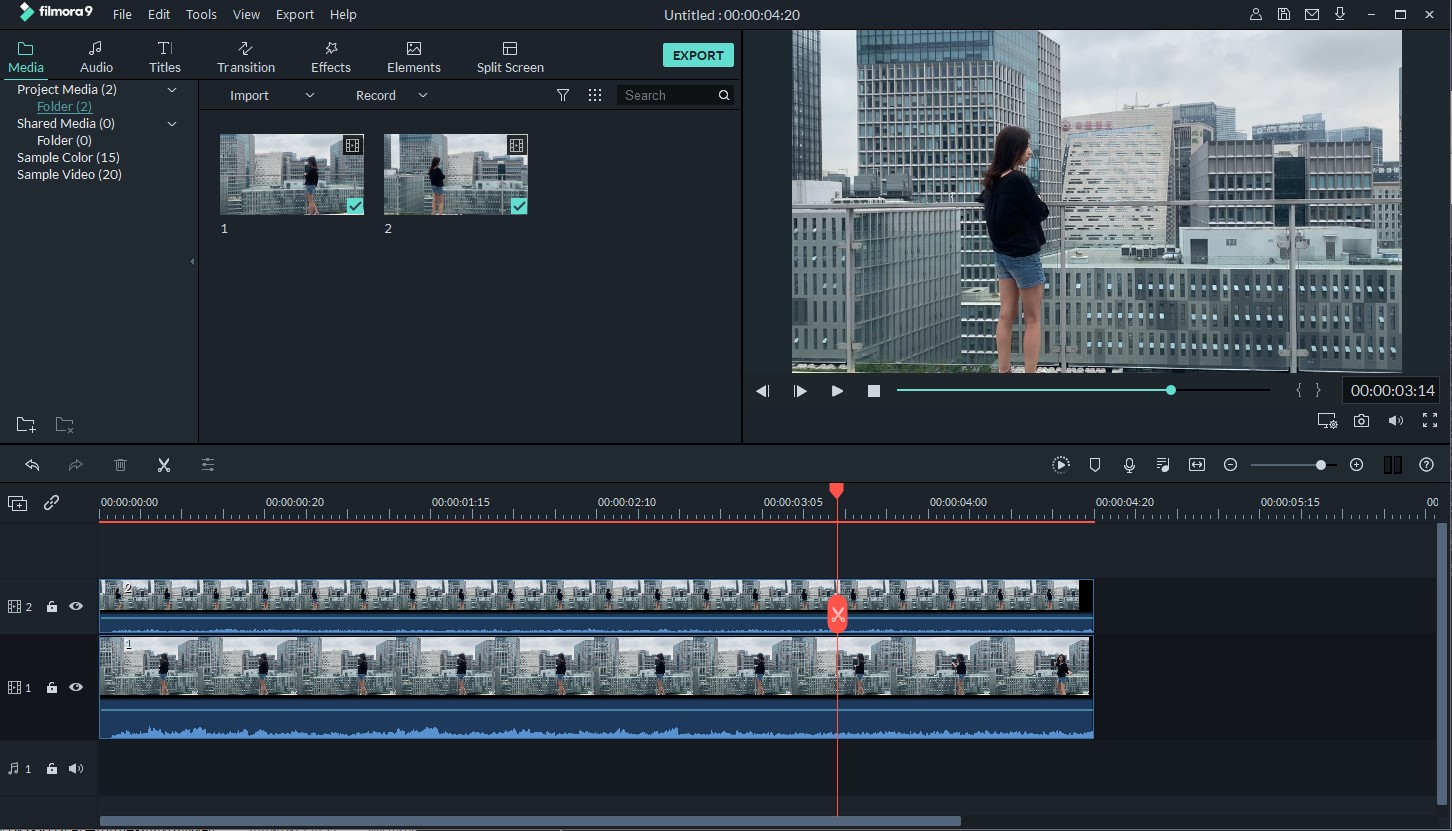
We’ll use two clips for a start: In the first video, record yourself performing an action and in the second video (without changing the background or moving the camera) record yourself performing another action—probably dressed in another outfit. You may want to shoot your videos quickly to avoid significant changes in background lighting.
ALSO, try to get the timing right if your clone is going to have a conversation with you.
Step 2: Open Filmora, create a project and import your files
Launch Filmora (Filmora is a video editing software, you will have to install it if you don’t have it). Next, you create a new project and import the two clips into it.

Step 3: Merge and apply effects
Now, here’s the fun part:
With your two clips now in Filmora, drag and drop the first one into the timeline. Next, you drag and drop the second clip just above the first one in the timeline.
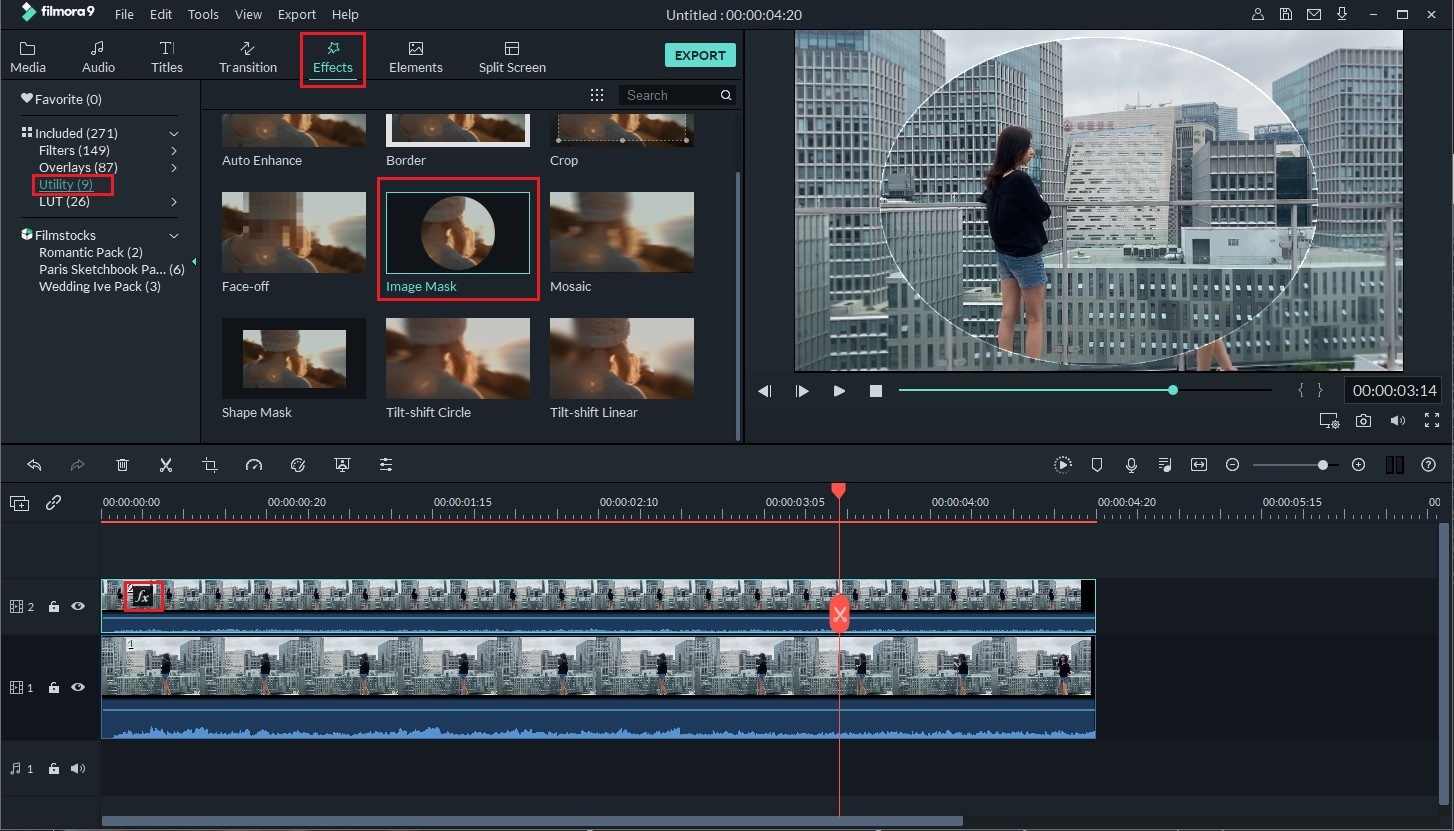
After that, click Effects from the panel above your project files and click Utility from the sidebar. From the utilities, find Image Mask, drag and drop it on the second layer of the timeline (i.e. on the second clip you dropped on the timeline) and click on it.
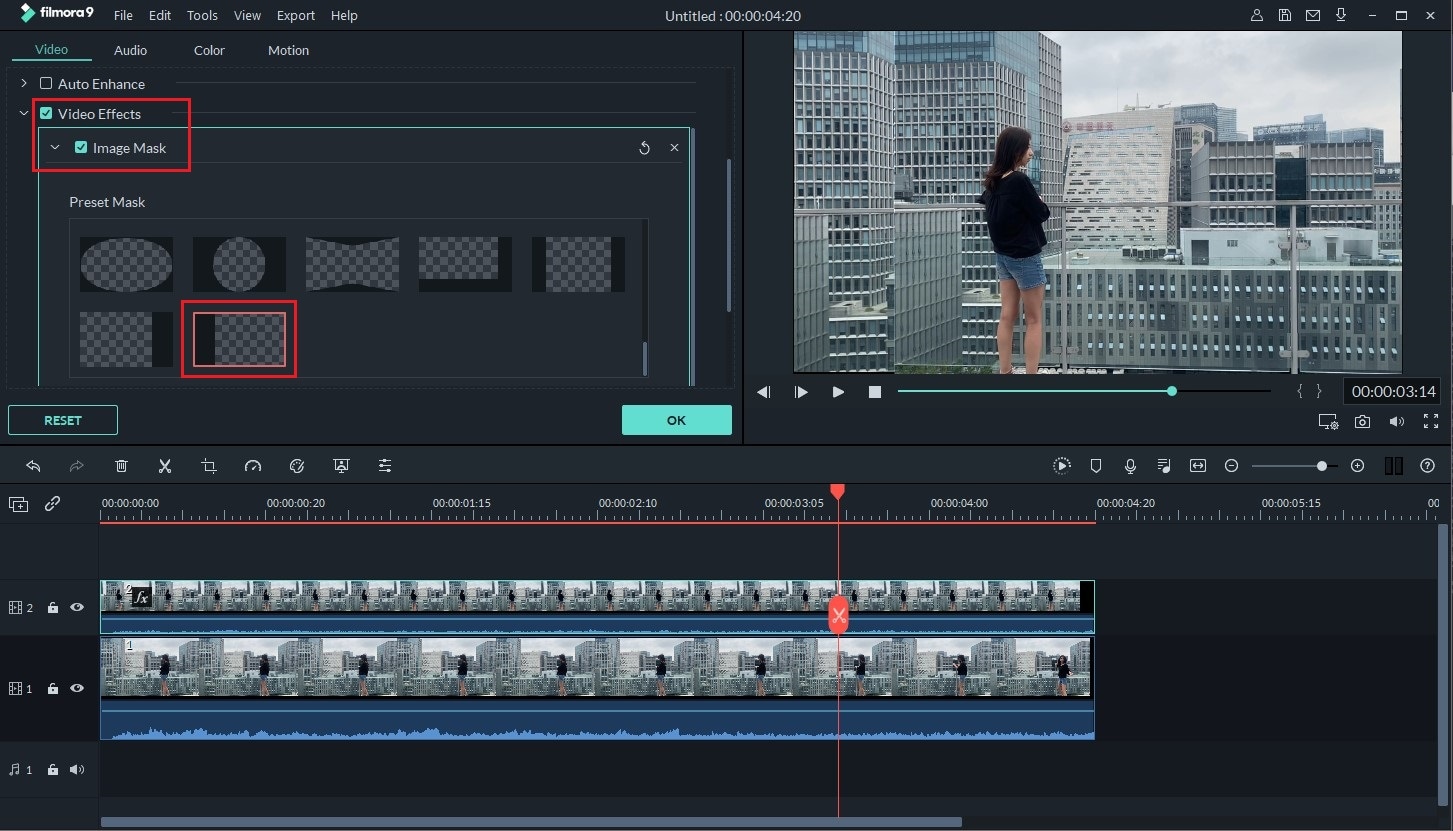
From the upper left area of the software, click on Video Effects. Under Preset Mask, scroll to the end and click the last item in the list.
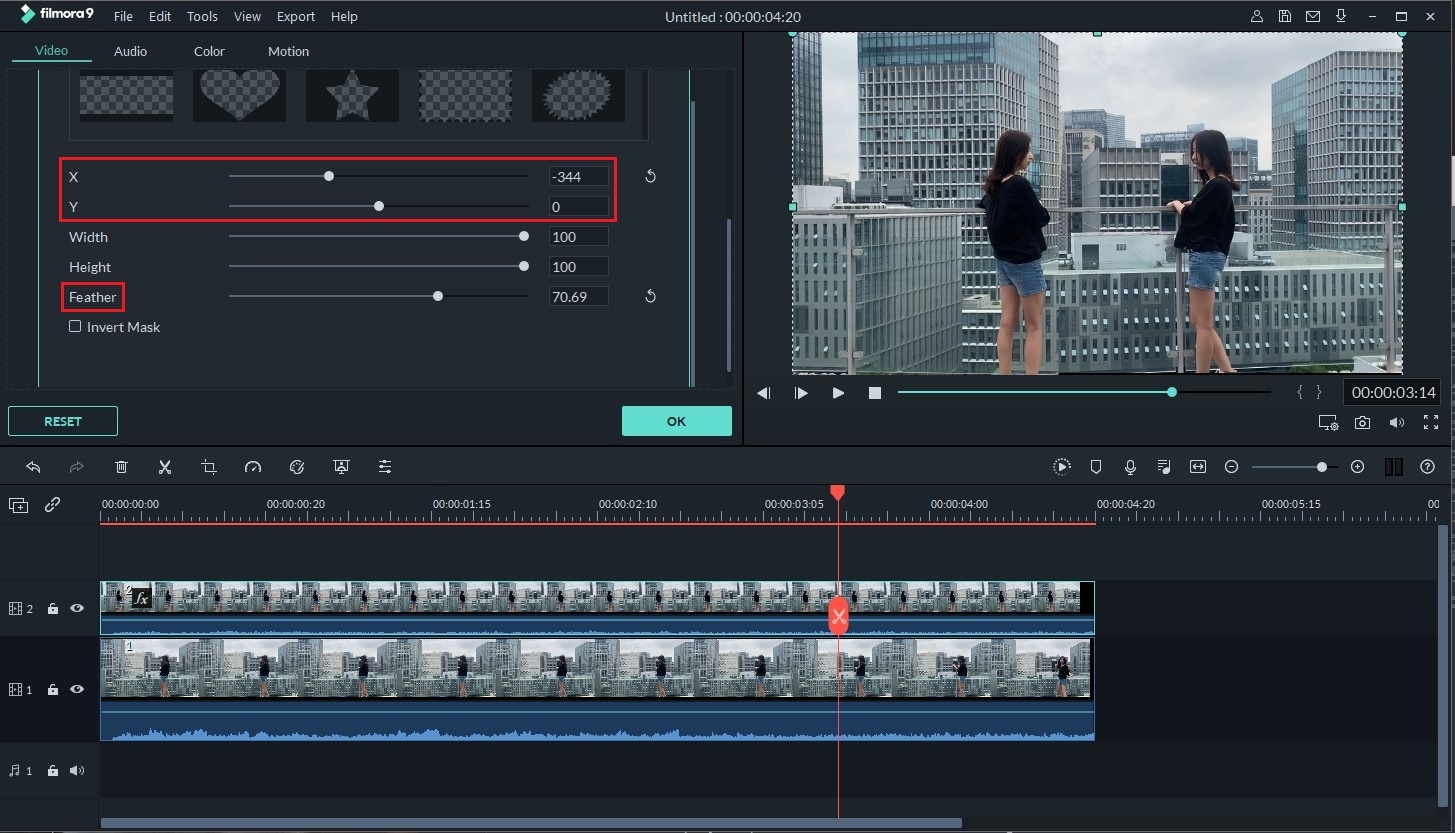
In the next window, go to X and slide the bar towards the right or left until your videos take equal spaces. If the backgrounds do not match, simply scroll to Feather and adjust the bar and viola!
Advanced Method: Step by Step on How to Clone Yourself using Green Screen
For the Green Screen method, you’ll have to shoot your footage with a green screen covering the whole background behind you. Refer to the picture below:
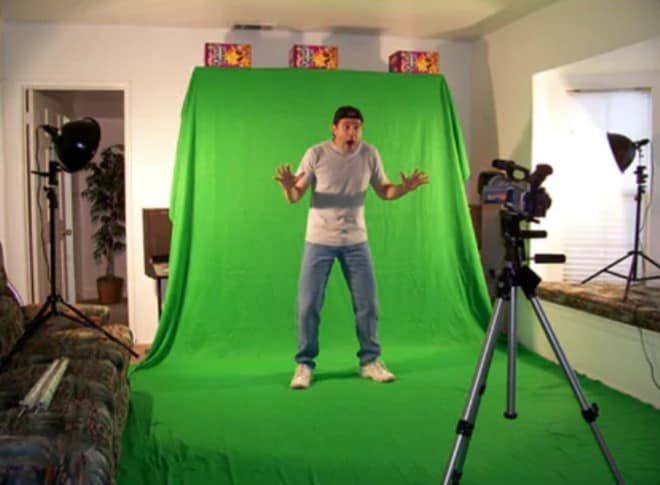
Professional green screens might be a bit expensive, however, improvising is allowed. Matter-of-factly, it doesn’t have to be a green background. It could be red, pink, blue or any colour as long as it is plain and uniform—not a mixture of colours. You could use green sheets, posters, tapes, lights, coloured walls, etc. Once you’re done setting up, simply continue with the procedures below.
Step 1: Film your clip
Set up the camera in such a way that the green background covers the entire viewable area. Obviously, you should avoid wearing clothes that match your background (green in this case). You could film yourself walking from left to right and vice versa—depending on what you want to achieve in the video. After filming (preferably in HD), proceed to the next step:
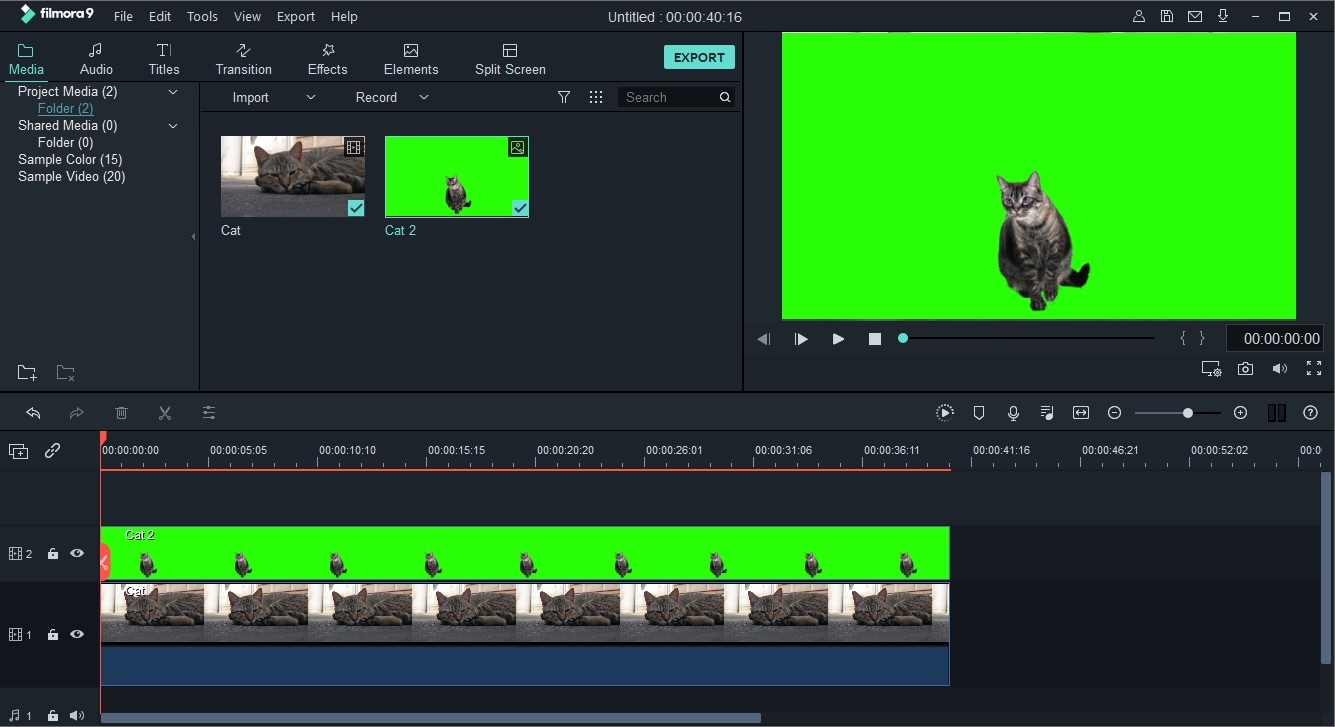
Step 2: Import/Add your clip(s)
Launch Filmora, create a new project or open an existing one and add your clips. Add every file you’ll be needing—from additional clips to backgrounds and music.
Drag and drop your first video to the first layer on the timeline. Add the clip with green background...place it just above the previous one.
NOTE: The image or video you want to show as the background (that is after removing the green background) should come first.
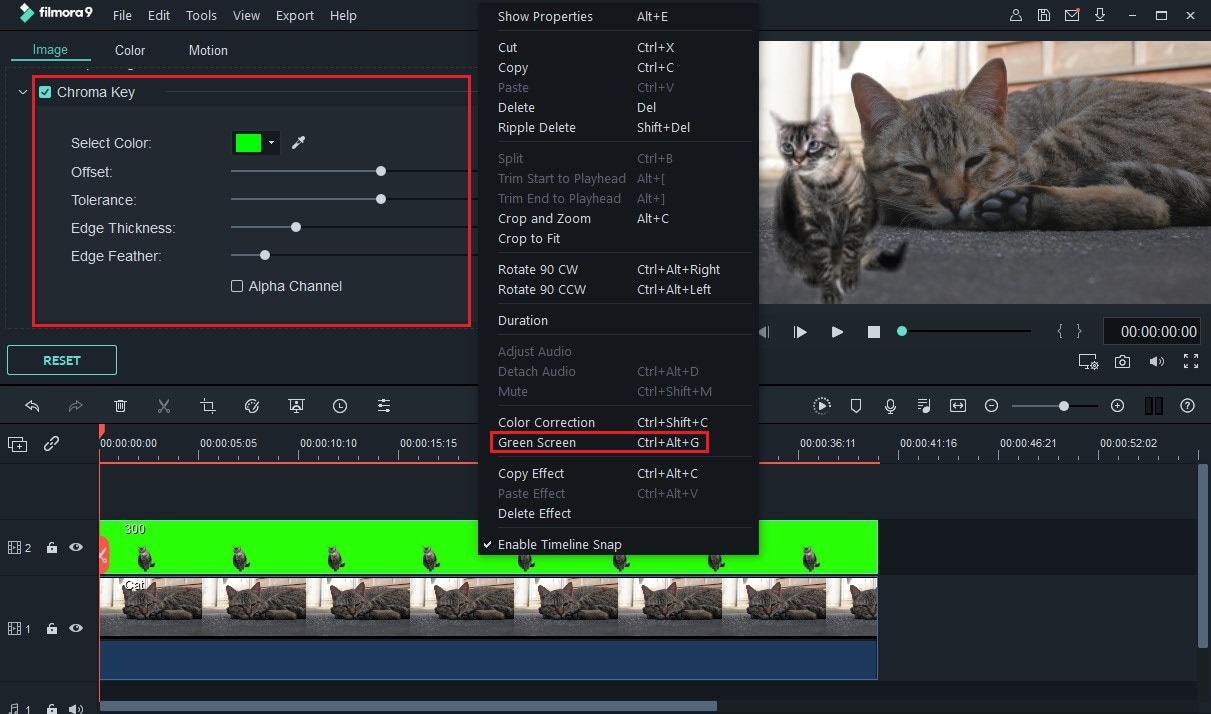
Step 3: Clone yourself
After doing all that, simply right-click on the green background video in the timeline and select the Green Screen option.
Note: If you used other color for background of your clips like blue, please click on Select Color in the Chroma Key menu. A colour palette will appear, simply select the colour you used as background (green in this case) and notice how the green background disappears.
If you have a background image or video already at the bottom of your timeline, you’ll notice how it brilliantly fills the entire background—replacing green or whatever colour you used. Repeat the same procedure to remove the background from the rest of the videos.
To organise, resize or reposition any clip, click on that clip on the timeline and select Video Effects. Under Preset Mask, scroll to the end and click the last item in the list. In the next window, go to X and slide the bar. Notice how the space taken by that particular video gets adjusted. Furthermore, you could click on the video you applied mask from the preview window to resize it—this is particularly useful if you wish to create a much smaller clone. Play your video to see results!
Conlusion
Well, in this post you have learnt 2 ways to clone yourself in a video. Which one you would like to try first?
While the PIP method may satisfy the needs of beginner and amateur filmmakers, professionals may prefer the Green Screen method.
Anyway,
click the bouton below to explore more more fun ways by yourself!


