


Lightwork has the fix if you feel overwhelmed by the sheer number of editors in the market.

Gone are the days when your only worry was to cut and trim the editing clip. These days there are dozens of tools and editing software, each with its own set of features. But having these extra features doesn’t automatically mean they will be needed. In fact, you can still do most of your edits on Sony Vegas and be done with it.
This begs the question, are there any editing programs that can perform basic tasks such as video splits and has an easy-to-understand UI? Well, Lightwork might be just what you’re looking for. It’s a non-linear editing software with a clean interface.
Besides that, it runs smoothly across a number of operating systems to ensure everyone has a smooth experience. That said, today, we will go through how to split a clip in Lightworks and export it at the end of the project.
We will also take you through some useful lightwork tips and a bonus editor so you can choose the best.
Part I. How to Split Videos in Lightworks
In Lightworks, splitting or trimming your clip is quite effortless. You don’t need any technical knowledge; every tool is available at your fingertips. The following guide will help you out in this process:
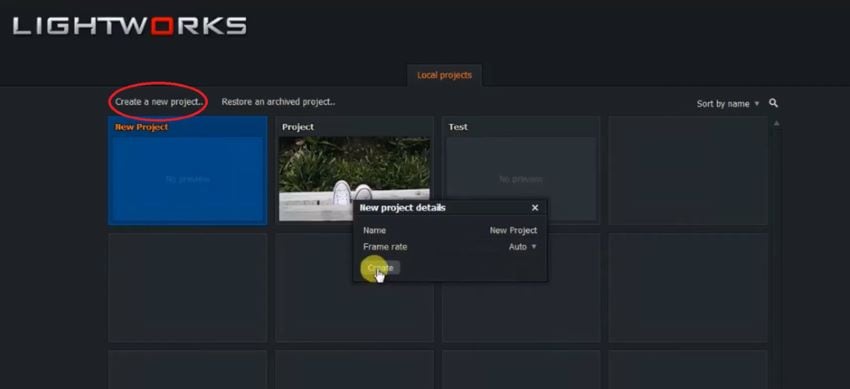
STEP 1: Launch a New Project in Lightworks
1) First and foremost, you have to have the latest version of Lightworks installed in your system. To get Lightworks for free, visit their official site and install it from there.

2) After that, launch Lightworks from your desktop and click “create a new project.” Specify a name for it, set the framerate to auto, and hit Ok.
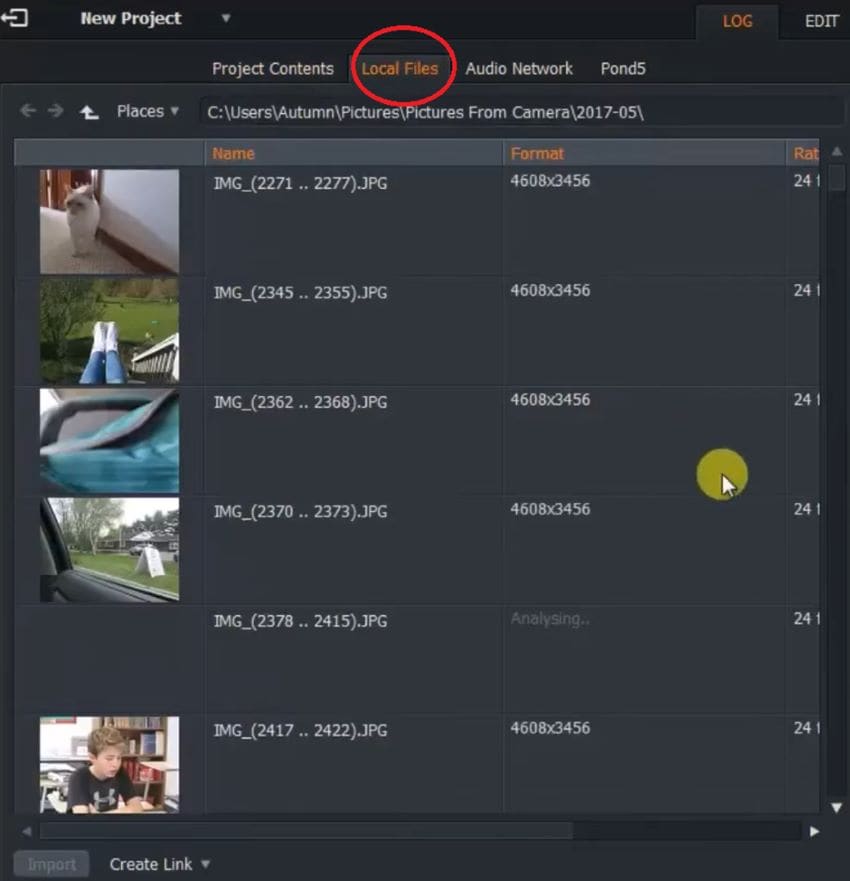
STEP 2: Import Your Files from the System and Load them onto the timeline
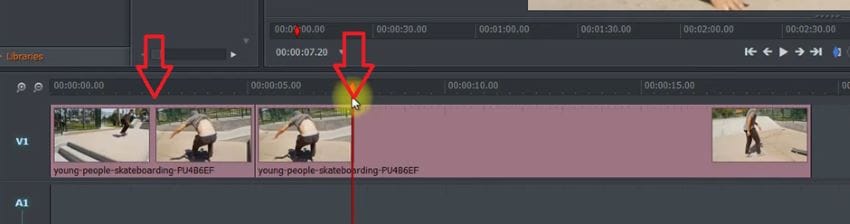
1) Once you’re on the main screen, head over to the top and select “Local files.” Now choose the video clip you want to split and click Ok.
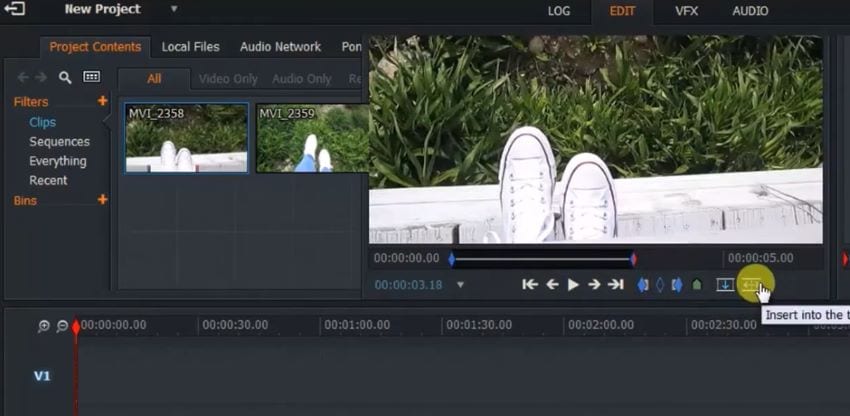
2) To put the editing videos on the panel below, double-click the clip and then select the “Insert” button. You can also drag and drop them for added convenience.
STEP 3: Cut/Split the Video Section using the Dedicated keys
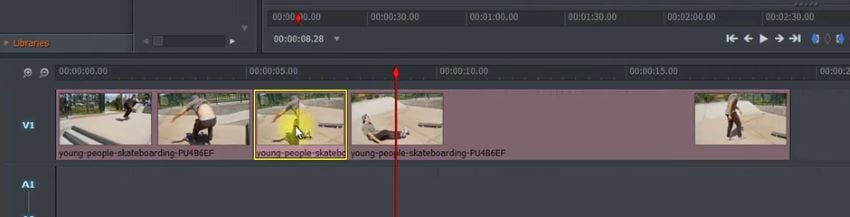
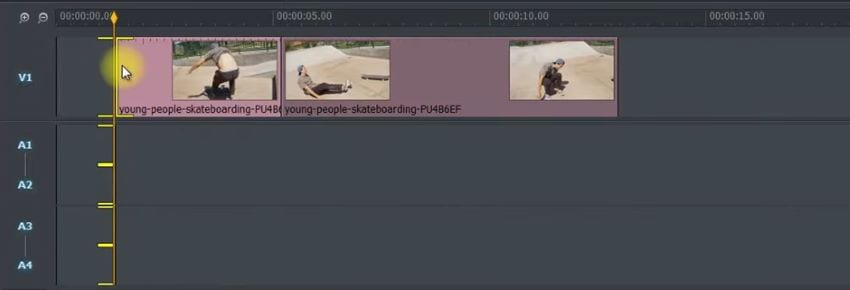
1) Now, let’s say you want to delete something in the middle of your clip. To do that, simply move the timeline head to the unwanted part and then hit “C” on your keyboard.
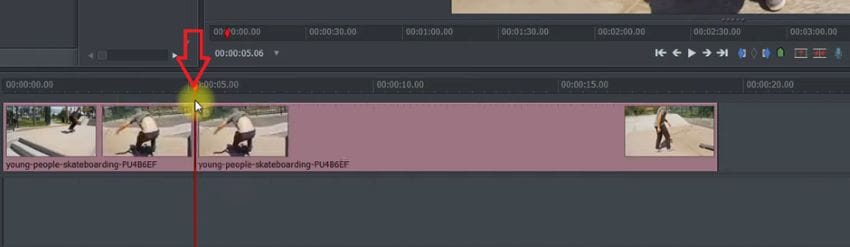
2) After that, take the timeline, head to the part where you want to finish cutting the clip, and again enter the “C” key.
3) Since the unwanted part of the clip is now cut, you need to remove it. You can select the portion and hit the “Delete” key.
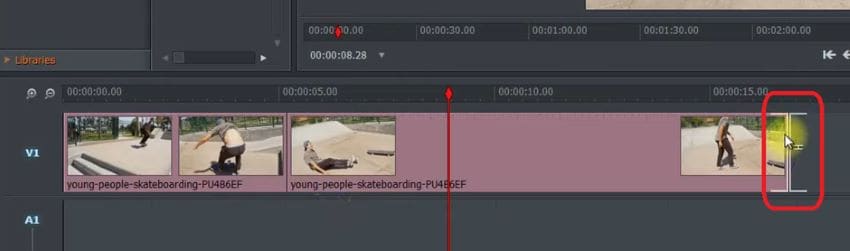
4) Deleting the portion will cause a small gap between your video. You can manually move them to each other or simply select the “X” key, which will be automatically done.
STEP 4: Trim the Required Portion from the End
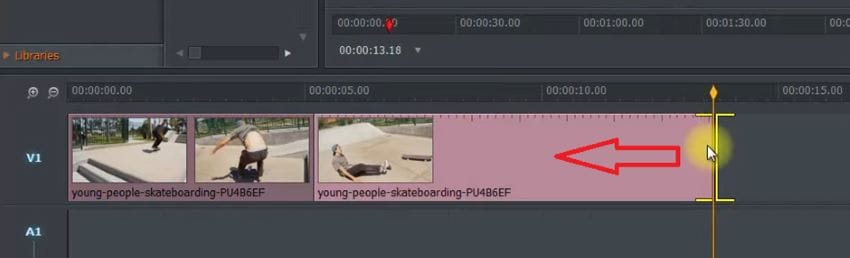
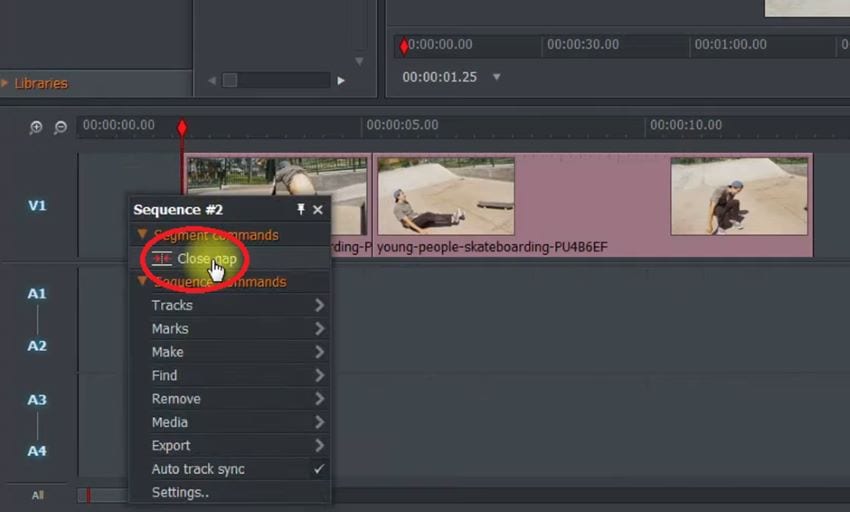
1) To trim off your video clip from the timeline, hover at the end until you see transparent brackets.
2) Now select and drag the clip to the other side, and it will be trimmed.
3) You can also trim from the beginning of the timeline but for this, press and hold the “Ctrl” key as you drag the cursor.
4) Like cutting, there will be some gaps to be removed. So, right-click the empty spot and choose “Close gap” from the list.
STEP 5: Export the Video After Split & Trim
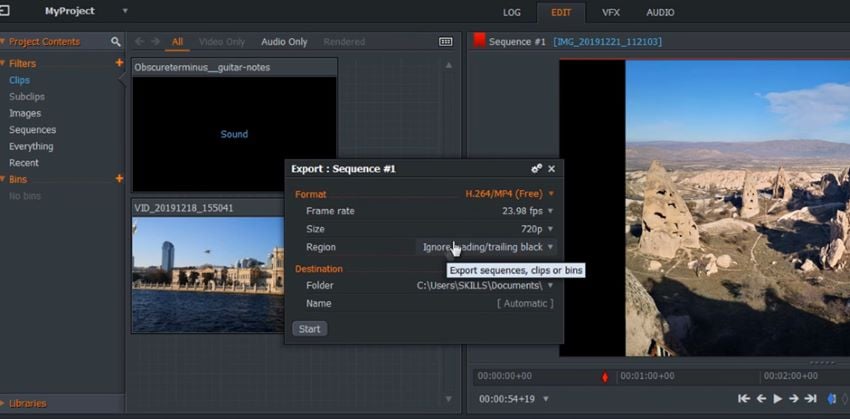
1) After you are done editing, right-click on the timeline and move to “Export.” Then select your format (the free version only supports HD MP4), choose a filename, and finalize the destination.
Hope you now understand how to split a clip in Lightworks
Part 2. Split Video Tips in Lightworks
Like most editors, there are some fundamentals of using Lightworks. These can be as simple as importing your assets to splitting the footage. Some of the important ones are as follows:
1) Uncheck the audio track sync option as you’re moving your clip on the timeline, as it can overlap your edits.
2) Always preview your clips after any trim or split, as it can get hectic at the end of the project. This can be done by selecting the “Playback” button at the top.
3) Make sure that all of your Lightworks split clips are in the same format (resolution) and that there is no variation in between.
4) Try not to overlap the segments while stretching the time gaps.
5) Create backups of your clips before you split them, and make sure to remember the shortcuts.
Part 3. Filmora – A Premium Alternative to Lightworks
Lightworks is an excellent tool to have in your arsenal, but that doesn’t mean it’s perfect. Often, adding certain effects and performing a specific function in Lightworks feel outdated. This means you will probably need to learn several tutorials to figure out how to add transitions and use the trim tool.
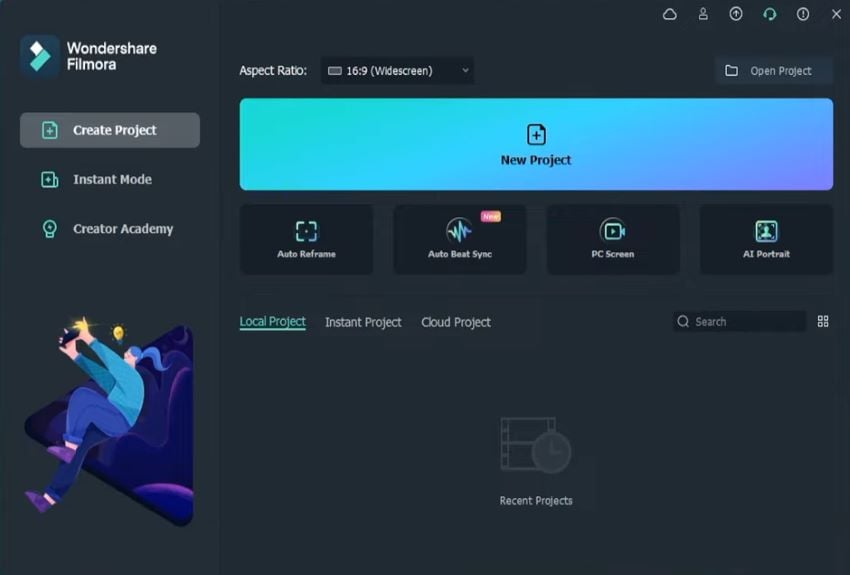
But what if you didn’t need to have to worry about all these things and could get started with your clips? Well, meet Wondershare Filmora, an easy-to-understand editing app that doesn’t come with any strings attached.
Unlike Lightwork, it can even render 4K clips in a matter of minutes. And because of its simple interface, importing your clips won't take you all day. With Filmora, cutting and trimming your clips becomes a child’s play.
This program is supported on almost all major operating systems and doesn’t require much hardware to run. They even offer exclusive features, such as motion tracking, audio ducking, and color matching. So, if you want to give your content a new outlook, they will have you covered with their advanced functions.

Recommendation: Filmora Video Editor
- Best video editing software for beginner and semi-professional, that comes with powerful editing skills like trimming, splitting, rotating, editing, etc.
- Advanced video effects like green screen, PIP, audio mixer, etc. can also be found and applied to your video within few clicks.
- 500+ free special video effects to customize and create an awesome movie by yourself.
- 1000+ standalone effects downloading resources to make videos in all kinds of styles.
- Export videos to Chromebooks compatible format with 1 simple click.
How to Split Videos in Filmora - A Step-By-Step Guide
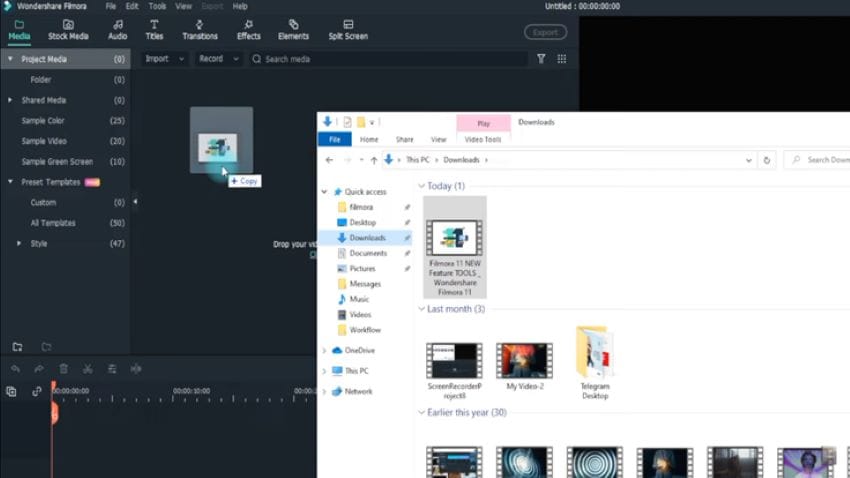
1) Launch your Filmora app and create a new project (like you did in the case of Lightworks).
2) This will load you into the interface. Now you can click on the main “Import” box or drag and drop the clips straight from your system.
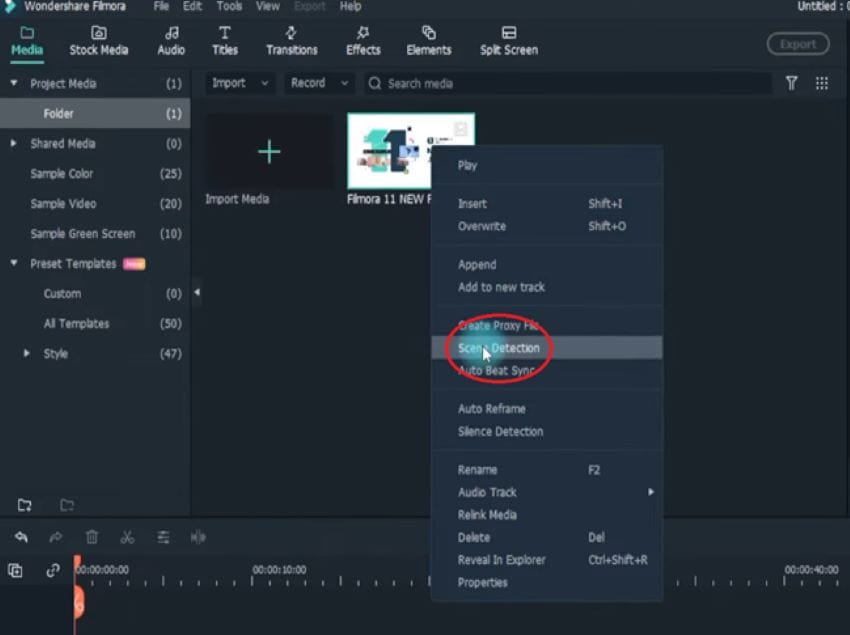
METHOD 1: Use the Scene-Detection Feature For Automatic Split
1) Wondershare Filmora provides a scene detection feature that can automatically split the video clip into many segments. To try this, right-click on the clip and choose “Scene Detection.”
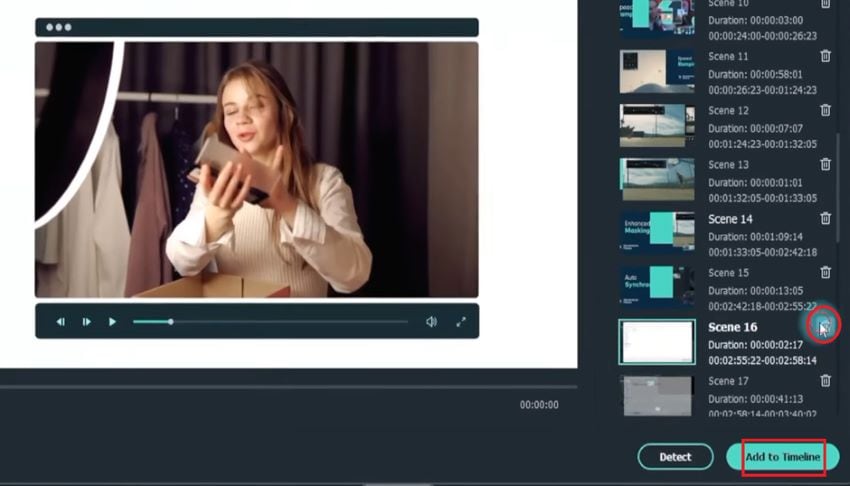
2) Wait for a few seconds, and the software detects the different portions. Once finished, delete the unwanted segments and add the remaining ones to the timeline.
METHOD 2: Use the Manual Method to Split & Trim the Clip
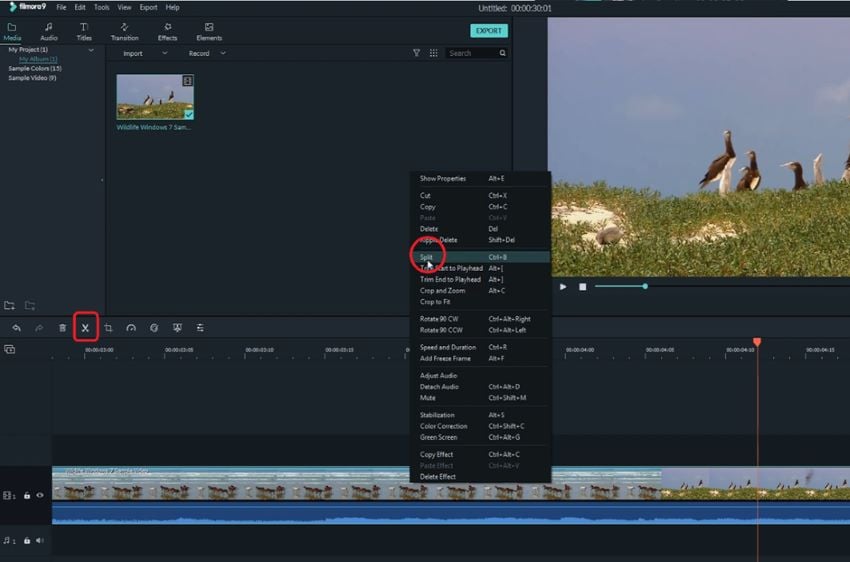
1) The second method is to edit the video straight from the timeline. For that, move your cursor over the position where you want to cut, right-click and then select “Split.” You can also use the cut button at the top or press the “Ctrl + B” shortcut.
2) Next, to trim off the part of the clip that you don’t like, select the clip (from the beginning or at the end) and drag it to either side.

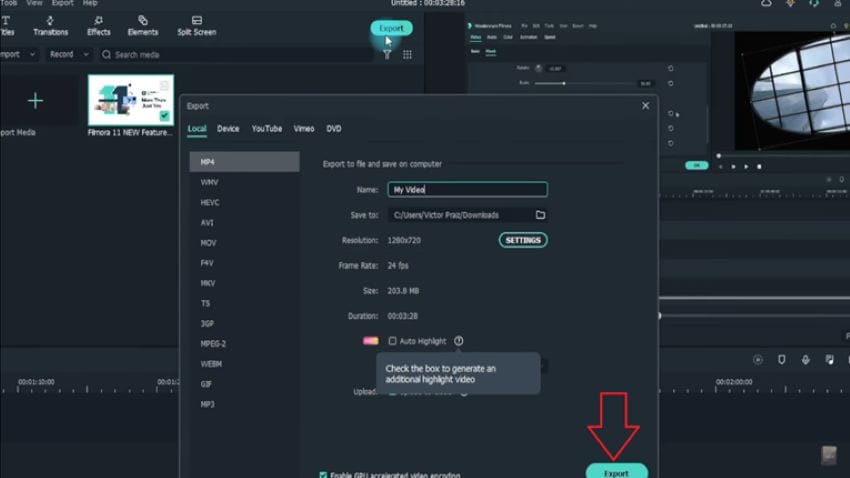
3) Once satisfied with the split, select the “Export” button from the corner and choose your format.
You can learn more about video splits in Filmora from here.
Conclusion
All in all, these were some guidelines through which you can split videos in Lightworks. No doubt, this editor is still one of the most sought-after tools in the industry, but when you talk about convenience, Filmora is a different ball game. Everything is crystal clear in its UI, and you won’t feel overwhelmed using it. So, try it out yourself and see the difference!


