


How do use green screen in Premiere? Green screen or chromakey is an editing effect that allows you to add images or clips on virtual background. With this feature, you can be able to superimpose a superhero character on the virtual background. A software with this chromakey effect is Adobe Premiere. In this article, you will learn how to use green screen in Premiere as well as the best alternative to green screen in Premiere.
- Part 1. How to Use Adobe Premiere Green Screen
- Part 2. Why Do You Need An Alternative Green Screen Creator
- Part 3. The Easier Alternative Method to Create Green Green Screen in Premiere
Part 1. How to Use Adobe Premiere Green Screen
Before we get started you need to ensure that you have installed the Adobe Premiere software on your computer with the videos and green screen clips on your computer. After that, you can now follow this step by step guide on how to use green screen in Adobe Premiere.
[Tutorial] How to Use Green Screen in Premiere
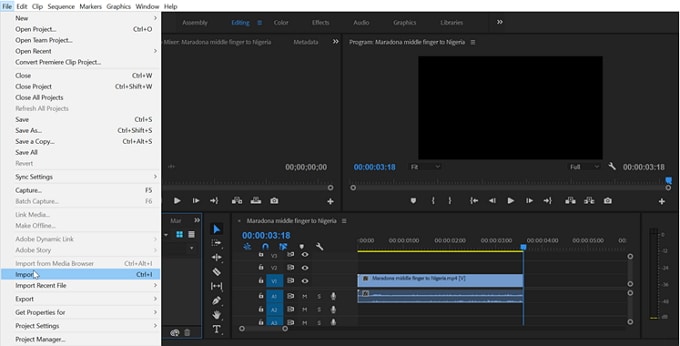
Step 1. Launch Adobe Premiere software on your computer. Next, you need to upload the videos and the desired green screen clips. Click on "File" and select "Import" on the drop-down menu.
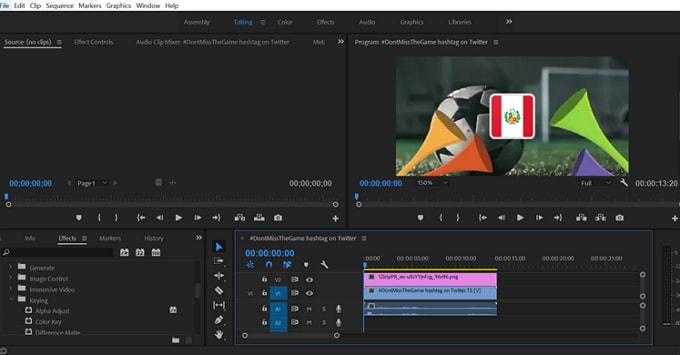
Step 2. Next, you need to drag the video to the video editing sequence window at the bottom right at V1. The preview screen will appear at the top right. The green screen you need to place it on V2 timeline.
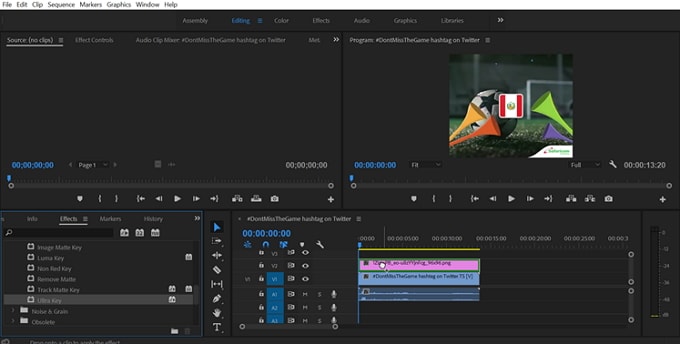
Step 3. Next, click on "Effects" tab and click on "Video Effects" > "Keying" to choose "Ultra Key" option that has green screen effect.
Step 4. Now, click on "Ultra Key" and drag it to the green screen clip on V2 Timeline.
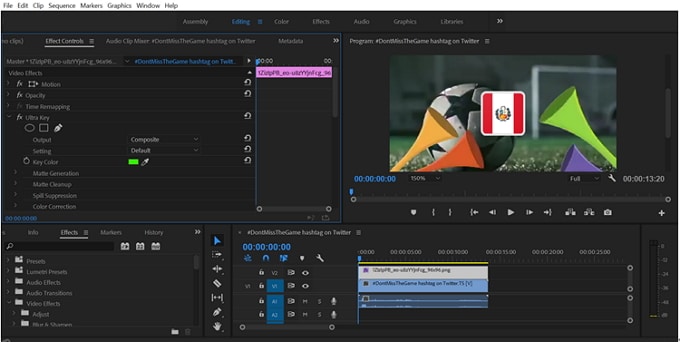
Step 5. Next, click on the "Effects Control" at the top to adjust settings of green screen in Premiere.
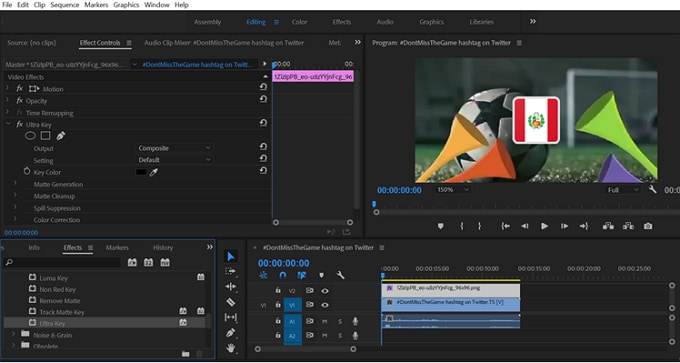
Step 6. Here you will be able to make different changes. Change the Key Colour, select output option as Composite. For the setting, you can leave it to default or customize it. Under the Matte Cleanup, you could use "Choke" option.

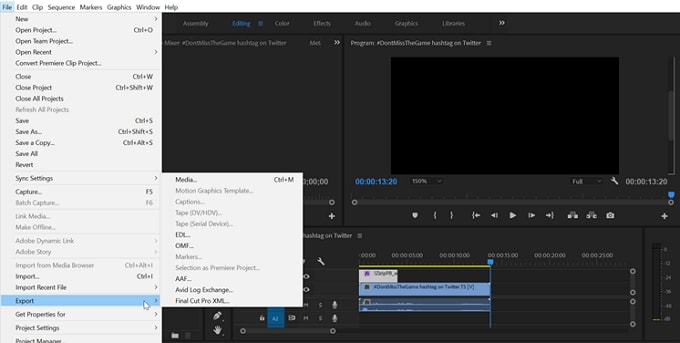
Step 7. After that making all the setting you can preview them and go ahead to save your project. Click on "File" on the main menu and then select "Export" option. Click on "Media" and choose a preferred output format and Export the video to your computer.
The process might be long but the results are worth it.
Part 2. Why Do You Need An Alternative Green Screen Creator
As you have seen using Green Screen in Premiere is only suitable for skilled video editors who can have their way easily while editing videos. Moreover, you will notice that it is costly and its user interface is complex. Therefore, if you are a beginner and you want an easy to use video editor with a green screen feature then go for Filmora Video Editor.
Part 3. The Easier Alternative Method to Create Green Green Screen in Premiere
Filmora Video Editor for Windows (or Filmora Video Editor for Mac) green screen is the easier alternative to green screen in Premier, especially for beginners. The green screen feature is easily available and you can just choose by right-clicking on it. Moreover, Filmora Video Editor enables you to edit your video by adjusting contrast, brightness, tint, speed and duration. You will also be able to auto enhance and choose 3D LUT option. As you edit your videos, you will be able to preview them in real time.

Other features of this Adobe Premiere green screen alternative:
- It is built with numerous effects that allows you to make your videos creative such as: filters, overlays, transitions, motions, elements, texts and titles.
- It is built with a free music library that you can choose and add a song as background music to your project.
- Filmora Video Editor also comes with an image editor that allows you to add images to videos and audios.
- With this software, you will be able to upload audios of different format and edit them by trimming, splitting, merging, fade in, fade out and equalize the audio.
- This software supports exporting of media files directly to YouTube and Vimeo. You can also export to any output format, to different devices or simply burn them to DVD.
[Tutorial] How to Use Green Screen in Filmora Video Editor
Step 1. Download and Install Filmora Video Editor on your Mac or Windows Computer. Go through the installation process and then open the application.
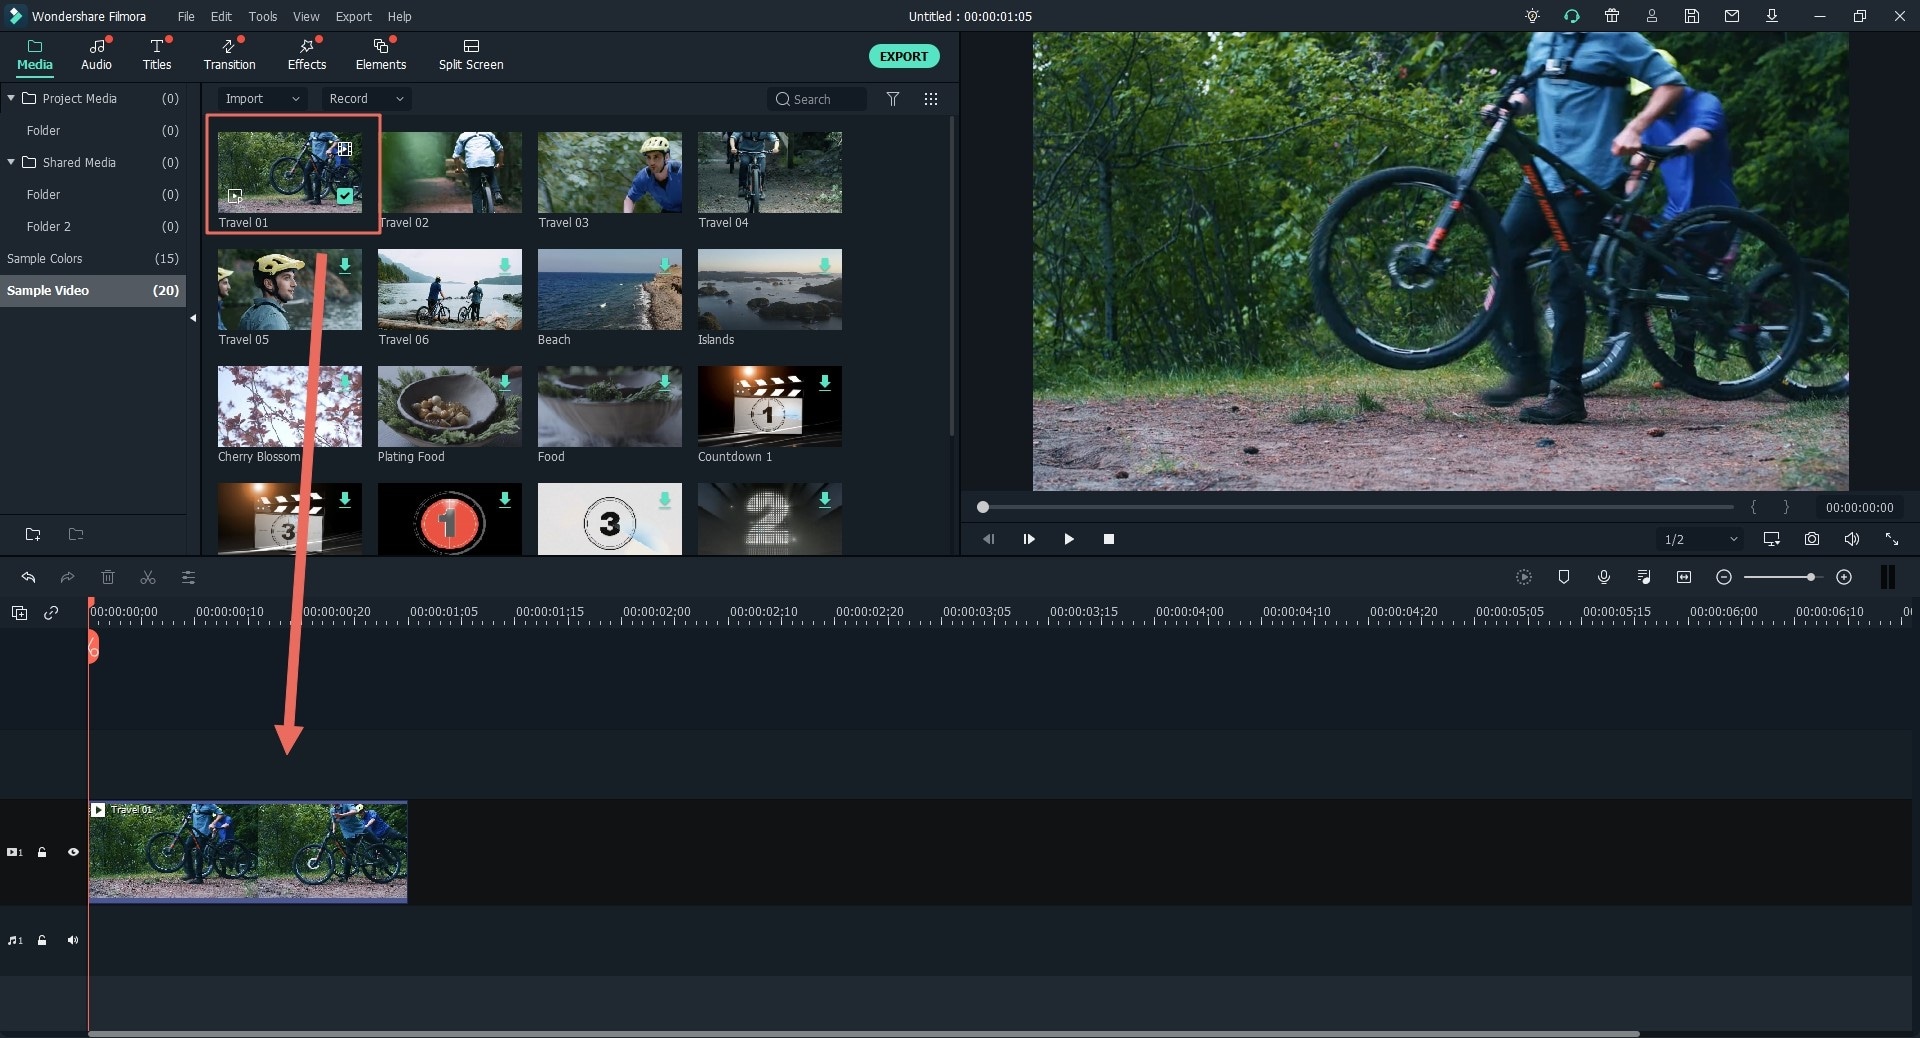
Step 2. On the Filmora Video Editor menu, click on the "Full Feature Mode". Next, click on "Import Media Files Here" to upload the video and green screen clips to the program.

Step 3. Next, you need to drag the video that you want to edit to the video timeline whereas the green screen clips to the PIP timeline just below the video timeline.
Step 4. Now, hover the cursor to the timeline with the green screen clip and then right click on it. Click on "Green Screen" option
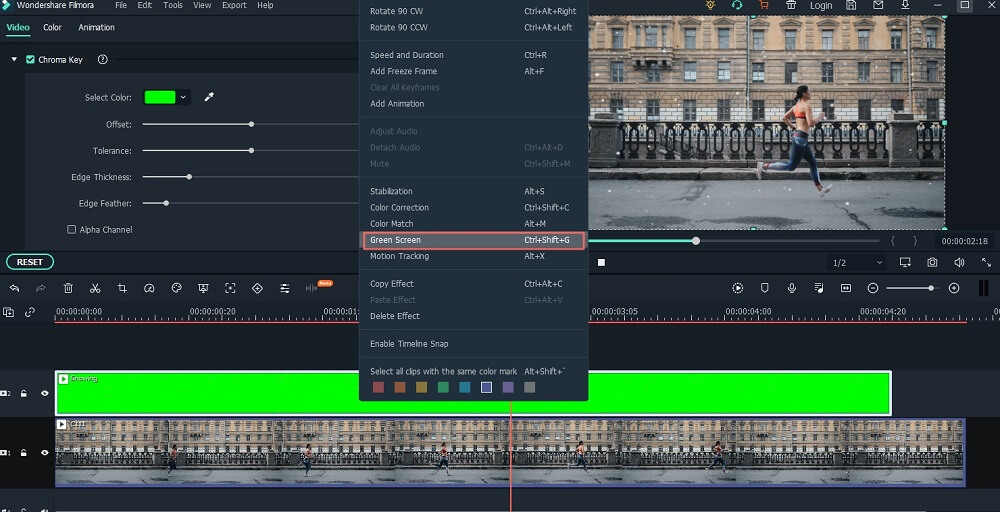
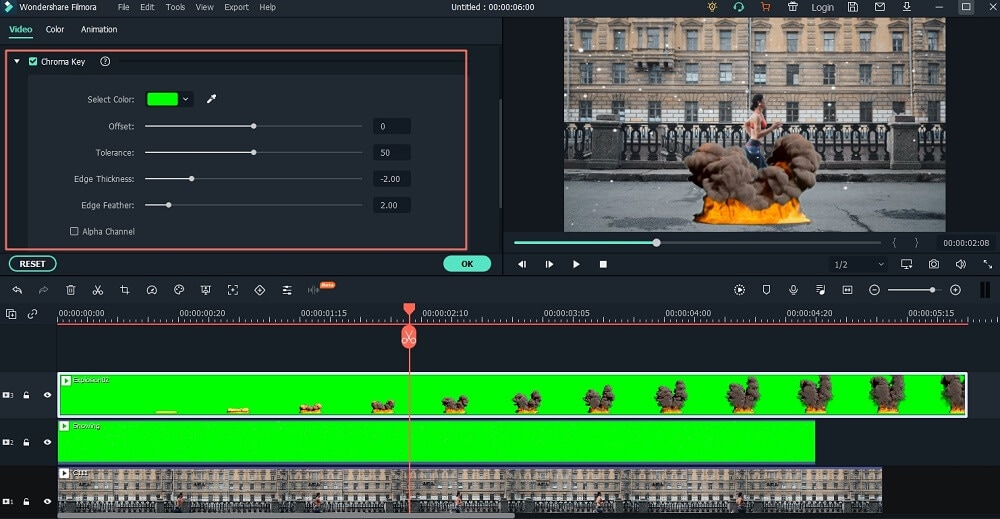
Step 5. On the Green screen window, check on "Mark parts of the clip transparent" box.
From there, you can pick preferred colour under "Current Colour" and then also adjust the intensity level. At the bottom left, are also options to edit shadow, border and flip.
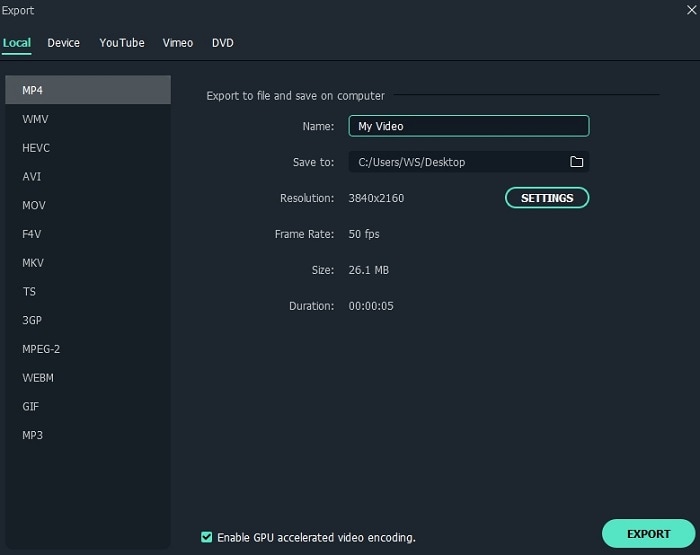
Step 6. Next, click on "OK" button and then click on "Export" button to save the file. Select the output format, set the destination folder and finally export the edited video to your computer.
Done! The steps are easier compared to green screen in Premiere, right?
Write in the End
To sum up, we see that green screen in Premiere involves many steps and needs a technical understanding of how to use the software. On the other hand, green screen in Filmora Video Editor is straightforward and its user interface is simple. So, if you want something that is easy to use go for Filmora Video Editor.


