


Visual effects play a significant role in enhancing video clips. There are many visual effects used in modern filmmaking: the motion blur effect is quite popular among filmmakers. Adding motion blur is of great help when it comes to enhancing the cinematic effect of your footage. However, most video editors find it confusing to create motion blur using Adobe Premiere Pro, hence this post comes to guide you.
- Part 1. How to Make Motion Blur with Adobe Premiere Pro >
- Part 2. Easiest Way to Create Motion Blur using Filmora Pro >
Part 1: How to Make Motion Blur with Adobe Premiere Pro
Motion blur on Adobe Premiere Pro is used to move objects around in your video, text, or other objects. If you move your camera rapidly while capturing a scene, you might not like how sharp the objects appear in motion - which is where Directional Blur comes to play. You can follow the steps below to add motion blur in Adobe Premiere Pro.
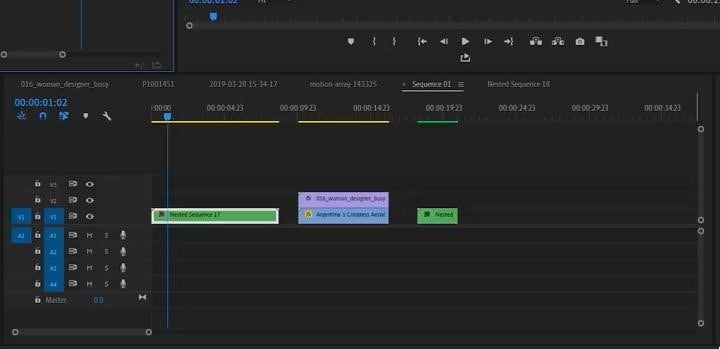
- Step 1: Add your video clip(s) to the timeline.
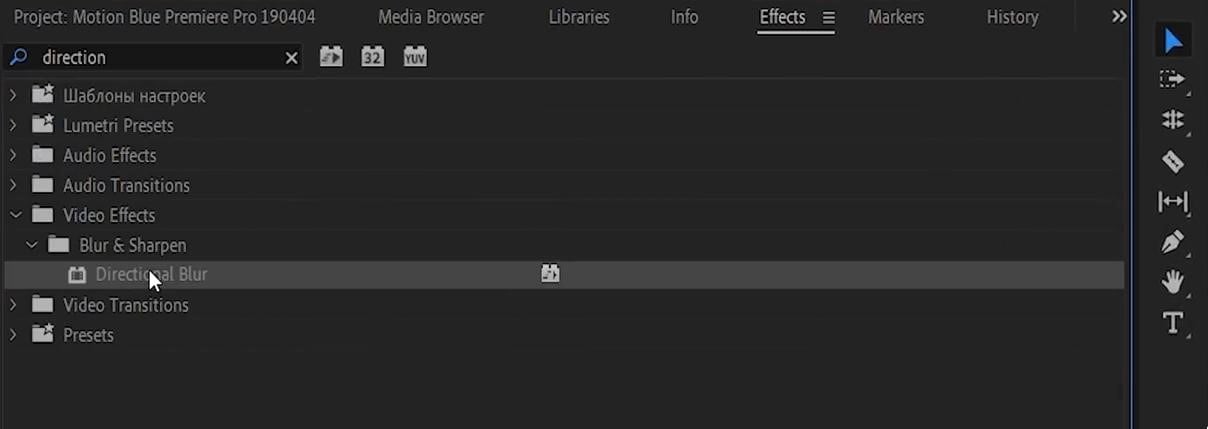
- Step 2: Drag and drop the Directional Blur effect on your clip.
On your effect panel, search for directional blur by typing in the search box. Drop the effect on your clip.
- Step 3: Adjust mask value.
On the Effects Control tab, you should have Direction and Blur Length parameters.
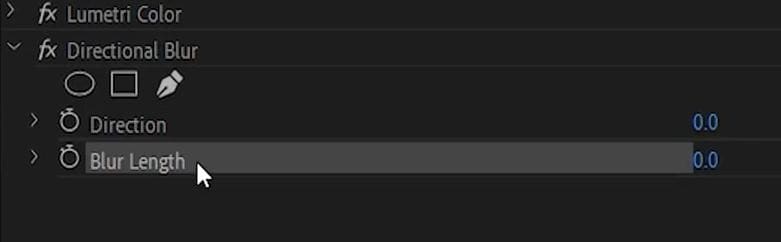
- Increase the amount of Blur Length to increase the blur intensity of your video.
- Adjust the Direction parameter to whatever direction your video is moving and see how the blur effects rotate accordingly. For example, set the direction to 90 if your camera is moving horizontally.
- Step 4: Soften the edges.
The directional blur is seen all through the video - which is undesirable. Fix this by softening the edges around the motion and adding some keyframes as follows:
- Go to the point in the video where the fast-paced motion is about to start and click the stopwatch beside Blur Length in the Effect Control tab to activate a keyframe and set it to 0 (zero).
- Go to the point where your video's speed is at maximum and change the Blur Length to your maximum amount, let's say 20.
- Go towards the end of the speed ramp, set another keyframe to 0 at the point where your video is getting back to normal speed.
You could add a woosh sound effect to make your visual effect come to life.
Part 2: Easiest Way to Create Motion Blur using Filmora Pro
Filmora Pro is a full-blown professional filmmaking software for intermediate and advanced professional filmmakers. Filmora Pro allows greater flexibility levels by enabling users to customize effects, as we'll see below - when adding motion blur in Filmora Pro.
We'll be using two videos in this tutorial. We'll see how motion blur affects transition between two videos/frames.
- Step 1: Import your file(s).
Drag and drop your videos anywhere on the timeline at the bottom area of the window. Position the second clip and keyframe both clips to slide to the left using a whip pan transition.
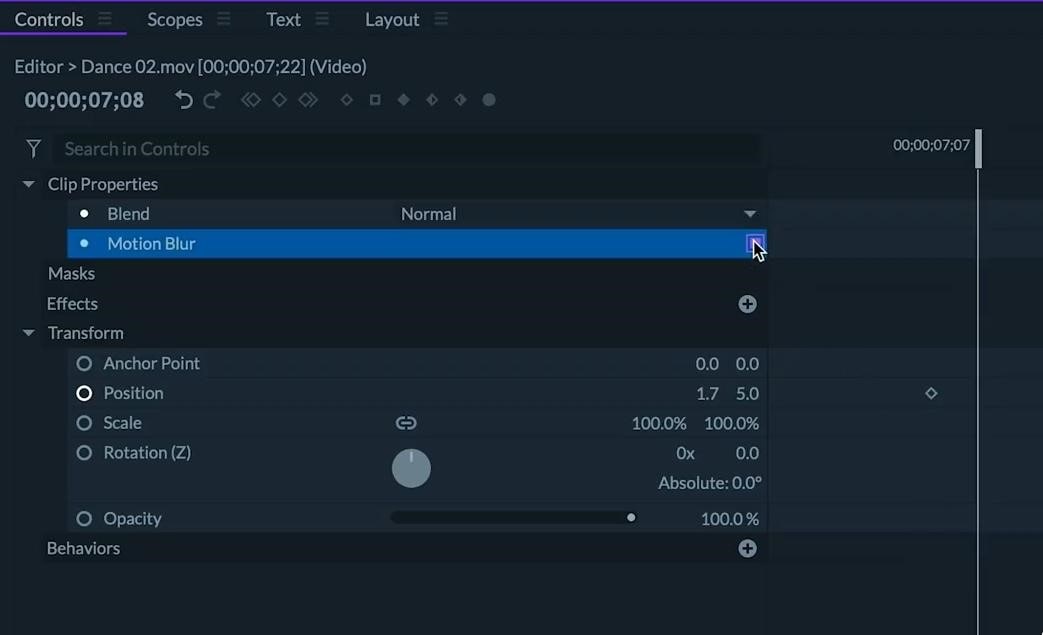
- Step 2: Apply motion blur.
Click the top of a clip on the timeline and click the "Motion Blur" option from the control panel. Repeat this process for the second clip.
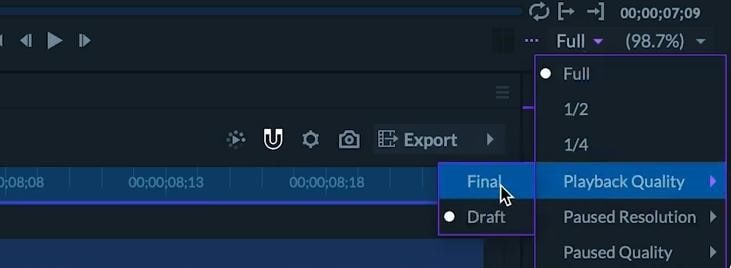
Notice how your footage starts rendering with the motion blur effect. Do you not see it? If you do not see it yet, go to the Viewer panel and set the playback quality to final:
To see how the effect comes to play, turn off motion blur for both clips and preview; after that, turn on motion blur for both clips, preview, and you'll see the difference.
- Step 3: Export your project. Right-click on individual clips, select "Add to Export Queue" in the menu to export the video.

Conclusion
Visual effects applied correctly spices up your footage and significantly increases production value. While the motion blur effect wouldn't always look good on every scene, applied to the right scenes makes your video more elegant.
In this article, we've seen how to add motion blur in Premiere Pro; also, how to achieve the same effect using Filmora Pro. You can use Adobe Premiere Pro or Filmora Pro to achieve the motion blur effect on videos. However, the steps to add motion blur in Premiere Pro is more complicated than Filmora Pro. I deem that it is much easier to apply motion blur to your footage using Filmora Pro, hence it's the recommended software for this purpose.


