


Photoshop could be an extraordinary photograph editing tool, which is one among the essential tools for many starting designers and photographers. For UI designers, Photoshop is one of the essential tools to assist them to produce a superb web/app style.
As a matter of fact, Photoshop not only allows you to edit pictures, but also provide some tools to edit videos. In this article, we'll introduce how to slow down video in Photoshop.
- Part 1. How to Slow Down Video in Photoshop Step by Step
- Part 2. Filmora Video Editor - The Best Choice to Edit Video
How to Slow Down Video in Photoshop Step by Step
Step 1: Importing Video into Photoshop
The first step in a way to edit videos with Photoshop is to essentially import the video clips. This is often achieved employing an easy method of clicking "import" from the "file" computer menu. Once you have got finished commerce your photos or video files, you'll be able to then drag them from the sidebar and into the editing space.
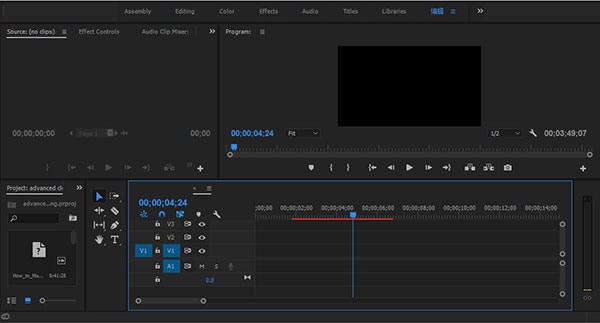
Step 2: Getting Started With a Project
To get started, open up a Photoshop professional project and ensure the scratch disks are set to the proper location by visiting Project-Project Settings-Scratch Disks.
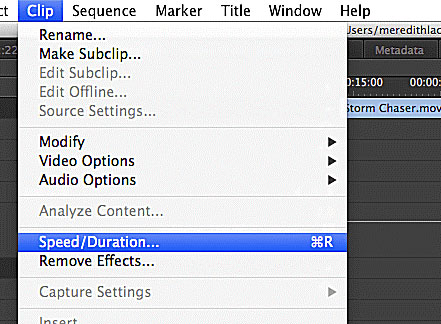
Step 3: Adjust Video Speed
Open the Clip Speed/Duration window in Photoshop professional by right-clicking on a clip within the timeline or by visiting Clip -Speed/Duration in the main menu bar.
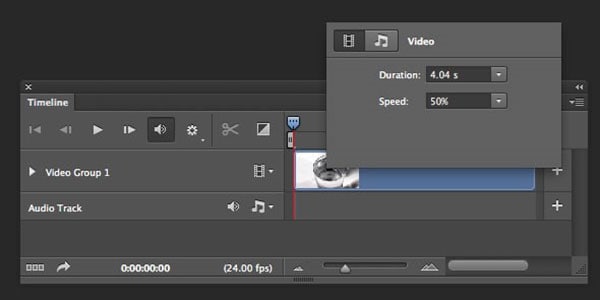
The Clip Speed/Duration window has 2 main controls: speed and period. These controls are coupled by Premiere Pro's default settings, indicated by the chain icon to the proper of the controls. After you modification, the speed of a coupled clip, the period of the clip conjointly changes to catch up on the adjustment.
For instance, if you modify the speed of a clip to fifty p.c, the period of the new clip is 0.5 that of the initial. The same goes for dynamic the period of a clip. If you shorten the period of a clip, the speed of the clip will increase so the identical scene is given during a shorter quantity of your time.
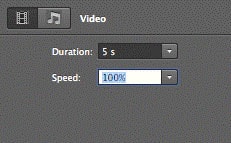
Unlinking Speed and Duration
You can unlink the speed and length functions by clicking on the chain icon. This permits you to vary the speed of a clip whereas keeping the length of the clip the identical and the other way around.
Additional Setting
The Clip Speed/Duration window has 3 extra settings: Reverse Speed, Maintain Audio Pitch, and Ripple Edit, Shifting Trailing Clips. Reverse Speed allows you to gift your clip backwards so the in and out points are flipped. Maintain Audio Pitch keeps the audio track the identical whether or not you alter the speed or length of the video.
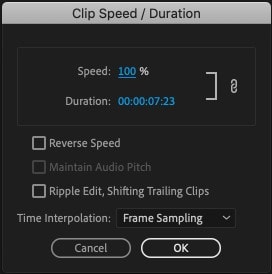
Checking this box could be a great way to forestall close tones from increasing or decreasing in pitch. Ripple Edit, Shifting Trailing Clips permits you to alter the length of a clip and regulate the subsequent clips within the sequence to atone for this alteration. If you don't choose this selection, a clip with inflated length cuts off the top of the next clip, and a clip with shrunken length is followed by black frames wherever the tail of the clip wont to be.
Variable Speed Adjustment
In addition to dynamical speed and period with the Clip Speed/Duration window, you'll be able to alter speed. With a variable speed adjustment, the speed of the clip changes throughout the clip duration; Premiere professional handles this through its Time Remapping perform, that you'll notice within the impact Controls tab of the supply window.
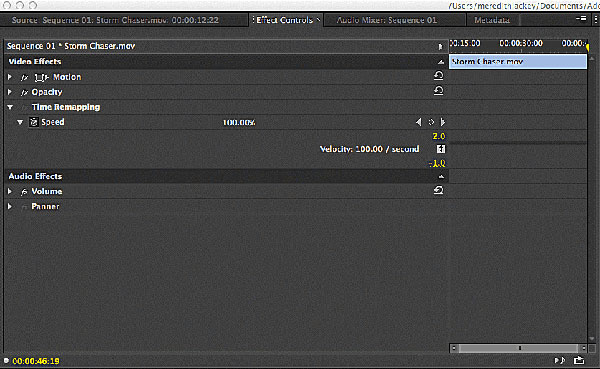
Time Remapping With Photoshop
To use Time Remapping, queue the playhead within the Sequence panel to wherever you would like to create a speed adjustment. Then double-click on the clip to open it within the supply panel. Go to the results tab, and notice Time Remapping beneath the Video Effects section.
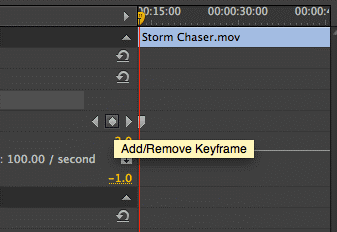
Add a keyframe to the clip by clicking on the diamond icon. This marks the placement for the start of the speed adjustment. Play through the clip within the Sequence panel to wherever you would like to finish the speed adjustment and add another keyframe. Drag the second keyframe forward or backwards to regulate the speed of the clip you've just hand-picked. By ever-changing the clip period, you mechanically modification the playback speed.
Step 4: Save the Edited File
It is important to note that even as you edit videos with Photoshop, the software does not allow direct uploads. This means you will need to save the edited file first on your computer and ensure you use anywhere supported format.
Creating video in Photoshop is good for time lapse photography when paired with Lightroom or Bridge, but it will do just fine for short movies. Beware of its limitations, which include:
- Slow, especially when working on long movies.
- Difficulties when applying audio, like MP3.
- Not great for special effects.
In order to avoid these problems when editing a video, we recommend a great video editor - Filmora Video Editor, which is definitely the best choice for users.
Filmora Video Editor - The Best Choice to Edit Video

Filmora Video Editor or Filmora Video Editor for Mac is such a video editor that we'd wish to introduce to you whether or not you're employing a window or a Mack PC, with this straightforward video editor, you'll quickly speed up and prevent videos.
Key features:
- Creative Tools: Whether you're creating YouTube videos or doing short video product that revolve around sound colors, and inventive use of filters, and different tools, the nice news is that Filmora9 comes filled with your needs.
- Full Suite of Sound Tools: One of the foremost necessary options of any video was written material software package is nice sound tools; with Filmora9, you get options like keyframing, background sound removal, and equalizer which will permit you to create positive that your videos have the right sound you'll be able to presumably get.
- Import Multiple Videos: Another profit you may get from Filmora9 I that you simply are going to be ready to import multiple videos all without delay. Whereas this could look like one thing that's not necessary enough, you'll be able to truly mix completely different videos and build very distinctive storytelling expertise.
- Upload on to YouTube or Vimeo: This is maybe the best feature for all the content creators around the world, particularly people who are actively posting on YouTube or Video.
How to Slow Down Video in Filmora Video Editor
Filmora Video Editor is the best software that anyone can use, it is simple and applied. Following the step by step guideline below, you will earn the process easily and apply it anytime you want.
Step 1: Add video files to the Filmora9 video edito
Click Import on the media library and select the video files from your computer to add them into this program. Alternatively, you can simply drag and drop files to the User's Album. Filmora9 supports almost all regular video formats, such as MP4, AVI, WMV, MOV.

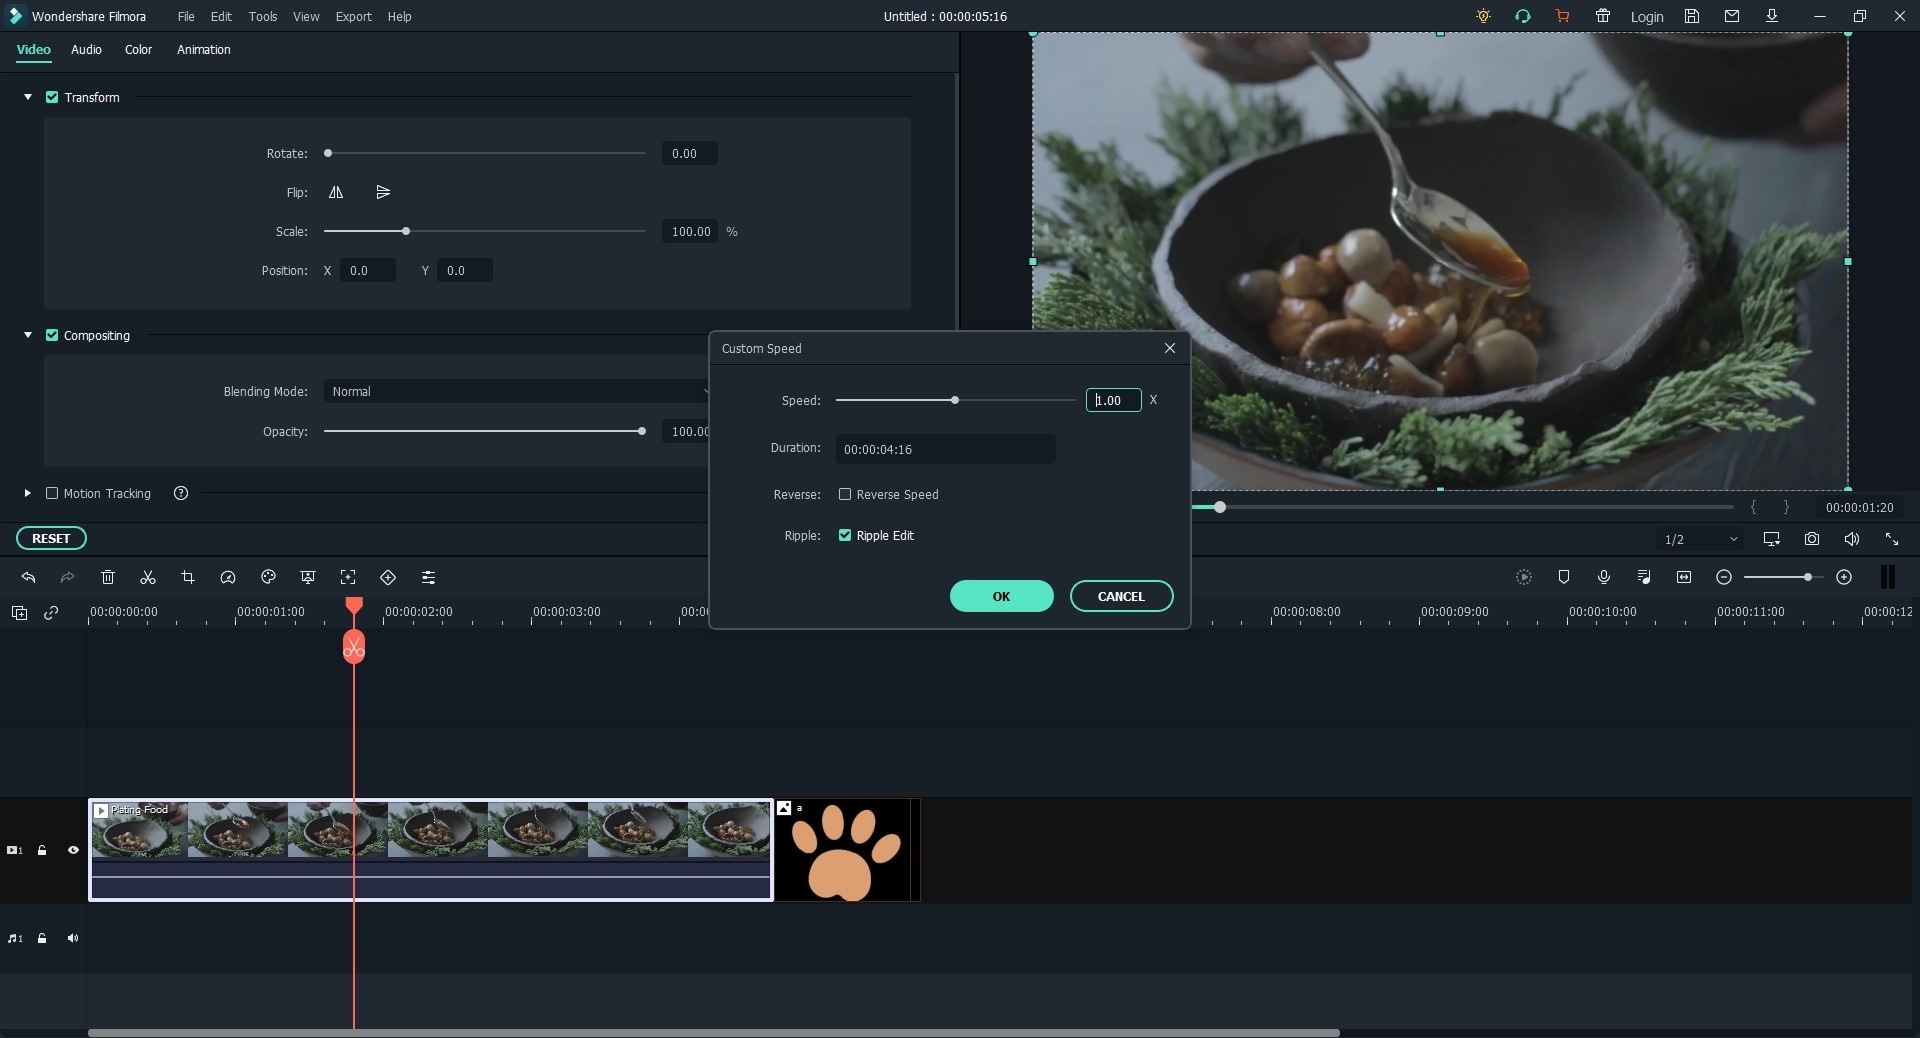
Step 2: One click to slow down
drag videos from the User's Album to the video track on the Timeline, so right click on that to click Speed and period. A pop-up window can seem. Speed numbers can indicate how briskly or slow the motion effects are going to be. Then regulate the speed you would like. You'll read the consequences of the preview window to create video quicker or slower. If you're thinking that it's an excessive amount of, 0.5 speed could be a sensible choice. 0.5: 1/2 the first speed (Slow Down, Half) 1: the first speed.
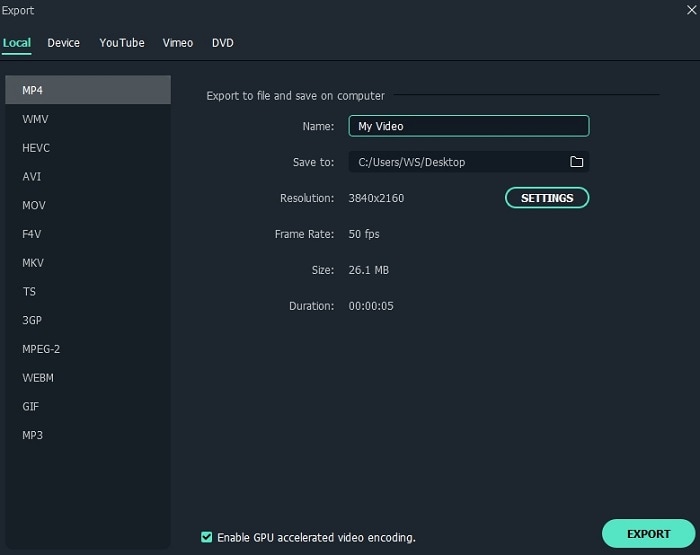
Step 3: Export fast/slow motion video
When you have finished adjusting the video speed, click Export. you'll be able to save video in any widespread formats by clicking Format. If you would like to play your new video creation on your iPod, iPhone, iPad, click Device and choose the icon for your devices. you'll be able to conjointly share your videos on YouTube and Vimeo directly or burn video.
Conclusion
Filmora9 may be a powerful video redaction program that's excellent for users need to specialize in their creative thinking rather than obtaining stuck on the technical facet of video production. Its careful balance of AN easy-to-use interface and skilled options create it sensible worth for beginner and intermediate content creators, however, more matured users can desire an answer that gives a small amount a lot of management and customization within the redaction method.


