


How can I use HandBrake to trim the extra clips? I need to trim a part of the video using HandBrake. And I don’t want to lose the quality of the video.
Is it easy to trim videos in HandBrake? what else I can do with it?
HandBrake is a free open source video transcoder tool. You can trim, compress or convert your videos from nearly any format to a selection of modern, widely supported formats. HandBrake supports Windows, Mac, and Linux.
Trimming video using HandBrake is not difficult. It is easy for a novice to use its basic features. For using some of its advanced features you need some expertise or detailed study. Please note down the start and end time of the clip that you want to trim by watching the video in your preferred video player.
- Part 1: Steps for Trimming Videos Using HandBrake
- Part 2: Filmora Video Editor - The Best Alternative of HandBrake
Turn long videos into viral clips. Effortlessly transform lengthy videos into engaging, shareable clips.

Part 1: Steps for Trimming Videos Using HandBrake
Download the current version of HandBrake here. Windows users need to install the latest version of Microsoft. NET Framework available for your Windows version.
Launch HandBrake after a successful installation. Don't get intimidated by the number of buttons on the interface. Just follow the below steps for trimming the video clip.
Step 1
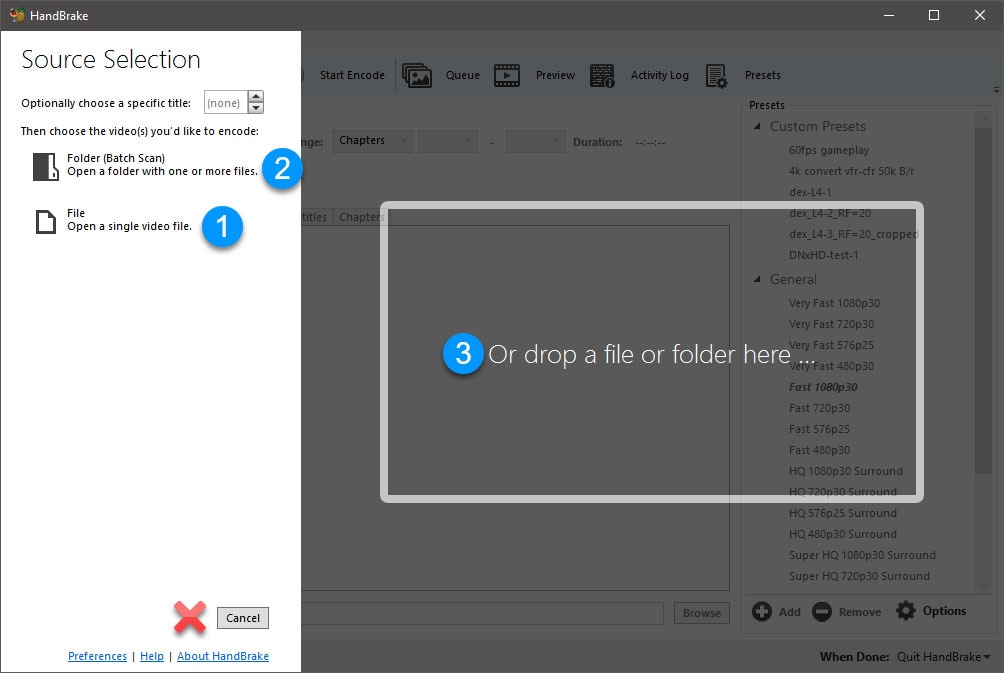
First, you have to select the source of the video file you want to trim. Click on Open Source then click on Open a single video file and browse the file that you want to trim.
Step 2
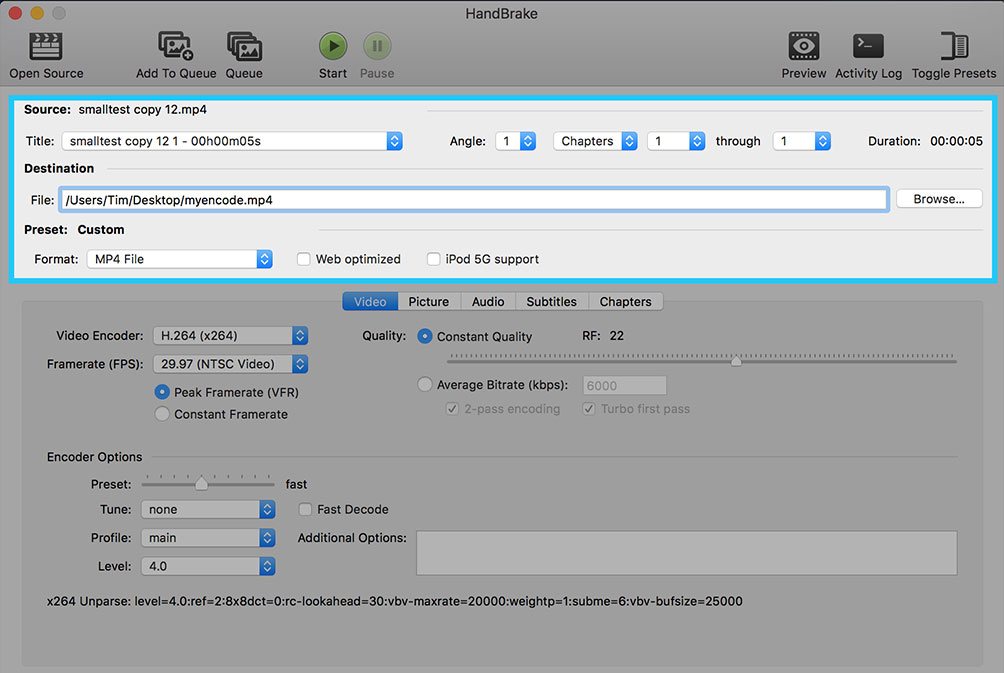
Select the drive/folder where you want your edited video to be saved, and type in the name of the new file to be saved.
Step 3
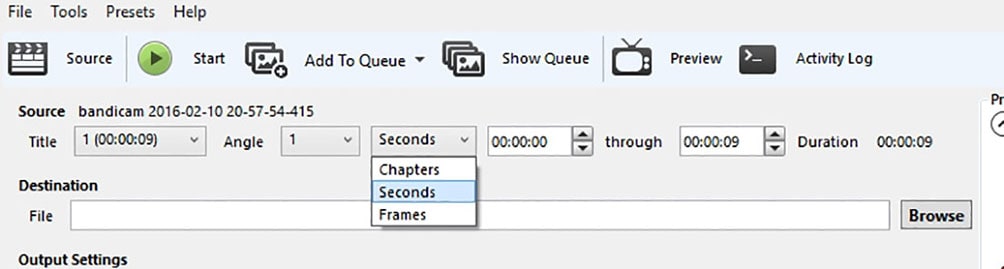
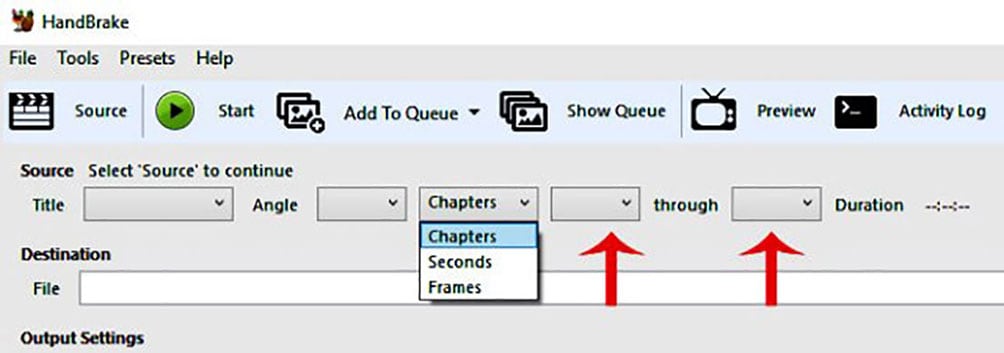
Now, from the drop-down menu where it is currently set at Chapter, select Second.
Step 4
Now enter the start time and end time of the video clip.
Note: In windows hh:mm:ss (e.g. 00:15:34) notation is used whereas Mac version uses only seconds (e.g.930).
Step 5
Now click Start Encode for compressing and trimming your video.
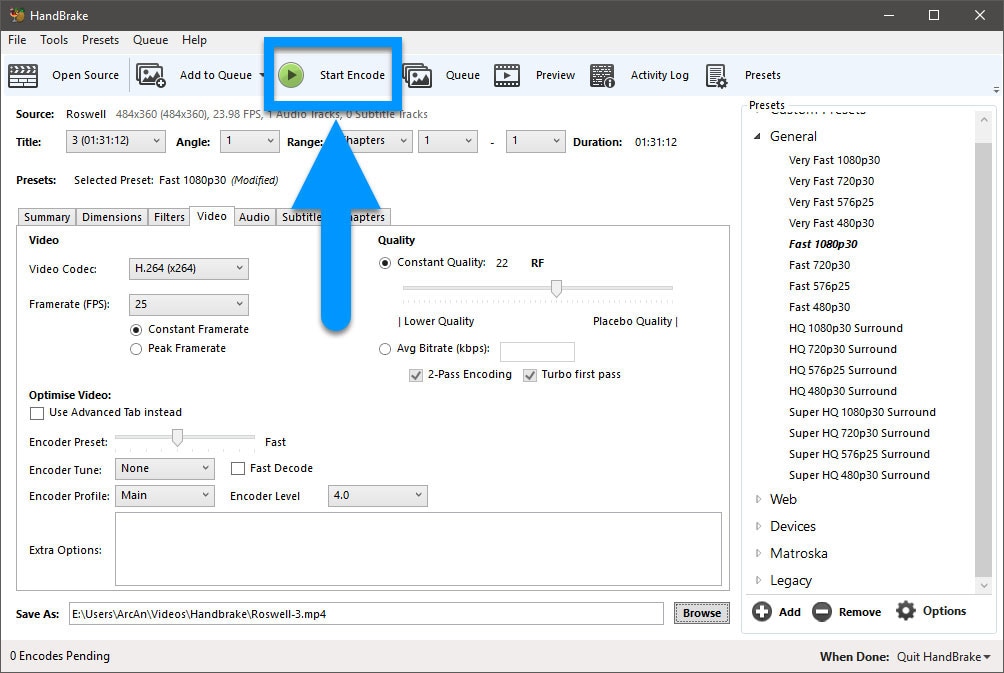
Once the process is completed, you can view your edited video in MP4 format in the selected folder.
Limitations and Issues in Trimming Videos Using HandBrake
• You can not trim a video from the middle by using HandBrake. HandBrake only allows removing parts from the beginning and end.
• You can not visualize the picture frames in the interface while trimming the video. So you have to manually note down the starting and end time of the video clip by viewing it in the video player.
• You can not use HandBrake to trim video without re-encoding.
To overcome such issues and limitations we recommend using Filmora video editor. Filmora video editor can trim videos from any part and does not require you to re-encode the video. Thus, it saves you time while maintaining the quality of the original video.
Part 2: Filmora Video Editor - The Best Alternative of HandBrake
Filmora Video Editor for Windows (or Filmora Video Editor for Mac) is an easy to use video tool for both beginners and expert users. One can use it split large files into clips and remove selected segments from videos. It also offers all professional features with a simple user interface. And you can split all the popular formats including MP4, AVI, DAT, MPG and many more.

Key features:
- Filmora Video Editor is all in one video editing software. It has a full range of editing tools for rotating, trimming, splitting, cropping and joining videos.
- Provide varieties of amazing effects to your videos. It has 300+ special effects like transitions, filters, titles, overlays, text, and motion elements.
- There are multiple options to save and share videos, you can export the video to any video format of your choice.
- Optimize videos for users with several devices like iPhone, iPad, Apple TV, Galaxy, Nexus, Xbox One, PS4, Sony TV, etc.
- It allows you to import images and clips from Facebook, Twitter, and other social media channels using a software interface. You can also upload the edited videos to Youtube or Vimeo directly from the program.
Steps for Trimming Videos Using Filmora Video Editor
Preparation:
To get started, you need to download and install Filmora Video Editor on your Windows or Mac computer, then launch it and choose to get started a new project or open a project.
1. Launch the program

2. Import Media Files
Now import the video by clicking Import Media Files Here and browsing the video from a computer or simply drag and drop it to that place.

3. Drag the video to the timeline
Drag and drop the video to timeline. Move the cursor at the beginning or end of the video clip until you see the pointer. After then move forward or backward the pointer to trim the beginning or end part of the video.
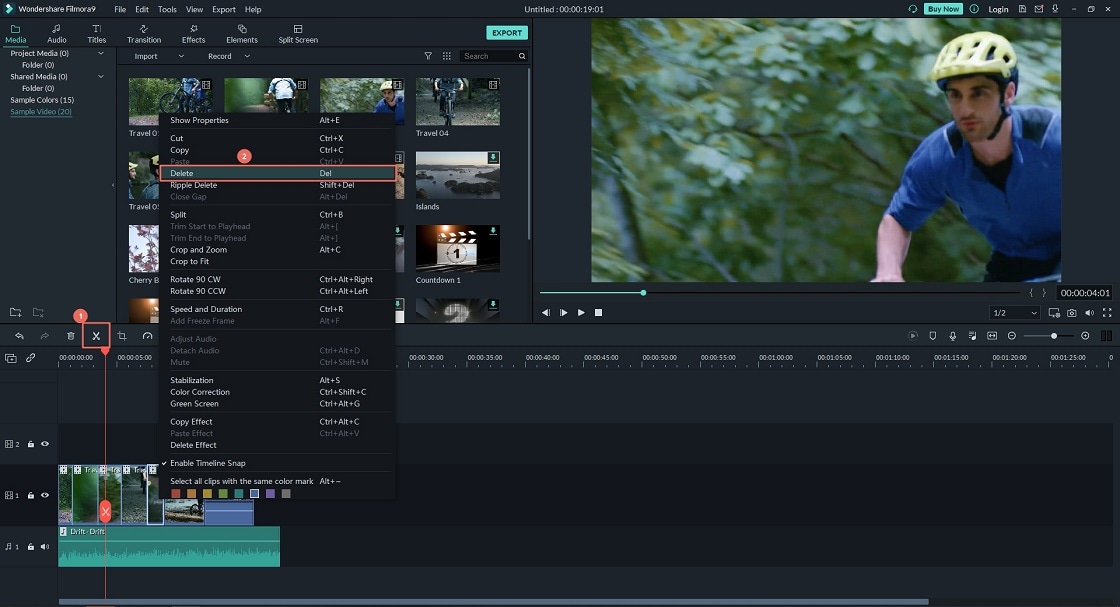
For cutting a middle section of the video, move the cursor to the beginning and end of the video section you want to cut. Now click the scissors icon. It will separate the section from the original video clip. Now you can delete the section by right-clicking on the video and selecting Delete.
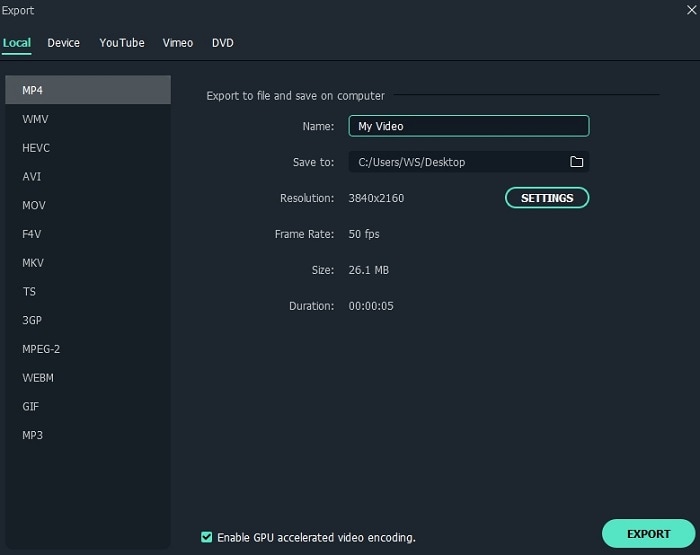
4. Export
Now since your video is edited press the "Export" button. This will open a new window where you can change the desired format and other settings such as aspect ratio. You can directly share the edited video to YouTube or Vimeo from here. After selecting the desired settings press Export to complete the process.
Conclusion
You can use free tools like HandBrake for simple editing requirements. But Filmora video editor provides you hundreds of features that allow you to use your creativity and create amazing videos.
If you like this article please share it with your friends and help them in creating fantastic videos.


