


Lightroom and Photoshop are the go-to choices for experts in photography regarding image editing. Each tool allows you to modify your photographs and supports post-production workflow. There is a good chance that you have used at least one of the two. Over some time, there have been contemplations and concerns about the topic of photoshop action vs export lightroom presets. Many beginners struggle with this decision because they are ignorant of the differences and similarities between these two software packages.
This article will demystify the mechanics of both photoshop actions and lightroom presets by emphasizing their similarities and differences. It will also explain how exporting presets from lightroom is done in a concise manner.
WHAT ARE PHOTOSHOP ACTIONS?
Photoshop actions are a set of instructions that Photoshop should follow in a certain order, as determined by you or the action's creator. For instance, you can instruct Photoshop to modify the image's color tones first when you create an action. After that, change the blend mode, apply a high pass filter, and then reduce the opacity. All of the recorded stages will be executed in the precise sequence specified in the action once you have finished recording the action and run the Photoshop action on a different image. The Photoshop action will complete all of the recorded stages when you press the play button to launch it, typically in a couple of seconds. You will also have access to the layers produced by the operation after it has been run, so you can alter them if necessary.
USES AND BENEFITS OF PHOTOSHOP ACTION
- It enhances your photo - You may now quickly and easily add an action to your photos after choosing to use one. Once you hit play, the adjustments take effect right away. Isn't it amazing how you can create amazing images in such a little amount of time? You can really benefit a lot from taking action, and it may even motivate you to work harder.
- It allows you to apply various effects - Perhaps you searched the web and discovered some excellent Photoshop Actions. Download these unique actions to create beautiful artwork using different techniques in a single action. You have spared yourself the need to tweak and use several effects. Everything will be accomplished through action.
- It speeds up the editing process and saves time - You'll have more time to relax rather than spend a long period in front of your computer editing a lot of pictures. Actions will do the task for you by accelerating the once-taxing editing process.
HOW TO CREATE AND USE PHOTOSHOP ACTIONS
Below is the step-by-step guide on how to easily create and use photoshop actions:
- Open an image in Photoshop and launch it – Open the first image you wish to edit in Photoshop once it has loaded. Additionally, since Photoshop keeps track of all of your actions, you may open any random image and create an action there.
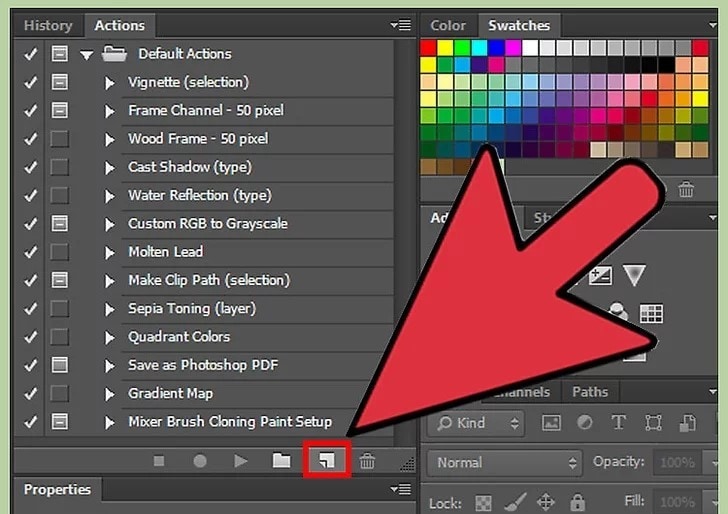
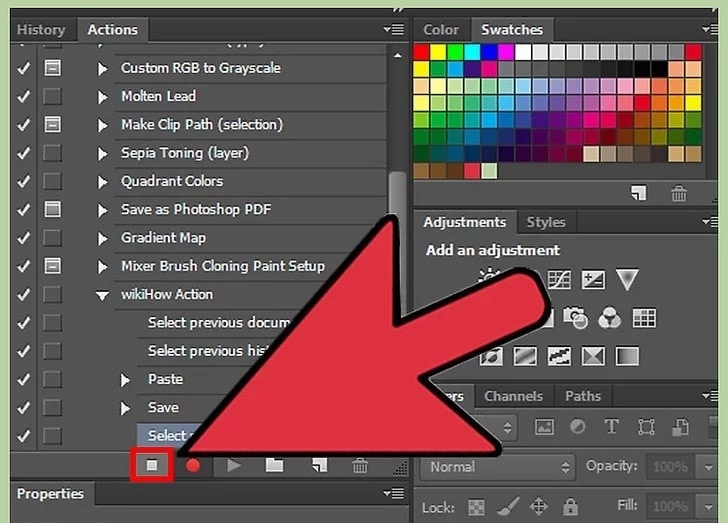
- In the Actions Panel, select “Create New Action” – Sometimes, the button is reduced to a tiny grey cross. You may create, edit, remove, or run actions on any of your photos using the Actions Panel. Typically, it is paired with the "History" tab.
- A different option is to select "New Action" from the Actions panel menu.
- If the Action Panel is not visible, click "Windows" --> "Actions" on the top bar to bring it up.
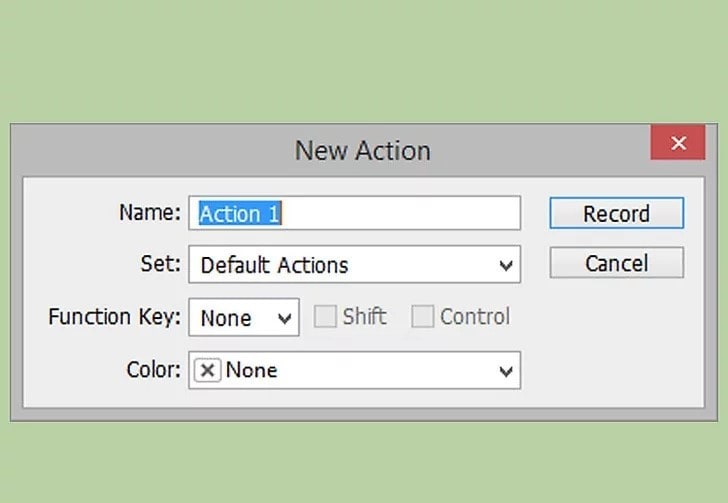
- Select your action settings. – Before you start "recording" your activity when you create an action, you are required to complete a number of boxes. While modifying the default settings is not necessary when you first begin, as you gain more knowledge, these settings will provide you more control over your activities.
Choose a name that you’d remember easily, set action to ‘default action’ as seen. The function key allows you to map the action to a button, like F3, so that every time you press the button the action is performed. You can select whichever color you like.
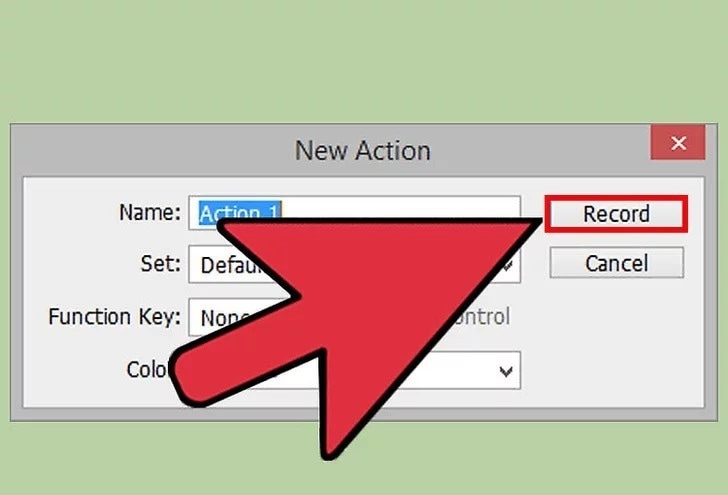
- Click on record – Everything you do in Photoshop will be captured in the recording once you start it. To indicate that you are recording, the little button on the activities panel will turn red.
- Edit your image – To understand how actions function, start with something easy. For instance, select "Image" - "Adjust" - "Brightness/Contrast" and fiddle with the knobs. When completed, click "OK." The task will be saved.

- Click on ‘stop recording’ to finish – This button is located on the Action panel, or you could also click on the bright red "Recording" button. Your action will then be saved.
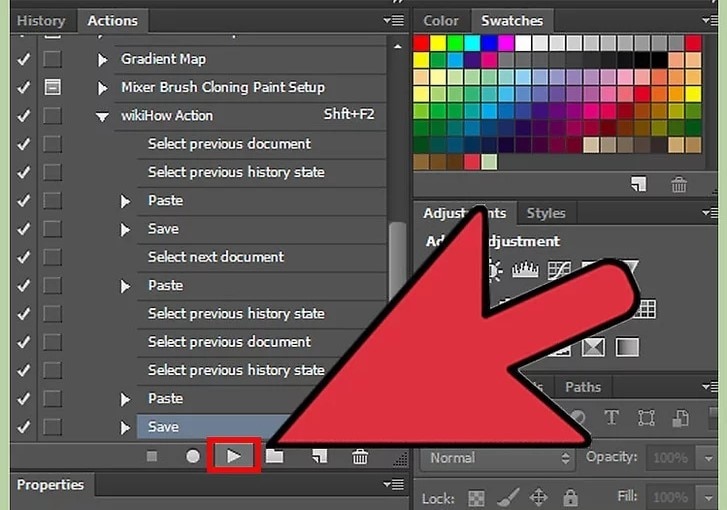
- Test your action on a different image – Click on your action in the action panel after opening a new image file. To initiate the action, click the tiny grey "Play" button in the actions panel. Since Photoshop makes all the same adjustments in the same order you did, you'll notice the image is edited just exactly like the first one.
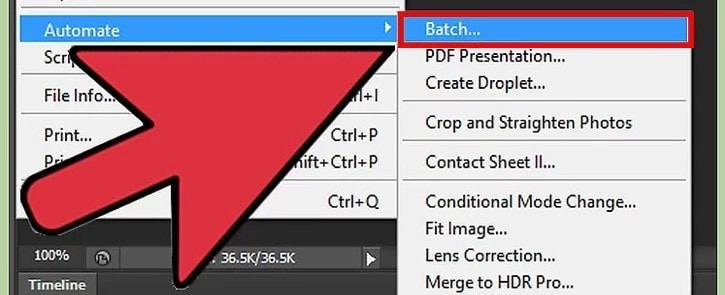
- Perform an action on multiple images at once – The most powerful use for actions is to process many pictures at once, saving you time and energy spent performing the same steps over and over again. This is called performing a "batch" action. To work on a batch:
- Click on "File" --> "Automate" --> "Batch"
- Choose the action to perform. This will choose from all current actions available. You may need to exit and select another action set if you have multiple sets and yours does not appear here.
- Choose the files to edit. You can choose a whole folder, files open in Adobe Bridge, the files currently open in Photoshop, or even files you are importing to your computer from a digital camera.
- Choose how to name and save your new photos.
WHAT ARE LIGHTROOM PRESET?
Lightroom presets are saved settings that can be applied to a RAW or JPG file. The change to your image is instant and can later be adjusted further if you’d like. They accomplish the same thing as Photoshop actions by applying specific effects to your images. But Lightroom presets don’t go through particular steps as Photoshop actions do.
BENEFITS AND USES OF LIGHTROOM PRESET
- It gives you faster workflow with many photos - Even though applying Photoshop actions might be fast, if you need to apply several actions and deploy them on hundreds of photographs, it may take a while. Naturally, you can configure a batch job in Photoshop to apply actions to each and every image in a folder. To select all the photos and apply the presets to them all at once in Lightroom, however, is much simpler. Presets for Lightroom are applied immediately and without the need for a script to be run step-by-step.
- It gives you instant preview – The effect on your image can be seen in the thumbnail viewer simply by moving your mouse over a preset name. Photoshop actions don't provide you the luxury, but it's also not necessarily necessary, as they frequently assist you with a particular stage in post-processing, so seeing a preview of the impact on the full image isn't as helpful for actions.
- Tweaking is easier on presets – You should consider Photoshop actions and Lightroom presets as a starting point for modifying your photographs, regardless of whether you use them. To achieve the greatest result, you will probably need to make a few more adjustments to your image after applying the effect. Additionally, Lightroom makes setting adjustments simpler than Photoshop. Instead of navigating through numerous layers in Photoshop to determine whether it is a levels adjustment layer or a curves adjustment layer, you should edit if you want to add a little more contrast. Even though speed is obviously not everything, Lightroom is just faster to use in this regard.
HOW TO CREATE AND USE PRESETS IN LIGHTROOM (STEP-BY-STEP GUIDE)
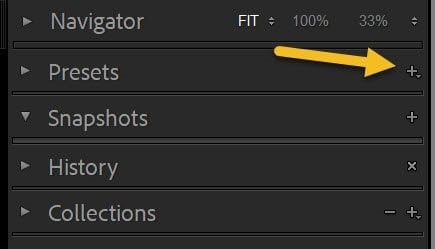
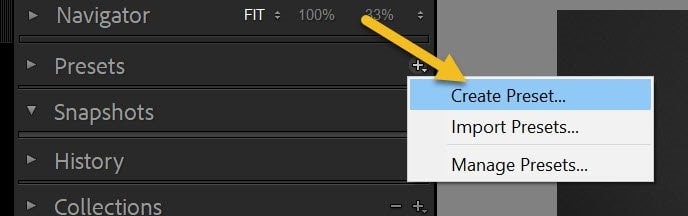
- Select the create preset option – Ensure that you are in the Develop module, then click the Plus icon next to the Presets panel.
And select create presets
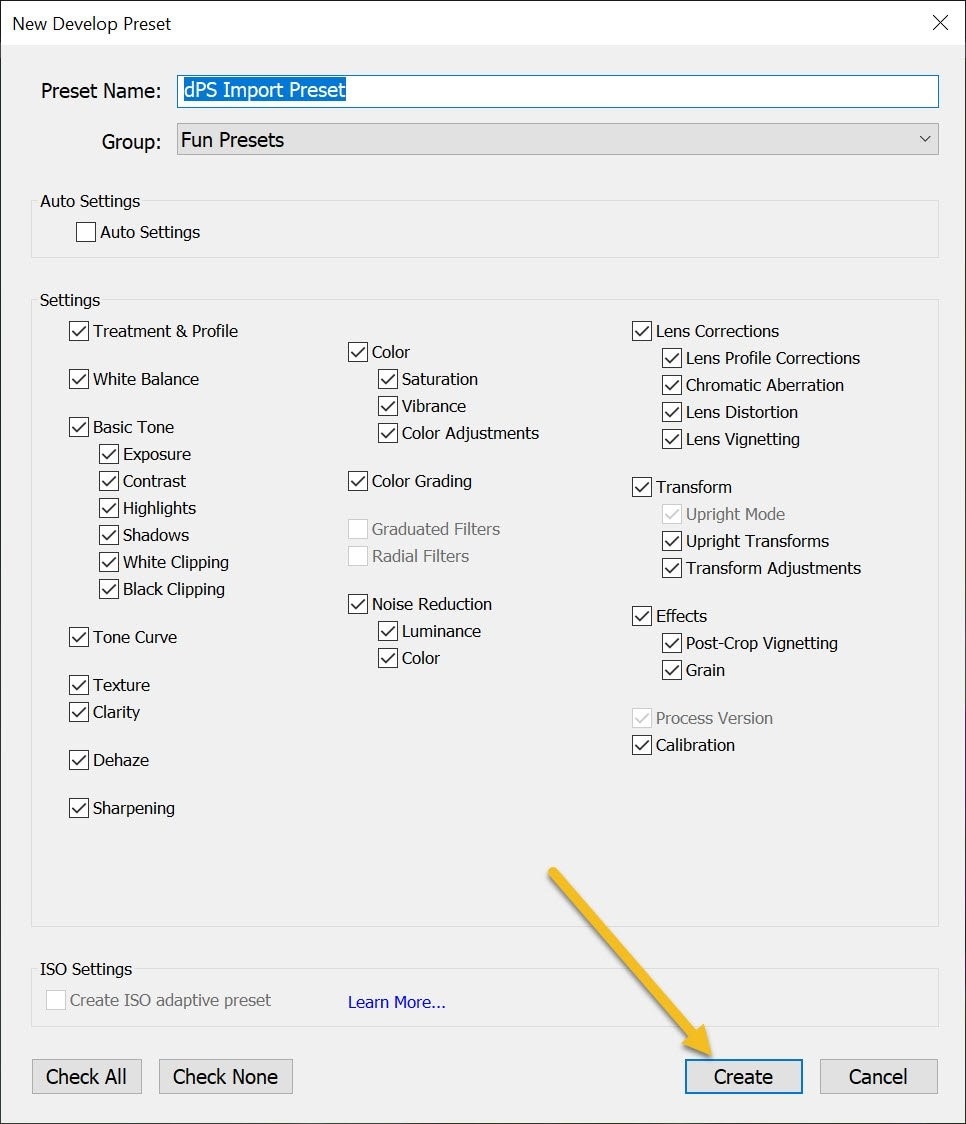
- Choose the options that should be included in your preset – the new developer preset window will come up as seen in the image below.
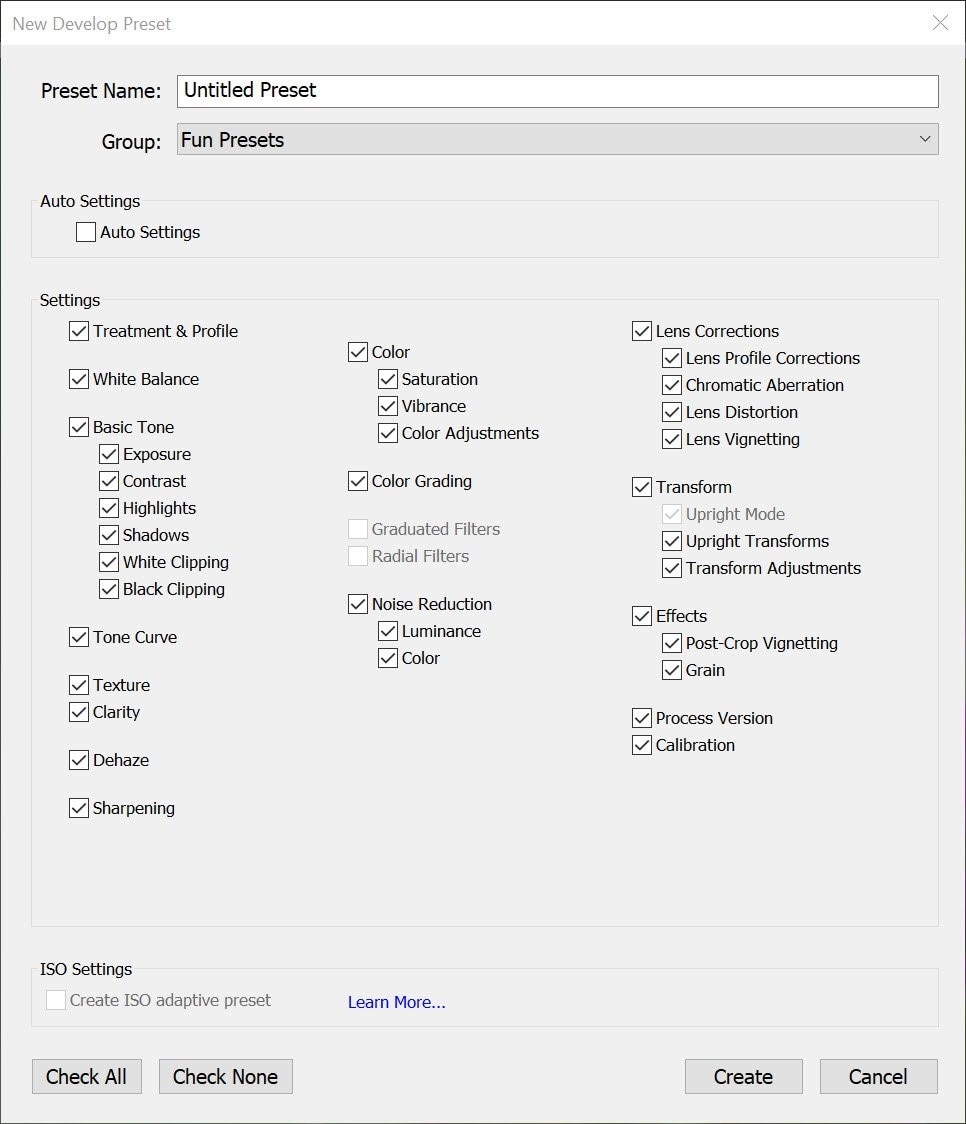
Give your preset a name and chose a folder to save it in.
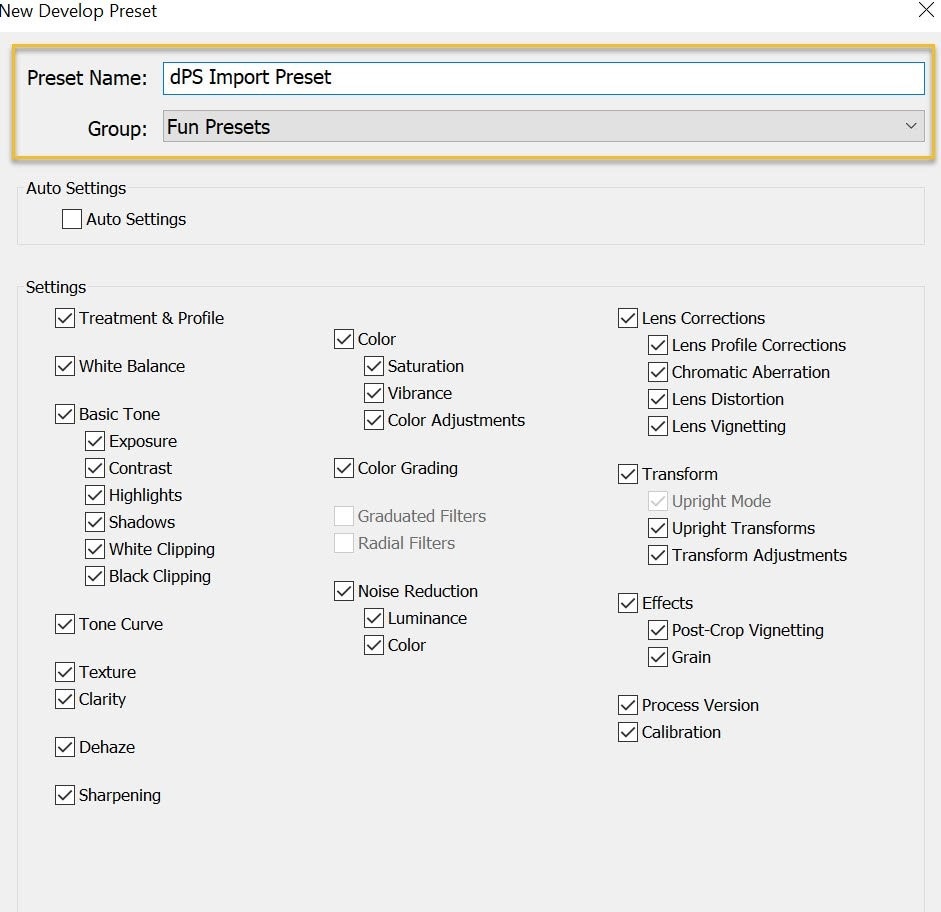
Next, pick the parameters you want to use as your preset. Pressing 'Check All' the preset outlined above works perfectly, but if you want to build a more focused editing preset, you might just want to click certain boxes.
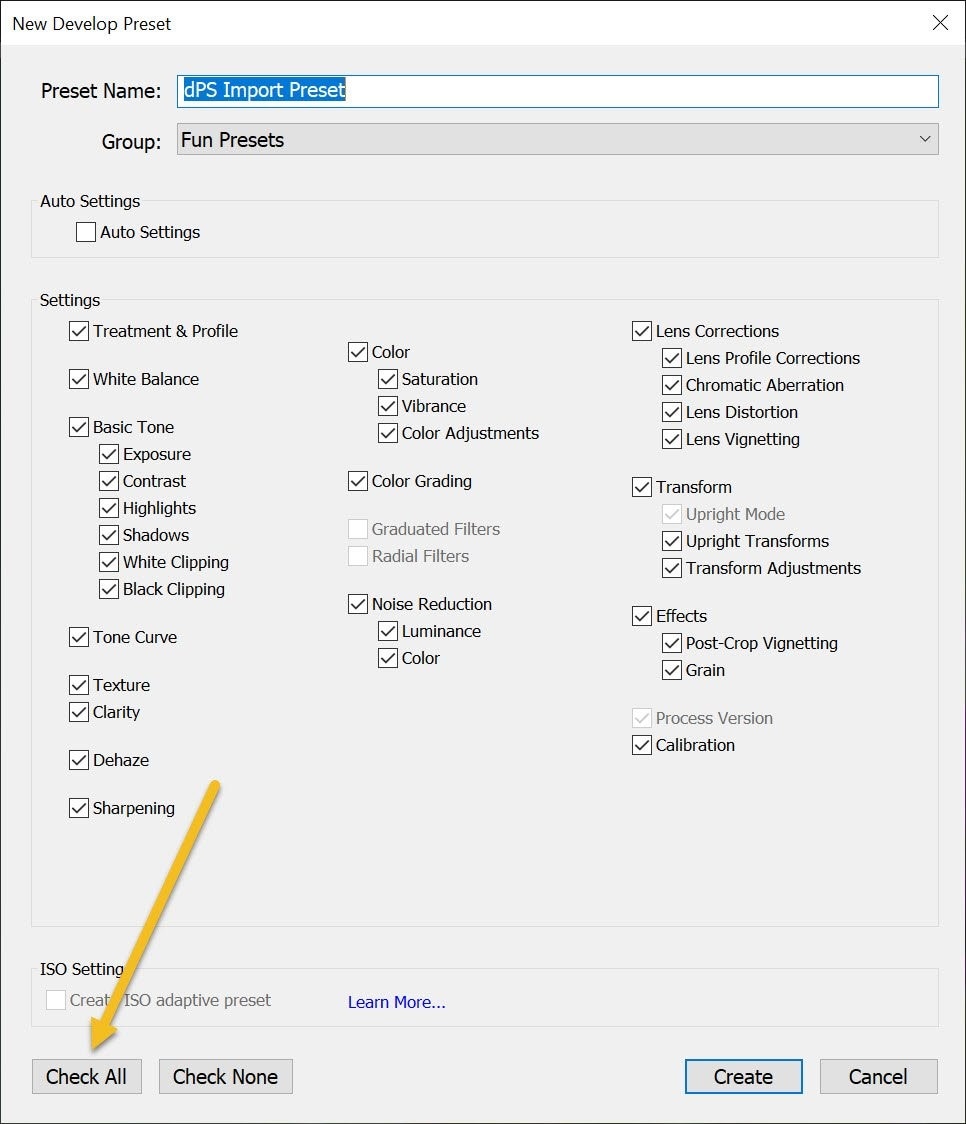
- Click on create – once you are ready to save your preset, select Create.
That's all, then! You may save a lot of time when importing or editing your images by following this easy, quick approach.
PHOTOSHOP ACTIONS VS LIGHTROOM PRESETS
SIMILARITIES
- Ease of use – Presets and actions are both simple to use. If you're new to Photoshop or Lightroom, you might not know how to make all of the effects you want, but you can still obtain the effects you want with the help of actions and presets.
- Speeding-up of workflow – You can optimize your workflow and reduce the amount of time you spend editing your photographs by using both Photoshop actions and Light room presets. For event photographers that have a large quantity of photographs to produce for each customer, this is likely the most important advantage.
- Consistency – With a preset or action, it is very simple to duplicate a precise alteration to photos. For a cohesive appearance, apply the same preset or modification to each file in a particular portrait session.
DIFFERENCES
- The ease of customization – It's possible that your image needs more tweaking after you've applied presets or actions. Both systems allow you to do this, however Lightroom makes it simpler.
- You can quickly move to the Develop module and make any necessary edits after using a Lightroom preset.
- After using a Photoshop action, editing becomes more challenging. To get your image to its final state, you must examine each adjustment layer to identify which one has to be adjusted.
- Compatibility – Sometimes only certain versions of Photoshop actions are compatible, which poses serious compatibility problems. Presets for Lightroom do not experience this issue.
- Speed and workflow
- Presets for Lightroom can be applied to your image immediately and without lagging. When you use presets, you can apply your effect to multiple images at once and stack them to create the desired effect. When an image is complete, you can sync your settings to as many files as you wish during the same session. This greatly simplifies editing wedding photos because you can quickly sync hundreds of pictures using presets.
- Actions in Photoshop take a little longer to execute. Once implemented, a series of recorded steps execute sequentially until the last step is reached. This takes longer to complete.
BONUS TIP: WHAT IF WE NEED ACTIONS OR PRESETS FOR A VIDEO?
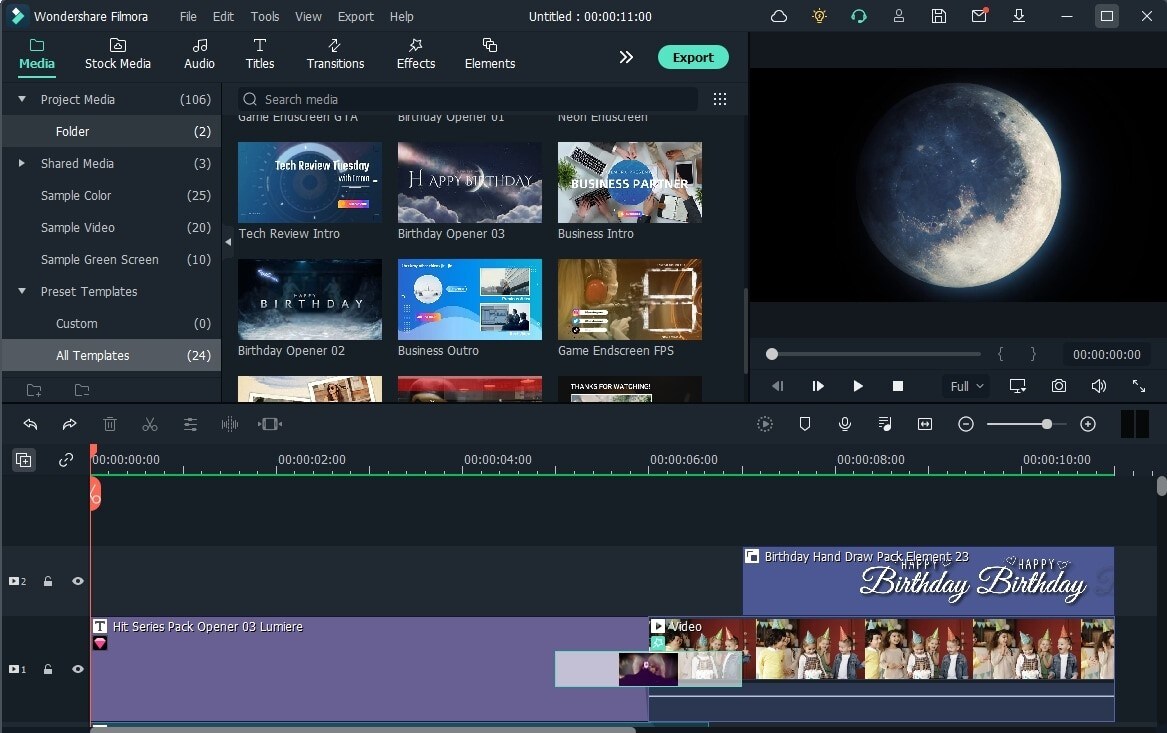
Filmora is the best editing tool that has different preset templates useful for video makers. It is the best editing tool with a range of preset templates for video makers. Below is the step-by-step guide on how to use templates on Filmora.
Recommendation: Filmora Video Editor
- Best video editing software for beginner and semi-professional, that comes with powerful editing skills like trimming, splitting, rotating, editing, etc.
- Advanced video effects like green screen, PIP, audio mixer, etc. can also be found and applied to your video within few clicks.
- 500+ free special video effects to customize and create an awesome movie by yourself.
- 1000+ standalone effects downloading resources to make videos in all kinds of styles.
- Export videos to Chromebooks compatible format with 1 simple click.
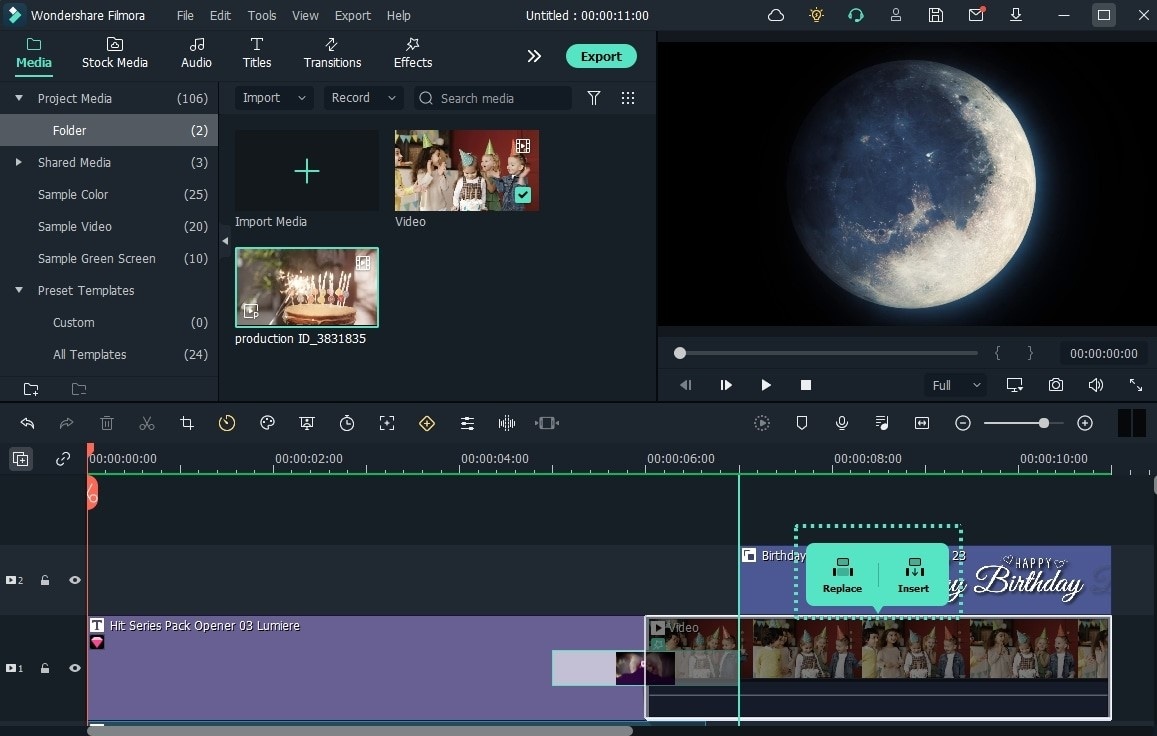
- Add a template to the timeline – Go to the Media tab at the top and select the All Templates menu under the Preset Templates category on the left side. You can see there are dozens of templates, click one to preview it, and then drag the template to the timeline.
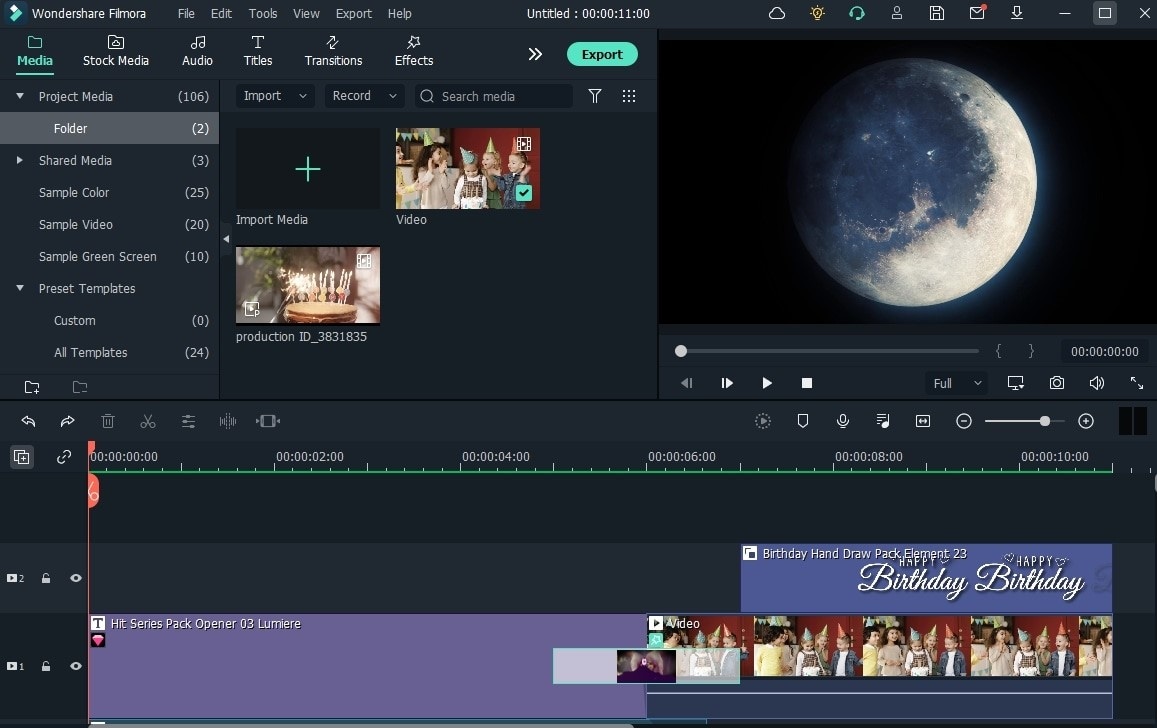
- Import your file – Go to Project Media and click the Import Media button to import your footage for replacing the stock video.
- Replace the template file (or footage) – click the stock clip in the timeline, and then drag your video to the position to replace it
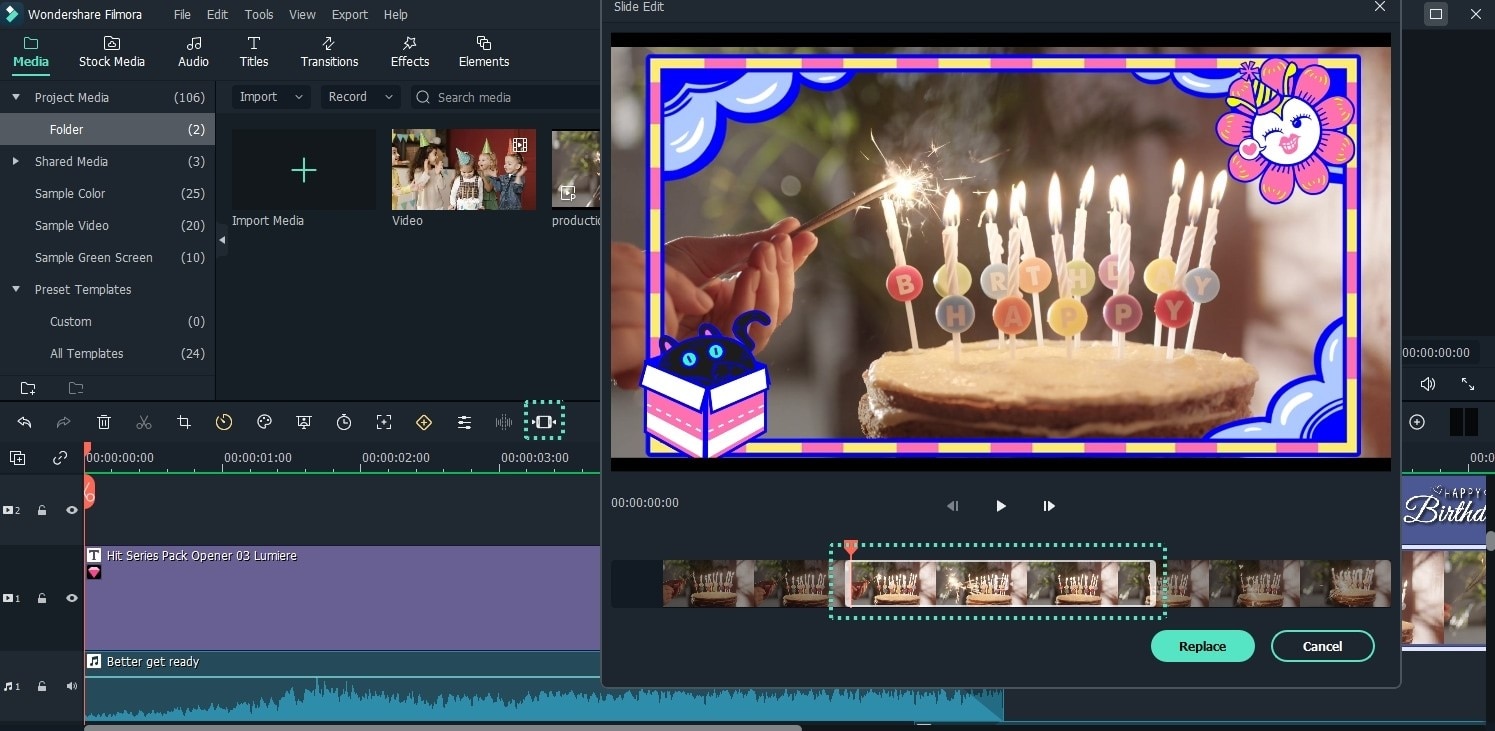
- Modify the video in slide edit – Click the Slide Edit icon in the toolbar, and then play the video and drag the box to select the section to replace the stock clip in the Slide Edit window.
- Preview and export the video – Press the Spacebar or click the Play button that is present below the Preview window to preview the expected output. Click Export from the top-center and use your preferred option to export the final video.
Note that you can share the customized presets template with others, as many people you wish to share it with. For more information on Filmora.
FINAL THOUGHT
Depending on how you prefer to edit your images, how many shots you typically go through, and how much control you want over the editing process, you should use Photoshop actions or Lightroom presets. Presets may also be necessary in some cases, whereas Photoshop actions may be required in more involved editing situations.


