


PowerPoint is commonly used for presentation. And people would like to add videos or embed YouTube videos to PowerPoint to make the presentation creatively. So there might be times you need to trim or cut the video to make the size or length fit your need. Is it possible to trim video in PowerPoint directly? Sure, you can do that without any problem. Below we will share detailed guide and tips on how to trim a video in PowerPoint. Read on and learn.
- Part 1. How to Trim Video in PowerPoint on Mac
- Part 2. How to Trim Video in PowerPoint on Windows
- Part 3. How to Trim A YouTube Video in PowerPoint
- Part 4. An Practical Method to Trim Videos Easily [Recommend]
Part 1. How to Trim Video in PowerPoint on Mac
For Mac users, you first need to have the PowerPoint application installed on your computer. And then follow the below steps to trim a video in PowerPoint on your Mac.
Step 1. Create a new PowerPoint project and insert video to the PowerPoint presentation. And open the video you have embedded as normal.
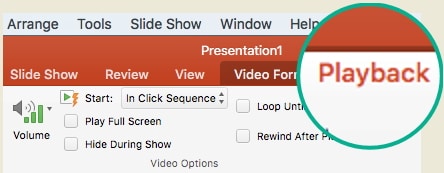
Step 2. You will see the "Video Format" and "Playback" tab on the toolbar of the PowerPoint. To trim the video, you need to select the "Playback" tab, and then choose the "Trim Video" option.
Step 3. Before you start trimming the video, click on the "Play" button in the "Trim Video" window. Then you can decide which part you want to trim from your video footage.
Step 4. When the duration move to the point you want to trim, you can click on the "Pause" button. And then you can start to cut the video by moving the Nudge Forward and Nudge Backward buttons to the location that you want to make a cut.
Step 5. Again in the "Trim Video" window, you can do any trimming per your need.
At the beginning of the video, you can click on the start point and then drag it forward to set a new start point for the video.
At the ending of the video, you can click on the end point and then drag it backward to a new position to set the new ending part of the video.

By doing the above operations, your video has been trimmed to a new duration.
Part 2. How to Trim Video in PowerPoint on Windows
If you are working on a Windows computer, the steps to trim video in PowerPoint can be similar to the Mac version. Just follow the below steps to trim a video in PowerPoint on Windows.
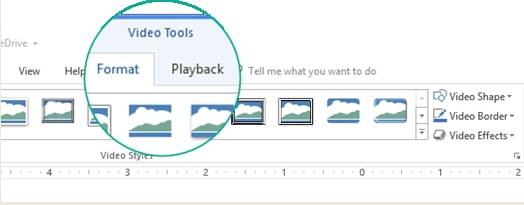
Step 1. Open the PowerPoint slideshow, and select the video frame in "Normal" view. And then you will get the "Video Tools" tab opened. There you will see "Format" and "Playback" menu.
Step 2. Now select the "Playback" menu, and click on the "Trim Video" option.
Step 3. Play the video as normal. You can click on the "Play" button in the "Trim Video" window. When you play the video, it will help you to go to the point you want to make a trim.
Step 4. When you come to the point that you want to trim, click on the "Pause" button. If you want to adjust the position that you want to trim, you can use the "Next Frame" and "Previous Frame" button.
Step 5. Also the "Trim Video" window provides you with more functions.
You can go to the beginning of the video, and click on the start point until you can see the pointer turn into a two-head arrow. Then you can mode the arrow to a new position that you want to make it a new beginning of the video.
In the same way, you can go to the ending of the video, and click on the end point until you can see the pointer turn into a two-dead arrow. And simply move the arrow to the position that you want to make it a new ending of the video.

Part 3. How to Trim A YouTube Video in PowerPoint
When creating PowerPoint document, embed a YouTube video to the slide could be very common. Below we will share the detailed guide on how to embed and trim a YouTube video in PowerPoint.
Step 1. The first step is to go to the YouTube site and find your video. And then in the video window, click on the "Share" menu to select the embed way for sharing. And you can copy the embedded code.
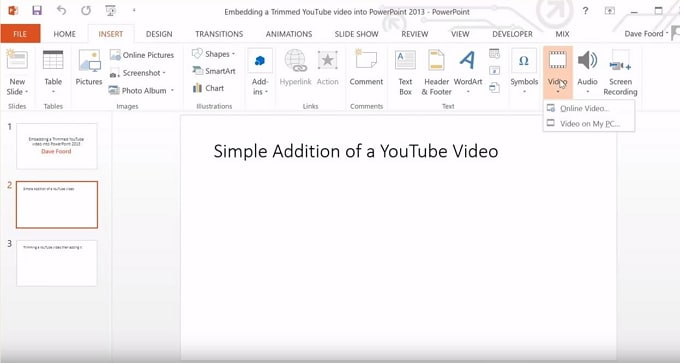
Step 2. Now move back to the PowerPoint document. Find the side that you want to insert the YouTube video. Click on the "Insert" tab, and go to click on the "Video" menu, and then select the "Online Video…" option.
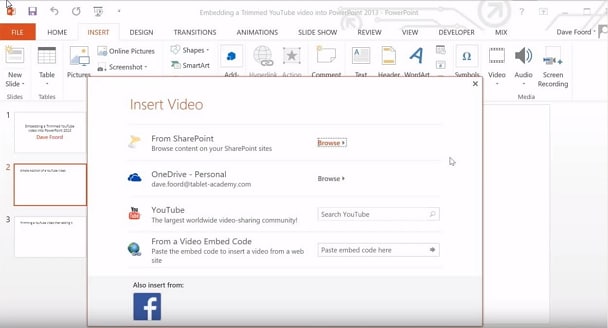
Step 3. You will get a new window with options on the ways to embed the YouTube video. You can select the option of embedding by code. And then paste the code to the blank box. And go back to the slide, you will see the YouTube video you have embedded.
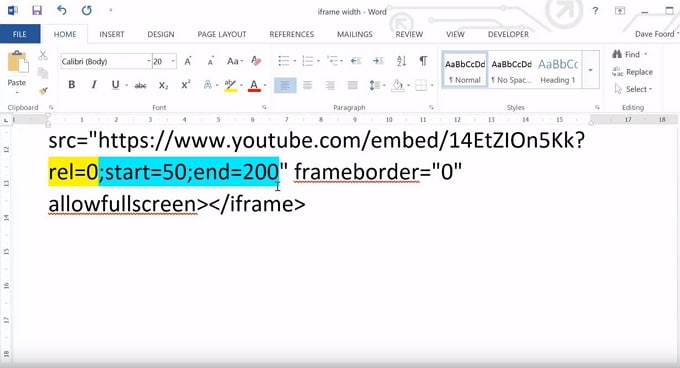
Step 4. If you want to trim the YouTube video in PowerPoint directly. Before you paste the embedded code, you can add a start and end code with exact time for trimming. And then paste the new code to the slide. Now you have got the trimmed YouTube video embedded to your PowerPoint.
Part 4. How to Trim Video in PowerPoint on Windows
If you want an easier and more reliable way to trim videos, you should get help from third-party video trimmer software like Filmora Video Editor for Windows (or Filmora Video Editor for Mac). This is video editing software that allows you to trim any section of your video with quality output. It lets you to trim from the beginning or ending of the video with simple steps. Also, you can use it to trim or cut any middle part of your video. You are able to expand every frame for precisely trimming and editing.

Filmora Video Editor
- It is easy-to-use with user-friendly user interface so you can easily handy it without too much learning.
- There are multiple basic and advanced video editing tools specially designed for beginners and professionals.
- You can use it to do any changes on your video by trimming, rotating, cropping, splitting and combining.
- Also it offers you with hundreds of free video effects for you to stylize your videos to make them look funny and professional.
Step by Step Guide on How to Trim Video Effortlessly
Step 1. Add video files to the program
Run the Filmora Video Editor and choose the "FULL FEATURE MODE" for advanced editing and trimming. And then you can click on the "Import Media Files Here" to select your videos and load them to the program media library.

Step 2. Trim videos
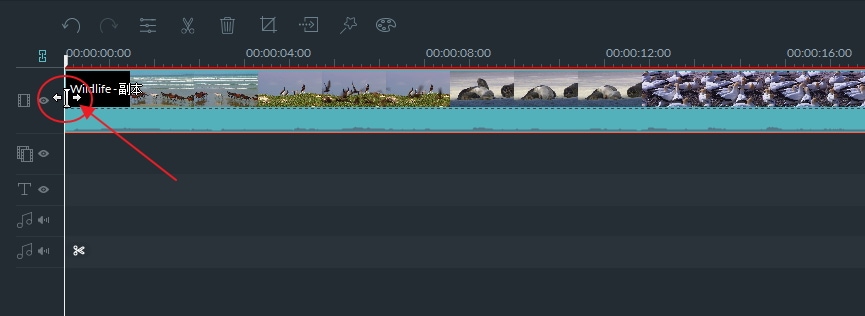
Now drag the video you want to trim to the timeline. And you can put your mouse to the beginning of the video until you see the "I" pointer appears. And then move the pointer right forward to trim the video from the beginning. You can use the same way to trim from the ending part.
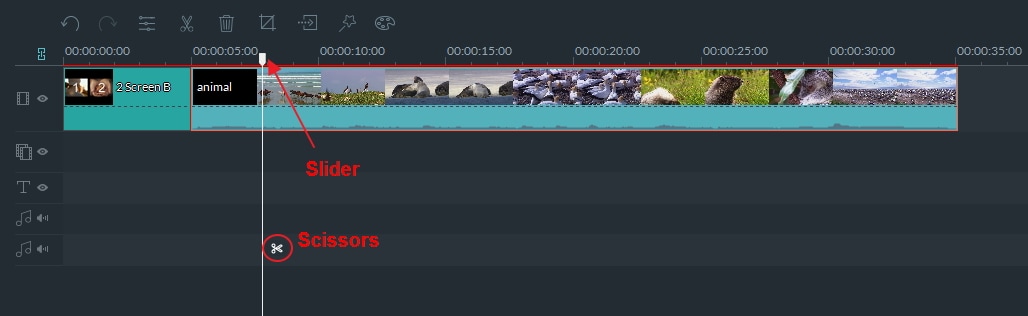
To trim middle part of the video, drag the slider to any position of the video and click on the "Scissors" to trim the start point. Also use the same way to trim the end point.
Step 3. Save the video
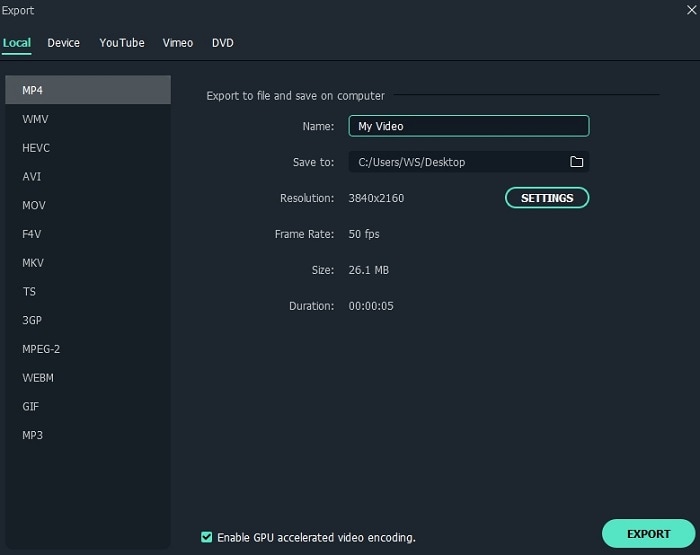
After trimming, you can cut and remove the unwanted part. Or save the video to a new one. Click on the "EXPORT" button and choose the output format you want, and save the video to your computer.
With the Filmora Video Editor to trim the videos before, you can directly insert the trimmed video to your PowerPoint slides.


