Dose Windows Movie Maker Support Webcam?
It is not always that you will add video files to Windows Movie Maker from the computer system. You can add them directly from a webcam and it’s very easy. Without giving it a try, you will always consider it a very complicated process. This article will show you how to do that but first you need to know about a few things when using your webcam. Remember, the quality of the video you import from your webcam to the program will be dependent on how you do the recording.
When you record your video, maintain a good distance between the camera and your subject. This will make sure the images you capture are not invisible or blurred. A good distance will mean good quality for your video. If you are recording yourself, maintain the right posture and use clothes that will reflect well in the camera. You can choose between bright or dull colors depending on what will work with your webcam.
Your camera should not experience a lot of difficulties rendering the images in your video. Avoid too much of the jewelry and makeup when shooting a video with your webcam for future use with Windows Movie Maker. There is the aspect of lighting which is very critical in shooting a video with webcam. When shooting indoors, set lighting in such a way that shades are not visible. Don’t assume that the natural lighting you work with every day is enough because it might be dim in the video. You will need to add some artificial light to the setting for your video shooting. Choose a location that is peaceful and free from any interruptions. Just be sure you are comfortable and then begin to record.
- Part 1: How to Use Webcam in Windows Movie Maker?
- Part 2: Best Alternative For Windows Movie Maker - Filmora Video Editor
Part 1. How to Use Webcam in Windows Movie Maker?
Once you have recorded the video, these steps will help you to use webcam in Windows Movie Maker:
Step 1. Launch the program. Launch the Windows Movie Maker program to be able to start using it officially. You can double-click on the application or left-click on it to choose the “Open” option from the dropdown menu.
Step 2. Record video. Once you have access to the program, click on the tab named “Home” and you will see the “Webcam Video” option. When you click on that, three options for “Cancel”, “Record” and “Stop” will pop up. Click on the “Record” option and your video will begin to record.
Step 3. Load video. After you are through with recording, click on the “stop” button to bring the recording to a halt. Immediately, the recorded video will load to your Windows Movie Maker program and you will get to view it from the timeline.
Step 4. Save video. Save the video and you will be ready to enjoy. You can choose to just play the video on your program or edit it depending on what you want.
With these clear steps being followed to the letter, you will have nothing to complain about in regards to using webcam in Windows Movie Maker. Challenges are only for those people who are never keen on following given instructions.

Part 2: Best Alternative For Windows Movie Maker - Filmora Video Editor
Filmora Video Editor is no doubt the best Windows Movie Maker alternative tool capable of editing your media files in a simple, reliable, and easy manner. The several equipped capabilities help to transform the whole experience super-awesome. Users can crop, split, merge, add effects, and Trim their media files among other options within a short time and export them to the destination of their choice. There are quite a lot to explore in this program and I bet you in no time it would become a must-have tool. Download the appropriate version for either Windows or mac depending on your operating system and install it in your computer.

- Speed- Filmora video editor is capable of editing your media file in a super-fast speed and hence saves time for the user.
- Simple- The program features a well-designed easy to use interface characterized with clear icons and steps.
- Compatibility- This program is compatible with an array of hot and new devices in which you can export the media files into. They include iPhone, iPad, Apple TV, PS4, Android Generic, Nexus, and iPod among others.
- Wide Range of Formats- With this program, you import or export media files of several formats like WMV, MP4, WAV, MP3, GIF, WEBM, 3GP, TS, and MOV among others.
- Online Export- With this program, users can export their projects or files to online platforms like Facebook, YouTube, and Vimeo among others.
- Edit Features- This tool provides several basic as well as advanced editing features including effects that helps to enhance the visual appearance of your video or give the desired length depending on the edit requirement.
How to Use the Best Windows Movie Maker Alternative - Filmora Video Editor:
Step 1. Launch the Program
Download the appropriate version of Filmora Video Editor and install it in your computer. Once installed, go to its icon and click to run and open the main program’s interface.

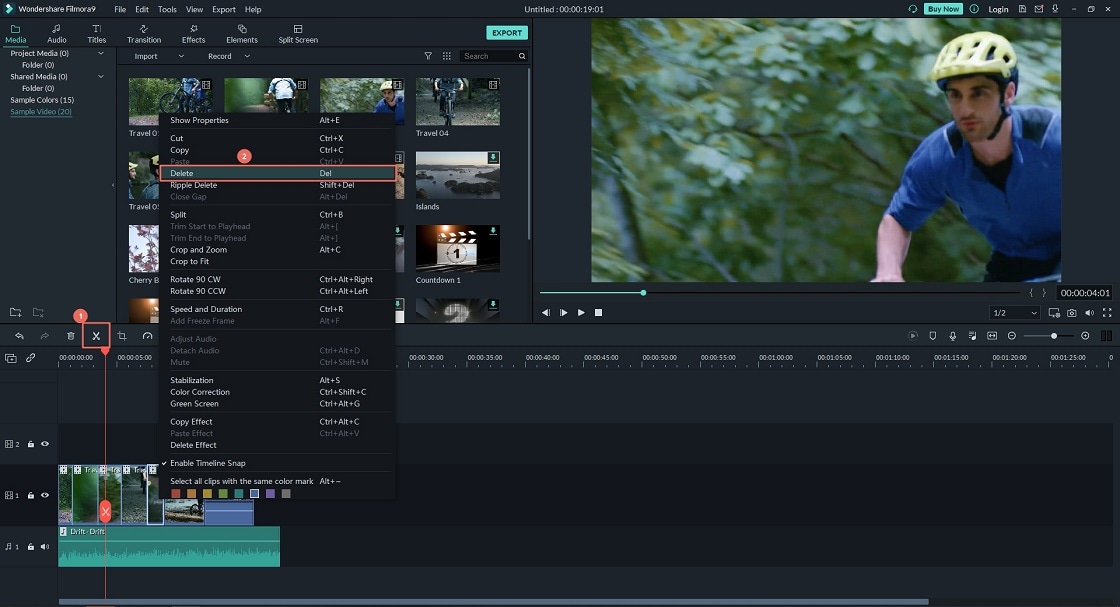
Step 2. Import Files
This program allows users to add the files to be edited in several ways. One method is to go to the “File” menu and then “New Project” or “Open Project” depending on whether you need is starting a new project or want to edit an existing project respectively. After selecting any of these options, the window explorer shall open where you select the file of interest and subsequently hit the “Open” button. This would then automatically begin loading your file to the “User’s Album”. The value of the “Users Album” shall indicate the number of files added to the program. Alternatively, you can tab on the “Import” button and select “Import Media File” or any of the suitable options from the drop-down menu. You can also drag the respective files to the program’s interface.

Step 3. Edit your Files
Once the files have been successfully added to the “User’s Album”, just drag them one by one to the “Timeline” at the bottom of the primary window. They shall be arranged in the very order you dragged. Here, several edit options are available and users can edit depending on their need. These edit options include crop, cut, split screen, add filters, and add transitions among others.
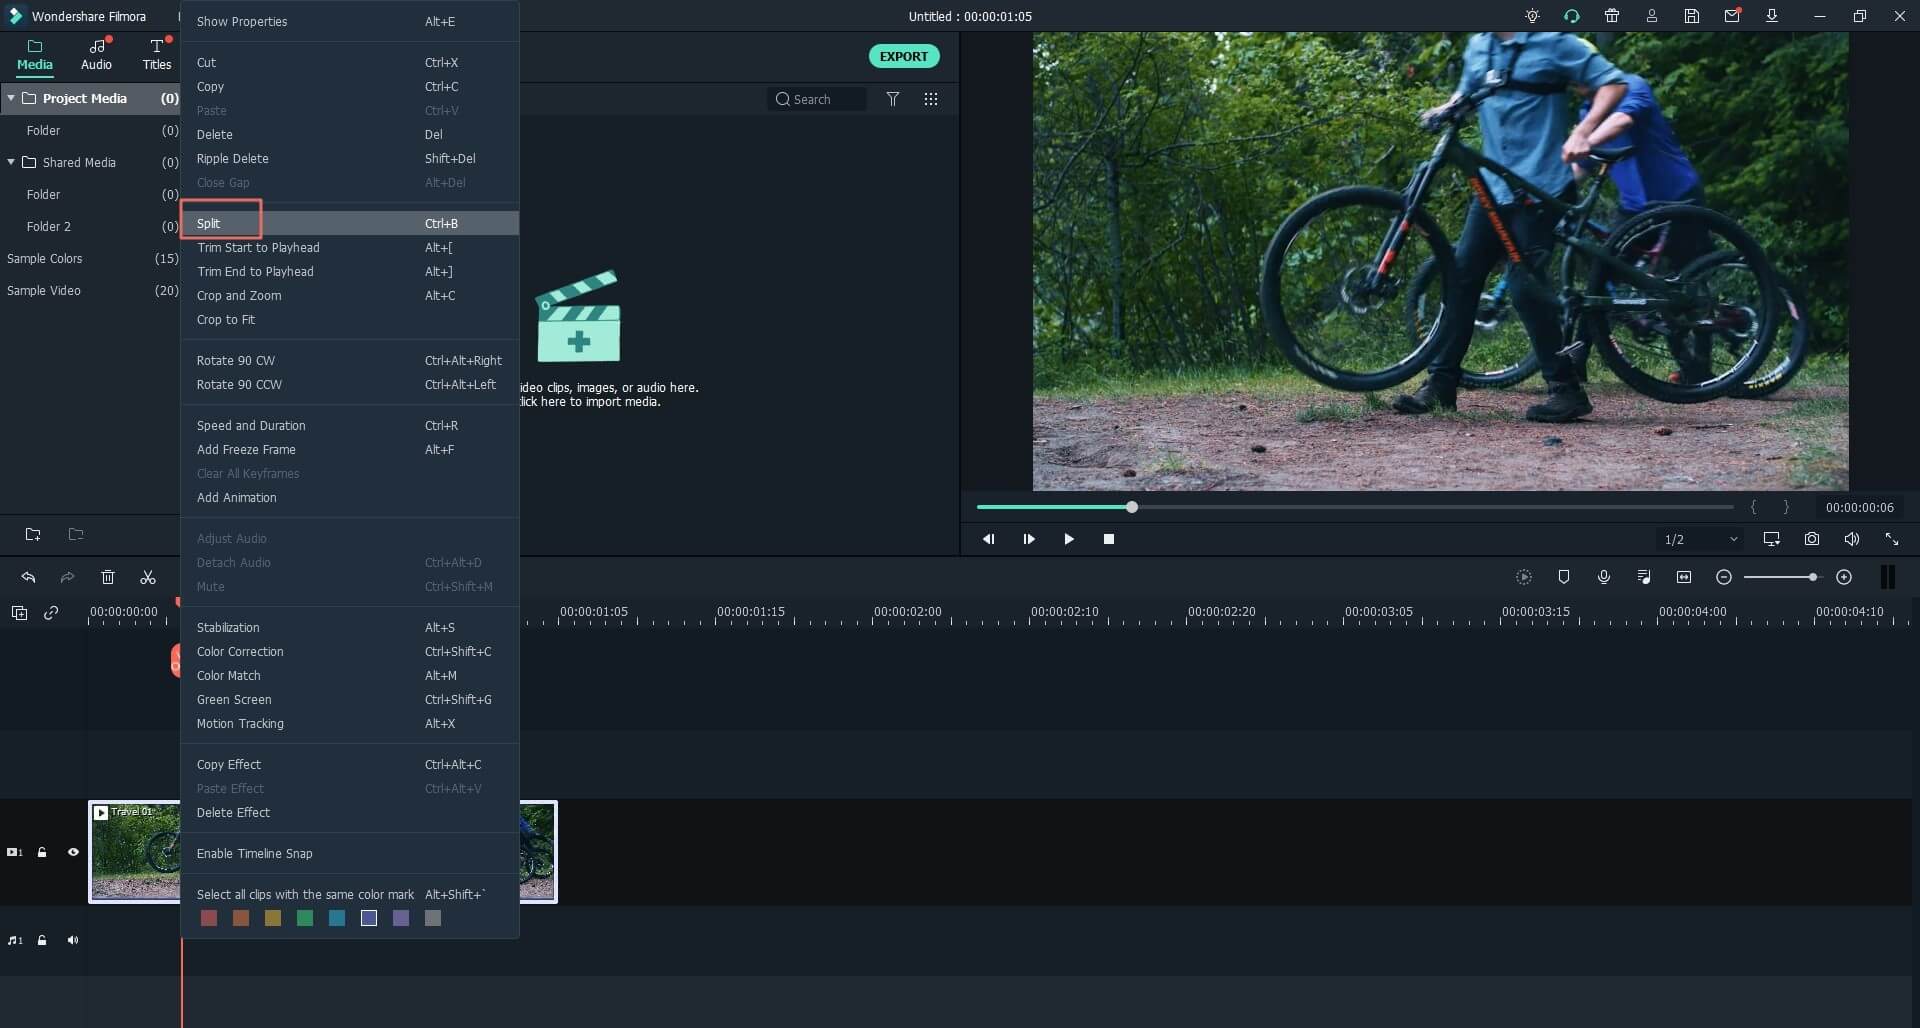
To split your video or audio file, just right-click at the point where you would like to split and select the “Split” option from the options provided. Alternatively, move the cursor to the point of interest and hit the scissor-like button at the Timeline.
To cut your file, move your cursor over the vertical edges of the file at the Timeline until a cursor-like or I device appears. Drag the edges using this device until you obtain your desired length.
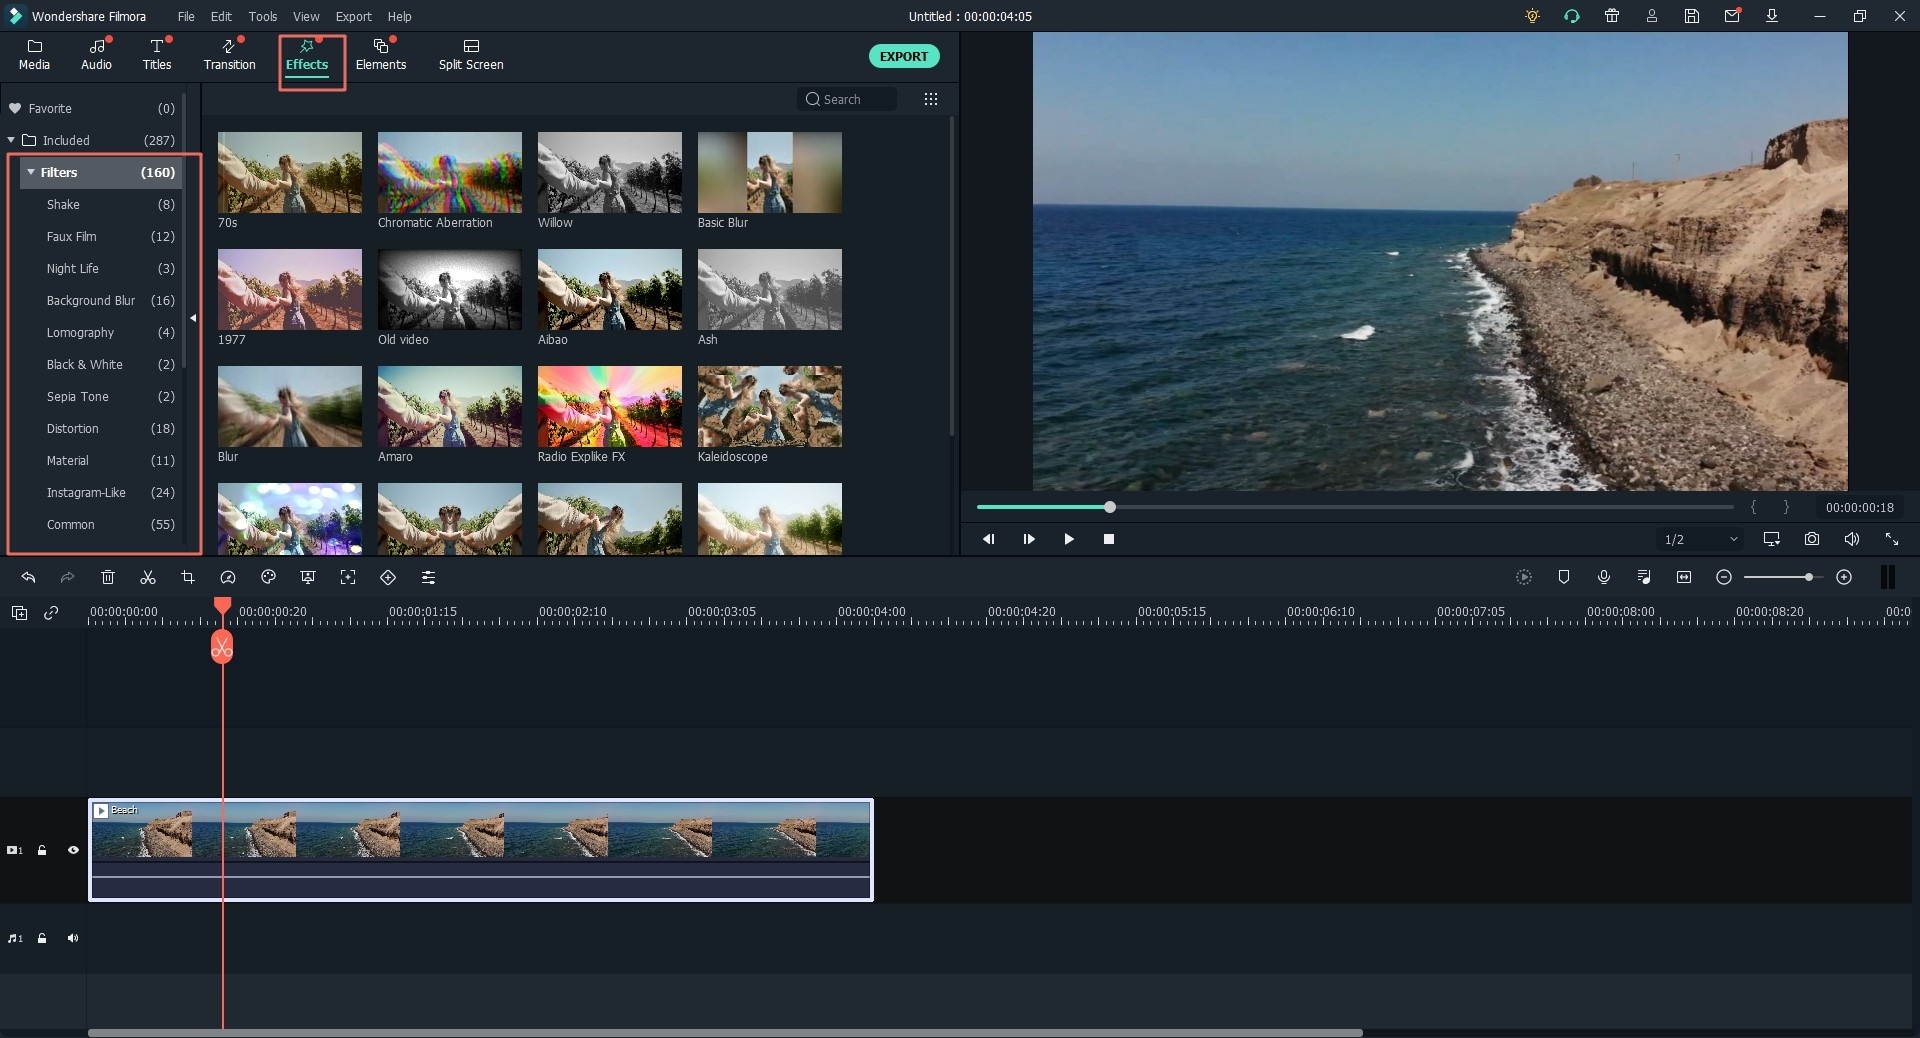
To add filters, just click on the “Filter” button also on the Timeline and select the filter type you desire. If you want to add more effects, click the “More Effects” button at the preview window and choose the one that interests you. The other options like split screen, and overlays among others can be accessed by hitting their respective buttons on the Timeline.
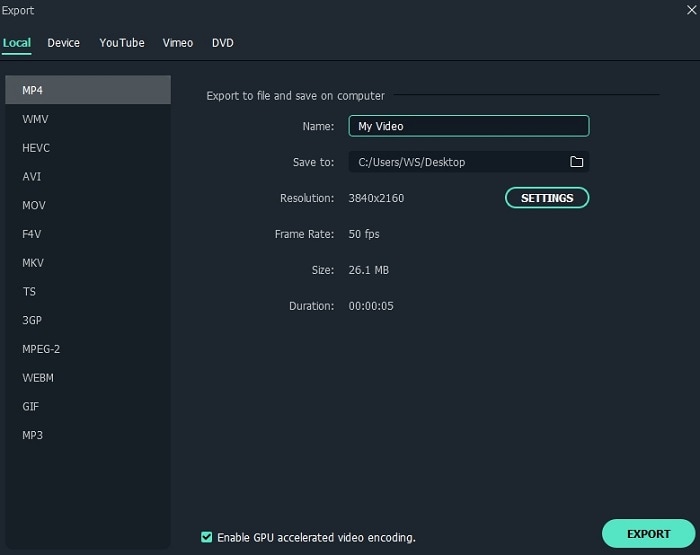
Step 4. Export your Project
To export your project, just hit the “Export” button on the main program’s menu or at the Timeline and choose whether to export to device, DVD, or online sites like Facebook and YouTube among others. Under “Devices” select the appropriate device and give the save path before finally clicking on the “Export” button. To save in other formats other than device, choose “Create Video” under the “Export” tab instead and select the format of your choice from the new window displayed and select a save destination, file name and click on “Export” button.