


Do you want to change the background of your video and superimpose it with a new background? Well, in a situation where you have filmed a video with a green background and you want to change the background you need a software with a green screen feature. Final Cut Pro is Apple's video editor that is built with green screen that you can use. Therefore, this article shows you how to use green screen Final Cut Pro as well as get its best alternative in the market.
- Part 1. How to Use Green Screen in Final Cur Pro
- Part 2. Why Need An Alternative to Edit Green Screen Video
- Part 3. Best Alternative Way to Use Green Screen in Final Cur Pro
Part 1. How to Use Green Screen in Final Cur Pro
If you do not have Final Cut Pro app on your computer, you can visit iTunes and download it on your computer. After that, go ahead and follow the prompts to install it your computer and launch it ready for use. At this point, you can then follow the following steps on how to use green screen Final Cut Pro.
[Tutorial] Steps to Use the Green Screen in Final Cut Pro
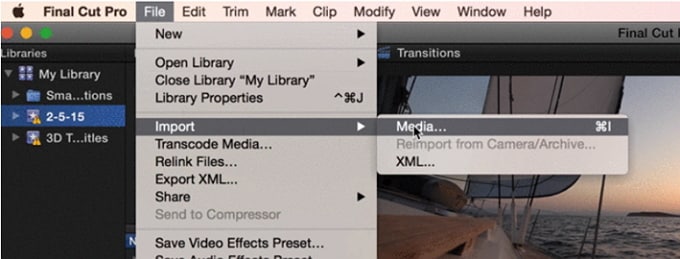
Step 1. The first thing is to import the green screen clip and the video background clip that you want to add. Click on "File" menu select "Import" and then select "Media" option to import files from your local folder.
Step 2. After upload the files, you can now drag the video to background while the green screen clip on the foreground.
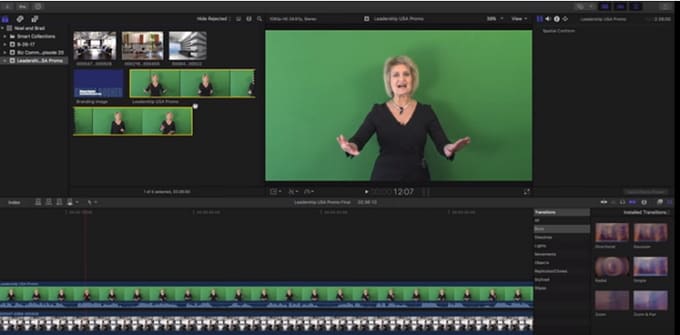
Step 3. Next, you need to click on the foreground video and then click on the "Effects" tab.
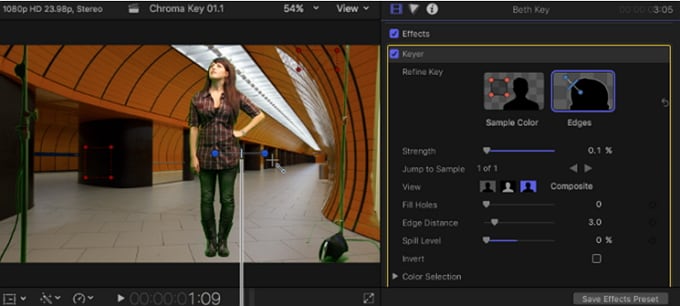
Step 4. Now, under the "Effect" tab clicking on "Keying" and choose for "Keyer" effect.
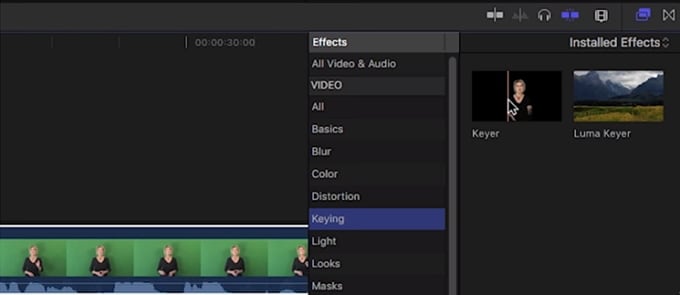
Step 5. From there, click on the Keyer effect and then drag it to the green screen clip. The effect will turn the green background on your video.
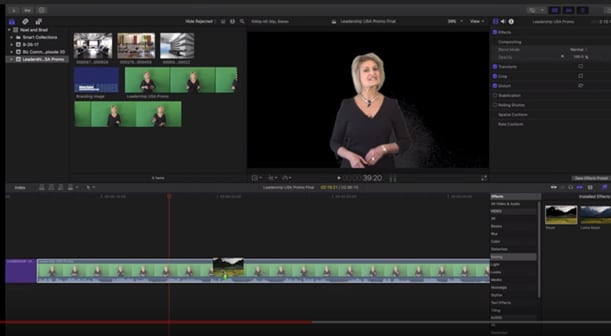
Step 6. Next, you need to adjust changes on the Inspector Window. Under the Sample, colour icon is where you can adjust the image colour background. Play along with other effects and fine-tune the appearance of the background as desired.
Step 7. Finally, save your project. Click on "File" menu, select "Share" and then "Movie" option.
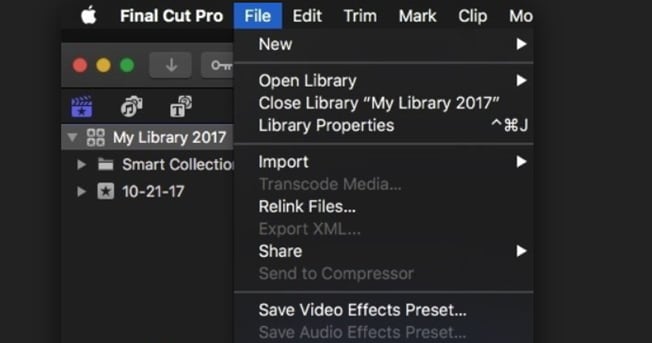
You can opt to retain the current settings and choose the desired folder and export the project to save it.
Part 2. Why Need An Alternative to Edit Green Screen Video
Green Screen in Final Cut Pro as you have seen needs some professional knowledge of the software especially when it comes to adjusting of the background effects. It helps fix the green screen background but you cannot export files to online formats like Vimeo and YouTube. With that begin said if you are a beginner you need a simple to use green screen application such as Filmora Video Editor.
Now I will share the steps to use green screen in Filmora Video Editor with you, you can compare these 2 methods on using Green Screen, and select the suitable one according to your actual situation.
Part 3. Best Alternative Way to Use Green Screen in Final Cur Pro
Filmora Video Editor for Windows (or Filmora Video Editor for Mac) is the best alternative to Green Screen Final Cut Pro. Filmora Video Editor is an editing software for Mac and Windows operating system that is built with green screen option. Its user interface is simple that is ideal for beginners to execute their green screen options. Moreover, this software is an audio and video editor with basic editing features such as trim, crop, split rotate and much more.

Before we look at how to use green screen in Filmora Video Editor, let us have look at some of its essential features:
- This software has is built with advanced editing options like split screen, video stabilizer, audio effects, advanced colour tuning, noise removal, speed control and much more.
- It allows you to personalize videos in a stylish manner by adding elements, transitions, motions, effects and music background.
- It is built with a stand-alone action cam editing features such as speed control, colour tuning, instant cutter, fix and correction.
- It supports several ways of exporting projects including direct online sharing.
[Tutorial] How to Use Green Screen in Filmora Video Editor
Step 1. Open the Installed Filmora Video Editor software on your computer.
Step 2. Next, you have to upload the green screen clip and video background or image that you want to add to your project. Click on "Import Media Files Here" button.

Step 3. What follows is for you to drag the video to the video timeline and the green screen to the PIP timeline.
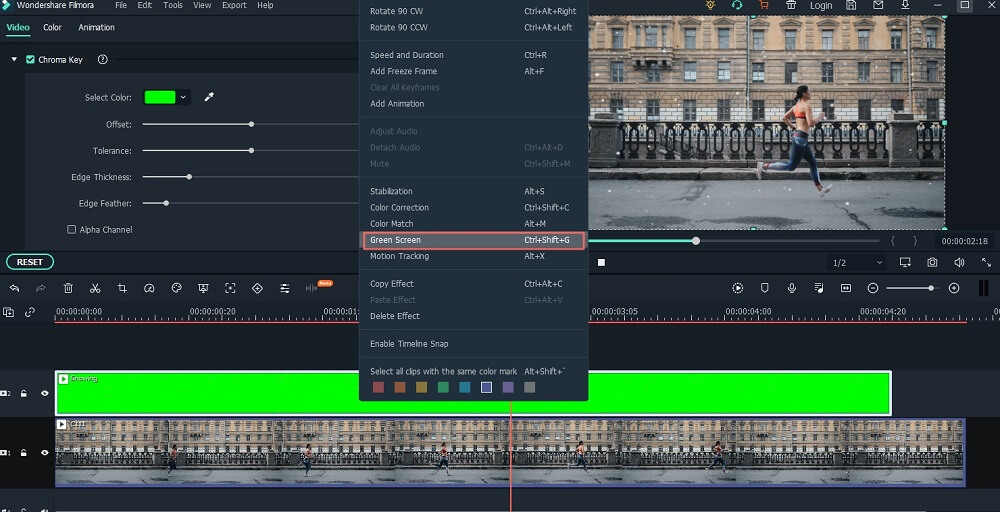
Step 4. After that, right click on the green screen clip on the timeline and select the "Green Screen" option on the drop-down menu.
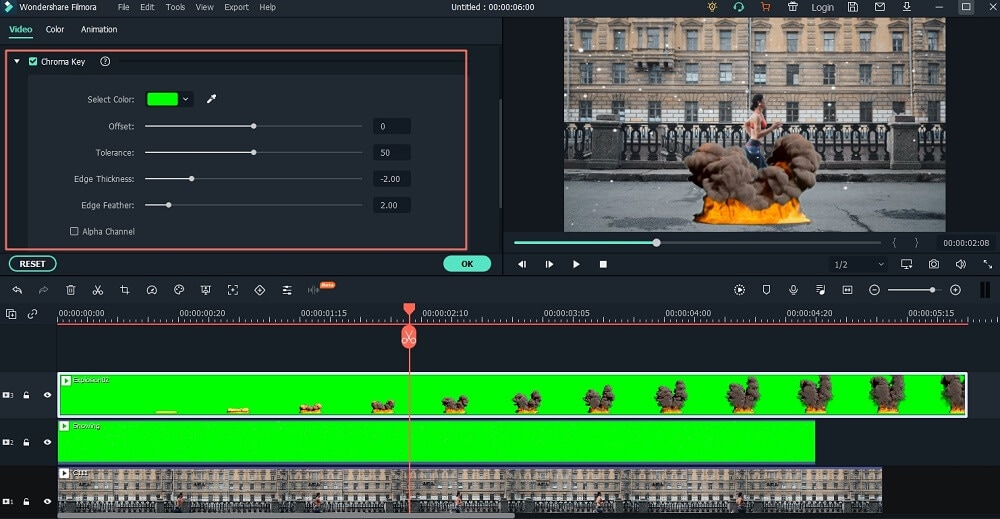
Step 5. A pop-up green screen window will appear. Under the "Effects" menu activate the "Make parts of the clip transparent" and then choose the "Current Colour" that you want.
You will see the changes appear on the preview window. Next, adjust the intensity level as desired. Below the window are options to adjust shadows, borders, and flip. You can create many different amazing video effects like cut out a person from a video to put him to a cooler background video by using Green Screen feature.
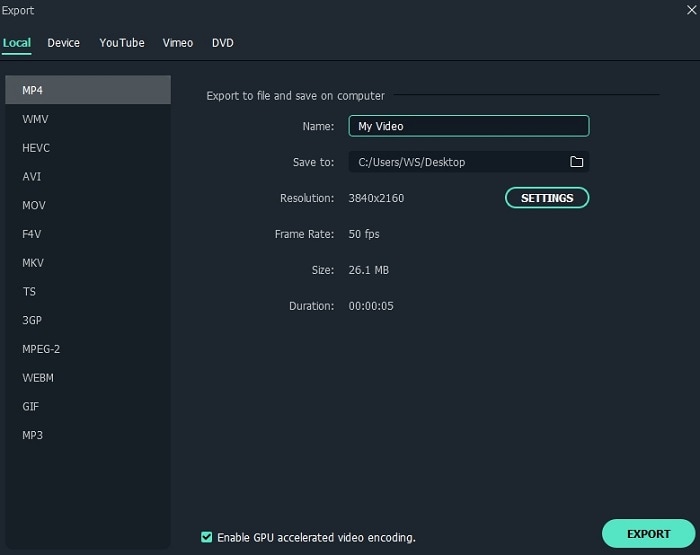
Step 6. When you are done, click on "OK" button and then click on "Export" at the home screen. Next, choose an output format, select the desired output folder and export the edited video.
It is that simple!
The Finish Line
When it comes to using green screen, consider using Filmora Video Editor if you are a newbie since it simple and straightforward, unlike Final Cut Pro software. Final Cut Pro X Green screen process is involving unlike the Filmora Video Editor that is well structured. Therefore, for starters, we recommend using Filmora Video Editor if you want excellent output.


