


Animation keyframe is an incredible tool for post-production video. It uses the adjustment of video frames to enhance the video scene's mood through basic digital movement.
For beginners in video editing, the keyframe may sound strange, and seeing each keyframe can be troublesome. Indeed, there is not much data on the program about what each of them does. Besides, how you apply keyframe definitions is different from each other, making it more difficult to preserve all other content. Here, we will learn more about the keyframes in video editing and show you how to add keyframes in Filmora Video Editor & Filmora Video Editor for Mac, including how every one of them will influence your movements.
Part 1: What is Keyframing
Keyframes in animation and film production are graphics or shots that define the starting and ending points of any smooth transition. They are called frames because their temporal positions are measured in frames on the timeline of film or digital video editing. A series of keyframes define the movement that the viewer will see, and the position of the keyframes on the movie, video, or animation illustrates the time of movement.
In most video editing software, keyframes indicate the beginning or end of a parameter change. For example, you can set a keyframe for your video to indicate the point where the audio will gradually fade in or fade out to a certain level.
Difference Between Keyframes and Frames
Here we will explain the main differences between these two terms, which are often collated and might consume beginners in the video editing industry.
| Frames | Keyframes |
| Every little box in a timetable is known as a Frame. | The central point within the video editing platform is the keyframe, which we use to transform anything over the long run. |
| Frames have somewhat square drawn on them. | Keyframes have a little hover drawn on them. |
| A-frame empowers our video editing items to show up on the course of events as the play head moves. | It is a significant point in the activity where ae starts or ends. |
| Frames are a short shot that shows up in the arrangement of pictures within the timeline. | It shows up as a dark speck in several video editors. |
| Frames outlines are what you essentially need to expand the span of something that shows up on the video editors' timeline. | Addition of the keyframes on the off chance you need to roll out free improvements at specific focuses in the movement. |
Importance of Keyframes
keyframes are the main highlights you have to think about when you are animating layers. Numerous keyframe variety and types may be somewhat befuddling when you begin figuring out how to vitalize. I accept that acing the keyframes in blend with chart proofreader is the thing that characterizes an expert movement planner artisan versus a beginner illustrator. After experiencing this article, you should know how keyframe functions and figure out which keyframe is required for your activity.
Changing positions
Whatever suits and makes the picture persuasive, you can make the working in each frame. If you are trying a hand-drawing pattern, you can change the frame by changing the position of the object.
Scaling subject of the clasp
You can play as an uncommon brain to scale your content with strategy, thing, or subject of the edge with keyframing. You can, as requirements, be resized in the article. To display an incredible message from your video, you need to make an overhaul to improve perfection.
Customizing Opacity
With this component, making your shot is got substantially clearer and briefer, the part of cloudiness. This will give you a panning sway like someone is working the camera.
Part 2: How to Efficiently Use Keyframing in Filmora Video Editor
Filmora Video Editor & Filmora Video Editor for Mac offers a vast pool of alternatives that are fit for drawing an incredible line of highlights. Thus, on the off chance that you wish to switch the subject's spot or the article's focal point, essentially empower keyframes over the position and customize murkiness property.
Presently, without paying an extraordinary mind to different choices, you can unquestionably turn the chance of making a stunning piece with Filmora X. It remains the one-stop answer for styled-components keyframes to all your video altering requirements. Any expert or a rookie in this field can modify the impacts so without any problem.
Filmora Video Editor - Use the Best Software For Keyframes
- Ease of use: With the Filmora X intuitive interface, you can quickly get used to its usage within the shortest period as it has an attractive user interface.
- Preset Animation (drag and drop): Filmora X provides powerful yet handy built-in animations and effects which you can efficiently utilize in your projects.
- Handy Graphics: This software's library is enriched with the graphics and intuitive and customizable graphical effects you can use in your keyframing structures.
- Powerful Performance: Filmora X has a magical speed and user-friendly design. You can easily shape what you think of and bring your ideas into reality with this handy toolkit.
Step-By-Step Guide on How to Use Keyframes in Filmora X
In this section, we’re going to brief you about the step by step procedure of how you can use the keyframes in this powerful and intuitive software Filmora Video Editor & Filmora Video Editor for Mac.
Step 1: Activate Keyframes
Before we dive into the creation of keyframes with this masterpiece, the first step you need to do is activate this unique feature within the Filmora X, and here we'll show you how you can do it.
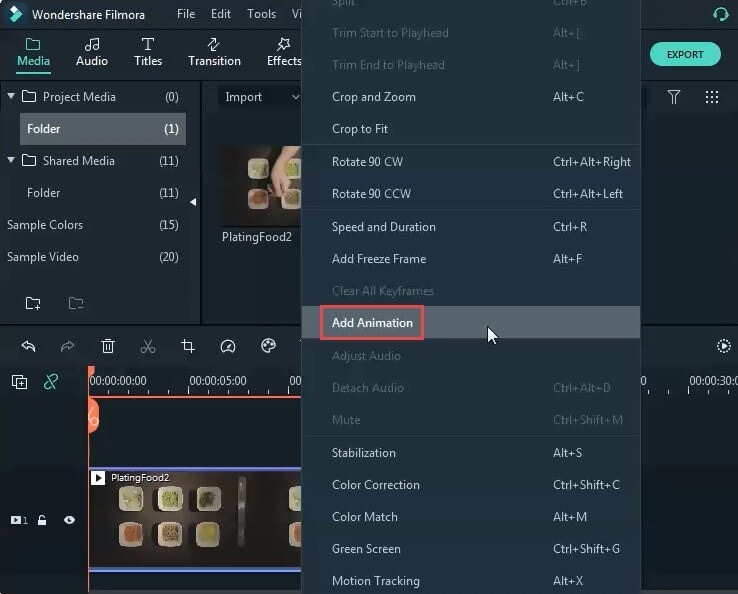
To activate this powerful feature of keyframing, right-click on your video in the timeline and select the Add Animation option as follow. This will take you towards the keyframing activation menu.
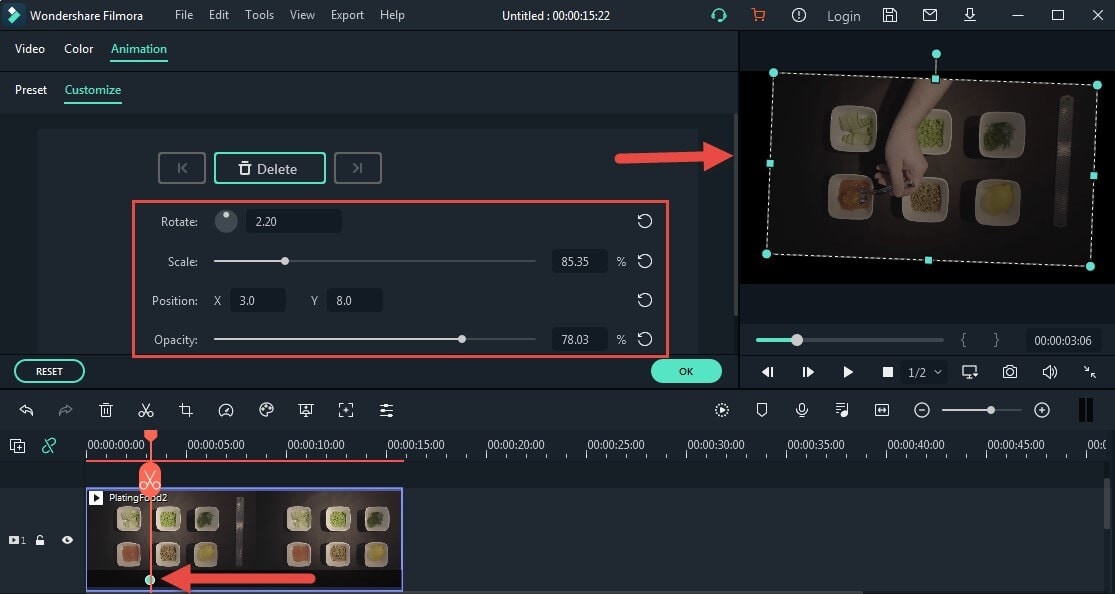
Step 2: Create Keyframes
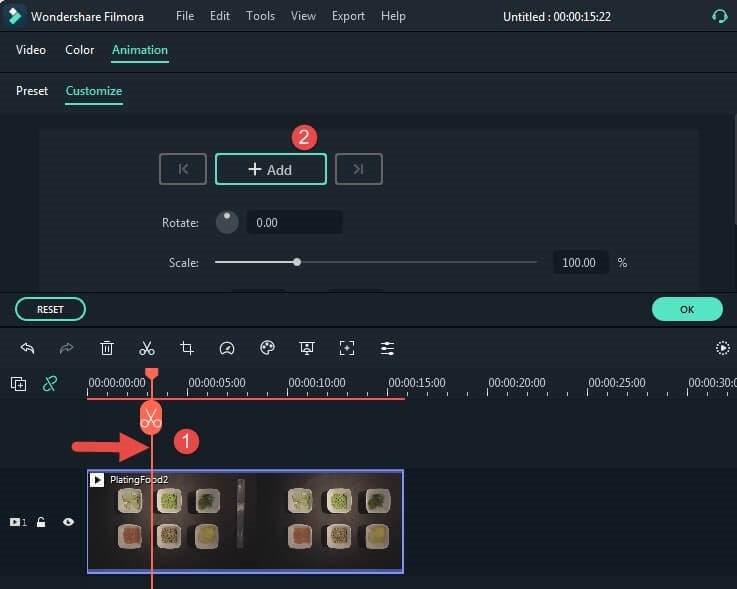
To create your specified keyframe, hit the Animation menu bar, and just after that, select the Customize menu as follows.
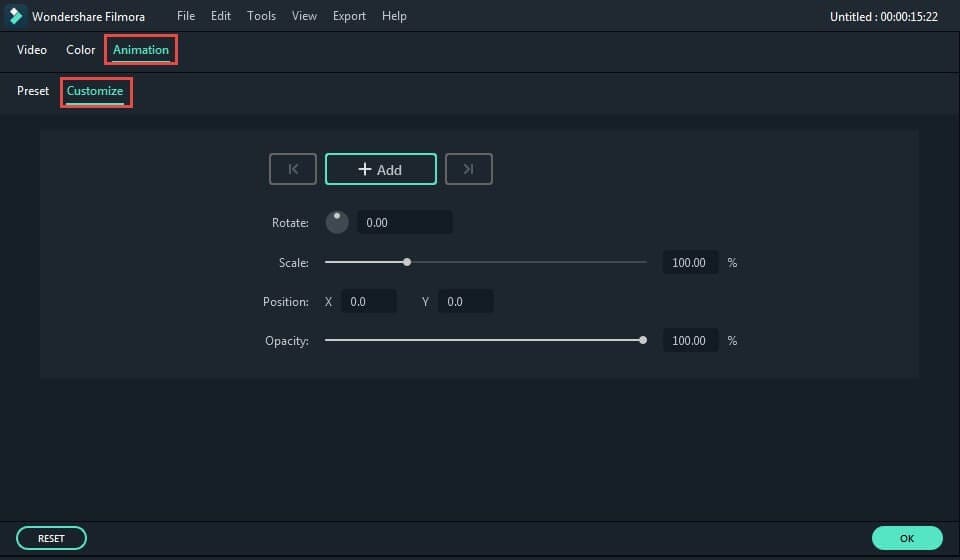
Create the specified keyframe, then click the Animation menu bar. Then select the Custom menu, as shown below.
Step 3: Navigate by Keyframes
With Filmora X, the best part is that you can also navigate your keyframe, which you will embed in your timeline. By clicking on your specific keyframe within the timeline, you have now the options to navigate your keyframe as you want it to be as follow:
Step 4: Remove Keyframes
Now, suppose you want to delete your keyframe because of any reason or do it better. In that case, you can also do it easily just by right-clicking on the specific keyframe within the timeline and hitting the Remove option will eventually delete it as follows:
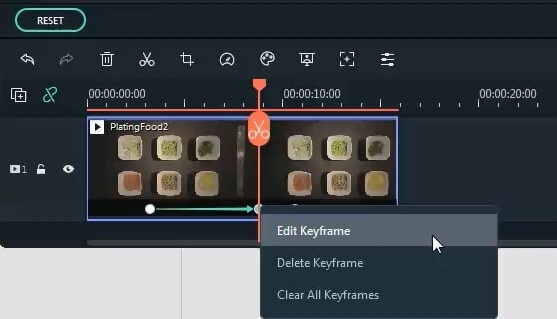
Step 5: Edit Keyframes
Here’s the kicker with the Filmora X as you can handily edit your specified keyframe within the timeline. To do so, hit the right-click on your video of keyframe and select the Edit Keyframe button as follows, which will take you to the keyframe's editing options that you just added within the timeline.
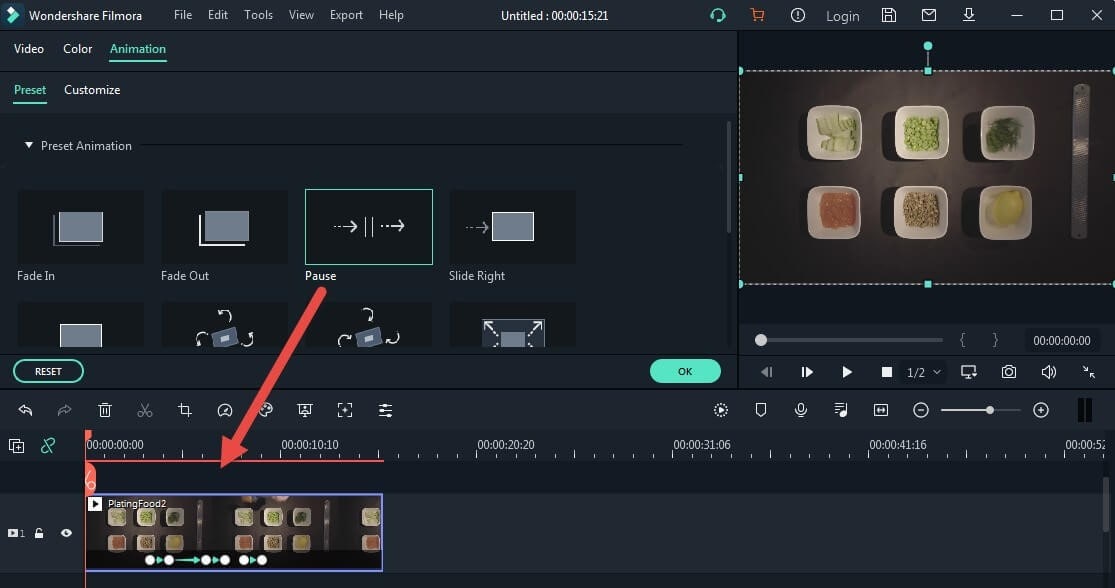
Step 6: Select Keyframes
Filmora X has a vast library of pre-defined built-in keyframes for you. So, to ease your panic of creating from scratch. You can handily select your specified keyframe from the Preset menu. To do so, hit the Animations menu and then choose Preset as follow

To add multiple keyframes at once, you can drag a selection box that will quickly select them all.
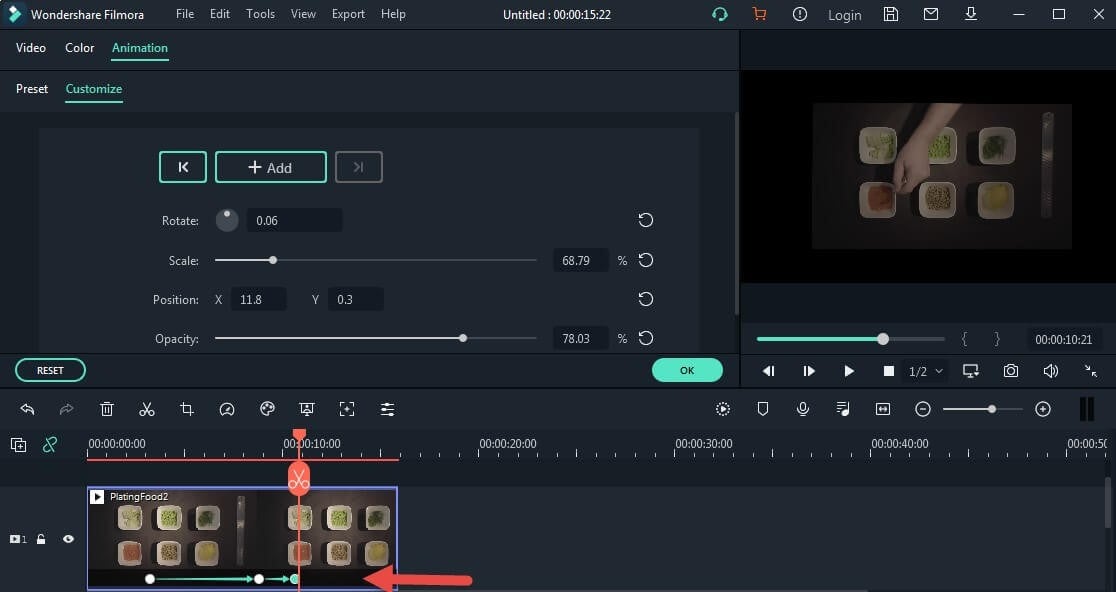
Step 7: Move Keyframes
In the next step, you can move your specified and favorite keyframe preset from the Preset menu to the timeline, where you can edit it accordingly as follow:
You can also move multiple keyframes at once. To do so, press the Alt button from your system keyboard and move the required keyframes to your place.
Step 8: Change Temporal Interpolation
This unique feature of Filmora X has enabled you to animate the various frames within your created keyframes effectively. You can access this feature by right-clicking on the keyframe and select your specified Temporal Interpolation menu from the multiple options within this menu.
Filmora Video Editor & Filmora Video Editor for Mac has also provided you an opportunity to embed motion tracking in your masterpiece. You can follow an object's development and afterward apply the following information for that creativity to another layer within your project. For instance, another layer or an impact control point used to make extra layers in which pictures and impacts follow the movement.
You can likewise balance out movement, in which case the tracking information is utilized to invigorate the followed layer to make up for Animation in this keyframe animation app. You can connect distinct layers to tracking information using articulations, which opens up a wide assortment of creativity and motion art.
Summary:
We hope this article can help you get familiar with and understand keyframes. It is undeniable that keyframes have certain advantages in the video presentation, and clarifying the use of critical edges can make your video more attractive and get more attention. Obviously, with Filmora Video Editor, you can viably and effectively tweak the keyframes as per your need. We value your advantage and time to peruse this article and expect that you've liked our endeavors to get this post through.


