


Adobe Premiere Pro is a video editing software for professionals, so for a beginner or semi-professional, many people find Adobe Premiere Pro to be quite complex so that they frequently asked questions and wish to find an answer to every single function of Premiere Pro. Therefore, I write this article to show you a step-by-step tutorial on how to reverse video in Premiere Pro.
The best part?
All steps in reversing a video in Premiere come with a related image to show you the whole process with text and images. And you can also get 6 advanced Premiere video editing tips to enhance your editing skills with Premiere Pro.
You might also interested in:
How to Make A Slow Motion in Adobe Premiere Pro
How to Use Green Screen Effect in Premiere
Now, let's get started.
[Tutorial] How to Reverse A Video in Premiere Pro?
Step 1. Launch adobe premiere then click "Add new project". Go ahead and import the video you intend to reverse then add it to the first monitor.
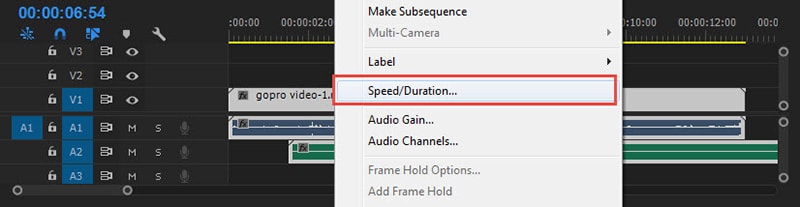
Step 2. Drag the video to the timeline then right click on it, here you can select "Speed/Duration" to set the speed you want the reverse video to play.
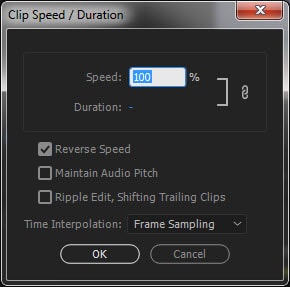
Step 3. Then, click on "Reverse Video" then click on "OK". The video will then be reversed and you can then play it.
The Best Adobe Premiere Pro Alternative to reverse video
Only 3 simple steps, you can reverse a video in Premiere Pro successfully. However, this process might be very complicated when you're not familiar with the interface of Adobe Premiere Pro. That's also why more and more users start looking for Premiere Pro alternatives.
Filmora Video Editor
- Reverse a video and edit it with various editing skills, including rotating, overlay (picture in picture), green screen, spliting, slow or fast motion, etc. within few simple clicks.
- 1000+ video effects help you enhance the performance of your created video as easy as 1-2-3.
- User-friendly interface makes even a beginner to complete the video editing process at seconds.
- ...
6 Advanced Editing Tips You Need to Know for Using Adobe Premiere Pro
There are other commonly used video editing tips that makes the software to be considered as great. In this post, I'd like to share 6 advanced editing skills about using Adobe Premiere Pro with all of you. If you're interested in them, just keep reading this post.
1. Playback Resolution
This is a simple tip that can help with reducing the burden off your system. Instead of previewing your edits in the highest quality, you can reduce the quality of the footage with up to ½ or even ¼ of the HD footage for a 4k or above kind of footage. The playback resolution will not have any impact on the quality of your final video.
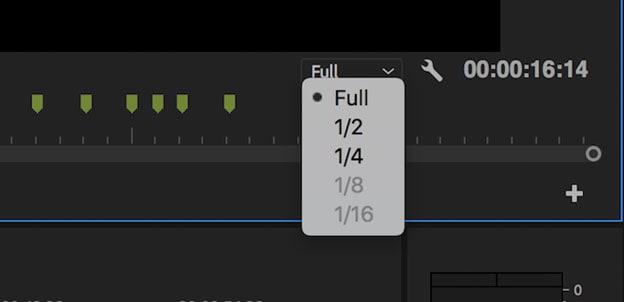
You can perform this task by clicking on select playback resolution box that’s located at the bottom right side. The options can be used to reduce preview quality.
2. Use Proxies
Proxies is one of the great ways that can be used to squeeze out more performance off your system. Proxies in Adobe Premiere Pro are files used for editing and final render. If you have a film in 4K or even higher and your computer is not capable of editing 4k smoothly, you can still work with a reduced quality to about 1080p or even fewer proxies. You can easily swap for the final render.
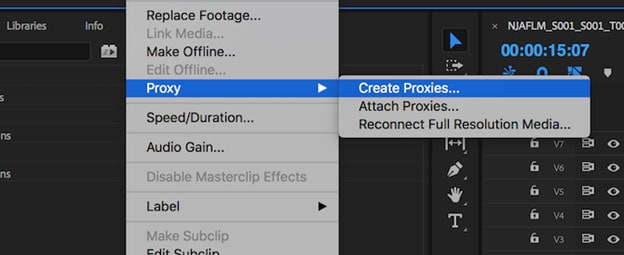
To create proxies, you need to choose a file right click on the video clip then choose "Proxy > Create Proxies". From the menu, select a file format and proxy location then click on "OK". Adobe media decorder will then get opened which automatically renders all the selected clips into proxy files that are easy to edit.
3. Playback Zoom Level
Premiere Pro provides users with quite a number of playback zoom levels so you can easily clip scale settings however that can at times reduce performance. You can adjust your playback zoom level control by adjusting the size of your playback monitor. You can either set it to 100 percent or even a smaller percentage.
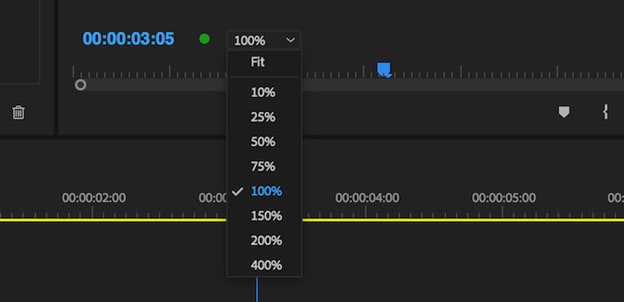
If you are working with a smaller screen then you may want it to be larger. Setting it to a smaller percentage may lead to the marginal performance increase.
4. Transcode Footage
Most of the videos recorded using DSLR or a mirrorless camera are normally stored in a compressed format such as . Codecs like may be good at reducing the file size but very tough for the computer to work with.
If you convert your shots to a format that’s easy to edit, you will realize that your computer may be less taxed and you can get more performance out of it. Adobe media encoder is capable of converting multiple files easily. If you are working with a 4k footage but you need to deliver 1080p, you can use the media encoder to render your videos to 1080p.
5. Ripple Edit
Trimming video clips on premiere pro can be quite frustrating however setting In/Out points can be very helpful. The challenge comes when you want to remove one second from the start or end of a video clip which is on your timeline. The whole process can be quite a time consuming as you have to select the razor tool or use the keyboard shortcut to cut your clip, delete the unwanted section and then shuffle other clips to fill the gap.
The Ripple Edit Tool can be used to make the process much faster. You can drag to either expand or reduce your clip and premiere pro will automatically move the remaining clips to fill the gap.
6. Use Adjustment Layers
Adjustment layers are very powerful tools as any change that you make to the adjustment layer gets applied to all of your clips. This tool is vital for use during color correction as you can make to the advancement layer and have the changes impact several clips underneath it. It, therefore, saves one a lot of time and prevents one from having to make the common changes in different clips.
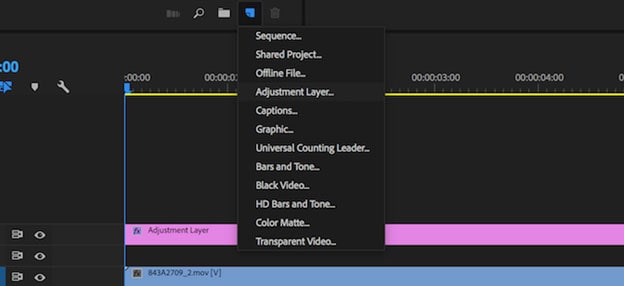
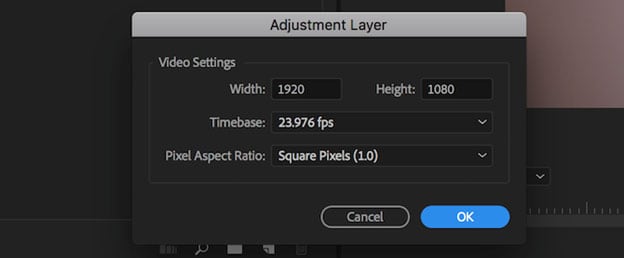
Create a new adjustment layer by selecting "New Item > Adjustment Layer".
Conclusion
If you have followed the above steps to reverse video footage in Adobe Premiere Pro, and you still think it is complicated, then don't hesitate to take a free trial on the Filmora Video Editor or Filmora Video Editor for Mac. With it, you can reverse a video as follows:
1. Import the video to the program and drag it to the timeline.
2. Double-click the video clip and choose "Speed and Duration" in the timeline.
3. Tick the option of "Play video clip in reverse" and hit "OK" button to confirm your changes.
That's all! Now, just click the below icon to get this powerful software.


