Is It Easy to Speed Up Video By Using Adobe Premiere?
The ease in using Adobe Premiere to edit your video will depend on a variety of factors. First and foremost, you must have some information on how it works. If you are new to it, there are manuals offered which you can use as a guideline. Secondly, you must be aware of the exact editing function that you want to perform. If it's speeding up the video, concentrate specifically on that and don't engage in others like trimming, rotating and merging. It will make it easy working with this program.
- Part 1: How to Speed Up/Slow Down Video with Adobe Premiere
- Part 2: Most Cost-effective Way to Speed Up/Slow Down Video Files
Part 1: How to Speed Up/Slow Down Video with Adobe Premiere
With Adobe Premiere, you will have gotten ideal software that will not give you problems editing video. It uses the timeline for editing and its interface is very friendly to the user. You will be able to load your files with ease and even track the editing process bit by bit. This program can support video editing with high resolution. That is always a big concern for many people but you should not when using Adobe Premiere to speed up or slow down your video.
It is a very straightforward process making adjustments to your video's speed in Adobe Premiere. The following simple steps should give you the right direction to follow.
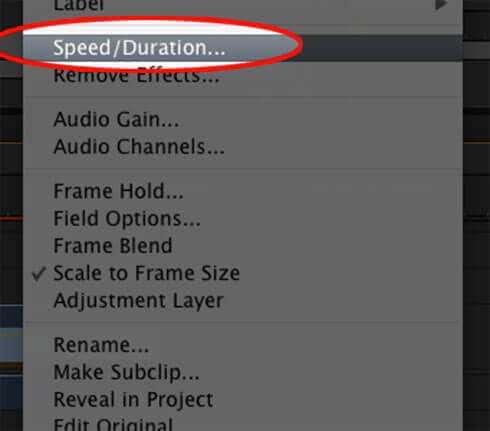
Step 1. Begin by loading the files to your program and right-click on the video that you want to edit. You will then see a context menu from where you will select "speed/duration" option.
Step2. Once the editing window opens up, you can feed in the precise speed figures that you want. If you want the video to slow down, put a small figure and a bigger figure for it to play fast.
Step 3. Finally, click "ok" to apply the changes to your video.
When dealing with Adobe Premiere, you must understand that speed and duration are two aspects that are interlinked. This means that an increase in speed will see the duration shorten and vice versa. It is important you have that information not to get surprised by turn of things when editing.
Part 2: Most Cost-effective Way to Speed Up/Slow Down Video Files
Filmora Video Editor is a media editing software that supports editing of videos, images, and audios. It is built with basic editing options as well as advanced editing options. Moreover, this software is speedy, and it supports different file formats. Therefore, you can upload a video file of any file format and edit its speed. Furthermore, the way it is also designed is modern making it easier for users to navigate around. To get an in-depth understanding of this software, we have made it easier by highlighting its key features below.

- Filmora Video Editor comes with basic video editing options like, rotate, crop, split, trim, cut, brightness, saturation and contrast among others.
- You can also do basic editing to audio such as trimming, splitting, fade out, fade in, adjusting pitch and adjusting volume.
- The advanced editing options include, playing videos in reverse, 3D LUT, video stabilizer, split screen, colour tuning effect, green screen and much more.
- When you want to modify your videos, you can use its inbuilt effects, transitions, overlays, texts and styles.
- It also has an inbuilt music library with various free music that you can add to your project.
- Save and export videos to online sites directly, to devices and also to local folder in a preferred format.
Steps on How to Speed Up/Slow Down videos using Filmora Video Editor:
Without further ado, now let us look at how to speed up or slow down videos using Filmora Video Editor.
Step 1. Import Video
After opening Filmora Video Editor, go for full feature mode and click on “Import Media Files” at the program window. From your local drive, you can then select the desired video and upload it. Alternatively, you can drag and drop the file in the import window.

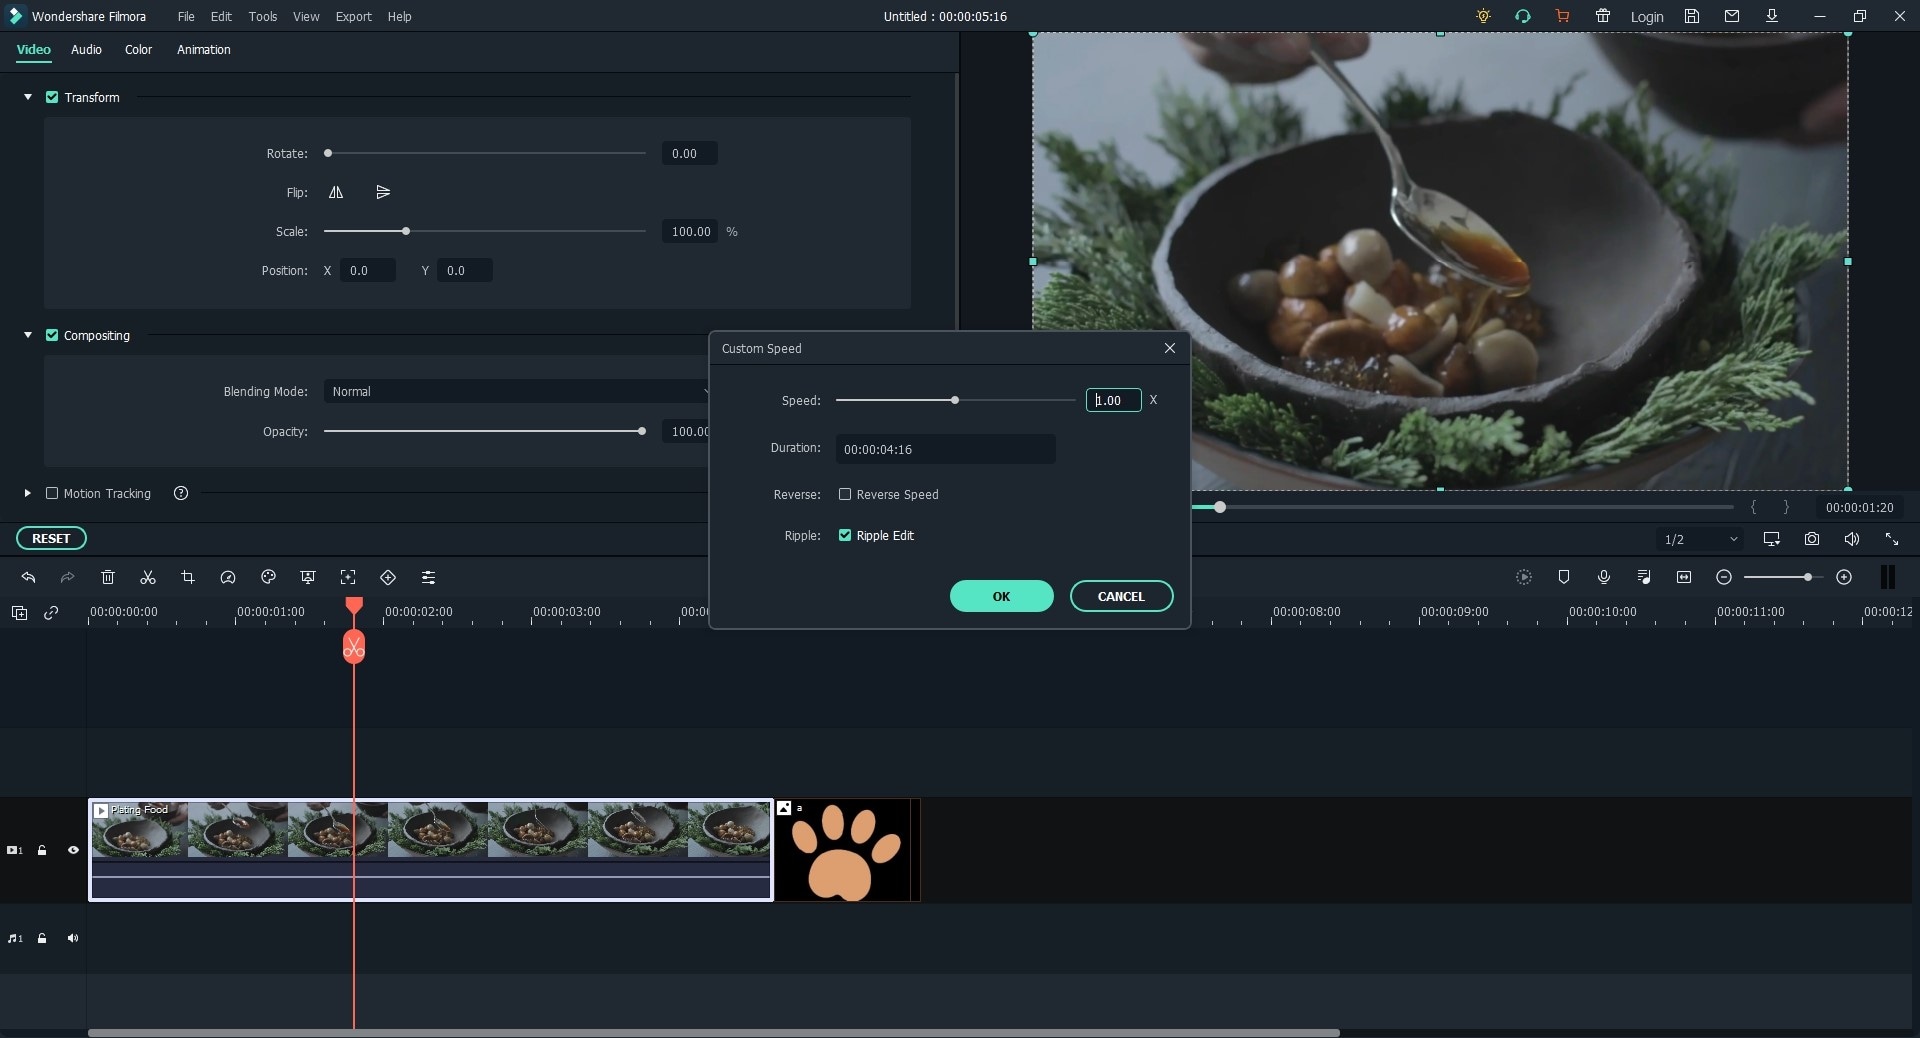
Step 2. Speed up or Slow Down Video
Next, you have to drag the video to the timeline below to begin editing it. To speed up the video, right click on the video and choose “Edit” option. Alternatively, you can click on “Alt+E” option. From there, you click on the speed option that appears on the window at the top. To speed up drag the pointer to the right. You can see the preview it and check the speed, and you can readjust it.
You can also slow down its speed by moving the speed pointer to the left and preview it. When you are done move to the next step.
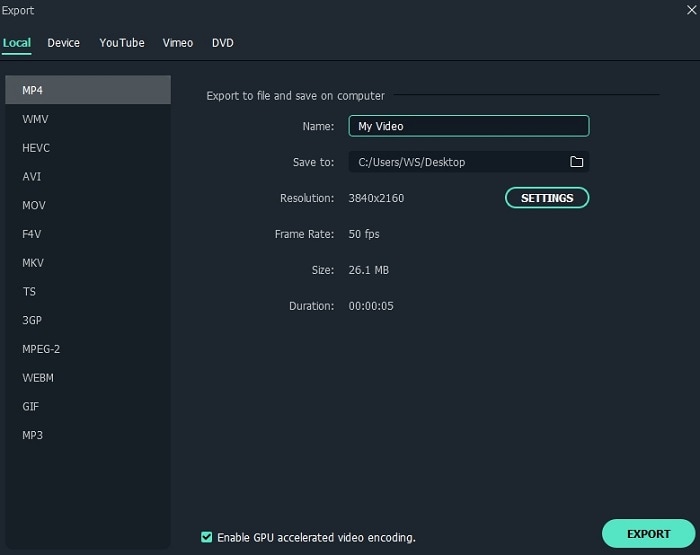
Step 3. Export and Save File
After speeding or slowing down your video, you can now click on “Export” button to save the file. Select “Format” and choose a preferred output format. Next, you have to rename the file and set the output location. Lastly, click on “Export” and you will be able to save your file.