


Many of the most popular YouTube videos rely greatly on colors. Colors in a HD video are not only pleasing to look at, they also help to communicate stories and their feelings to the viewer. If you are serious about creating unique and engaging videos for your YouTube subscribers, it is important that you put a high value on video color correction.
Video color correction is one of the best ways to improve your YouTube videos after they've been recorded, and has the potential to turn your videos from good to great. But how? How to change YouTube video background color?
Well, this article highlights the importance of video color correction and shows you how to effectively color correct your YouTube videos.
See Also: How to Cut YouTube Videos on PC/Mac
Why Video Color Correction/Grading is Needed before Sharing on YouTube?
1. Color correction is the process of balancing and matching colors on an image, or for the purposes of this article, a video. When done right, it can have a huge impact on the quality and feel of your YouTube video.
2. If you shoot videos in different environments, the differences in color and lighting of each environment will create color inconsistencies in your videos. Using a professional video editor will fix these inconsistencies and give your final video accurate and consistent colors.
3. Or you will also be required to correct colors in cases where you need to create moods in your video. For example, if your video is about a fun day at the park, you might want to increase color saturation and brightness to make the colors more vibrant and give your video an exciting and happy feeling. On the other hand, if you are making a video about haunted houses, you should go for darker tones with less saturation to create an ominous mood.
4. ...
Then, how to color grading your YouTube video effectively? Let's find an ideal solution at below section.
Filmora Video Editor - How to Color Grading or Correct Video for YouTube?
Color correction and color grading are easy with Filmora Video Editor. It's intuitive UI and high-quality results make it the go-to video editor for professional YouTubers worldwide. In addition to color correction, this all-in-one video editor will also add cool video effects and gives you the option of uploading directly to YouTube.
Now, click the below icon to get this YouTube video color correction tool at first.
Then, let's check other prominent features of Filmora Video Editor:

- Powerful video editing features: trimming, cropping, rotating, merging/splitting, adding subtitles etc.
- More than 500 stunning video effects, including transitions, filters, overlays, titles, elements, etc. for your reference.
- 157+ supported video formats including WMV, AVI, MP4, AVI, FLV, MOV, MKV, MPG/MPEG etc.
- Powerful Audio mixer to trim the soundtrack length, change audio pitch, adjust volume, etc.
How to Use Color Correction in Filmora Video Editor with the Fast Color Corrector?
Step 1: Add Your Video File
Launch the program and add your video file by clicking the "Import Media Files Here" button. You can alternatively drag-and-drop files directly onto the program interface from your storage device. Feel free to add multiple files at a time.

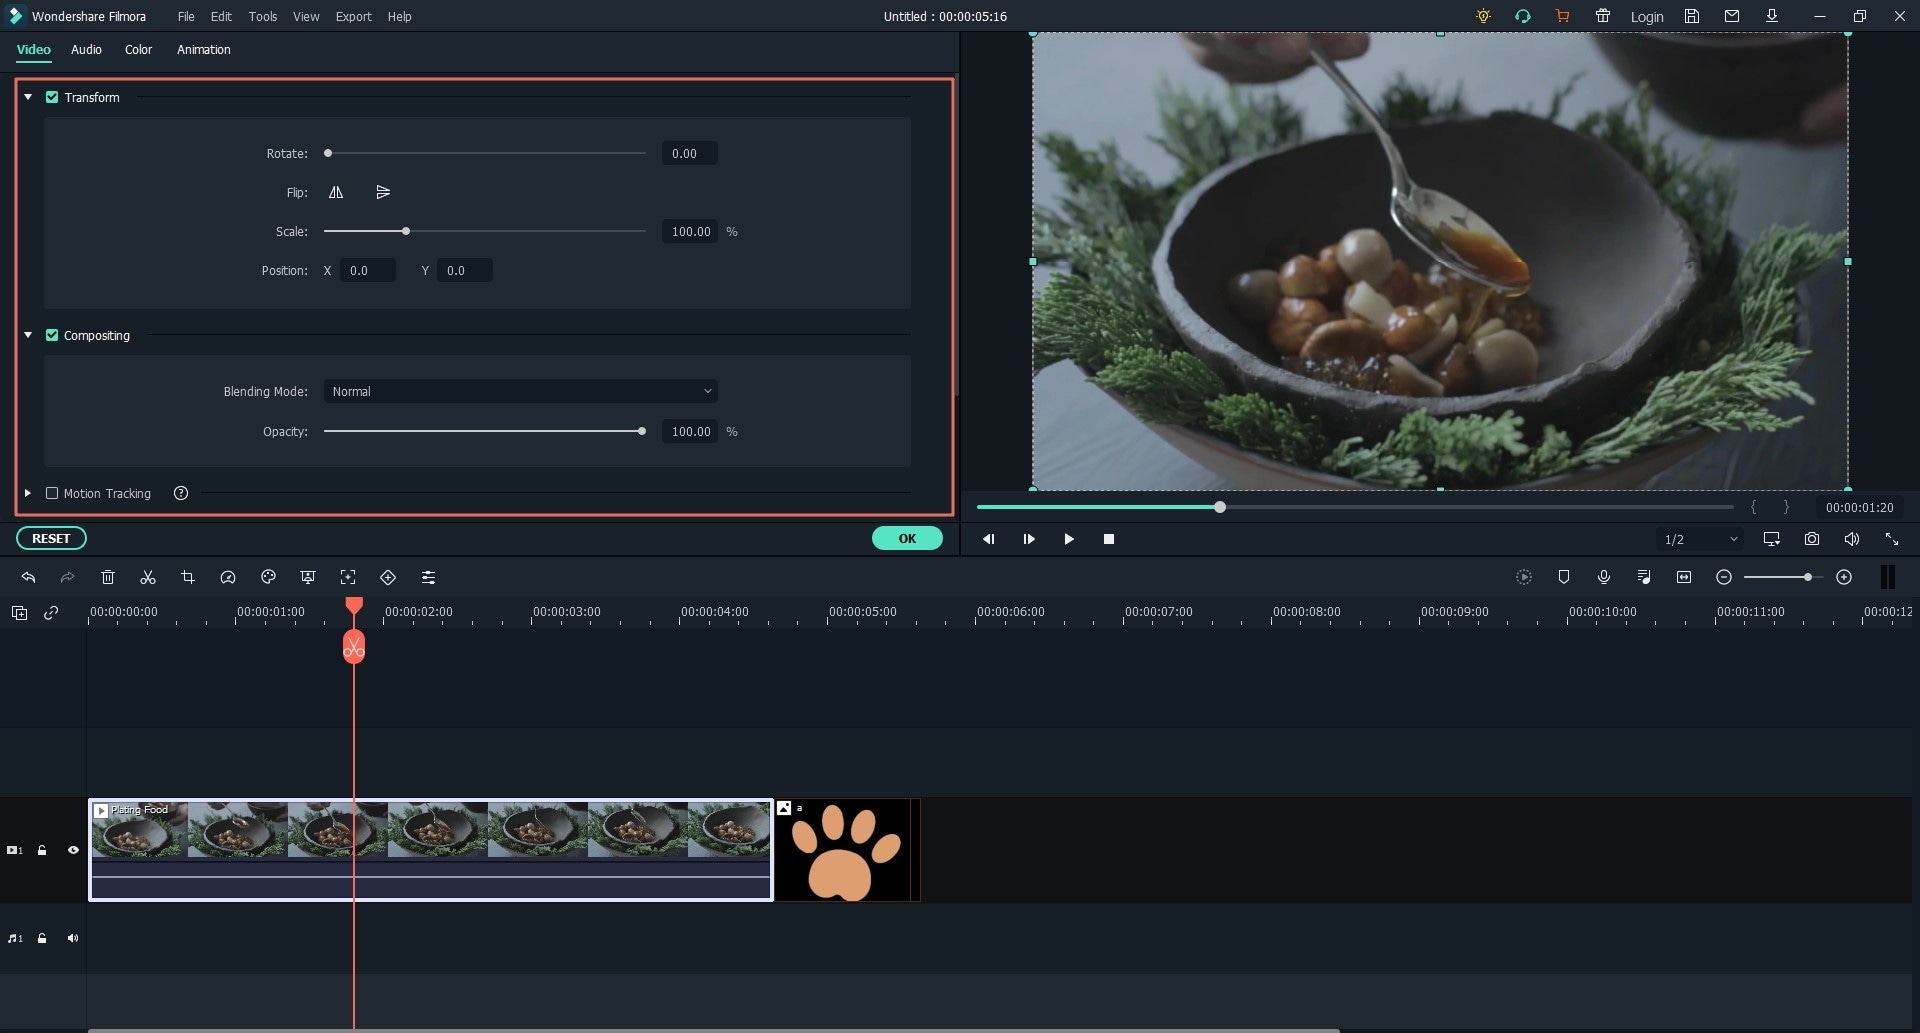
Step 2: Correct Video Color
Drag and drop your video onto the timeline and then double click on it to reveal the video editing window. You will now have several color settings to tweak to suit your preference. These include Brightness, Contrast, Saturation etc., you only need to move the sliders to the left or right to adjust settings to the desired values. Use the Preview Window to monitor changes.
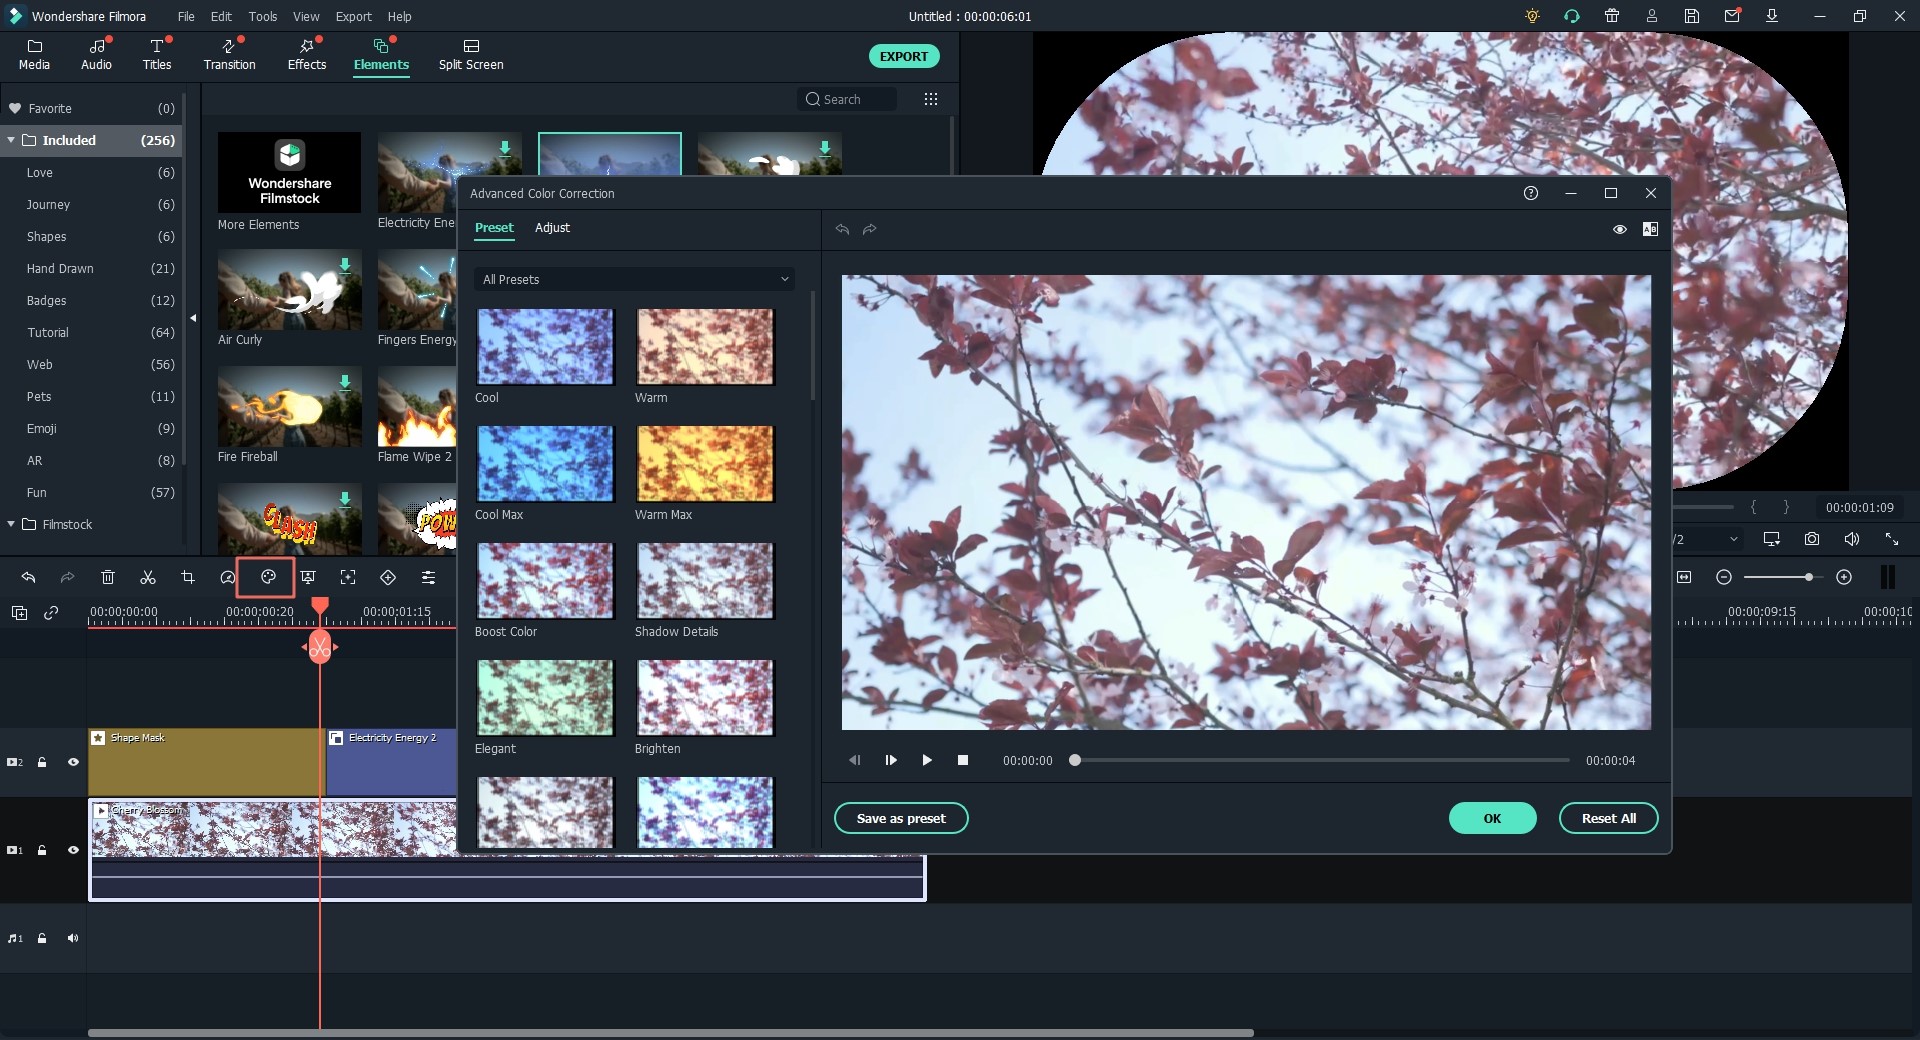
Step 3: Advanced Video Color Correction
If you are an experienced user or like to experiment, you can use the advanced color tuning settings to change and set video color as you like. This tool includes options like color temperature, 3D LUT, Vignette, HSL etc. To access the advanced color tuning tool, you can directly click its icon on the top of the menu bar.
Learn how to use the Advanced video color tuning in detailes >>
Step 4: Save Your Finished Video and Upload to YouTube
When you are done working on your project, preview the video to make sure everything looks perfect. Now select "Export" to save your video in a YouTube supported format such as AVI, FLV, MOV, 3GPP, MPEG4, WebM or WMV. You can also upload your video directly to YouTube from the program, or burn it to DVD.

Read Also:
How to Increase Video Volume for YouTube
How to Reverse YouTube Video on Windows or Mac
How to Edit A Video Step by Step
FAQs You Might Want to Know about Video Color Grading
If you are new to the concept of video color correction, it is unlikely you will get the results you need on your first try. It is recommended you ask yourself the following 3 questions to help you make better decisions and produce great results when color correcting and color grading.
1. What is the best monitor to use?
When color grading it’s important to use a good monitor that displays colors accurately. We’re not going to mention specific models as that depends on your personal budget, but we will share helpful tips on how to check whether your monitor is right for color grading. Check that your monitor covers at least 90% of the sRGB color space and is at least 2K resolution. If you cannot afford a high-end monitor, try calibrating your current monitor or ask a professional to do it for you.
2. What mood/emotion do I want my video to inspire?
This simple question is critical when fine-tuning video colors. When you define your goals before you start making adjustments, you’ll be surprised just how good your video will turn out. It is important that you use colors as best as you can to communicate the mood of your videos to your viewers. If it’s a happy scene, make sure to make the colors bright, warm and vibrant. If it's a sad scene, use flatter, darker colors to fit the mood.
3. What do I want to highlight in my videos?
This is important when you want certain themes or colors to grab the audience’s attention. When you are making videos such as a retro or vintage movie, color grading can highlight browns and desaturate other colors to help simulate that old degraded look and feel.
4. Do the colors look natural?
After you're done making changes, make sure to check whether your video colors look natural. Do skin tones look right? Do the trees look OK? As a rule, color grading should be subtle. Avoid drastic changes that might distract the viewer.


