


Why do you need to create a private YouTube channel?
A private YouTube channel is the best way to share videos with your family and loved ones. People often use these channels to transfer personal information to a group so that other people cannot access it.
When need to build a private YouTube channel?
Whenever you feel like you need to share videos and stuff that you don't want to keep public, you always choose a private YouTube channel. Create a private YouTube channel is the best way to keep the information between people you know.
- Part 1: How to Build a Private YouTube Channel >
- Part 2: How to Invite People to See Content in Your Private YouTube Channel >
Part 1: How to Build a Private YouTube Channel
1. Creating a YouTube account
Creating a YouTube channel is not difficult nowadays. But if you are thinking about that, 'can I create a private YouTube channel?' Well, of course, you can. The only thing you need for it is a Google account and then follow the steps below.
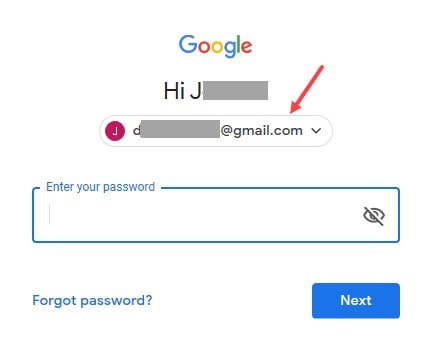
Step 1: Go to YouTube.com and select Sign in, now if you have a Google account already, you can log into it directly and skip to Part 2.
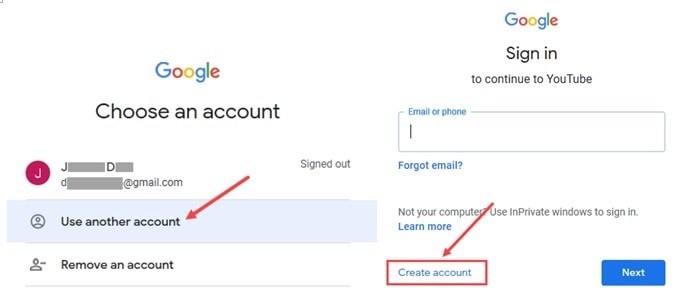
Or, you can sign up for a new one by clicking Use another account followed by clicking on Create Account.
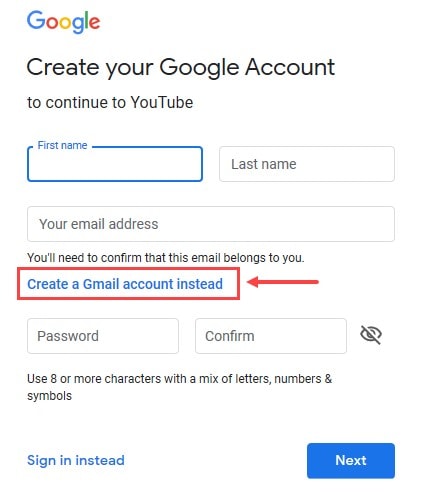
Step 2: Now, proceed with signing up for YouTube by filling out the form for your new account. Once done, you’ll be signed in to your new account. Now, move to the next part.
2. Setting YouTube account to private
Since you're now into your own YouTube account, it's time to turn your YouTube to create a private channel of your own.
Step 1: Go to the profile icon and choose Your channel in your account and choose Create channel after entering the name.

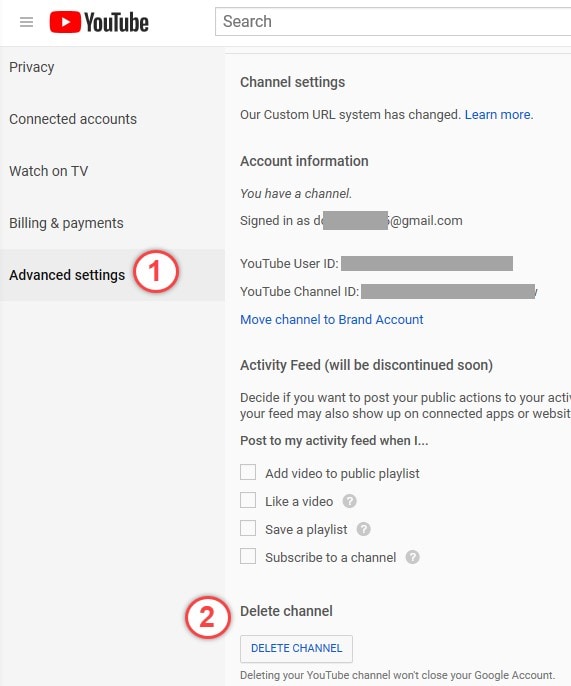
Step 2: Go to your Creator studio's settings after that and go to Advanced settings. From the settings, select Delete Channel.
Step 3: Then, you will see a hide my channel option. Just go and select the same.
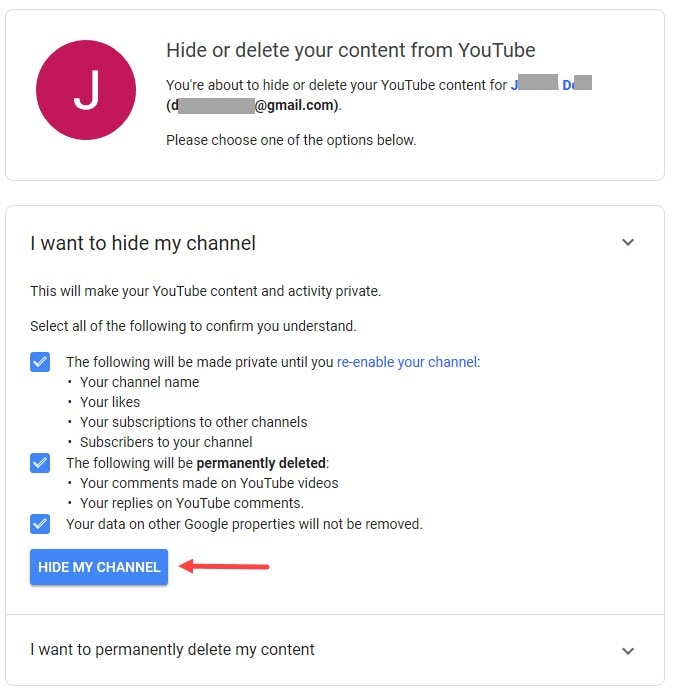
Hooray! You have successfully the hidden your content and find out the answer to how to create a private video channel on YouTube.
3. Switching to hidden brand channel
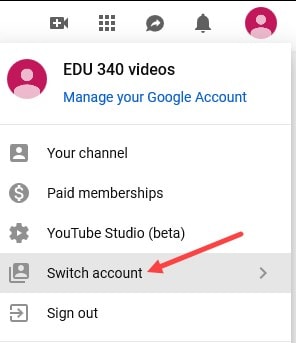
Step 1: Hit on the Profile icon on the top right, then click on Switch account.
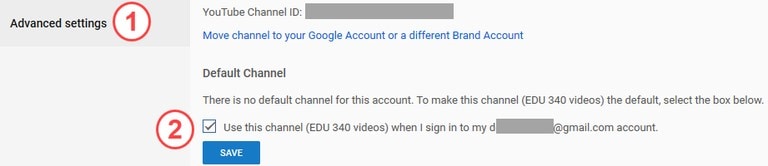
Step 2: Then, get into Settings and look under the Advanced settings section. You will see a Default channel for this account on the same page. Select it and click on Save to select the hidden brand channel.
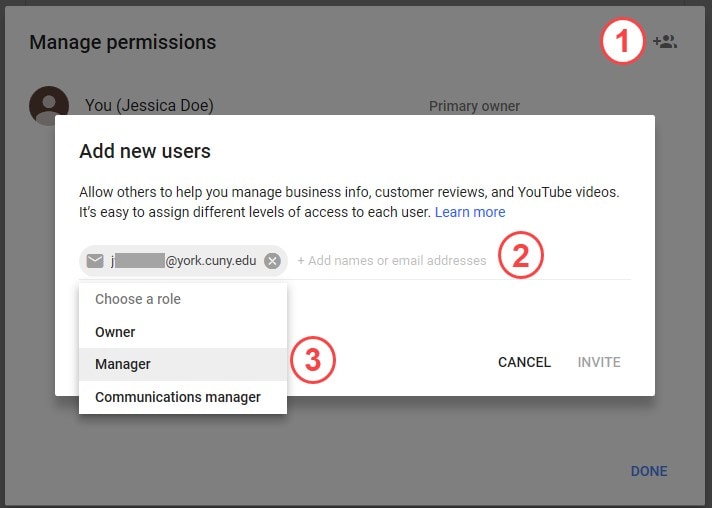
4. Adding and managing users
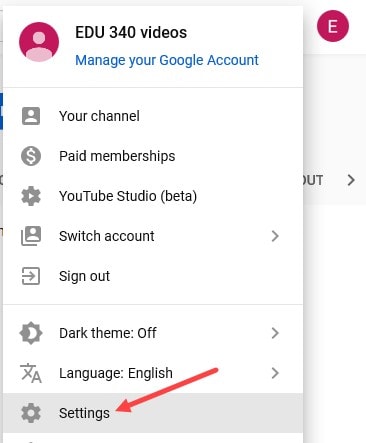
Step 1: Go to YouTube and select Settings from the options after you click on Profile icon.
Step 2: On the next page, select the "Add or Remove managers" and go on to Manage Permissions. Click on the Add button and enter the email of the people you want to add, followed by selecting the user's role. Hit Invite, and that's it.
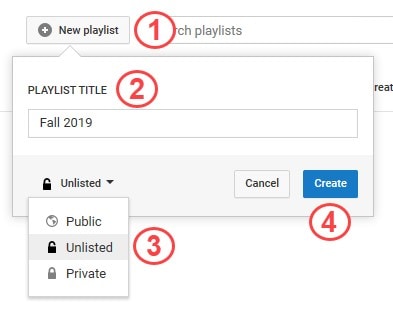
5. Creating an unlisted playlist
Creating an unlisted playlist is our next approach to the stepwise tutorial on creating a private YouTube channel.
Step 1: On the hidden channel, go on to YouTube Studio (beta) by clicking on the Profile icon and then go to Other features and then straight into Playlists.
Step 2: Add a new playlist by pressing + and give a title, and select the privacy to be unlisted from the drop-down menu. Hit Create and hooray! You are done creating an unlisted playlist.
Tips: If you want to become a successful youtuber, you should know everything from adding text to videos, to making thumbnails. However, the most important thing is, you should get yourself an easy-to-use video editing software. Try Filmora for free now and start your journey of creating!
Part 2: How to Invite People to See Content in Your Private YouTube Channel
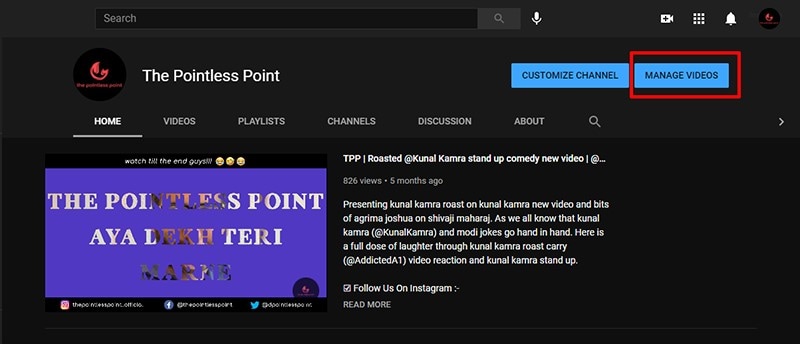
Step 1: Go to the official YouTube website and find your channel. Make sure you are logged into the hidden brand channel.
Step 2: Select your channel and go into the videos you have uploaded so far.
Step 3: Select the video you want to share with your family or your loved ones.
Step 4: Now, look for the share button or copy the URL of the selected video to share it.
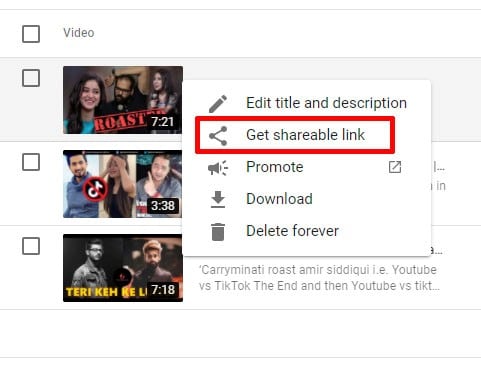
Anyone with the URL will be able to open and watch your private video, but no one can look it up on YouTube or anywhere on the internet.
Summary:
All in all, you just need a video editor and a private YouTube channel to share all your videos and content with friends. Besides, you are also allowed to create multiple YouTube channels with one Google account. YouTube is free to use, and you can upload whatever content you like until it exploits YouTube guidelines. So, get your hands on Filmora Video Editor & Filmora Video Editor for Mac today to add unique effects into your videos and use its advanced features for the best results. It is always a good idea to learn about creating your own private YouTube channel for sharing some of your best edits.
Make a high-quality video for your private YouTube channel with Filmora Video Editor
- Basic & advanced video and audio editing tools to create a YouTube video.
- Tons of titles, transitions, effects, elements.
- Motion Tracking – This allows you to track the character to add some effects to your videos.
- Color Matching – Color matching provides perfect colors to all your clips.
- Adjust Speed – Time mapping your videos can do wonders to your videos.


