Filmora Video Editor for Mac
User Guide
- Edit Videos on Filmora
- Edit the Audios in video
- Edit Your Images for Videos
- Put Text/Titles on Videos
Edit Videos
Once you've imported your media files (Videos and images included), you can now start editing. This tutorial will provide you the step-by-step guide on arranging clips in your timeline, cleaning up your footage, editing out unwanted parts, and more.
- Add Media to the Timeline
- Deleting Media Files from the Timeline
- Trim Videos
- Split Videos
- Rotate or Flip Videos
- Crop Videos
- Resize Videos
- Join videos
- Zoom in/out Timeline
- Copy and Paste Video
- Enhance Video Color
- Speed Controls
- Create Freeze Frame
- Add Watermark or Logo
- Change Video Playback Quality
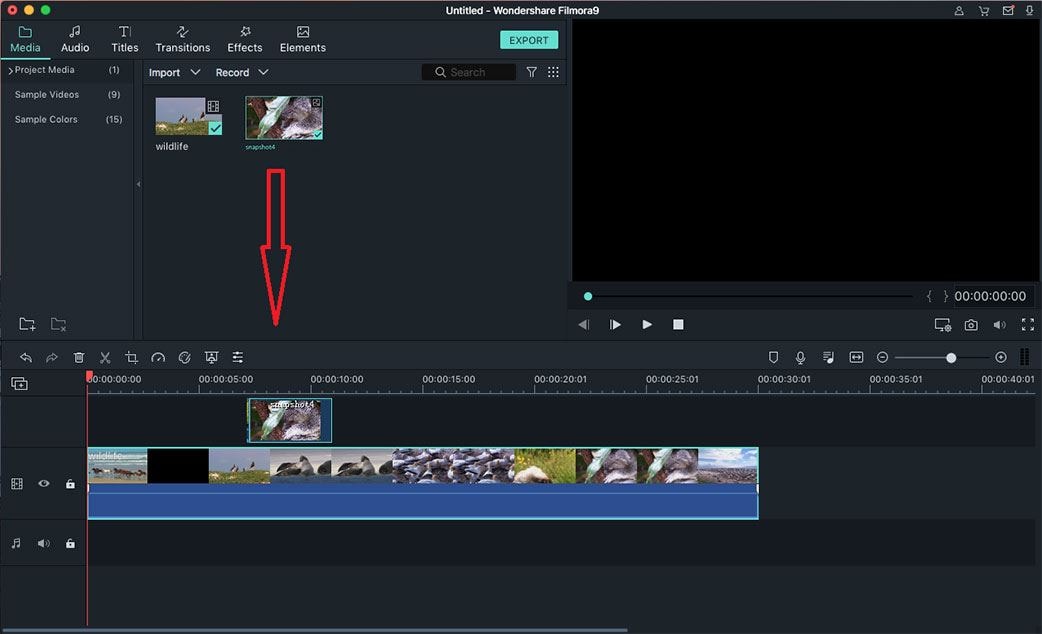
1 Add Media to the Timeline
There are 2 ways to add media files from the "Media Library" to the imeline:
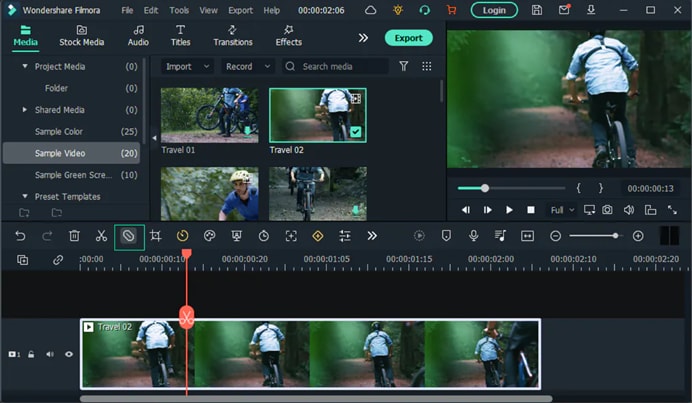
Way 1. Move the cursor to select the file you want to add to the timeline, and then drag and drop the file to where you want it on the timeline.
Way 2. Right click on the media file you'd like to place on the timeline and then choose one of the following options from drop-down menu:
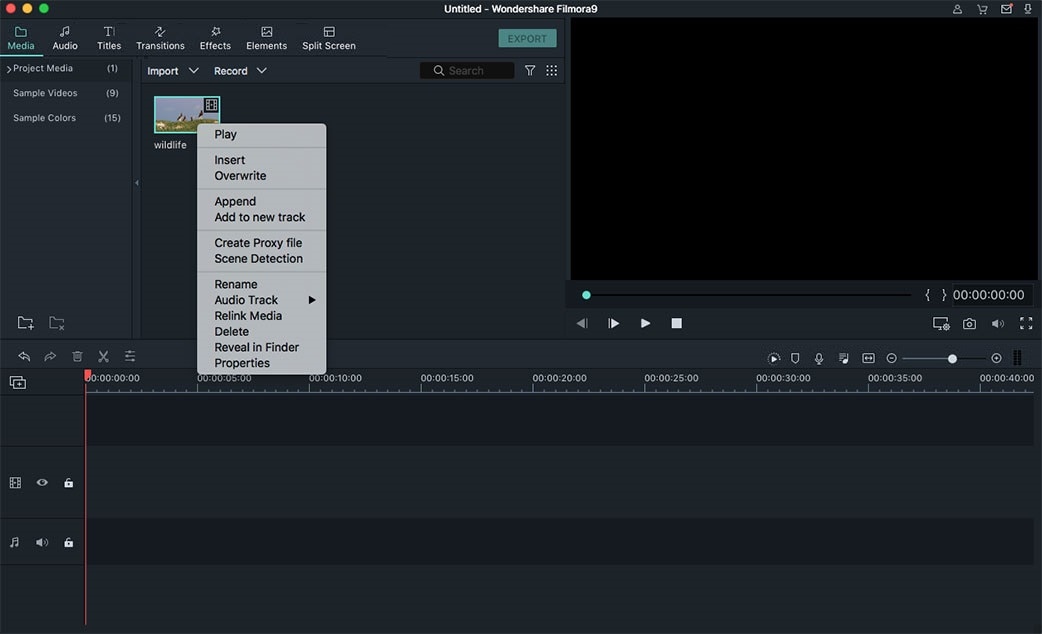
Option 1. Insert: This option allows you to add the media file to the selected track at the playhead. The media file is already in the track on the right side of the inserted media will move to the right by the length of the inserted clip.
Option 2. Overwrite: Add the file to the specific track at the play head and replace any media already occupying the space your added media takes up.
Option 3. Append: Add your media file as the last piece of media in the selected track.
Option 4. Add to new track: Add selected media file to a new created track which has no other media.
Note: You are not able to add media file to tracks with "Track Lock" enabled.
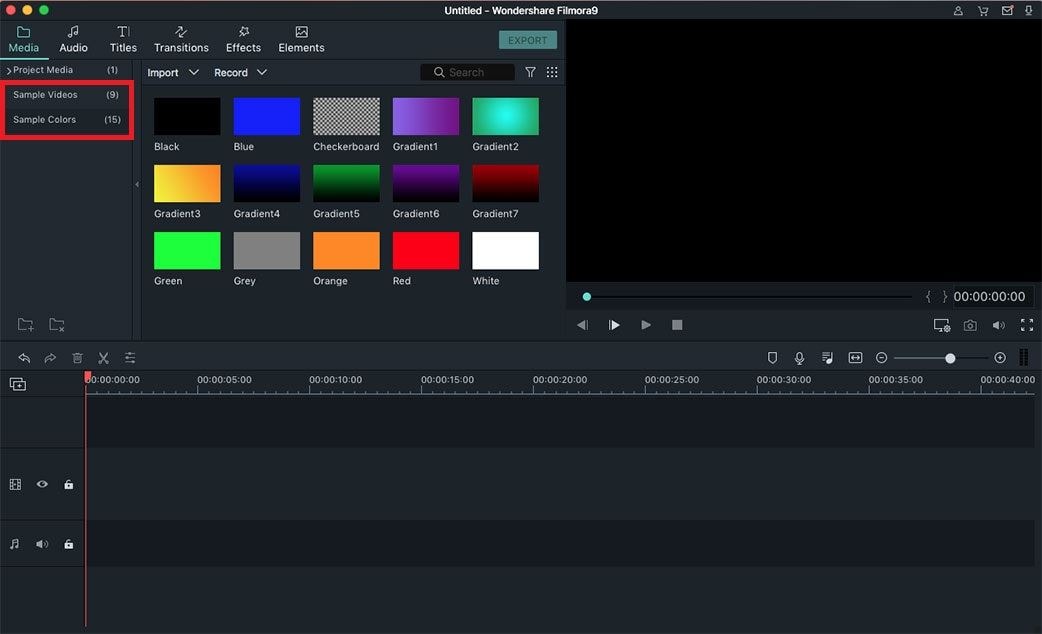
Accessing to Sample Colors and vidoes: To access sample colors and countdown intro videos, you can click on the "Sample Colors" or "Sample Video" button under "Media" menu on the left side toolbar.
2 Deleting Media Files from the Timeline
Those 5 ways below will teach you how to delete unwanted media files from the timeline.
Method 1. Click to select the media file and then press the "Delete" button on your keyboard.
Method 2. Click on the "Delete" icon on the "Toolbar" to delete the selected file.
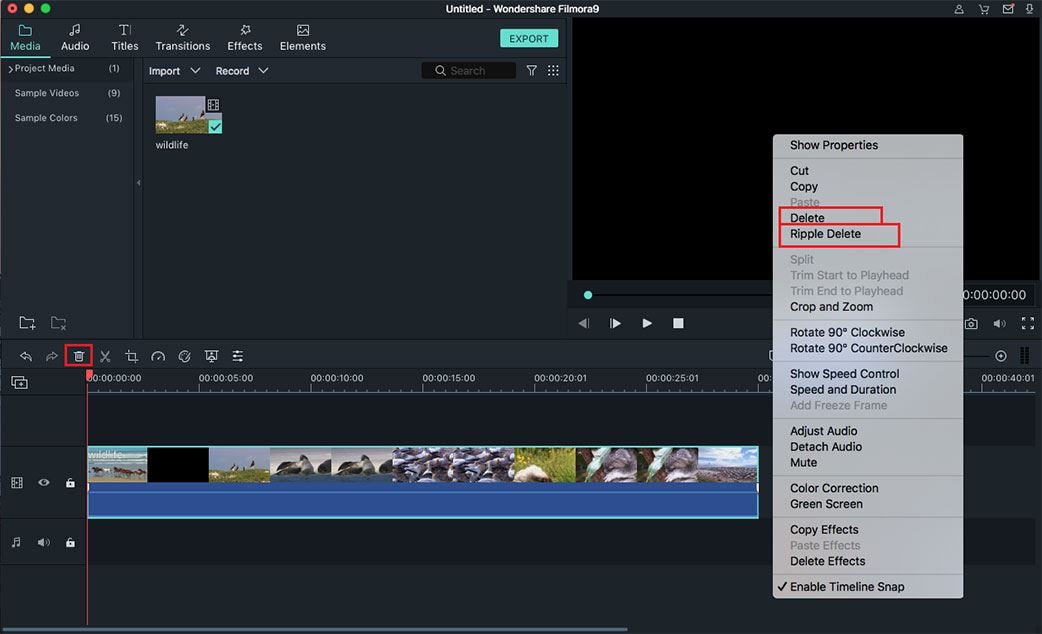
Method 3. Right click on the file in the timeline and select the "Delete" option from the new opened menu.
Method 4.Delete multiple files: Simply hold the "Command" key while selecting the files and remove them from the timeline by either of above methods.
Method 5. Ripple Delete: To remove video from the timeline without creating large gaps in your video, you can use the "Ripple Delete" feature.
Right click on the video clip you want to delete and select "Ripple Delete" option from the drop down list. The software will close the gap left by the clip you removed by placing the two nearest clips next to each other.
3 Trim Videos
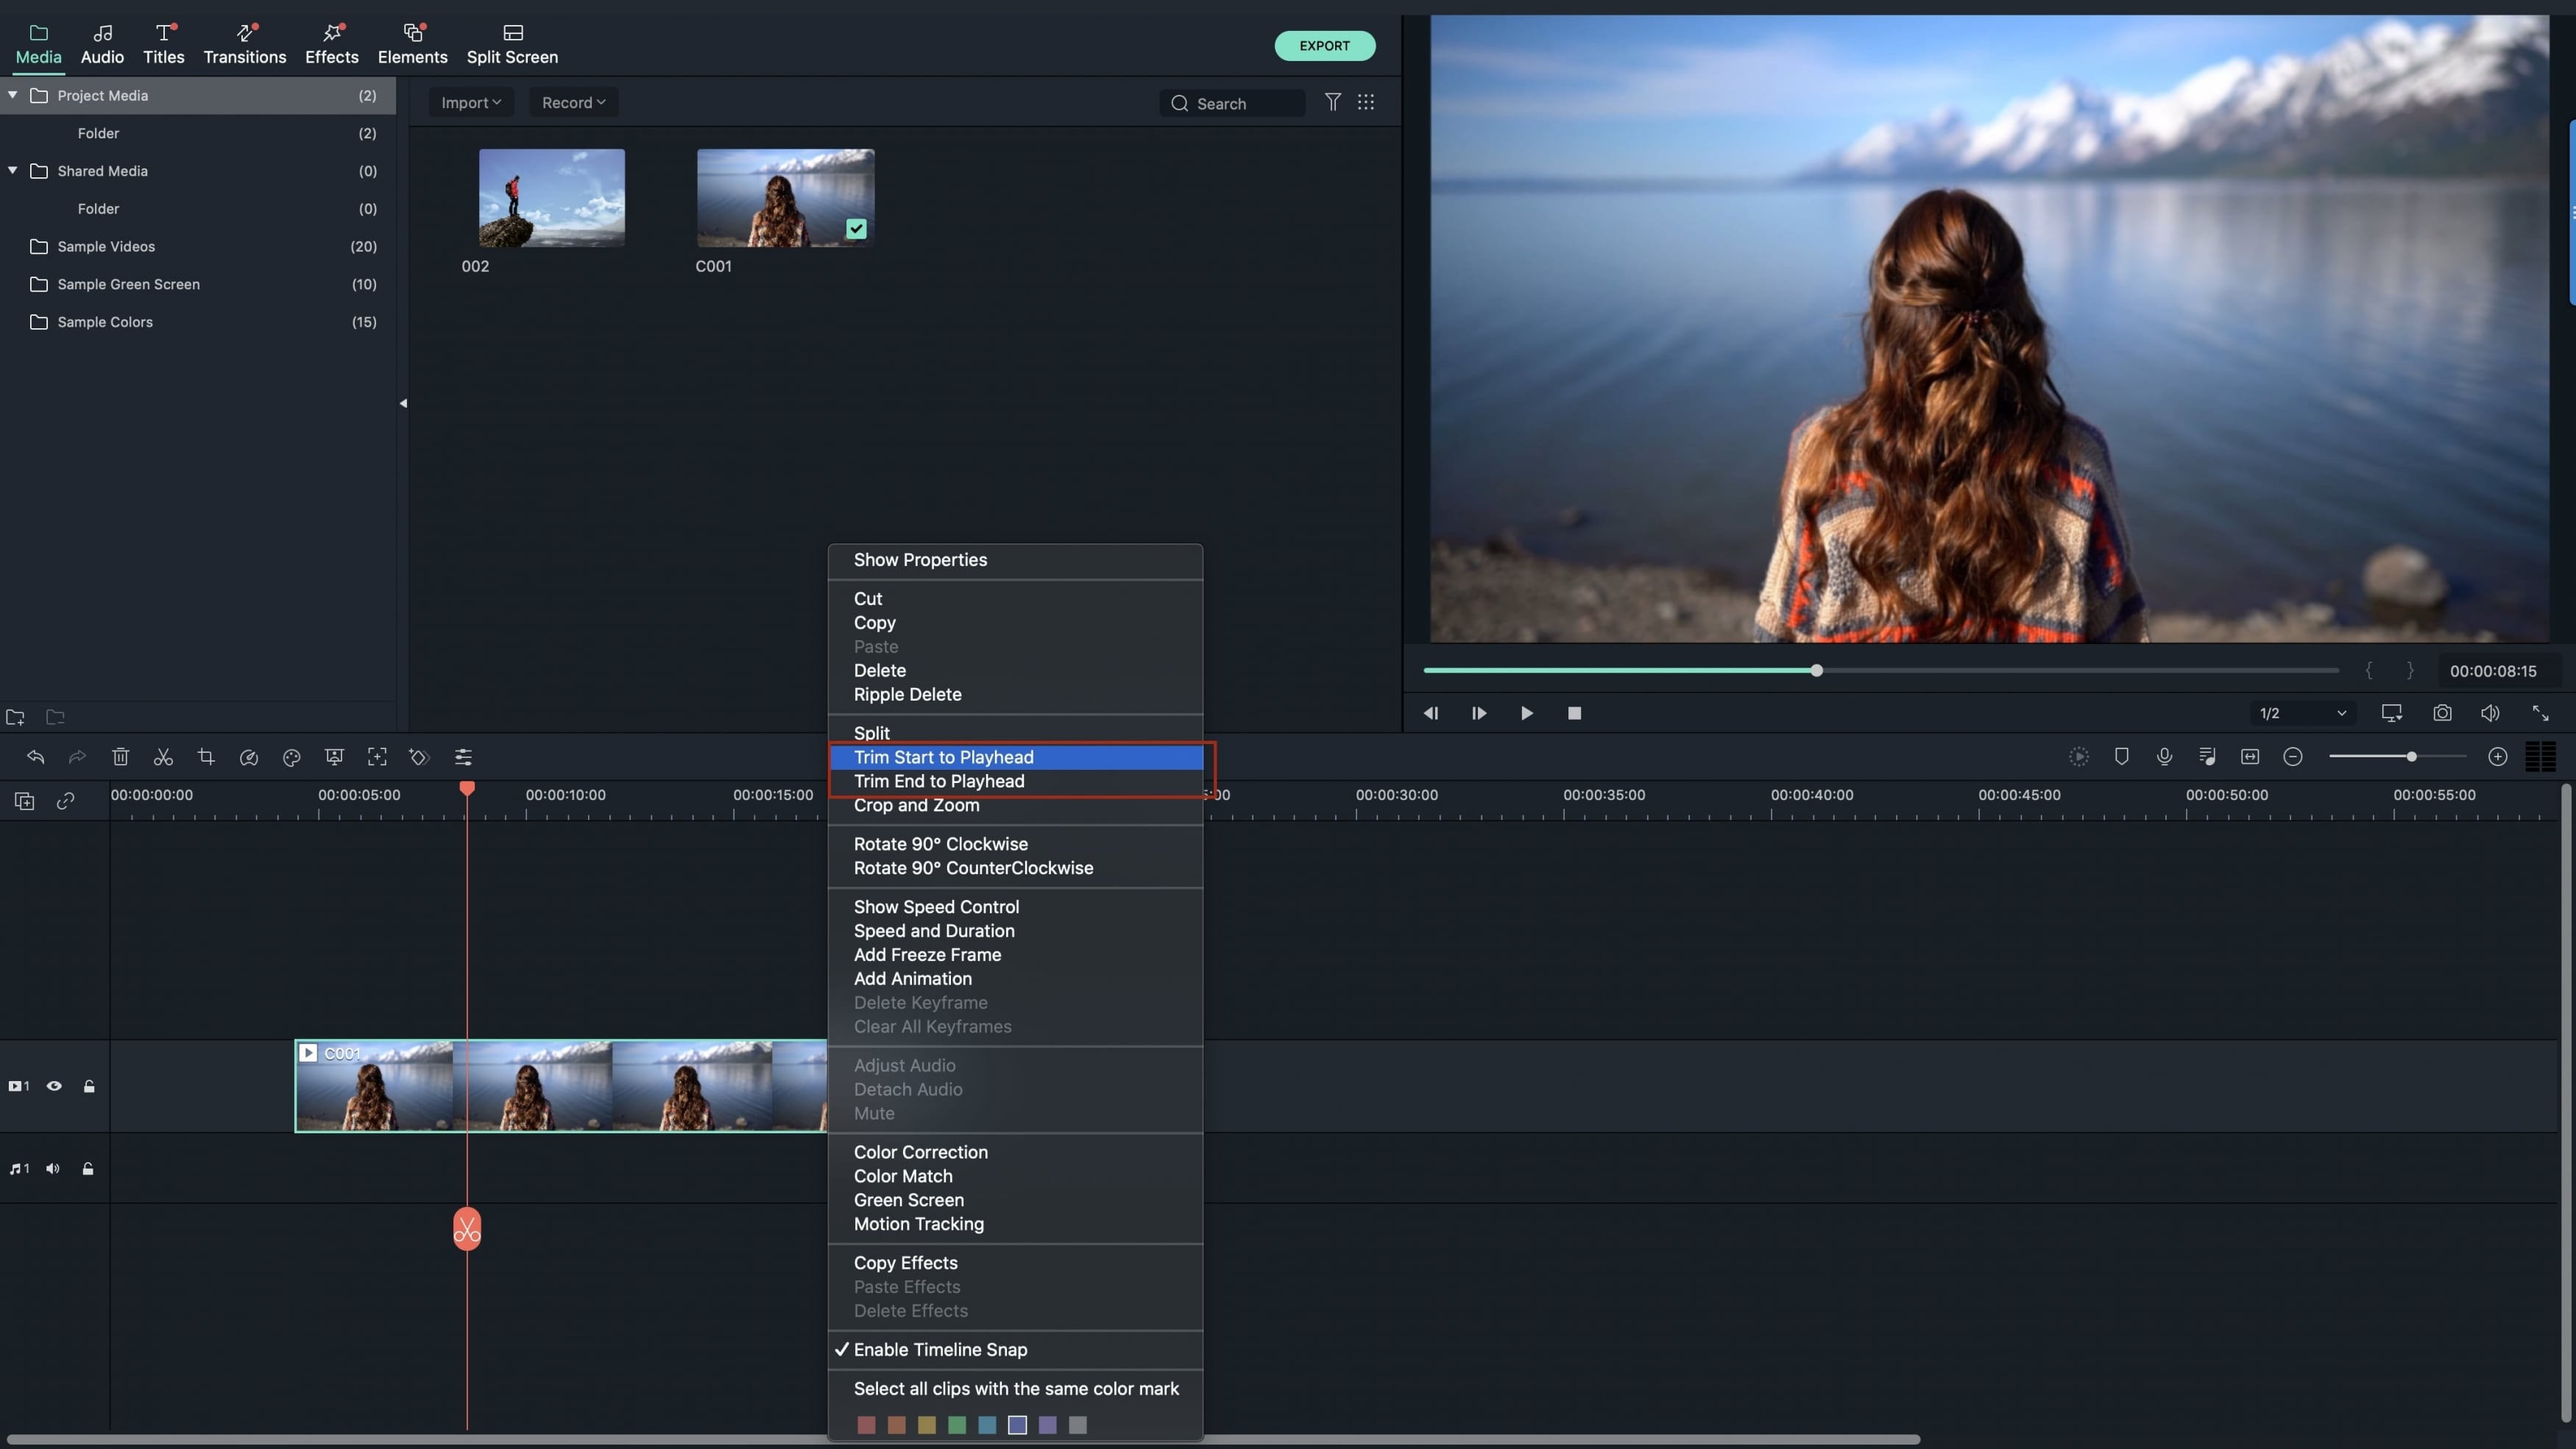
If a portion of the video doesn't seem right to you, you can trim down the video either from the start or the end. It's quite easy with Filmora for Mac. Move the cursor at the beginning or end of the video. And then you can see a pointer appear. Move the pointer forward or backward to trim the beginning and end of the video.
Cut a Middle Section of a Video: If you want to trim down a middle portion of the video then you will have to split the video in different section and then use this same trimming function on it. Let's taking cutting the section from 3' 2'' (3 minutes 2 seconds)to 5'20'' (5 minutes 20 seconds) as an example for how to do it: move the cursor to 3' 2'' (3 minutes 2 seconds) of the video clip in timeline and click the scissors icon > move the cursor to 5'20'' (5 minutes 20 seconds) and click the scissors icon > right-click on the video section from 3'2'' to 5'20'' and select "Delete".
4 Split Videos
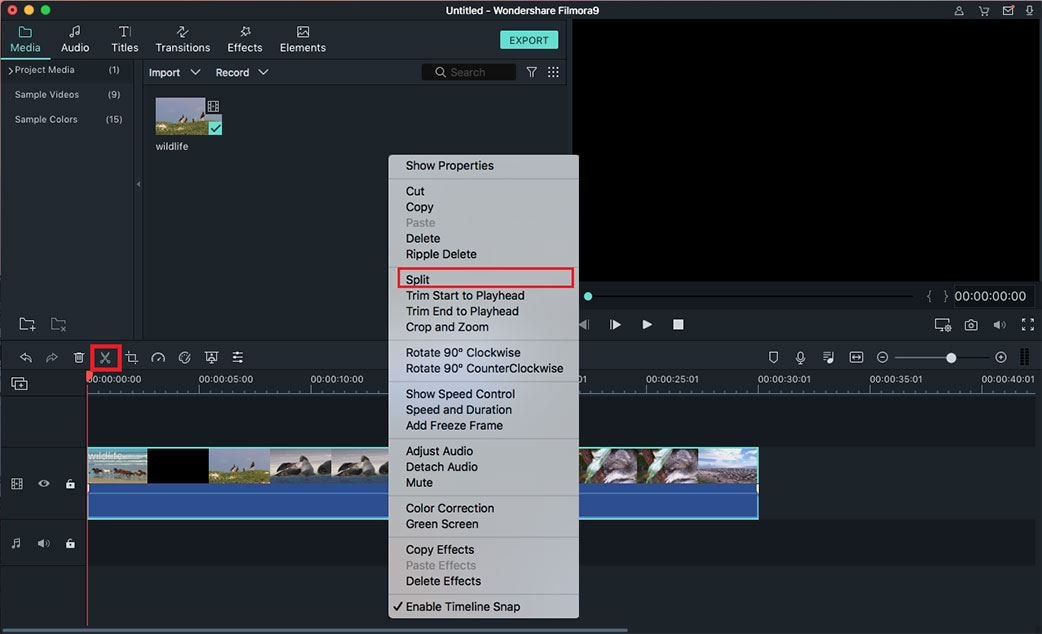
The split function helps you cut a video to two separate parts. You can either delete the part you don't want or save it for later use.
Split a large Video into Several Sections: Move the cursor to the position of a video you want to split and click the "Split" icon or right-click on the video and select "Split" from the drop-down list.
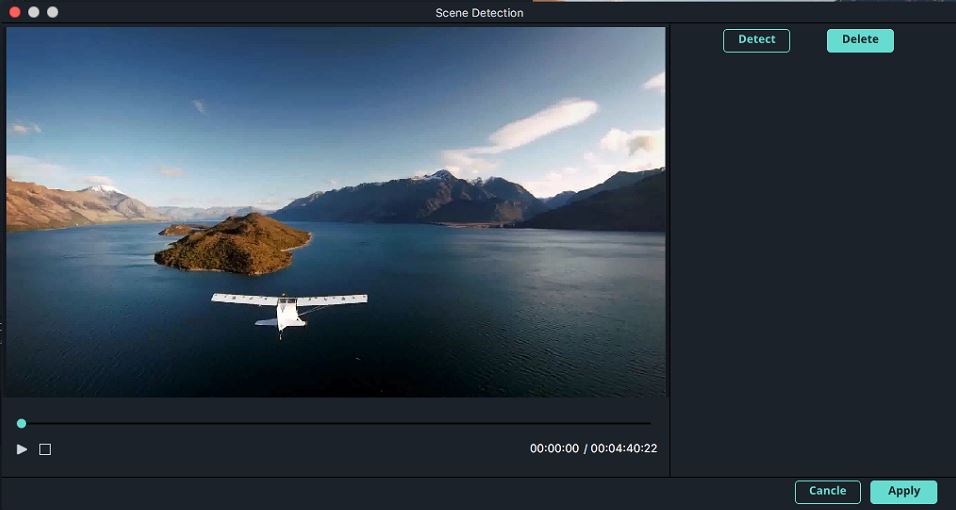
Split a Video using Scene Detection: If you are going to edit a large video with Filmora Video Editor for Mac, then the "Scene detection" would be a very helpful tool. It can detect the whole video and split them based on different scenes.
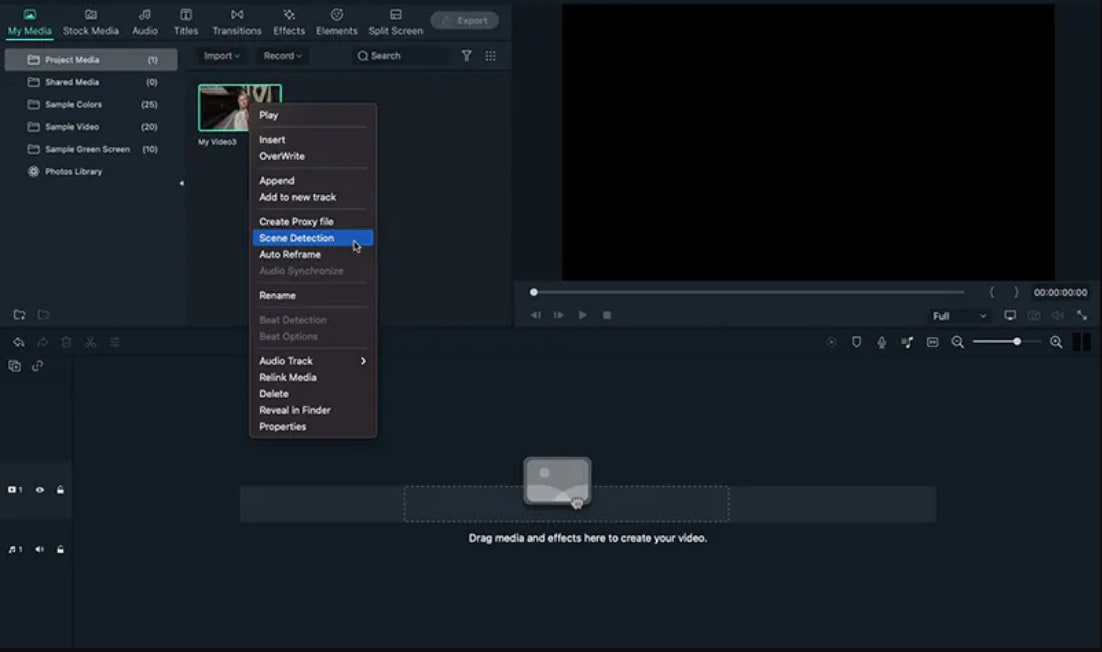
Right-click the video in the Media Library and select "Scene Detection", wait a few seconds, then you will see that the video is automatically added to the Timeline with many video clips. What you need to do next is to pick and delete the unwanted parts.
Quick Split Mode: The "Quick Split Mode" will be useful if you need to quickly split a video into many parts. To split a video, first click the button at the timeline's top and then the desired position.
5 Rotate or Flip Videos
Before editing multiple videos taken from different angles, you need to rotate all the videos to the right orientation.
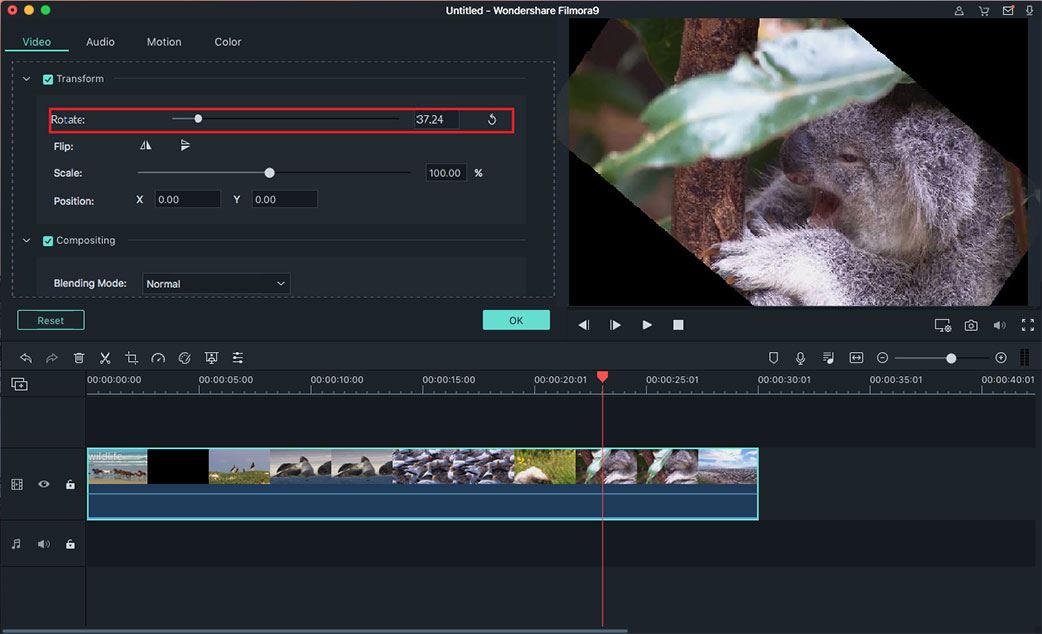
Rotate a Video: The menu that opens will have options like Chroma Key and Composting. Open the "Transform" menu and make sure its box is checked. Then you can drag the "Rotate Slider" to the right to rotate your video to the degrees you needed, or insert a numerical value into the box located next to the slider.
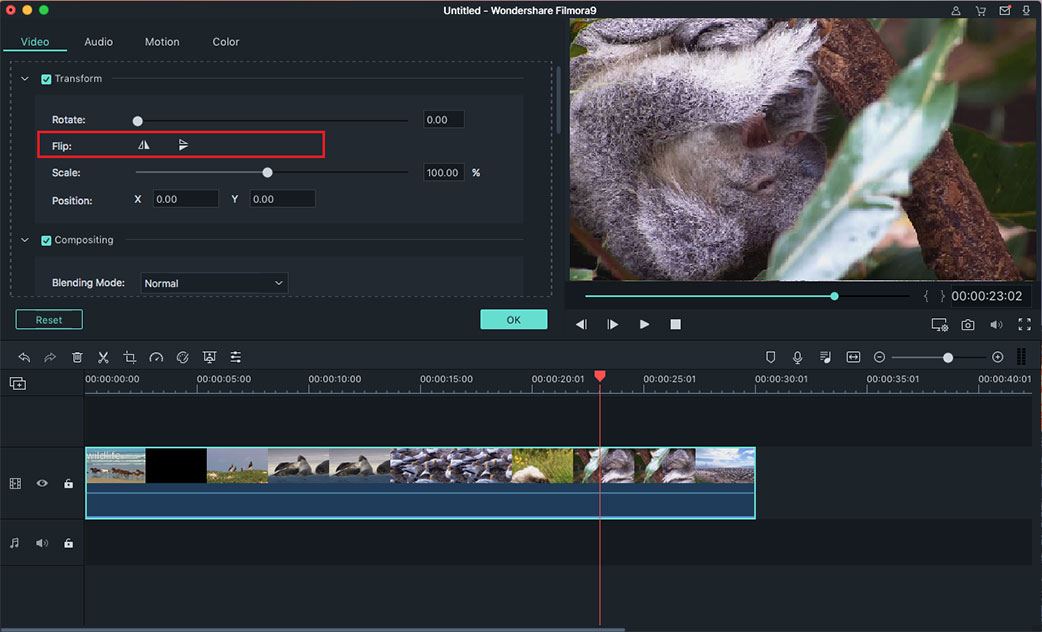
Flip a Video: Below "Rotate" option, you'll find the "Flip" option. The "Horizontal Flip" icon will let you reverse your clip from left to right, and the "Vertical Flip" icon will turn the clip upside down. On the bottom left-hand corner you'll see the "Reset" button. Click on it if you want to undo the changes you've made.
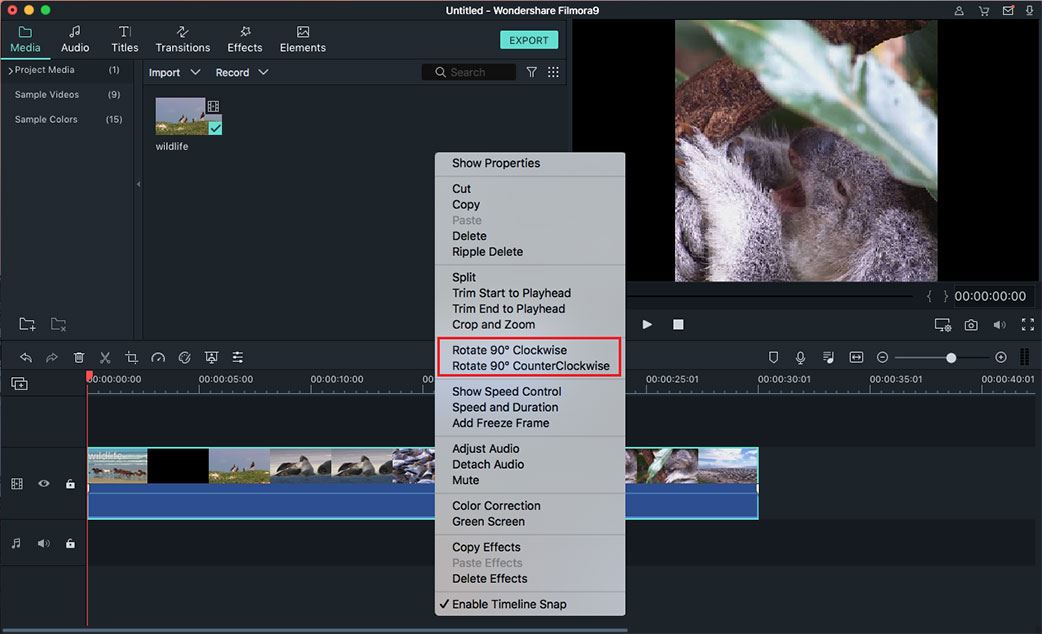
Rotate a video 90-degrees: In order to quickly rotate a video 90-degrees, right-click on the video clip in the timeline and select Rotate 90 CW or Rotate 90 CCW.
6 Crop Videos
You can easily crop a video to remove the unwanted parts of the video with Filmora for Mac. Before start the editing, please drag and drop the video from Media Folder to Timeline first. Follow the steps to start the cropping.
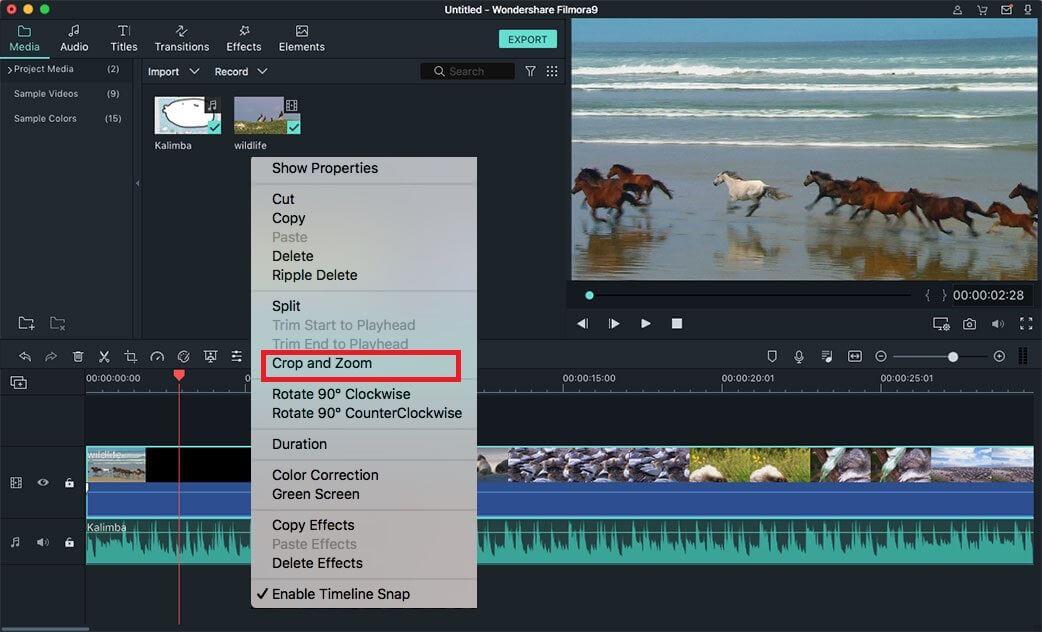
Step 1. Select the video clip in the Timeline, then click on the "Crop and Zoom" icon above the timeline. Or you can right-click on the video of Timeline, select the "Crop and Zoom" option from the drop-down list.
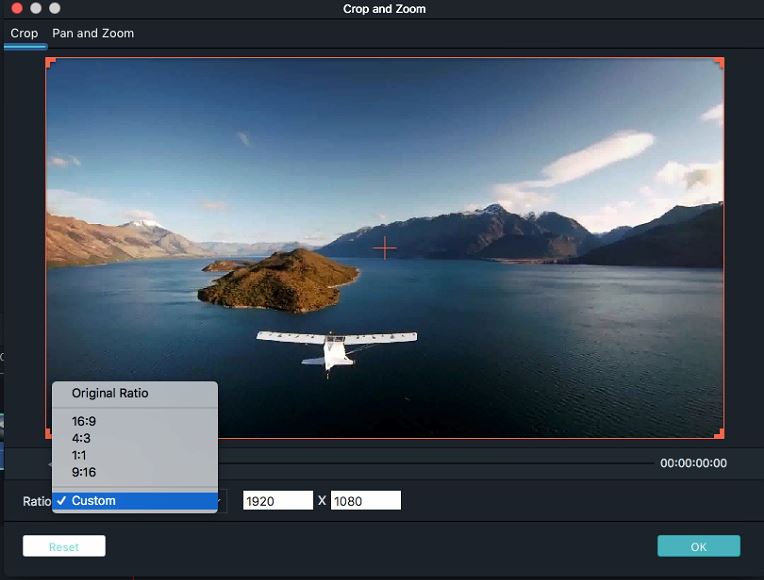
Step 2. A new window will be opened for the cropping. There are 3 cropping size options: 16:9, 4:3 and Manually. If you choose 16:9 or 4:3, then drag the frame over the video to adjust it. If you choose Manually, then you can adjust the frame freely according to your needs.
7 Resize Videos
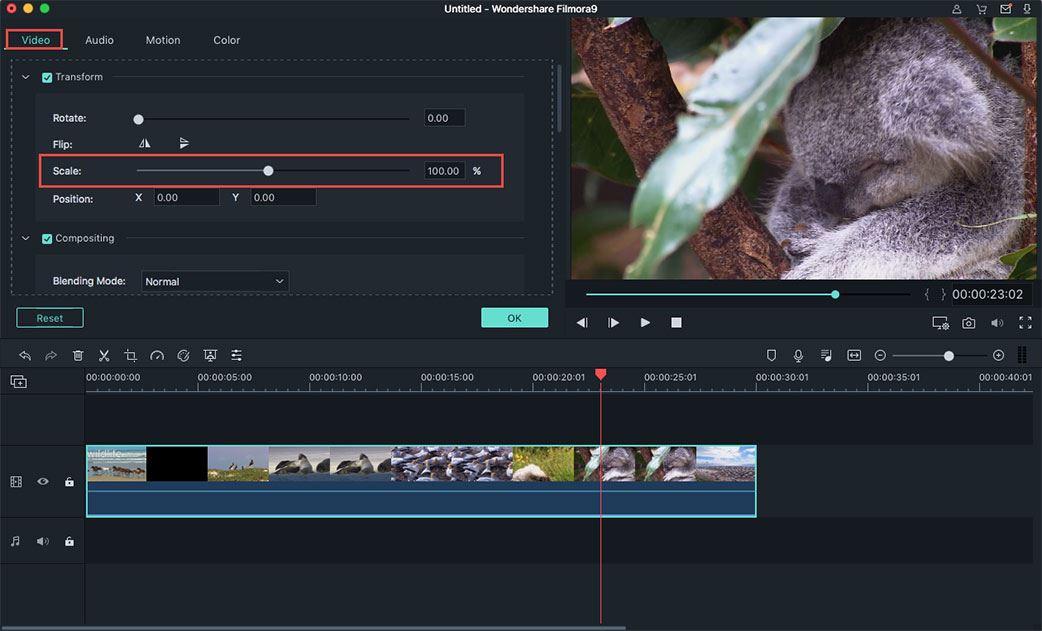
If you want to change the display size of a video, you can double-click on the video clip in the timeline to open the "Video" menu. Under "Video" menu, you can find the "Scale" option under the "Flip" option. Drag the "Scale Slider" button to change the display size with ease. You can also enter specific value to the box on the right side of the Scale slider.
8 Join videos
Filmora allows you to join several video clips and photos into a video. Combing videos and photos into a single file is simple: drag and drop video clips and photos to timeline in order. When you export them, they will become a single video. And if you want to get detailed guide on how to combine photos to make a video, please check this page to learn more.
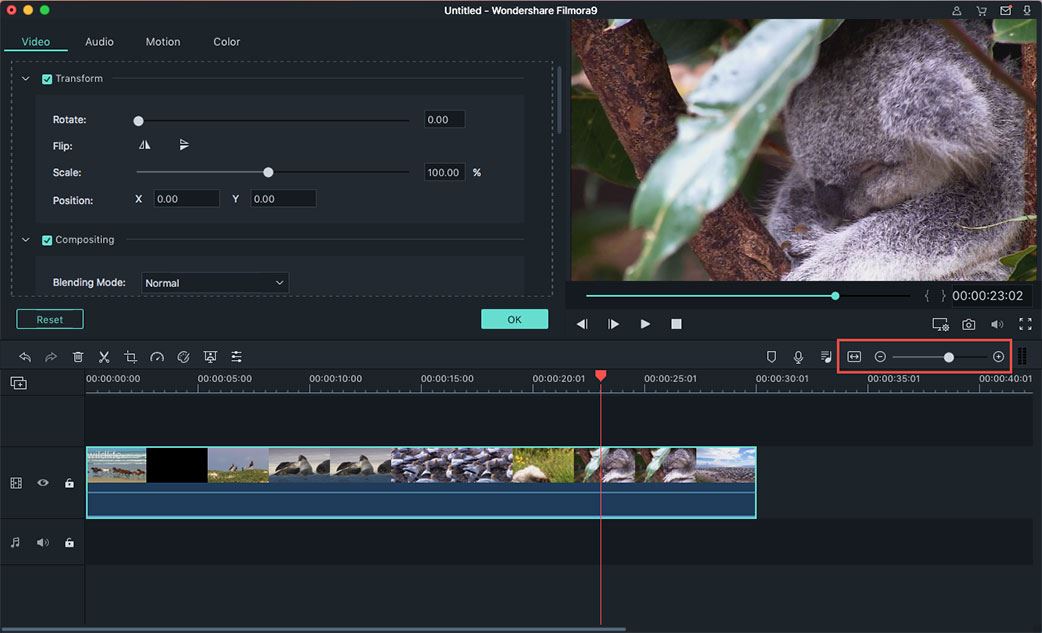
9 Zoom in/out Timeline
Zoom icon: To zoom in or zoom out the timeline, you can use the zoom slider located in the upper right corner or the timeline. Or you can click on the"+" and "-" button to zoom in and zoom out.
Zoom to Fit: The "Zoom to Fit" icon on the left side of the "-" icon will zoom in or out however much is needed so that you can see your entire video.
Keyboard shortcuts: To change the zoom level with keyboard shortcuts, you can hold the "Command" key and press the "+" key to zoom in or the "–" key to zoom out.
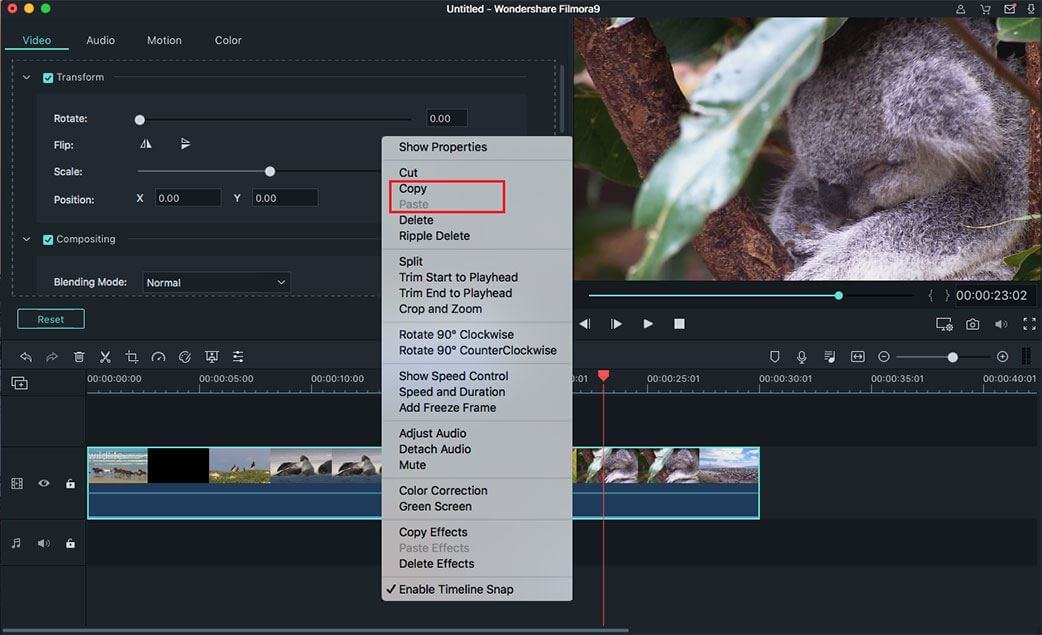
10 Copy and Paste Video
Filmora allows you to copy and paste clips. And the relative spacing (time and track) will be kept. You can copy and paste the copied clip at the end of the track or insert it to the location you want in the video.
First select the clip from the video in the timeline, and right click on the clip to select the "Copy" option. And then right click on any location of the video, and select the "Paste" option to insert the clip to the video.
Tips: To copy and paste the clips in the video track, they will just be inserted into the video track, but not overwritten the original video. If you copy and paste PIP clip, the original PIP will be overwritten.
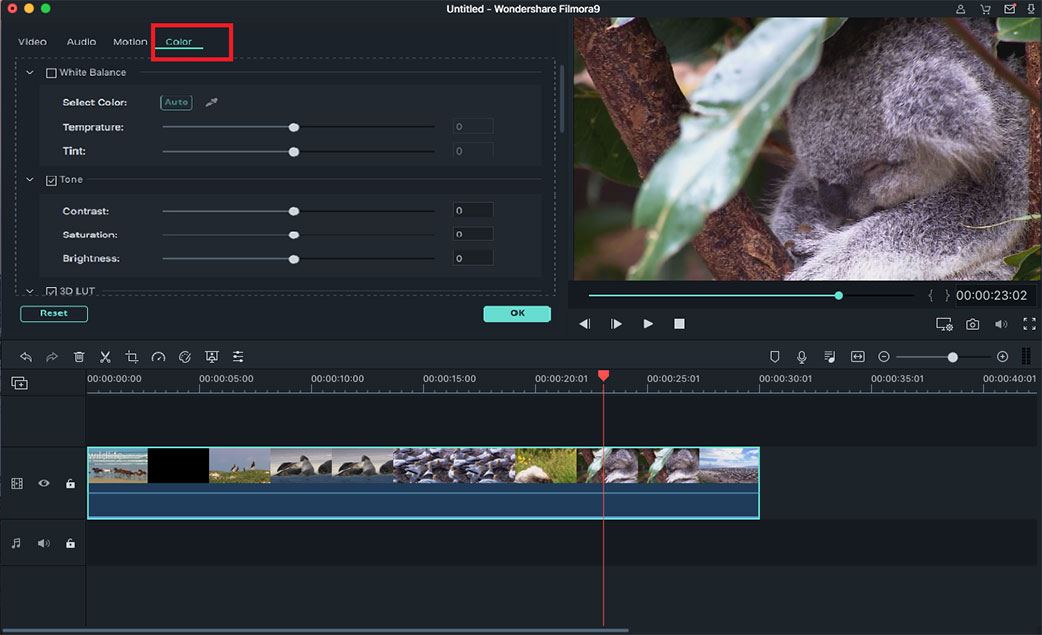
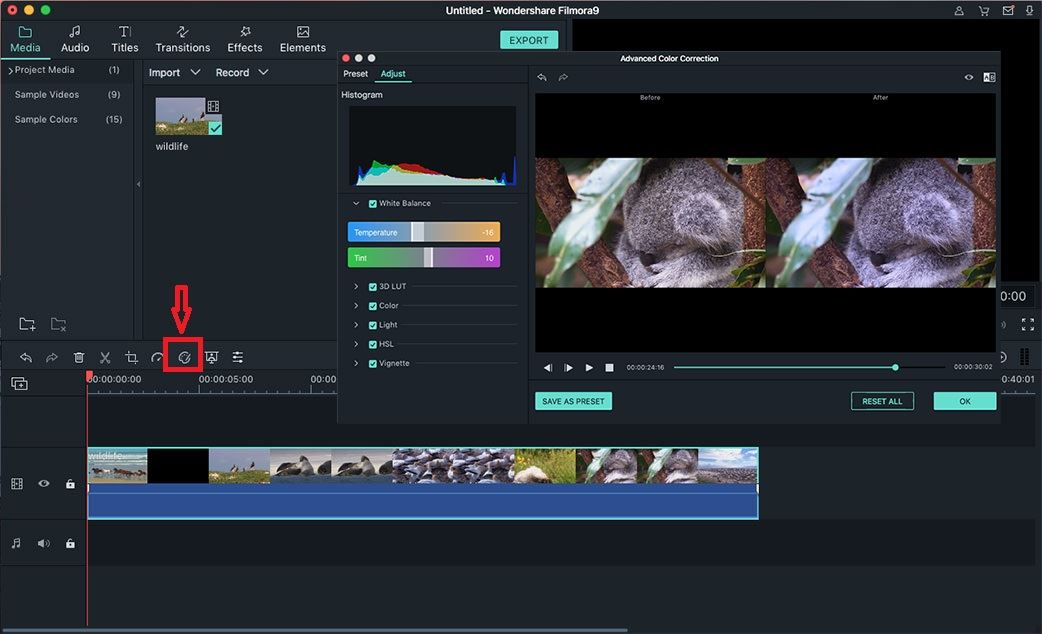
11 Enhance Video Color
To enhance the color the video clip, you can double click on the video in the timeline to open the "Setting Menu". Then you can choose the "Color" option to start to enhace color of your video.
Under the "Color" tab, you will find
3D LUT sub-menus: 3D LUTS are cinematic color settings that have been saved as presets.
Notes: You can preview all changes in the "Preview" Window, as long as the box next to the submenu you are using is checked. If you want to undo all your changes you can click on the "Reset" button.
Advance Color Correction: To open the "Advance Color Correction" menu , you can click on the "Advanced" button. In this menu, you will find more color correction tools.
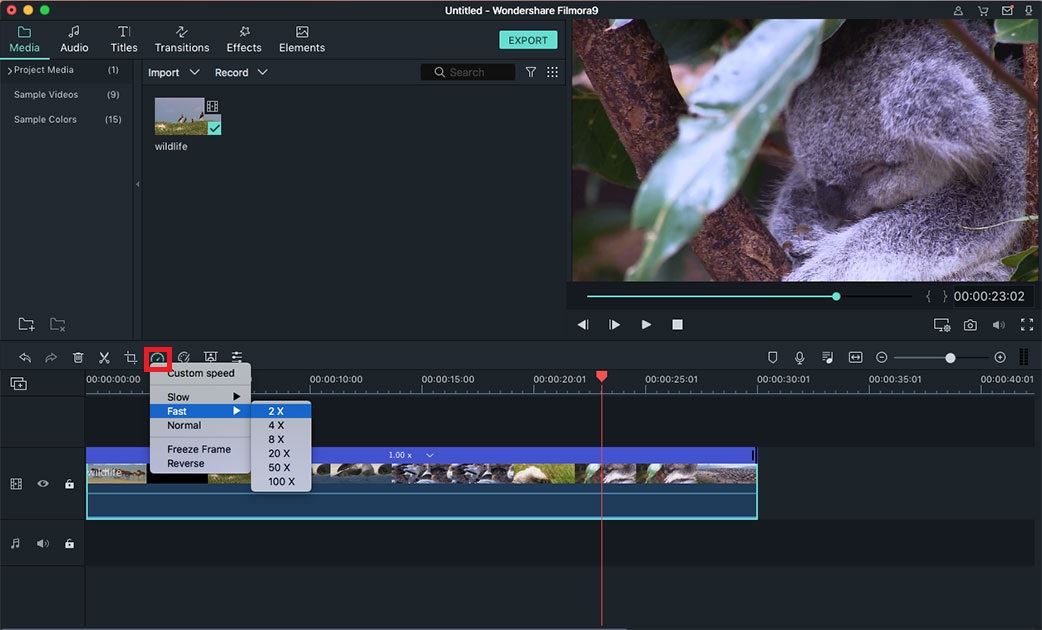
12 Speed Controls
Filmora for Mac provides you 2 ways to change your video's speed:
Method 1: Right-cllick on the video in the timeline, and choose "Speed and Duration" option. On the "Custom Speed" window, you can drag the speed slider to make your video faster or slower. You can also type in a precise speed value in the speed box next to the speed slider.

Method 2: Above the timeline, you can find the "Speed" icon on the toolbar. From the drop-down list, you can select Custom Speed, Slow, or Fast. You can change the video speed to 0.20x, 0.25x, 0.33x, 0.5x, 1.0x, 2.0x,3.0x, 4.0x, 5.0x.
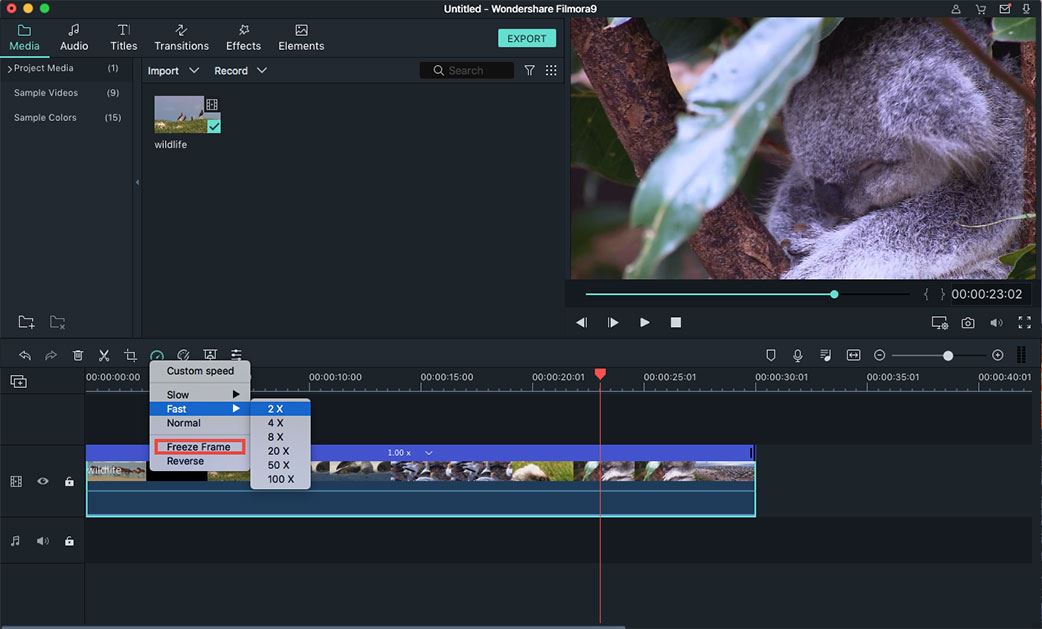
13 Create Freeze Frame
To create a freeze frame, you can click on the "Speed" icon on the toolbar and click on the "Freeze Frame" from the drop-down list. By dragging one of the frame ends, you can alter the duration of a freeze frame in the timeline.
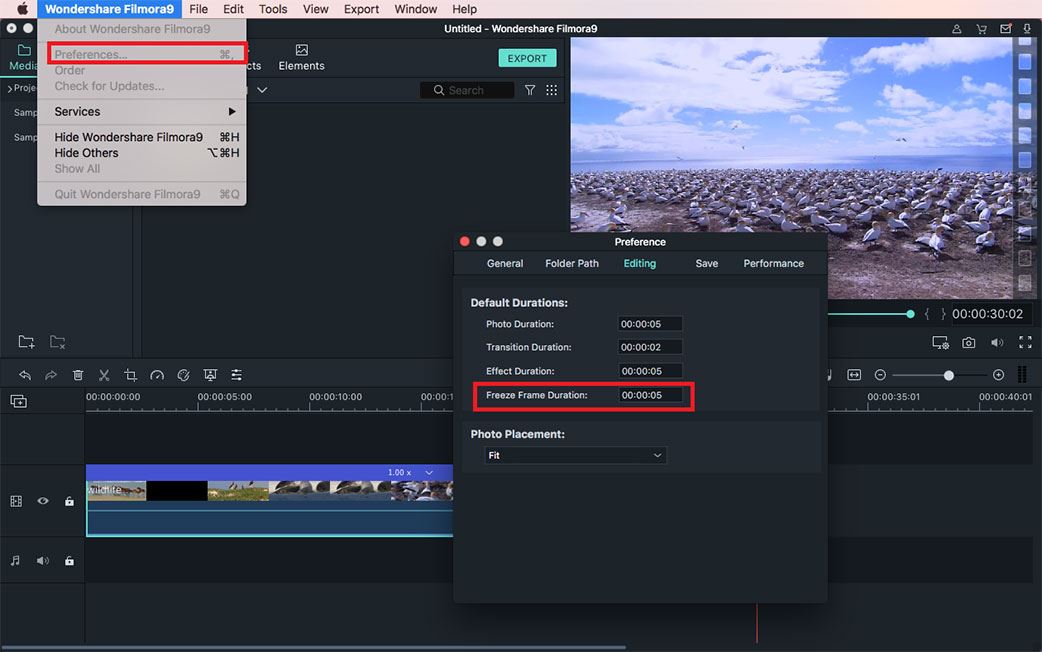
You can also open the "File" menu and click on the "Preferences" . And then you can click on the "Editing" option to insert preferred new duration by adjust the value under "Freeze Duration" option.
14 Add Watermark or Logo
Add wartermarks and logo: Drag and drop the video file to a video track and the watermark or logo to a track above it. Then drag the watermark image in the "Preview" window to move it to where you want it. To adjust size of the watermark or logo, drag the edge of the watermark/logo frame.
Adjust the opacity:Double click on the logo image in the timeline to open the Image panel and go to Composition. From there you can choose a composition mode (i.e. darken) and use the Opacity slider to adjust your transparency.
![]()
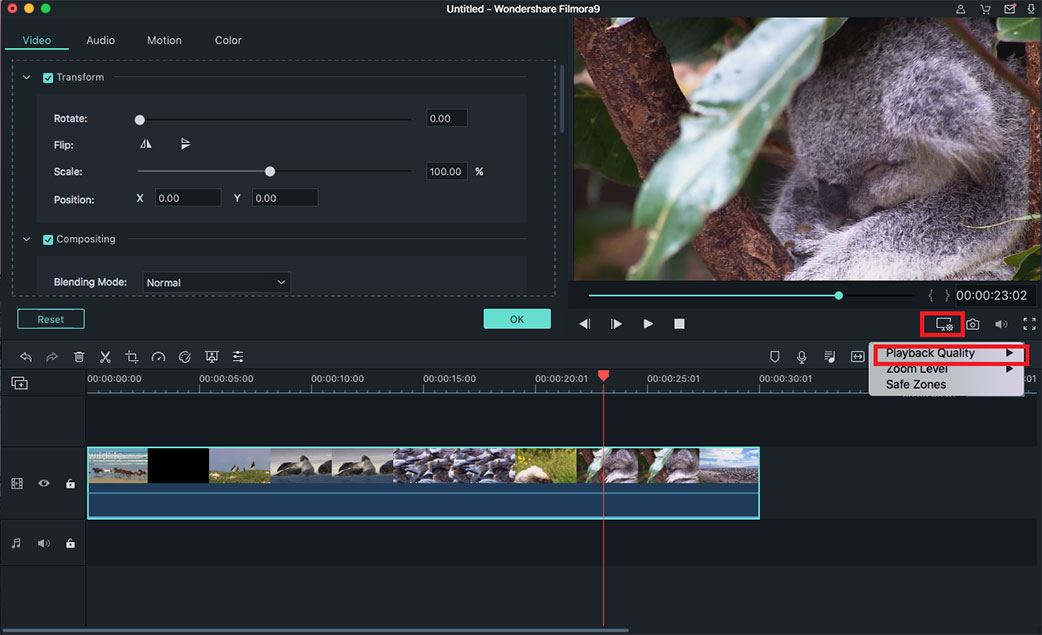
15 Change Video Playback Quality
To adjust the playback quality of the Preview window for a smoother editing experience, you can click on the "Setting" icon on the preview window and choose the "Playback Quality" option to adjust the quality.
Popular Products