
Wanna edit a video uploaded on YouTube? Don't worry. Learn how to use YouTube's built-in Creator Studio to make modifications now.
Editing videos is all fun and games until you realize that you missed out on the spot and have uploaded a video on YouTube, and now you can’t take it down because there’s already a lot of views and would do harm to your channel? It can seriously be bugging to take down an entire video to edit it minutely. YouTube has made it a lot easier for us by its own YouTube Creator Studio! With this, you can edit your already uploaded videos and do a lot more!
01. How to Edit Video on YouTube Creator Studio?
Did you know you can edit videos on YouTube creator studio? You can do it online! How cool is that! The YouTube video editor is a powerful tool to trim, crop, and edit your existing videos online. You can make many updates using these, such as removing sections from your video, a phone number editing down your live stream, blurring a face, fixing copyright claims of music, and whatnot!
Filmora is a suitable video editing software for almost all kinds of requirements. It gives its users a helpful interface to do everything from the basic to a very advanced level of customization. That is why it is equally favoured both by the novices and experts in the field of video editing.
Wondering how you can use it? We have a step-by-step guide for you!
Step 1Find the video you want to edit on your creator studio
Find your already uploaded video on your timeline, click on it, and you’ll find an edit button, click on that. If you need to pick a video that’s not public on your channel, click on manage videos on your timeline, it’ll open the YouTube studio dashboard area. Go to content and choose your video, open it and click on the editor.
Step 2Make Your Edits
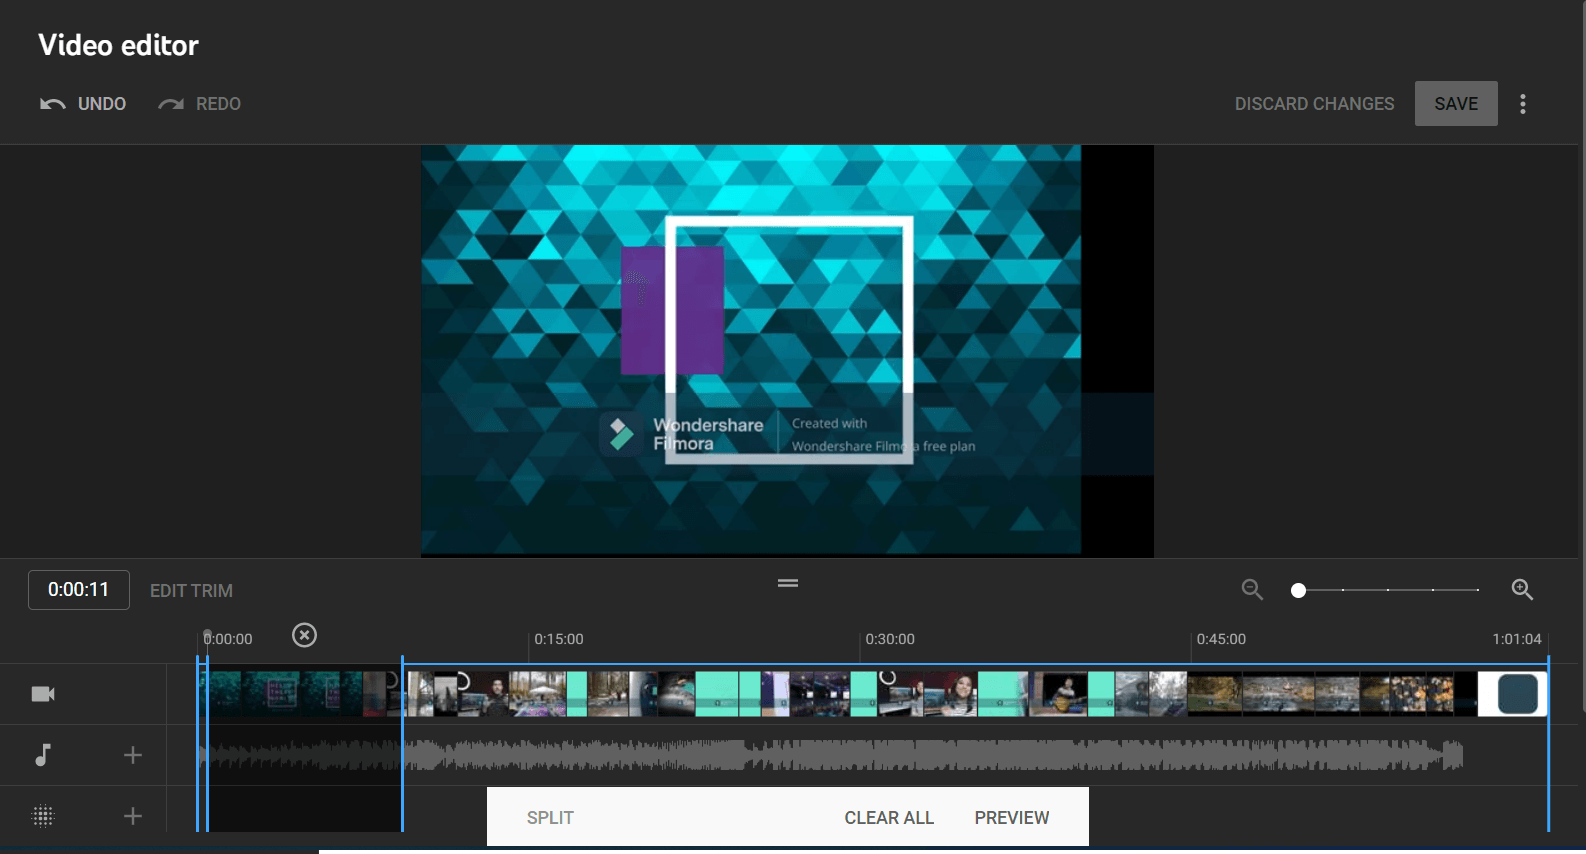
1. Trim a video
First, click on the trim on the left side of the editor timeline. A blue box will appear on the outside of the video showing that it is in trim mode. To remove the start of the video, drag the blue line to your desired length, that part will get grayed out, and your video will be trimmed. The same goes for trimming the end of the video. Now, if you want a remove a section from the middle of the video, click on that specific part and click split on the bottom of the editor, then drag the arrow to your desired length; that area will get grayed out.
FYI: You cannot change the order of the clips or add new clips; you can only trim them.
2. Add/Change music
If you want to add or change music in your video, click on the + option on the audio tab on the left side of the timeline. This will open the YouTube library. There are so many options to choose from! There’s free music, and if you’re used to editing your videos using YouTube editor, you can find your favorite tracks saved under the starred option.
You can also open the audio library, which will open a different tab, and you can choose from there as well! To add it to your video, click on the add button on the audio; this will drop it on the timeline, next place it where you want it to be. If you want a specific section of it, drag that part forward or backward, same as trimming the video.
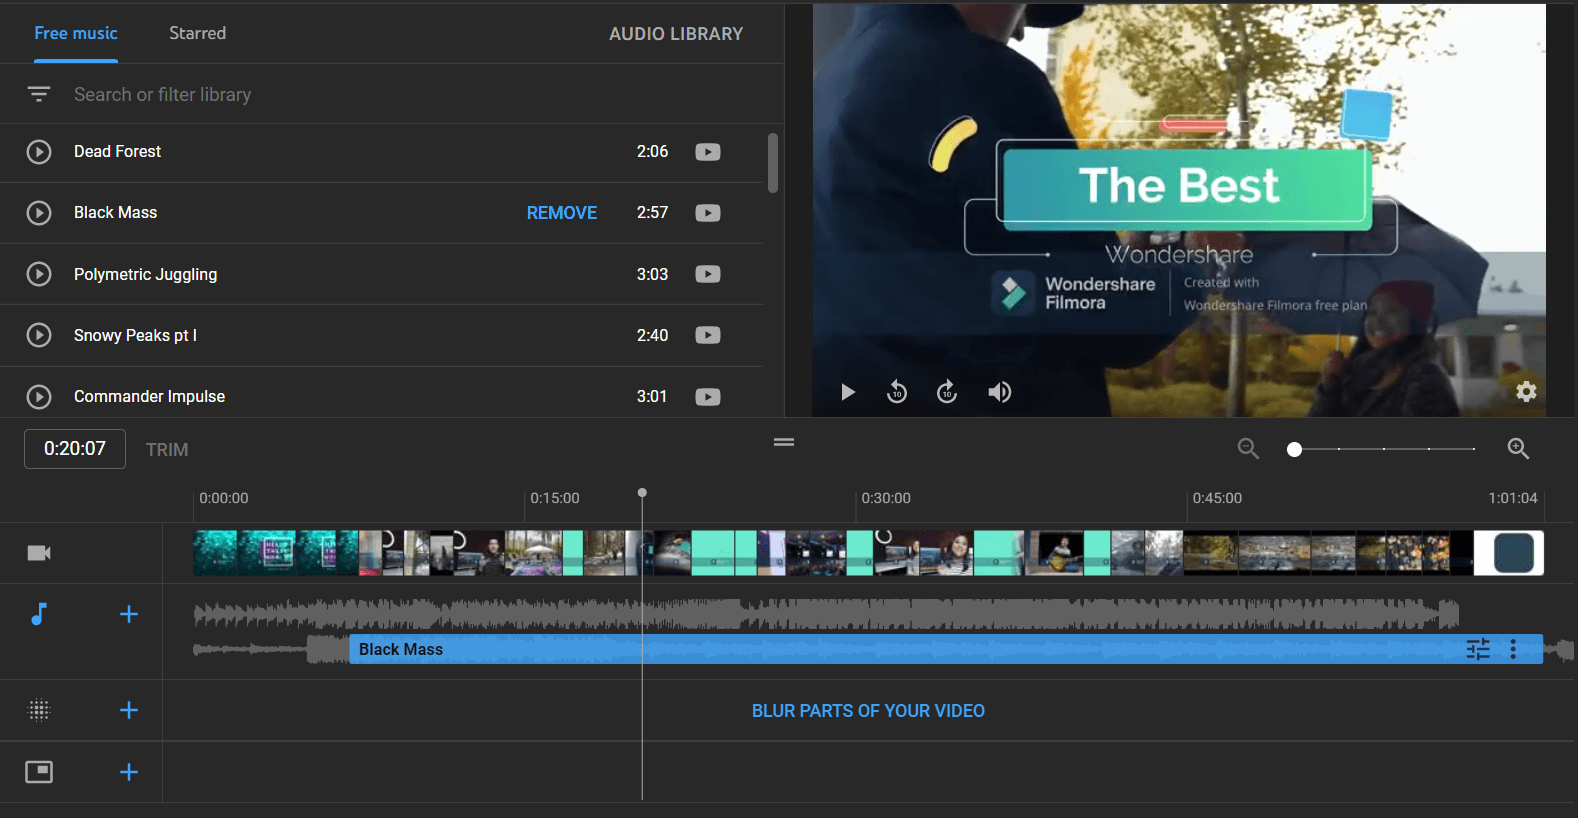
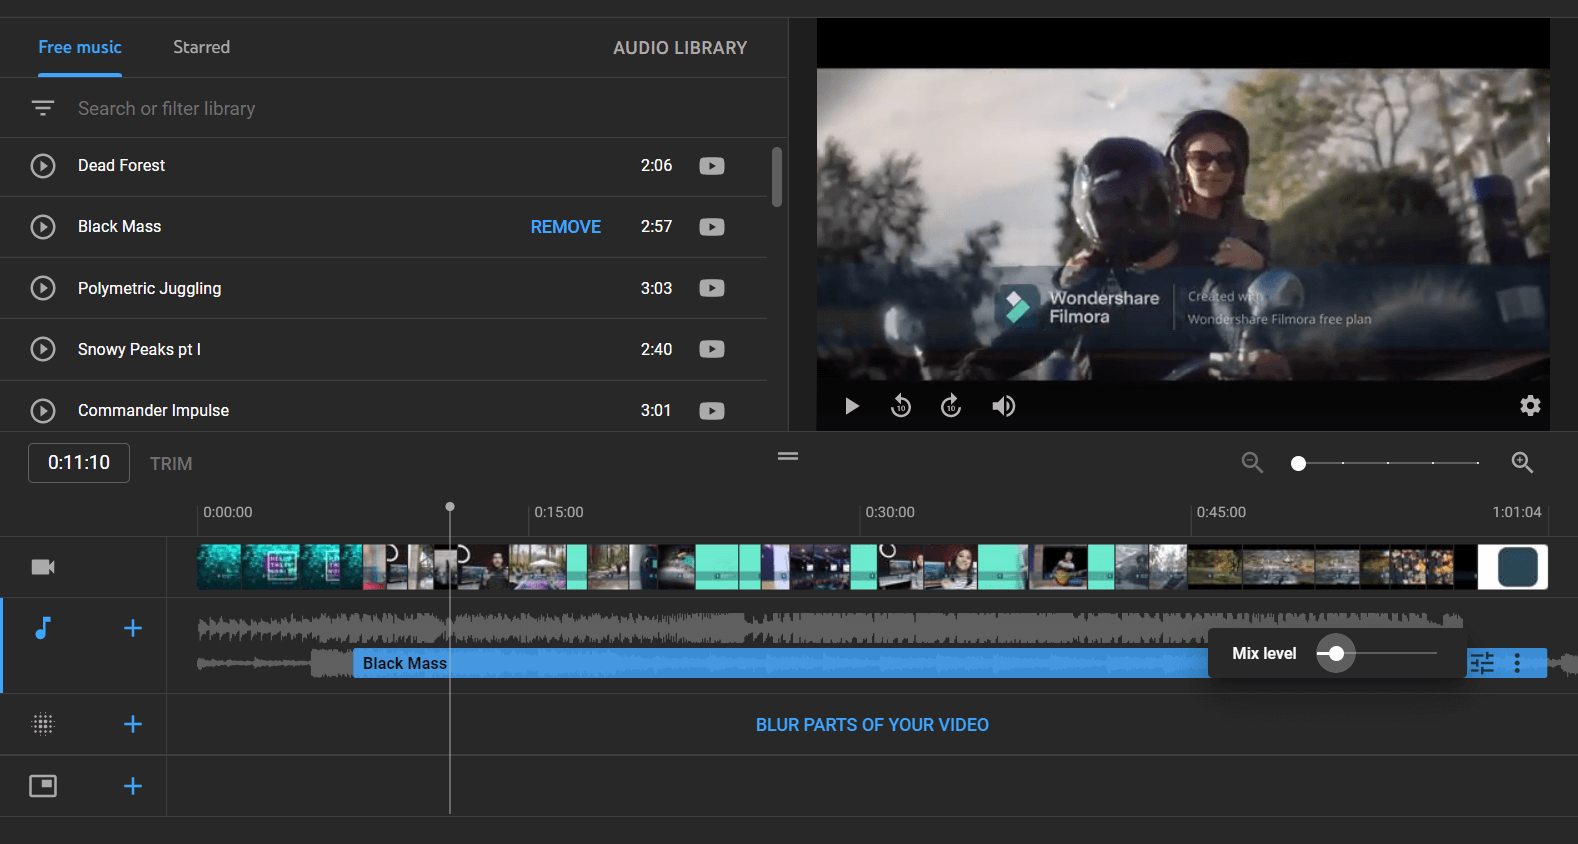
3. Adjust volume of audio
Simply click on the audio you added to the timeline and change the audio level. If it's at max level, you would only hear that track in the video. Adjust the level by volume slider so you can hear both the main voice and the background music as well.
You can add multiple tracks in your video, and the previous version only had one audio track option; now, there are multiple options! How cool is that!
4. Place ads in YouTube editor
To place ads, you need to be in the YouTube partner program and have monetization enabled for the video. Click on any gray markers on the timeline showing your ad positions. Click on any, and you can add them, remove them, adjust them, position them, and more!
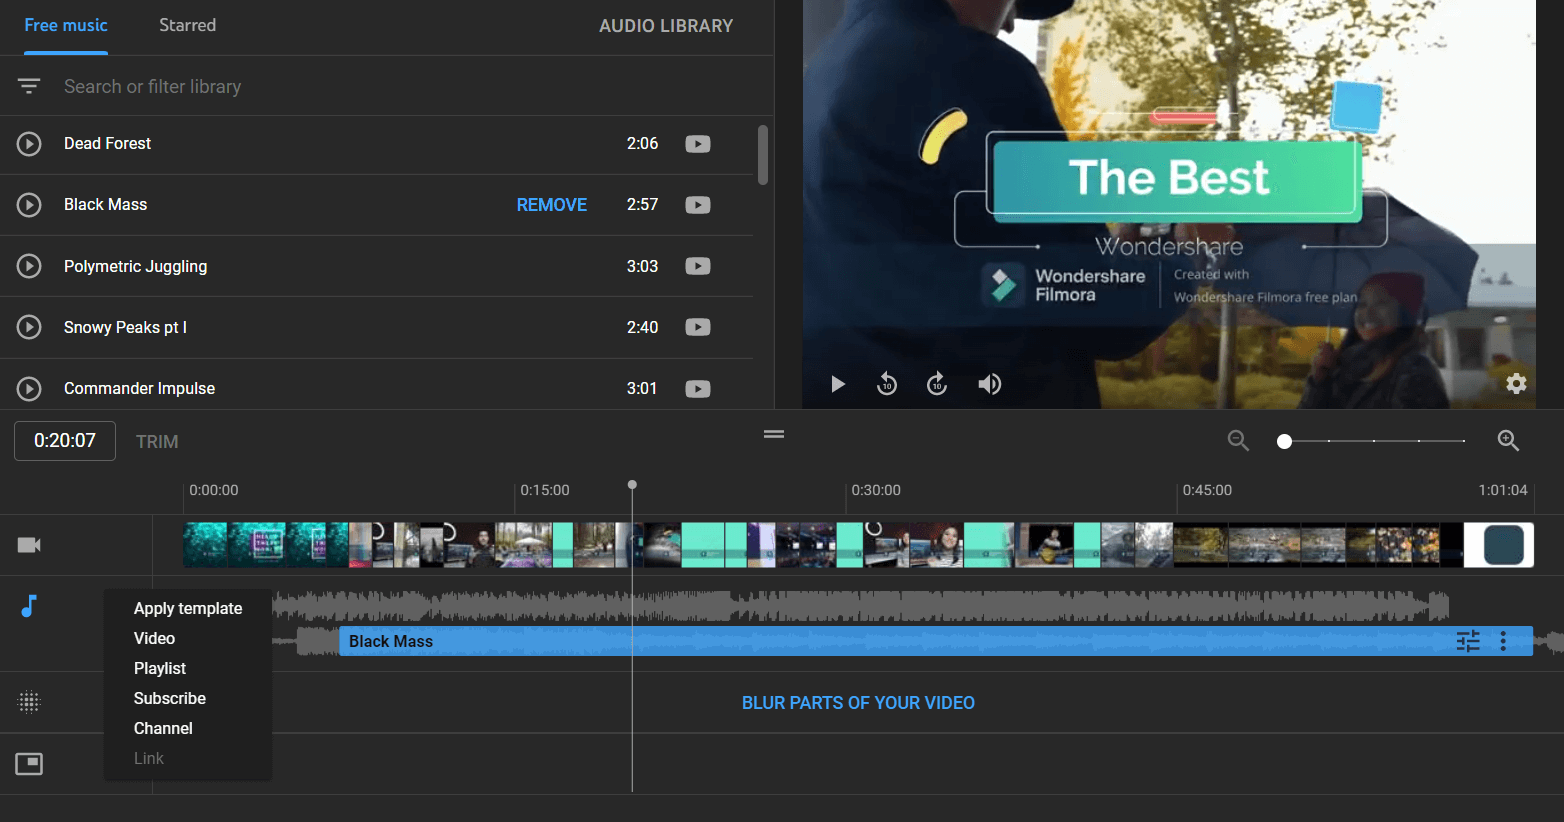
5. Make your end screens unique
The end screens will be shown at the bottom of the timeline. You can add, remove, adjust and do almost any sort of editing on it. Click on the plus button on the element. There will be an option to add the link, channel subscription button, playlist, or video. You can also choose any from the preset templates. The default setting is 20 seconds; you can lower the limit but not increase it.

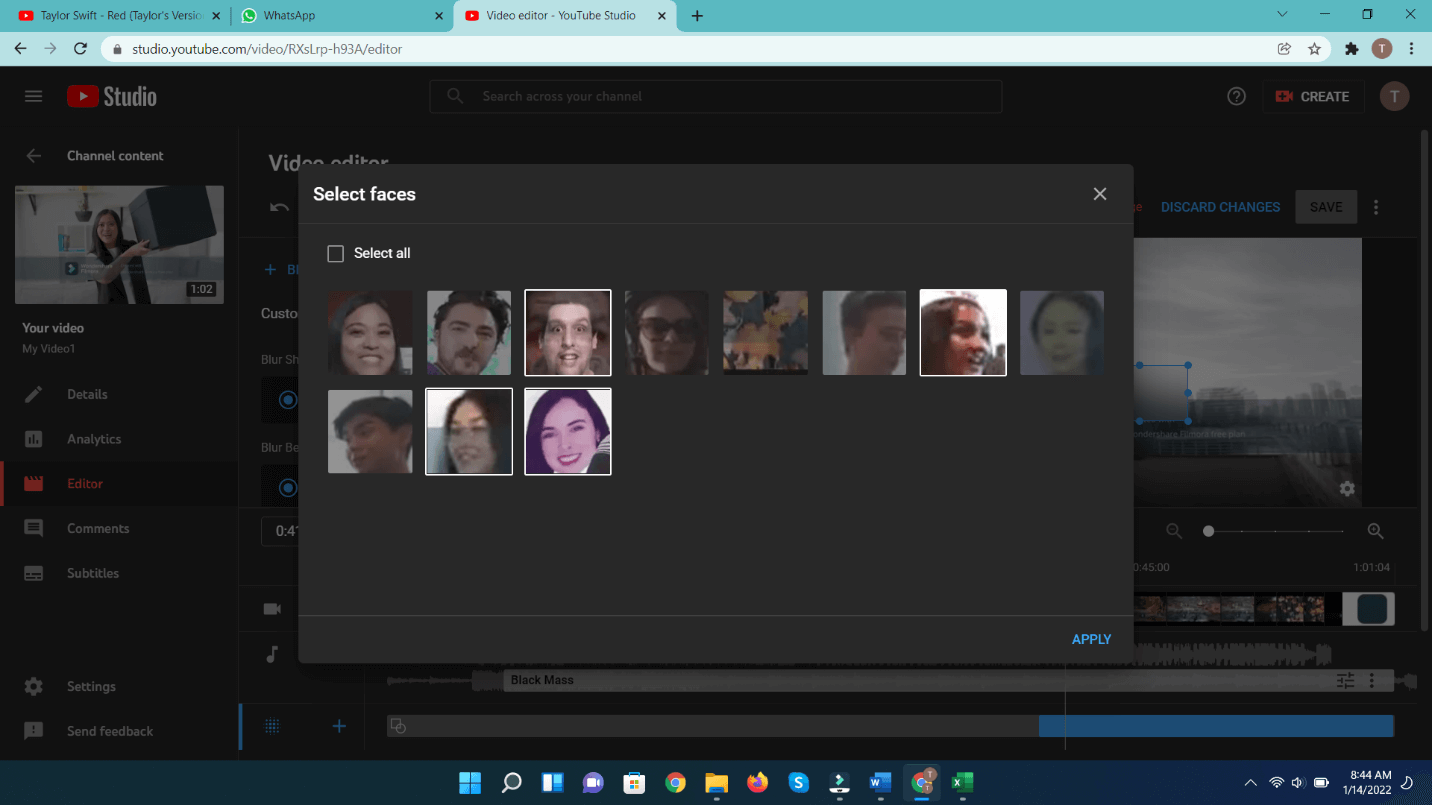
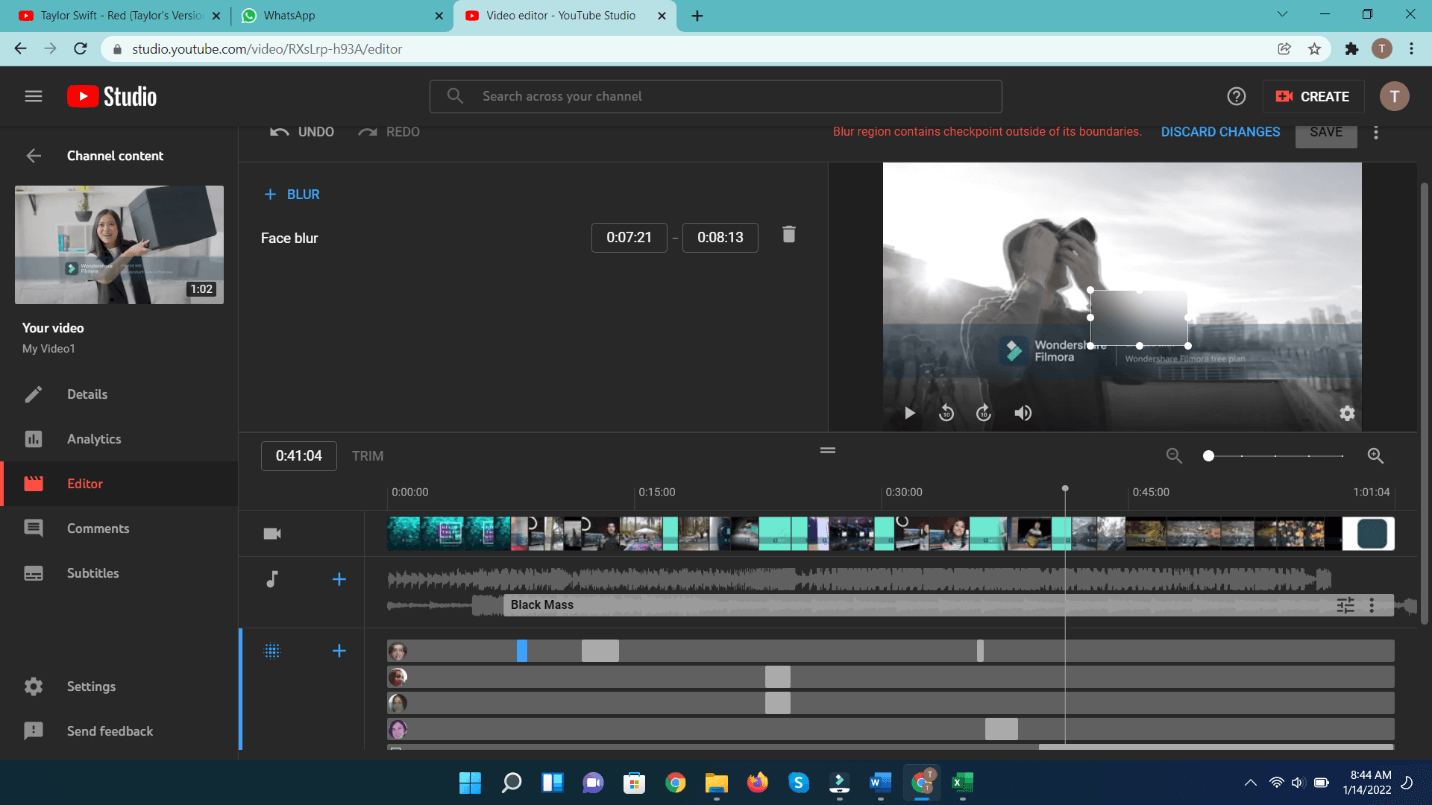
6. Blur Area
To blur a certain area or person out in your video, simply click on the blue icon and press the + button next to it. Then choose face blur or custom blur. If you choose face blur, it will take some time to process and detect faces in the video, depending on how long your video is. Once it has been processed, simply click on it and hit apply. That part will be blurred and will be highlighted in the video.
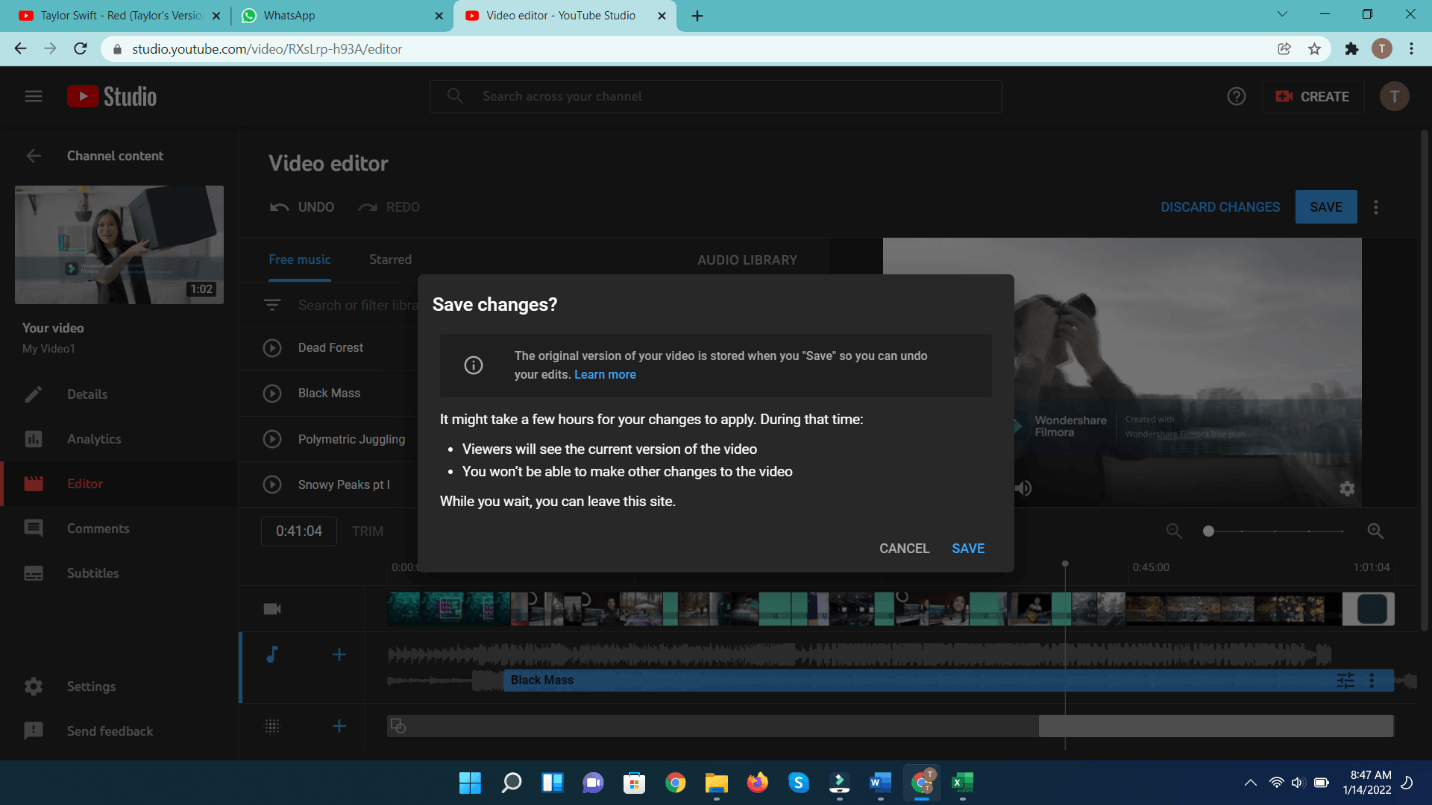
Step 3Preview and Save
Before saving the video, you’ll need to preview it first by clicking on the preview button at the bottom of the screen. Once done, only then saving the video option become available to us.
You can also save your video as a new one by clicking on the three dots and then saving it as new. It will take a bit of time for YouTube to process that video. It depends on how long your video is.
Part 2. An Alternative YouTube Editing Software for Advanced Video Editing
Now, if you want to edit your video from the start and are looking for video editors that are super easy and fast, we have something for you! The new update of Filmora is just outstanding when it comes to video editing software with unlimited features! It's super easy and simple to use and has all that you’re looking for in a fast and creative video editor for that perfect YouTube video every time. Simply you will have to add your media files, edit them, add titles, elements, transitions, and you’re all done! It's not so difficult! We have prepared a step-by-step guide for you even to make it easier!
Wondershare Filmora
An Easy-to-use video editor software to bring your imagination to life! Let's create Inspired Storytelling Videos Without Limitation now.
Let’s get started with that perfect and amazing YouTube video you have in your mind!! Follow these simple steps!
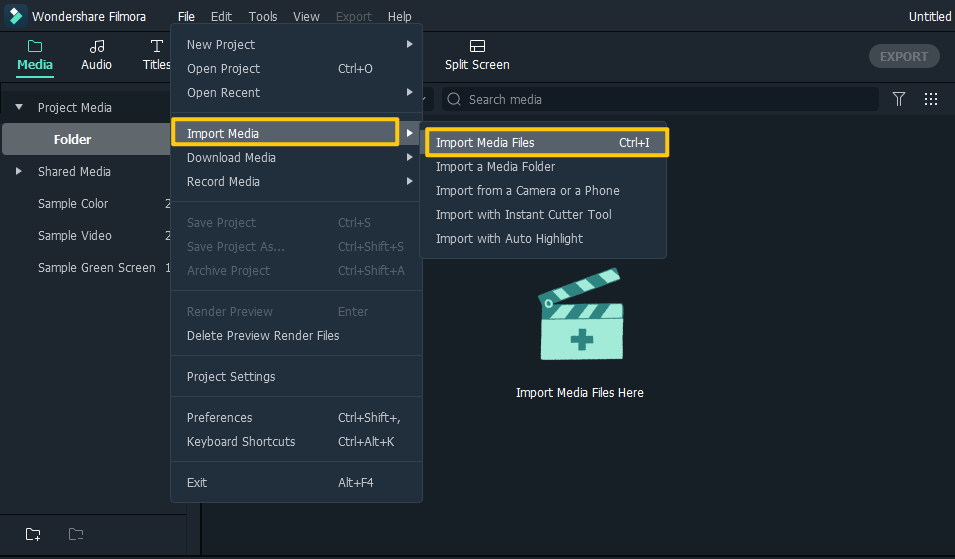
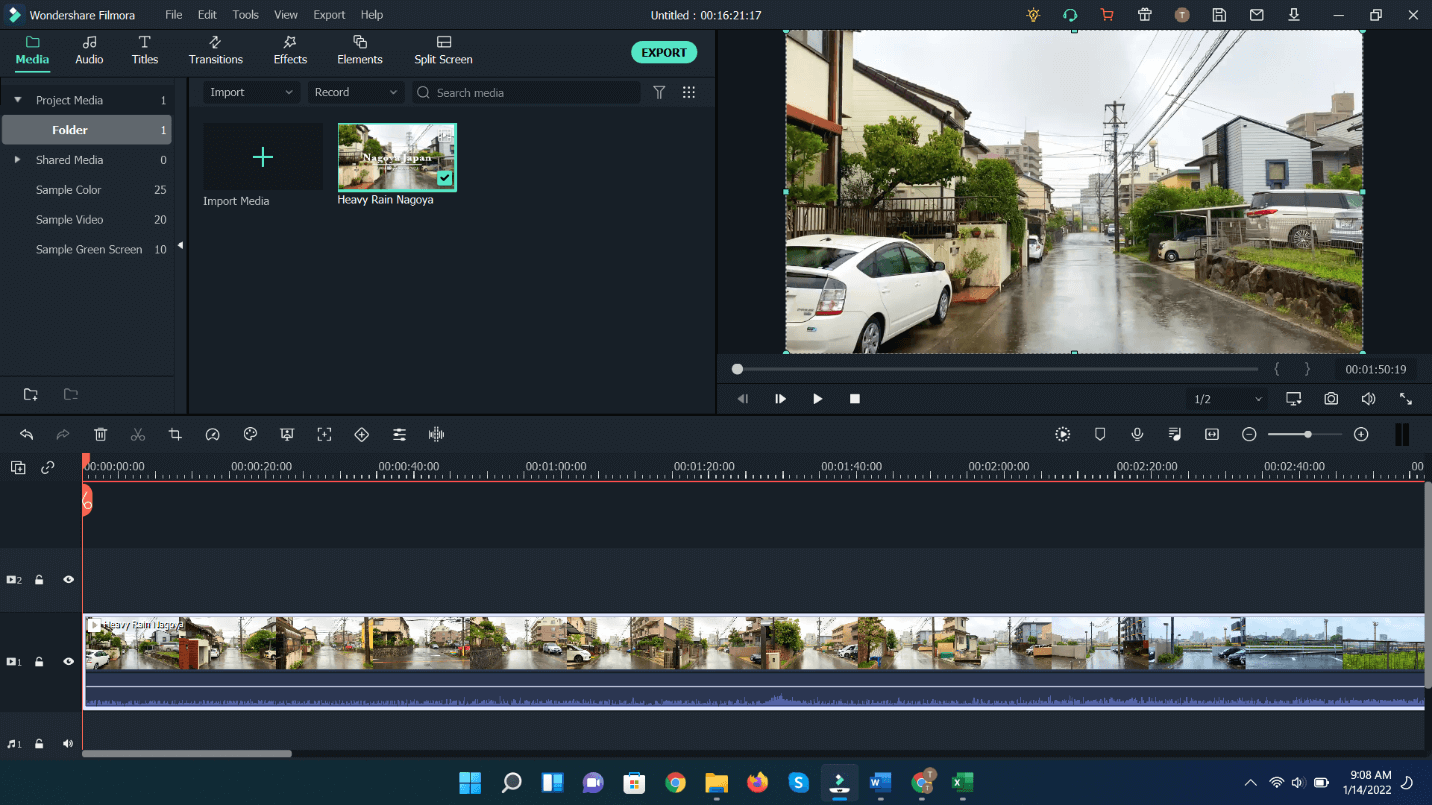
Step 1Import Media
First, import any data you want in your new year video. It can be any media, video, images, text, music, anything at all! Drag and drop them onto the media library to start working on it, or you can simply click on import and choose your desired files, and press open. Drag and drop you’re the clips preferably in order onto the timeline to get started with editing!
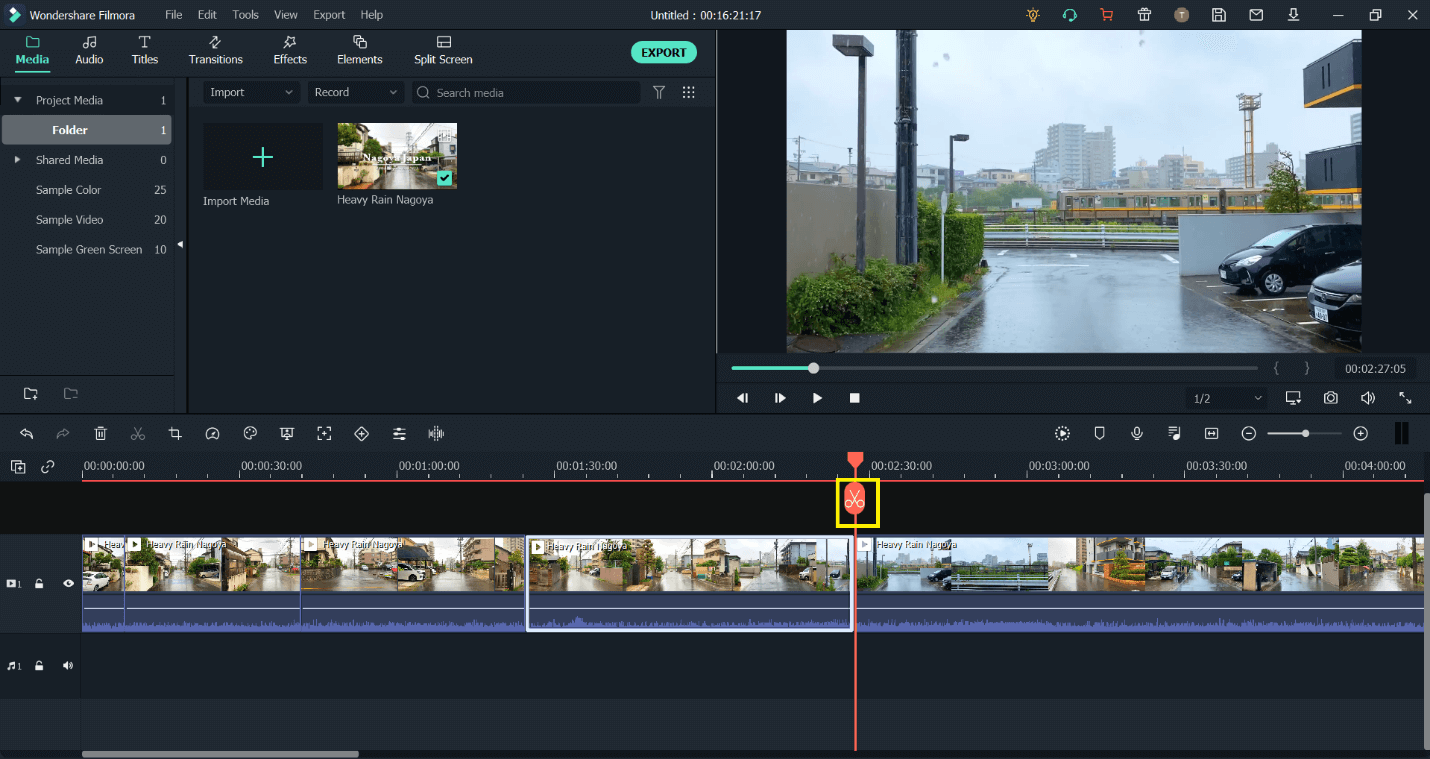
Step 2Use Cut and Trim Tools
Now, it's time to refine those clips, edit the clips to your desired length, omit any part you don’t want by clicking on the trim (scissor) tool on the timeline. Your video will get cut into different segments depending on where you drag the cut tool to. Once you’re done editing and reshaping the clips, merge them into a single video removing any gaps. This will provide you with a basic ground to work with.
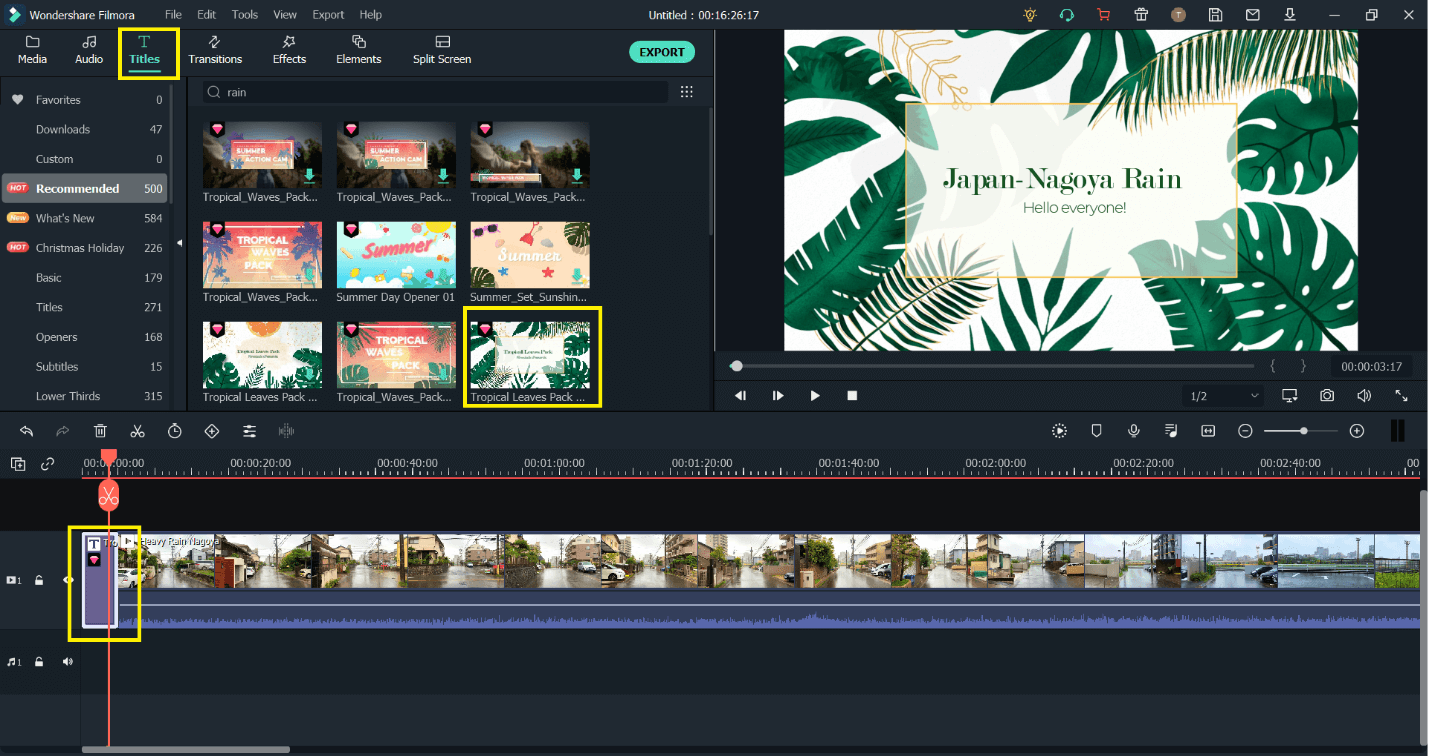
Step 3Add Title
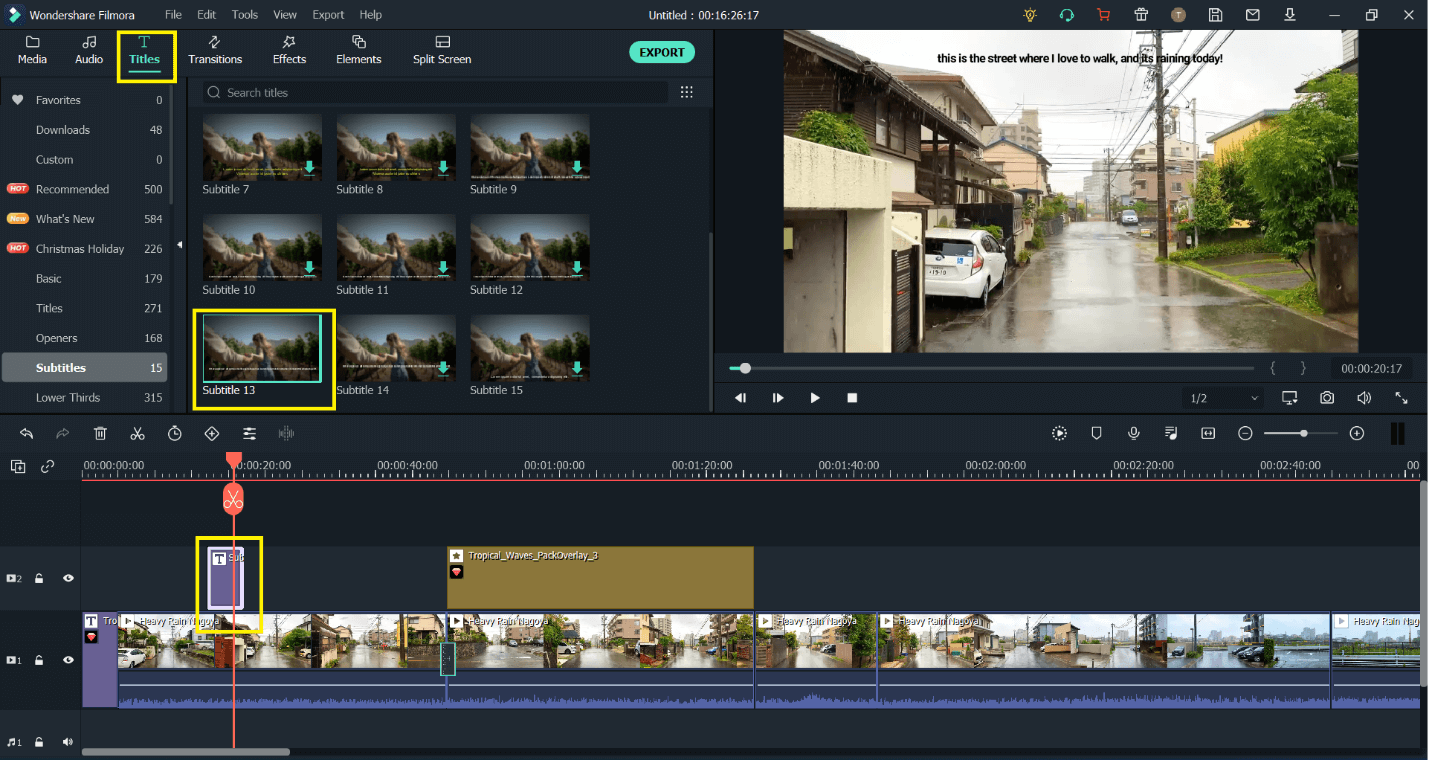
Now, your video must have a title, right? May it be a wedding video or a vlog, a beach trip or simply a study routine, or any video! A video without a title would look incomplete! To add an animated title, first, you need to add a video track above the original video track, right-click on the left side of the timeline, and click on Add Video Track.
Next, go to Titles and search for your theme intros. There are numerous options available! Or you can simply download them from filmstock! It provides you with everything regarding your theme! Whether it be titles, transitions, elements, and what not!! Simply go to Filmstock and download it! And there you have a whole pack to go with, and you will get all that you want of your desired theme with a single click!
Once you have chosen your desired Title, simply drag and drop that to the beginning of your clips on the new video you added.
Double click on the clip to edit it, once you’re satisfied with how it looks, lets add more details to the video to make it more complete!
Step 4Add Effects, Elements and Transitions
This part of the video will make it stand out from the rest; your creativity comes in here! Tweak it up a little bit by adding effects, transitions, and titles!
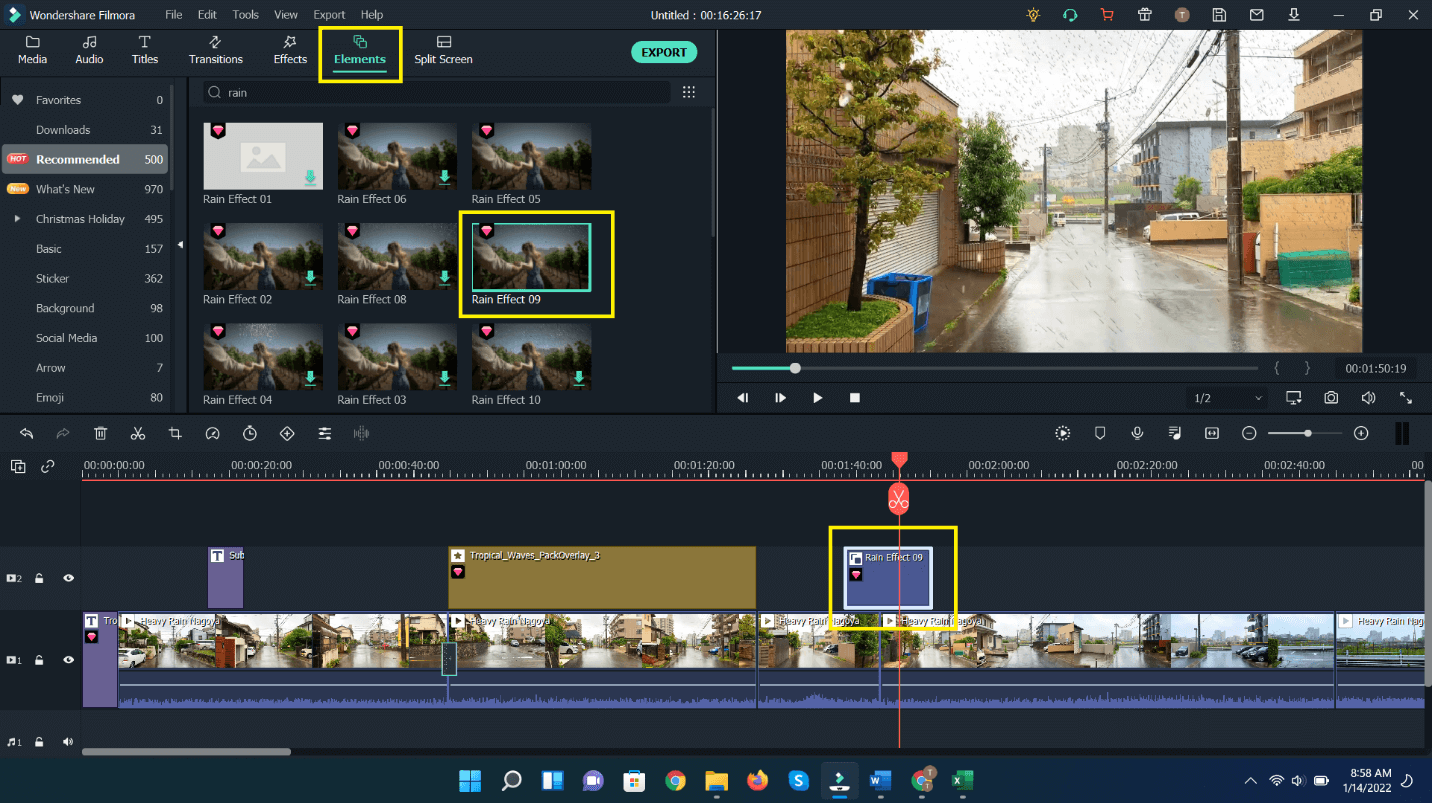
First, add elements, click on the element's icon on the top and choose any you think will express more and bring more life to your video. They may be different emojis or even arrows to communicate well to your audience, expressing emotions and what you truly want to communicate.
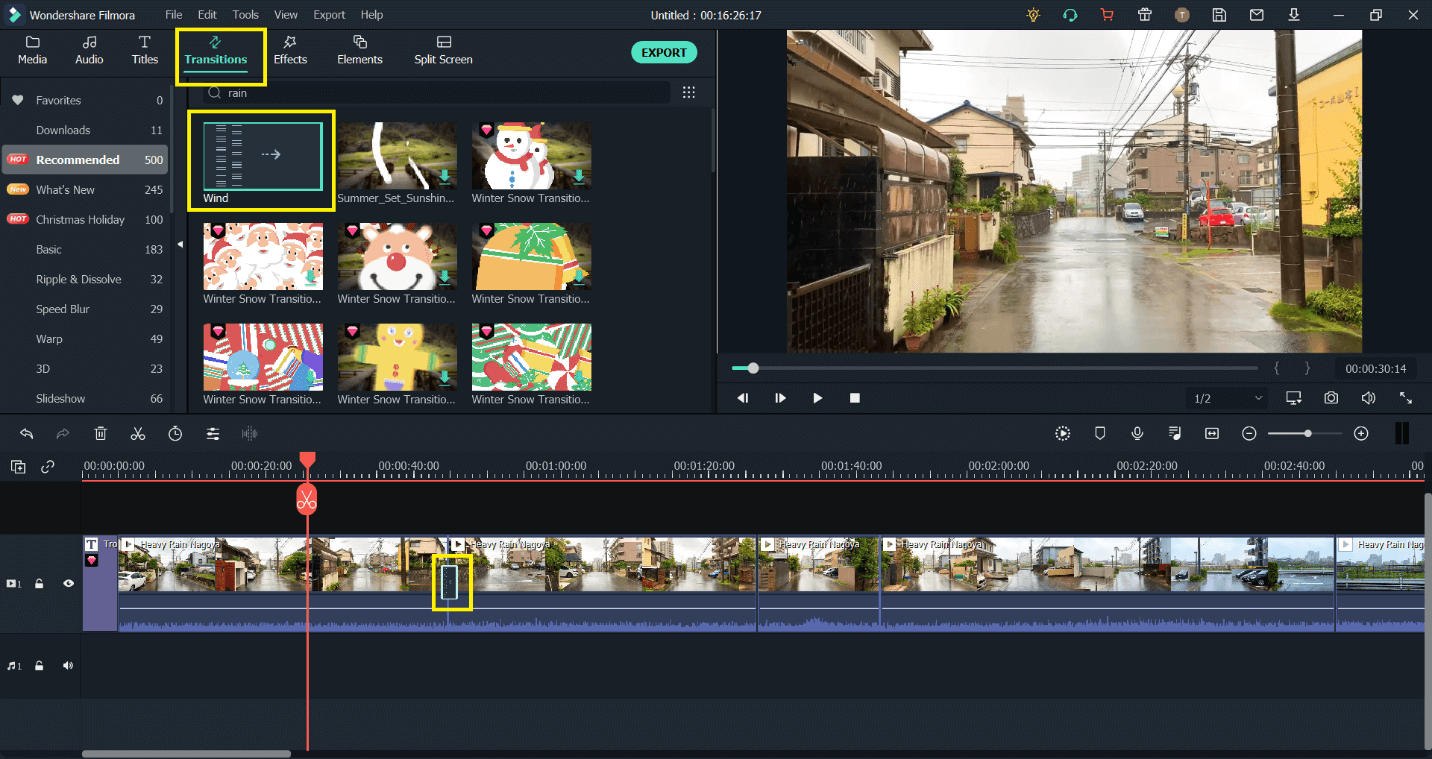
Next, add different effects to bring those elements to life. Finally, choose different transitions from the numerous available in Filmora to truly make your video one of a kind!
Step 5Add Music
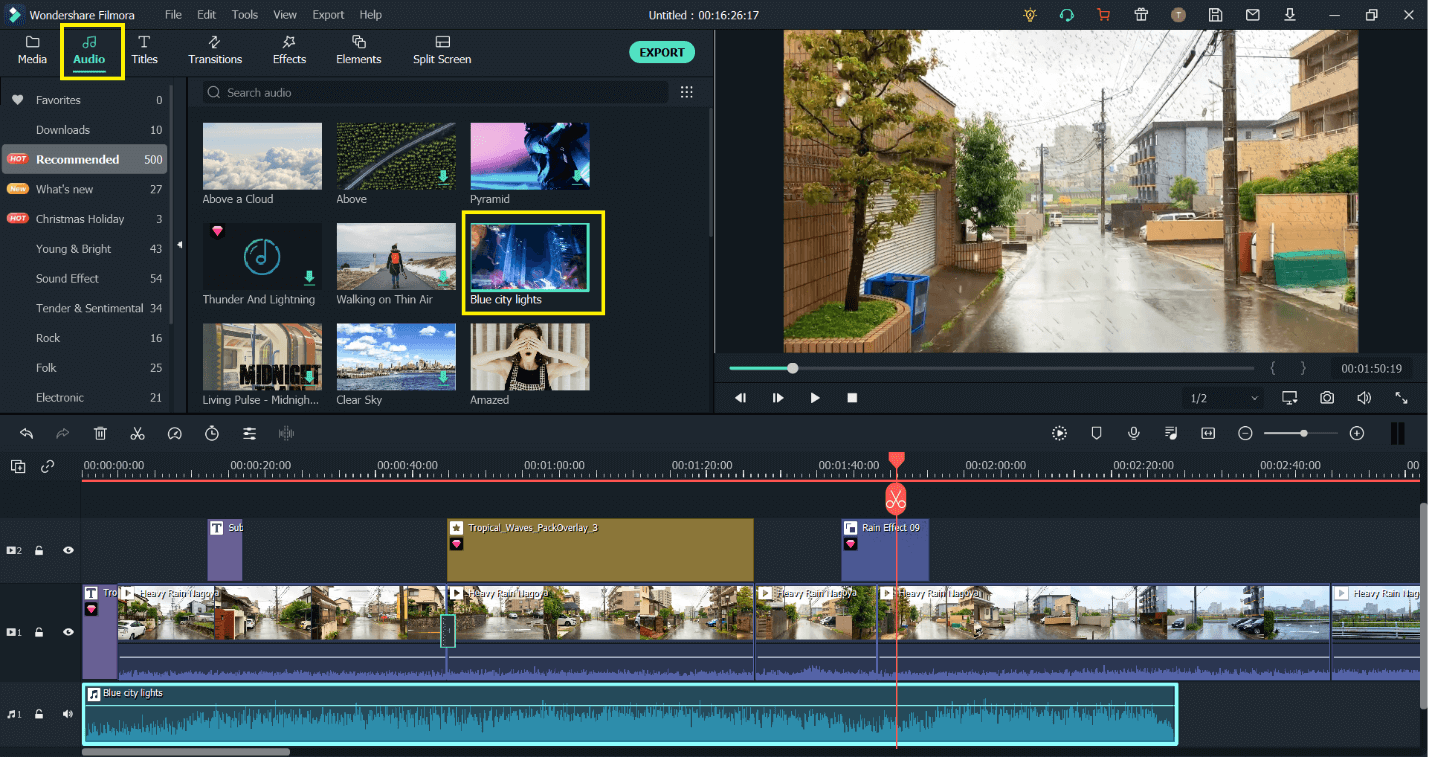
You don’t want your video to be dull, right? What’s a YouTube video without music! You can use any theme song going well with the video. You can try theme songs from the Audio section and Filmora library. Drag and drop that onto the audio track, trim the audio, preview it with the video and sync the audio or the clips with each other; this would make the transition smoother.
Tip: You can readjust your clips with the music beat too!
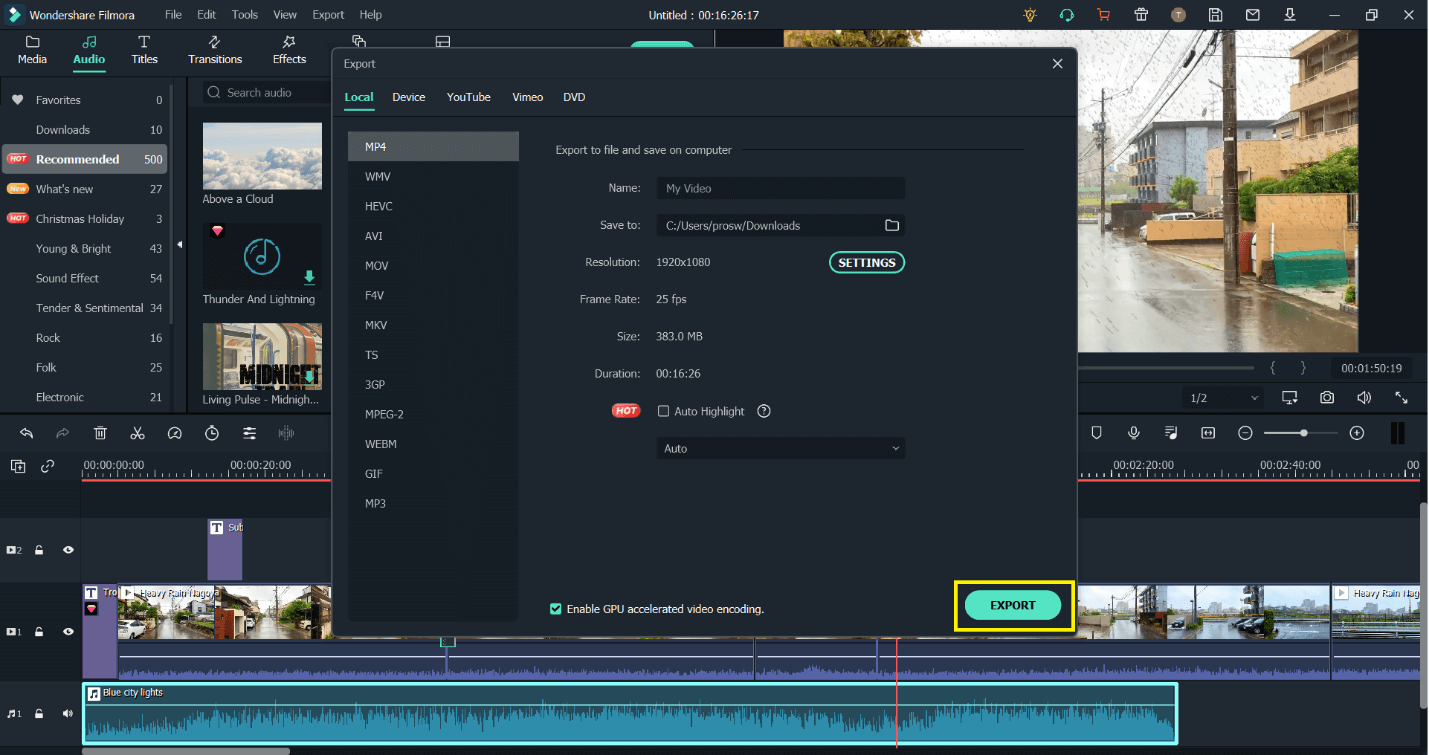
Step 6Export the Video
Once you’re done editing, preview the video to see how amazing it looks. Make any final touches required once you’re satisfied with how amazing and beautiful your video looks; it's time to export it and share it to YouTube!
You can directly upload the video from Filmora to YouTube even! Or you can simply export it first by clicking on export, choosing the settings and location of the video. Once set, click on export. Wait for a while till Filmora gets done finalizing the perfect New Year video and get ready to view the outstanding result and share it with your YouTube family!!
For Win 7 or later (64-bit)
For macOS 10.12 or later
Part 3. A Detailed Comparison between YouTube Studio and Filmora
Let’s walk through a comparison between YouTube Studio and Filmora.
The biggest pro of YouTube studio editor is that you can edit your already uploaded videos and make a few tweaks here and there without losing your view count or comments.
With Filmora, you can upload your videos directly on YouTube but not edit once they are uploaded.
The YouTube video editor gives you features such as trimming parts of the video, saving video as original, or saving video as a new video. You can even add or change your audio tracks. When there is a copyright claim on the audio, you can also blur faces/objects and add an end screen where you add your subscribe button and more videos, etc.
The cons of YouTube video editor would be extremely limited features, your video must be shorter than 6 hours, it can take hours or even days to completely process the video if you have over a hundred thousand views, you might not be able to save the changes except blur faces (unless you’re a member of the YPP), you cannot add pictures, video clips or merge video clips and lastly the editor is not available on mobile phones.
When it comes to comparison with Filmora, no doubt there are a few features that are over-the-top and very useful in YouTube video editors. But if you want an editor with simple and advanced features, and make your video stand out from all the rest, then this is your go-to video editor!
The cons of Filmora would be that if you’re not subscribed, your video will be watermarked with Filmora’s logo. There is also somewhat of concern about the compatibility of video importing. Another con would be that there aren’t many tutorials available on Filmora. Although there are many on YouTube regarding Filmora, the software doesn’t redirect you to a tutorial if you’re having difficulty.
Wondershare Filmora - Best Video Editor for Mac/Windows
5,481,435 people have downloaded it.
Best video editing software for beginner and semi-professional, that comes with powerful editing skills like trimming, splitting, rotating, editing, etc.
500+ free special video effects to customize and create an awesome movie by yourself.
1000+ standalone effects downloading resources to make videos in all kinds of styles.
Record voice in real-time: you can have you voices recorded in realtime and instantly add them to the video files.
The software supports almost all available videos, images, and video formats. Besides, it also supports GIF files and 4K resolution videos.