Filmora Video Editor for Mac
User Guide
Import/Record Media Files
Filmora supports multiple import methods. You can import media files not only from local Mac, but also from iPhone, iPad, Android, camcorder, cameras and many other devices, as well as from Facebook and other social platforms. You can even directly record videos from webcam or vioceover through the program.
In this tutorial you will learn how to:
1 Import Medias Files from Local
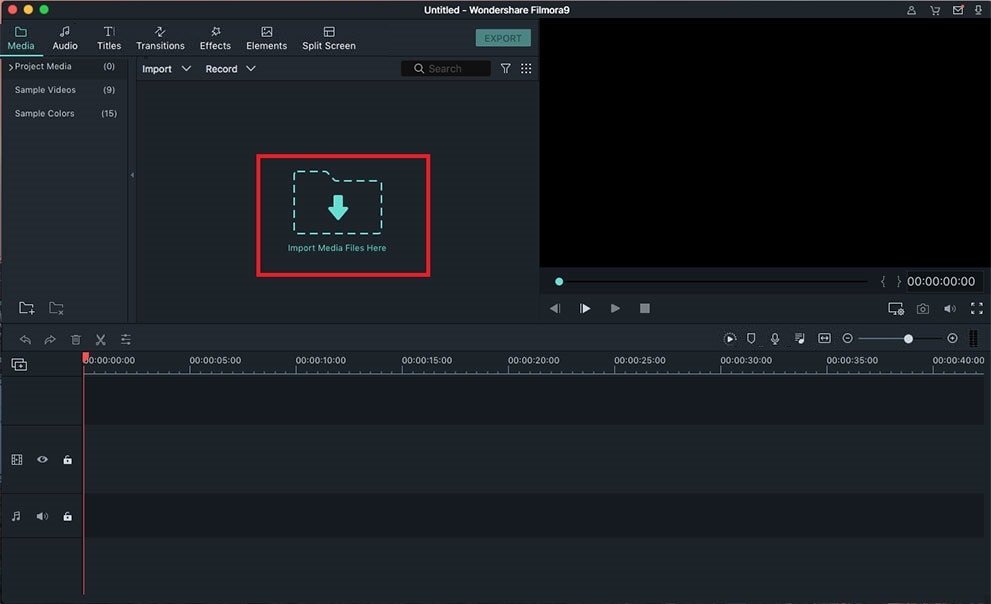
There are actually 3 ways to import media files, including photos, videos and audio files from Mac to Filmora Video Editor.
Way 1. On the "Media Library" interface, click on the "Import Media Files here" icon to impor files directly.
Way 2. Drag and drop media files directly to the software.
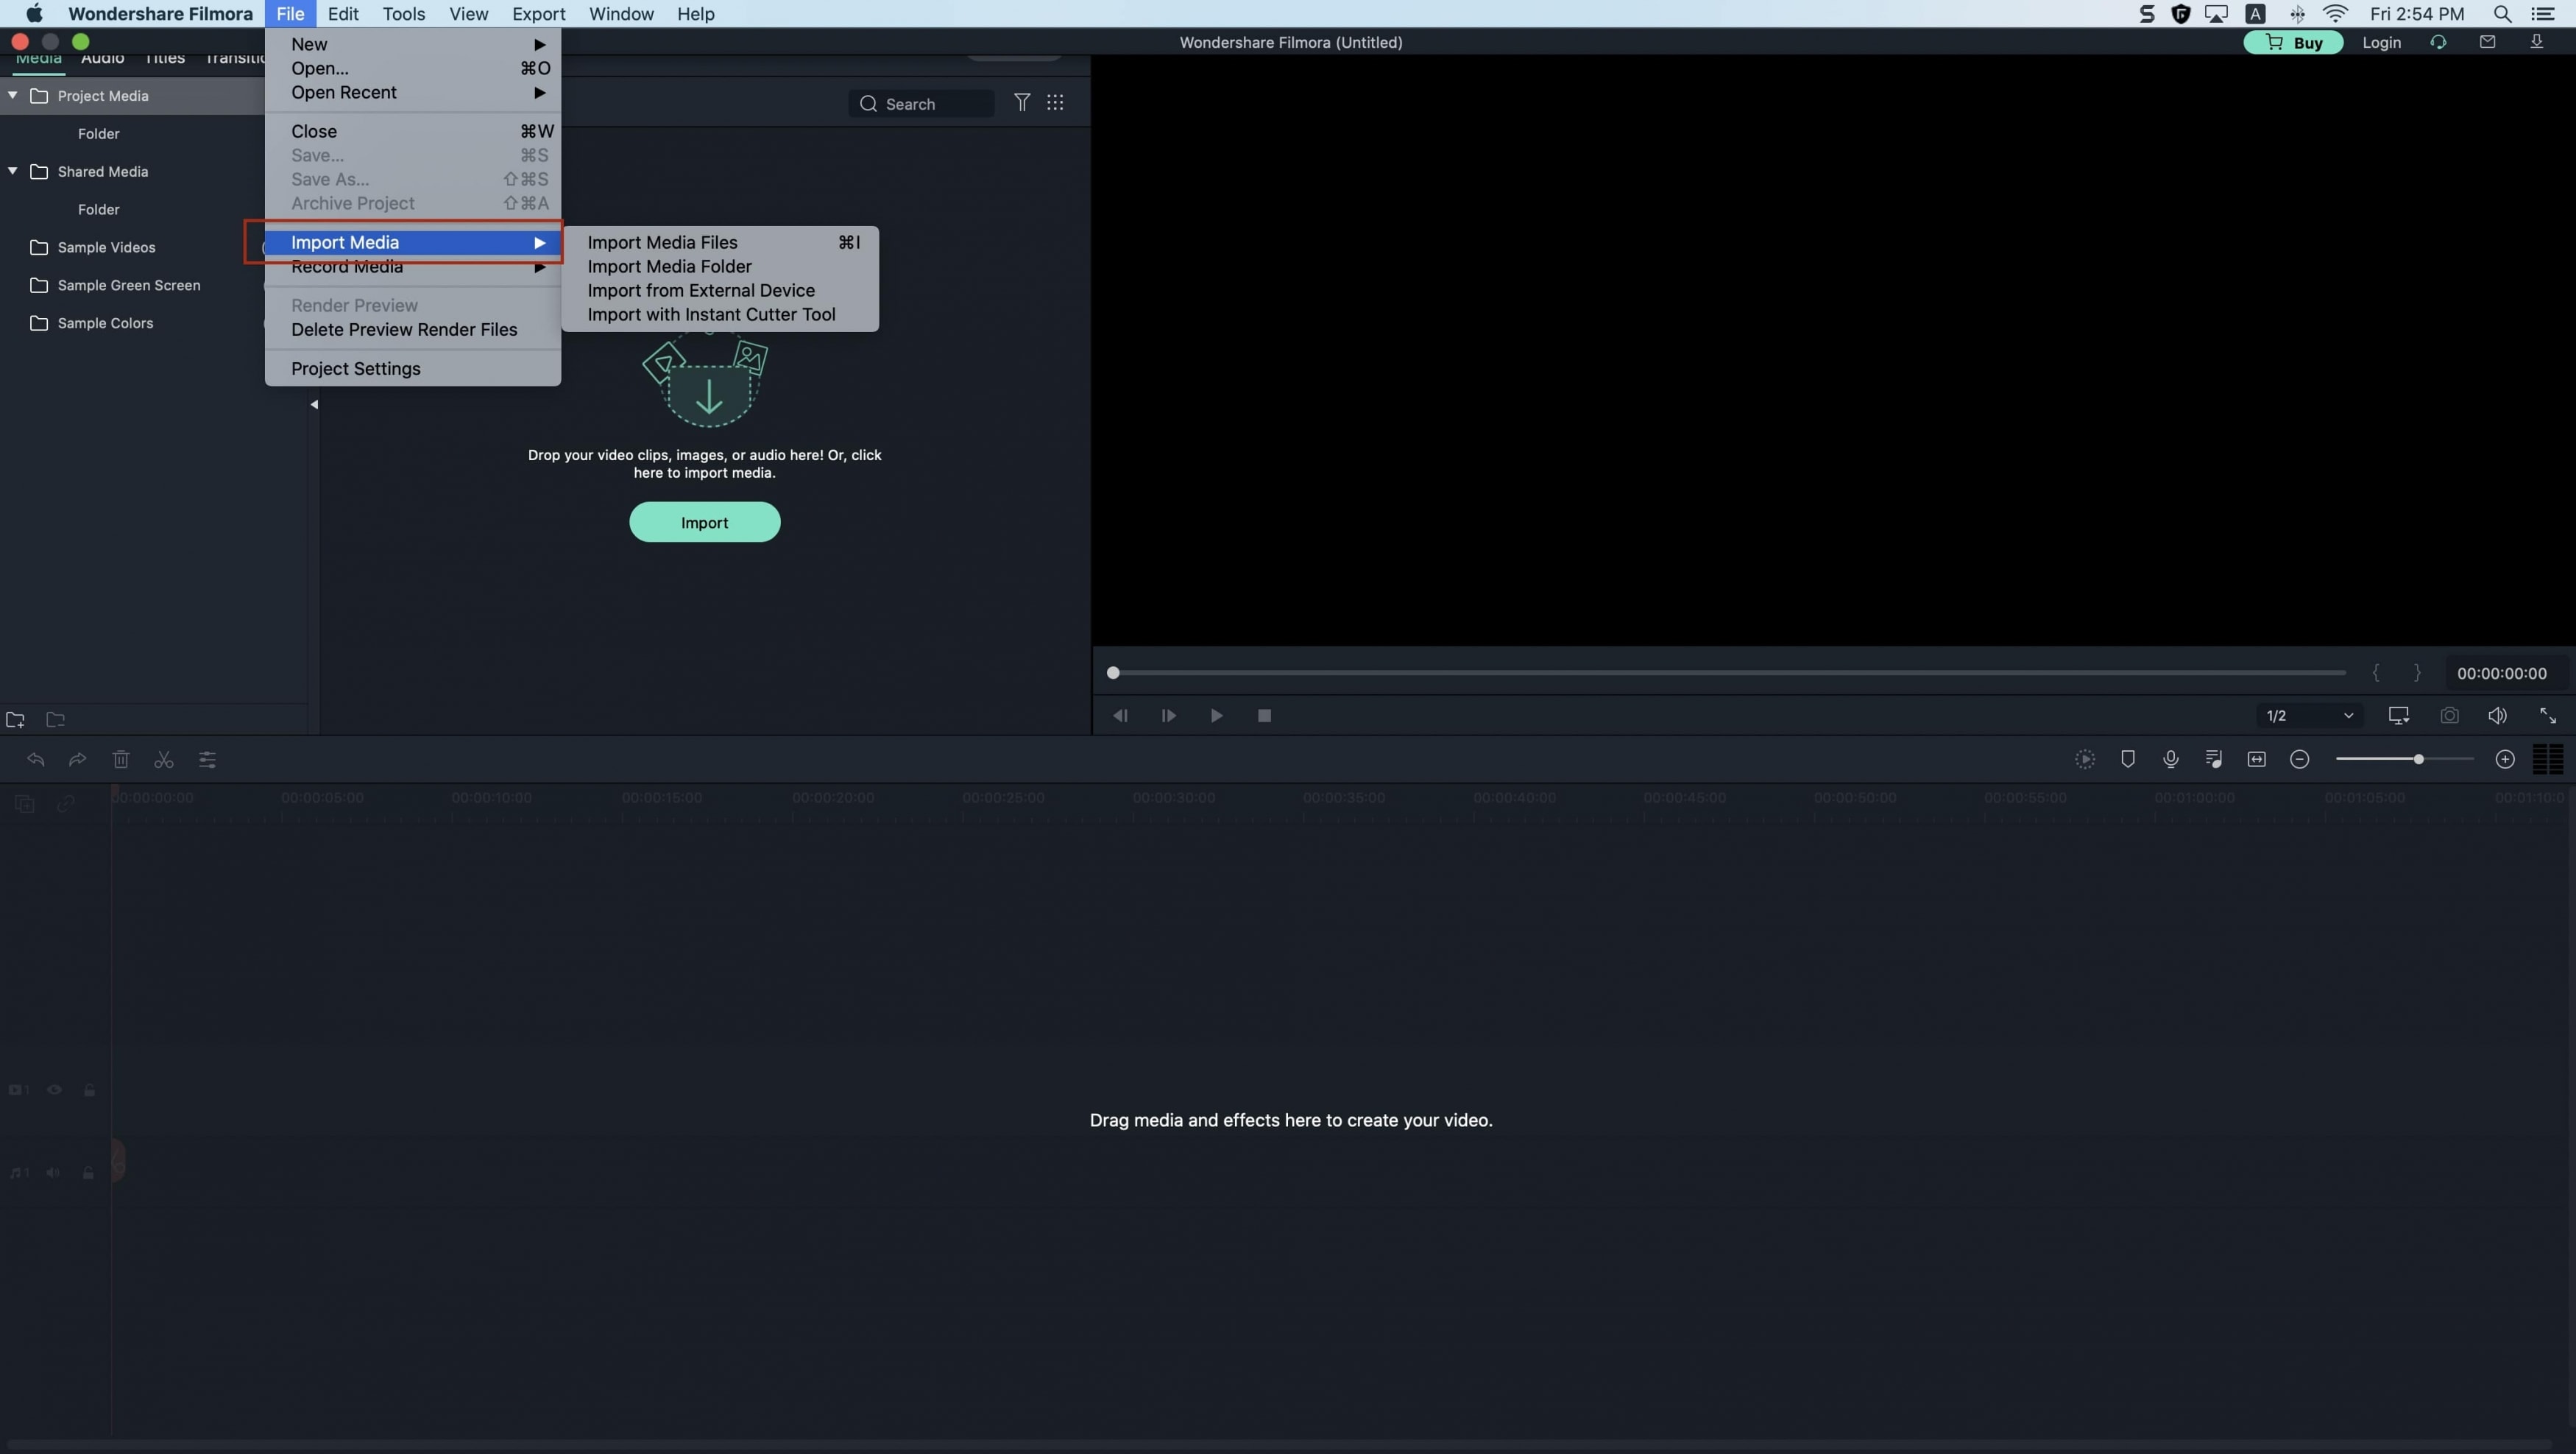
Way 3. In "File" menu, select "Import Media".
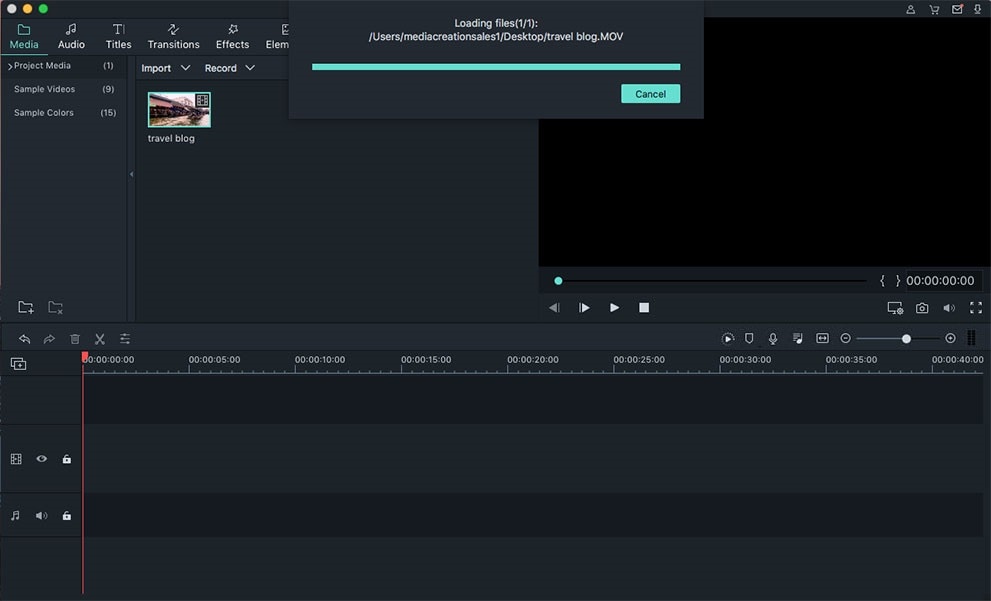
Note: While importing a media file, Filmora may ask you if you wish to create proxy file to accelerate editing process. Select "Yes" to continue.
2 Record Media Files with Filmora
Filmora for Mac allows you to record videos of yourself via the built-in Webcam, by capturing the computer screen, or recording a voice over.
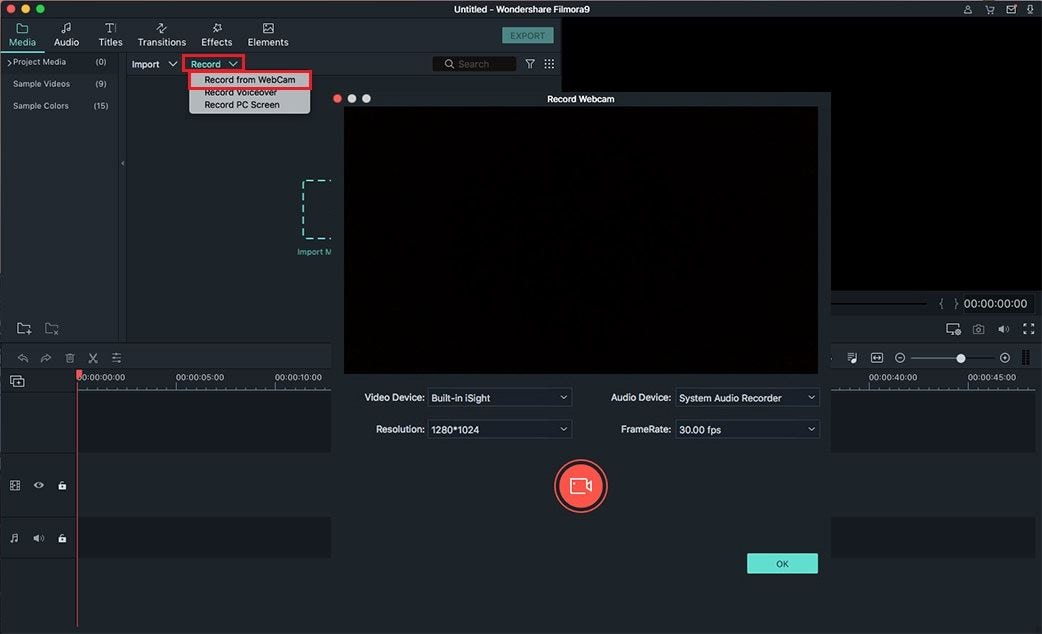
Record Videos via the Built-in Webcam: Click on the "Record" button on the Media Library interface > On the drop-down list choose the "Record from Webcam" option. And then, if you're ready, click the red round button to start recording and then click OK to save the recorded video file.
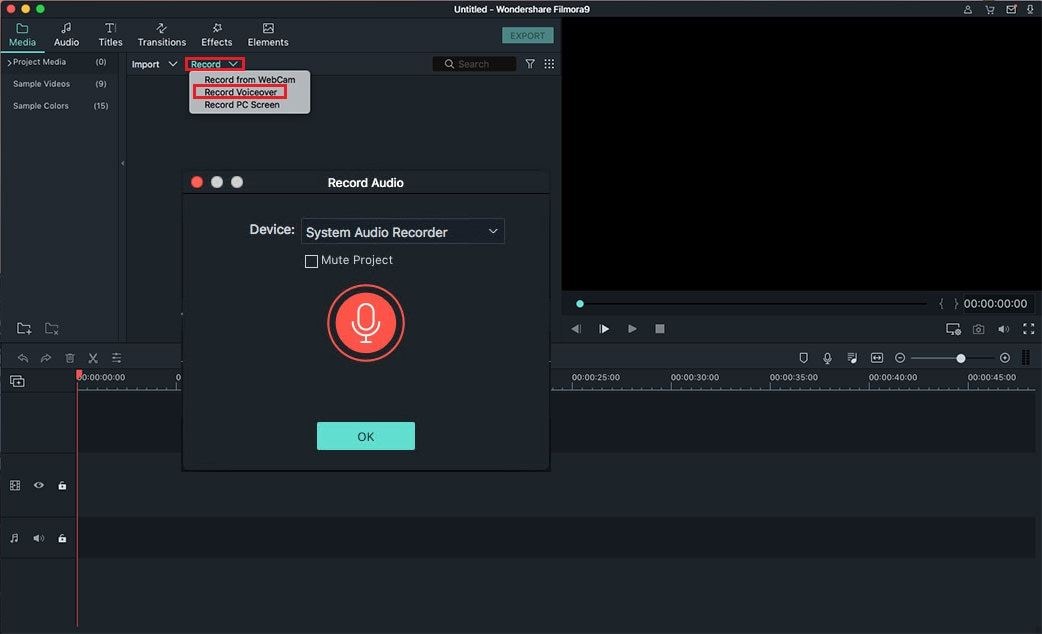
Record Voiceover: Just like videos, you can also record voiceover via Filmora for Mac. Click "Record voiceover" under the "Record" menu. And then in the prompt, click the red round icon to record voiceover. After the recording, the voiceover will be displayed both in the Media Library and in Timeline.
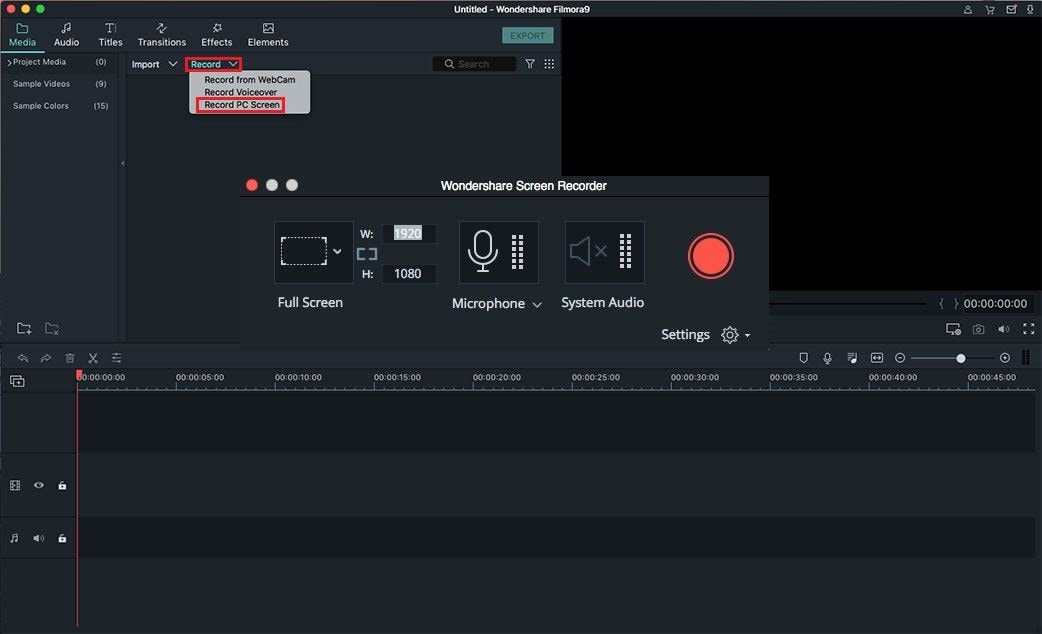
Record the Screen of the Mac: Filmora for Mac is able to record the screen of your Mac, which means it will help you record your love video games or any software running on the computer. Click the "Record" button > "Record PC Screen", click the red button to record your Mac screen. If you want to stop the recording, you can hit F9.
Settings for the recorded video are shaded in the same window. Click the Settings gear icon to reveal the settings options and set them up as you desired.
Note: All the recorded media files will be saved into Media Library automatically. You are available to drag and drop the recorded files to the Timeline for editing.
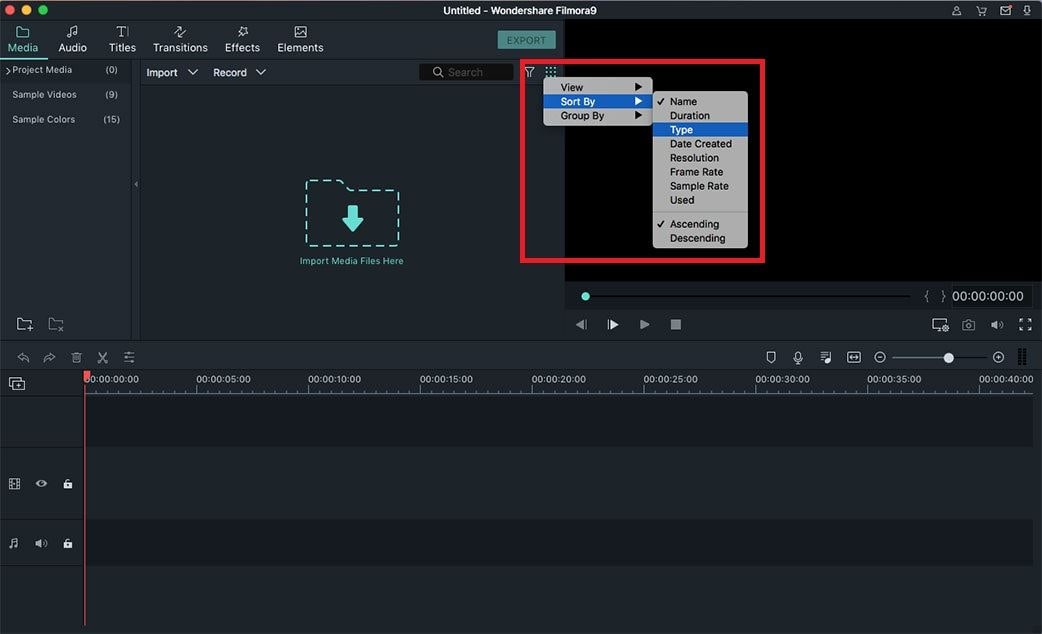
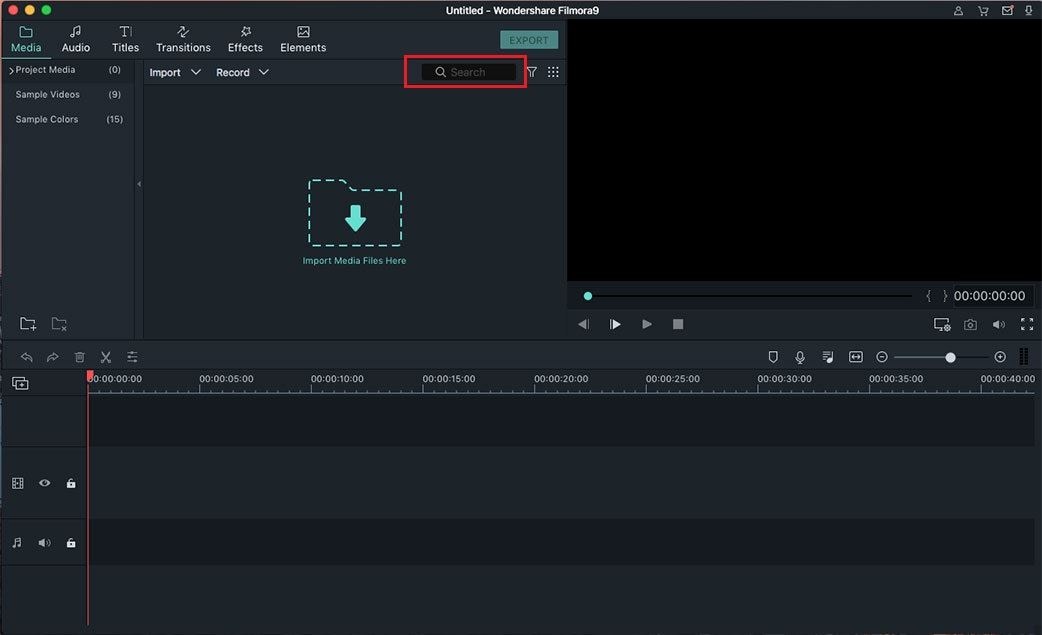
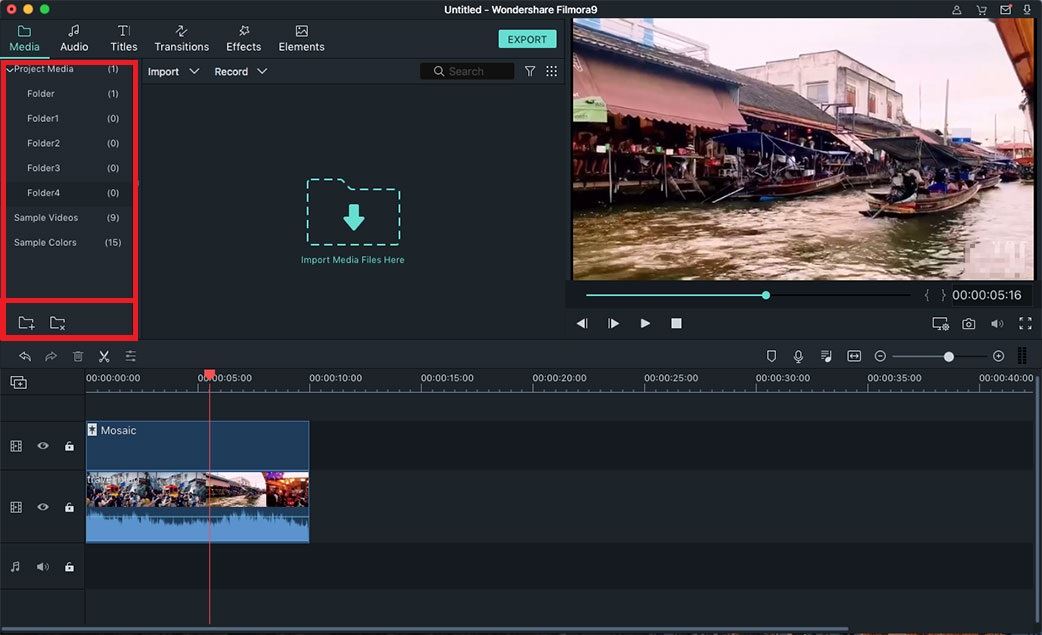
3Organize the Media Files
After all the media files been imported to the program, you can organize those files on the Media Library interface.
Filter by file type: By clicking on this icon, you can filter your files according to file type. You can also specific the classification according to your own needs.
Locate specific media: To find a specific media file rapidly, you can enter the name of the file into the search box.
Delete or add more: The folders listed on the left side can be deleted, you can click on the button with "x" icon in the bottom left corner to delete. To add more folders, please click on the "+" icon.
Popular Products