If you are using Mac previous version, you can create a slideshow in Mac with iPhoto, iDVD, and other photo related software. When you want to burn that slideshow to a CD or a DVD on Mac, it would be better you use the iPhoto to create a slide and burn the iPhoto slideshow to DVD with iDVD. But most of the users do not know how to transition from the iPhoto to iDVD. No worry! Here is an easy guide for you.
Part 1: Make a iPhoto Slideshow and Burn to DVD without iDVD
As we know, Mac users since Lion, especially those upgrade to macOS Sierra cannot use iDVD any more. So you need to look for iDVD alternative to burn iPhoto slideshow to DVD. iSkysoft DVD Creator for Mac is one of the best alternatives to iDVD of Mac (macOS Sierra). With this software anyone can burn videos, pictures, and slideshows onto a DVD. By doing so, you can play their videos, and slideshows on an Apple TV as well with other Apple computers. And you can import your photos to the program and create a photo slideshow. Other than this, this software also has editing, functions, along with slideshow, and DVD themes.
Why Choose This iDVD Alternative to Burn iPhoto to DVD:
- With this software, any video of any format can be burned to a DVD.
- Photo Slideshows with music can also be created, and burned onto the DVD.
- Menu Templates are also available, so that the experience is better.
- Videos, and Screenshots, can also be taken and burned onto a DVD.

Steps to burn iPhoto to DVD:
Burning iPhoto slideshows with the DVD creator is quite easy and simple, and can be done by following the understated steps:
Step 1 Launch iDVD alternative
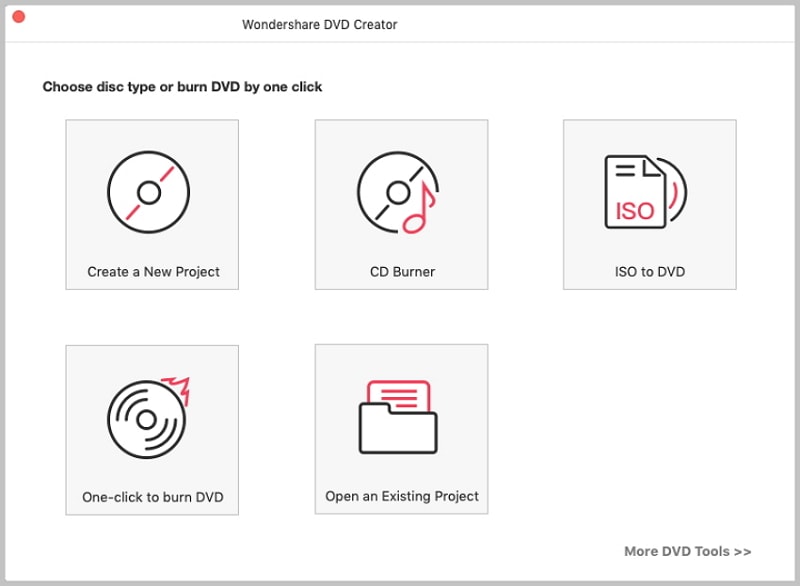
At first, download and install the iDVD alternative to your Mac. Then launch the program. In the main interface, click the "Create a New Project" button to open the file importing window.
Step 2 Create slideshow and import to the DVD creator
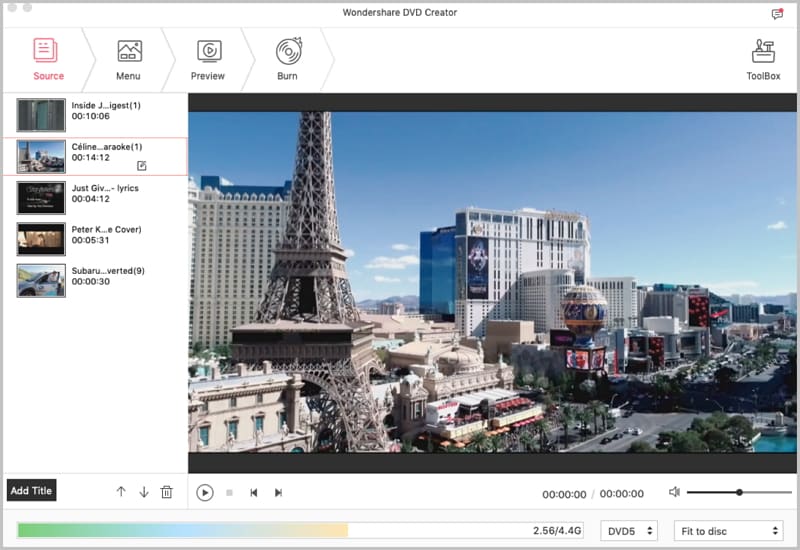
And then drag the photos or pictures you want to the program. The photos will be loaded to the program.
Or you can click the + icon to select the photos from your local folder and import them to the iDVD alternative.
Step 3 Burn slideshow to DVD
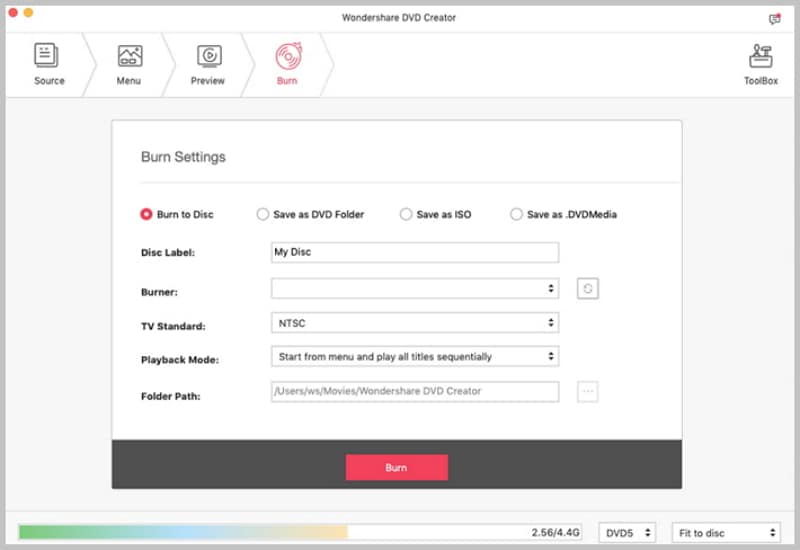
Then chose the option in the DVD menu as per your requirements. And click on the Burn button on the bottom right hand side corner of the screen. In the popup window that appears, give a name to the DVD, and then click on the Save button to start burning iPhoto to DVD.
Part 2: How to Export Slideshow from iPhoto to iDVD and Burn DVD
Creating a slideshow with iPhoto is one of the simplest tasks that one could ask for, but it would still be a tough job for new users. But with the following steps, one can create a slideshow with iPhoto.
Create a Slideshow in iPhoto:
Step 1
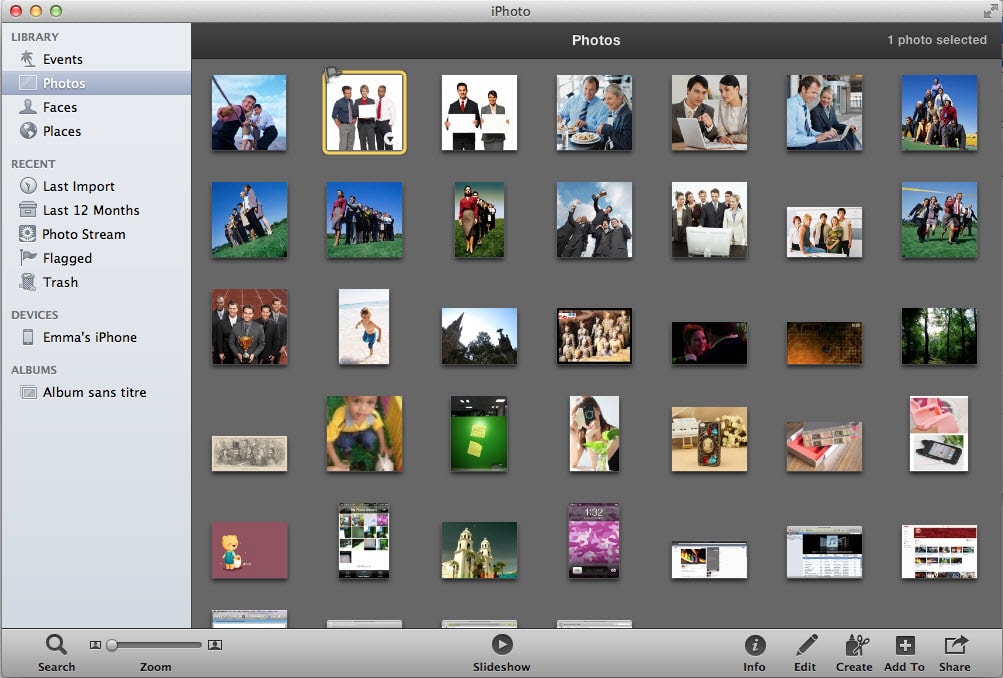
First open you photos folder, and chose the photos that you want to put in the slideshow. Just select them by rolling the mouse over the photos.
Step 2
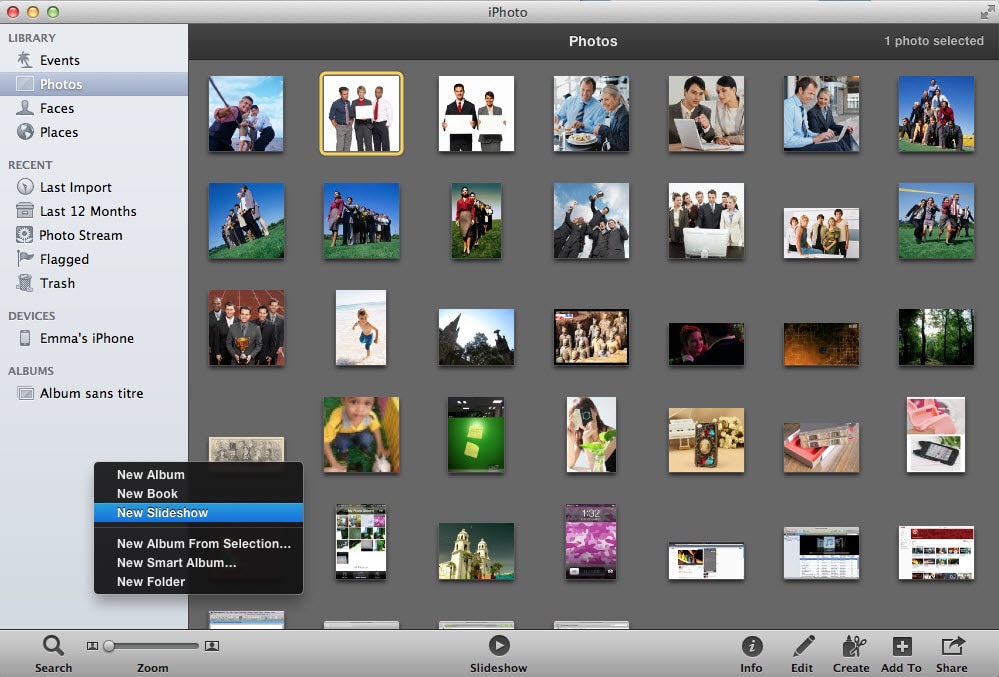
Then right click in an empty space on the screen, and then select the option of “new slideshow”.
Step 3
After this, the new slideshow would be created, and you can view the slideshow by clicking on the tab “Slideshows”, under which you can find all of your slide shows. Where you can make the changes.
Export the Slideshow from iPhoto to iDVD:
Exporting an iPhoto slideshow to iDVD is really simple, and can be done in a few simple steps. But to avoid any problems, the given steps can be followed.
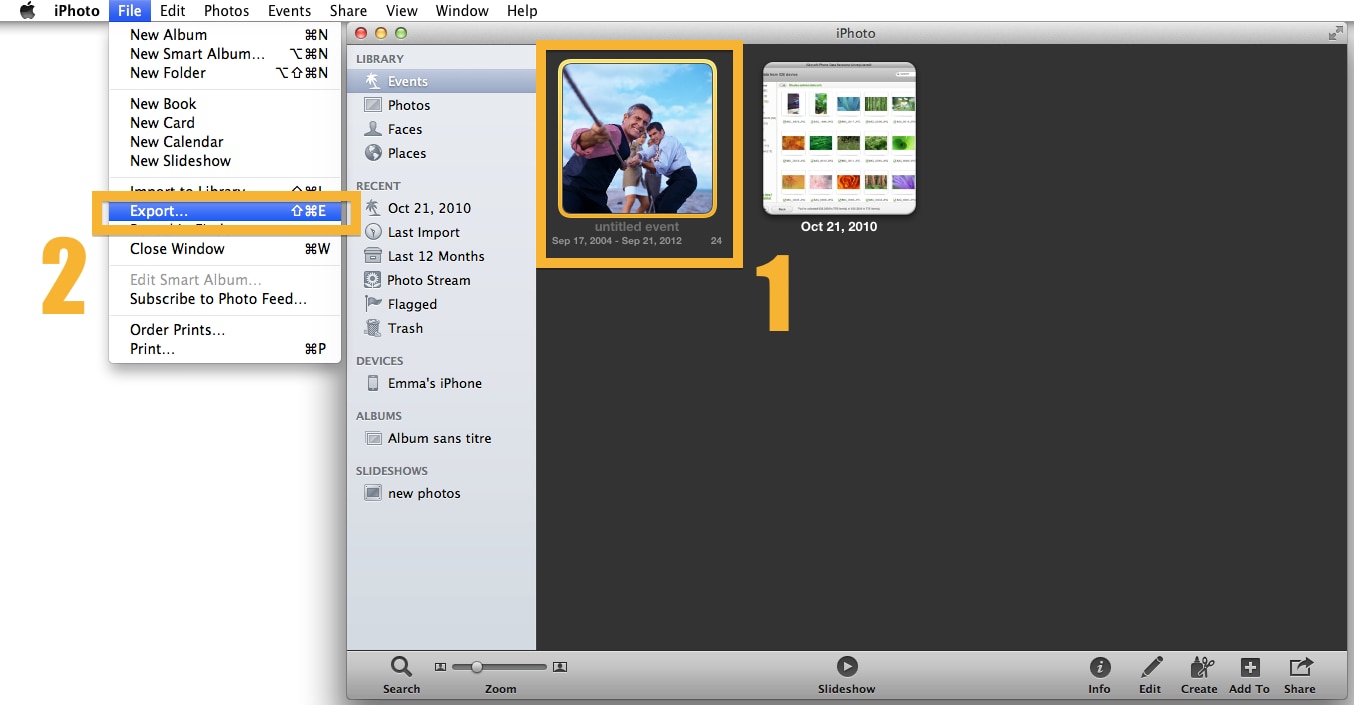
Step 1. After selecting the photos for the slideshow and creating the slideshow, go to the Files menu, and then click on the Export option.
Step 2. In the new pop up window hat appears, put in your preferences, and then choose slideshow, which is available at the top of the window, along with other tabs such as File export, and other photo related softwares.
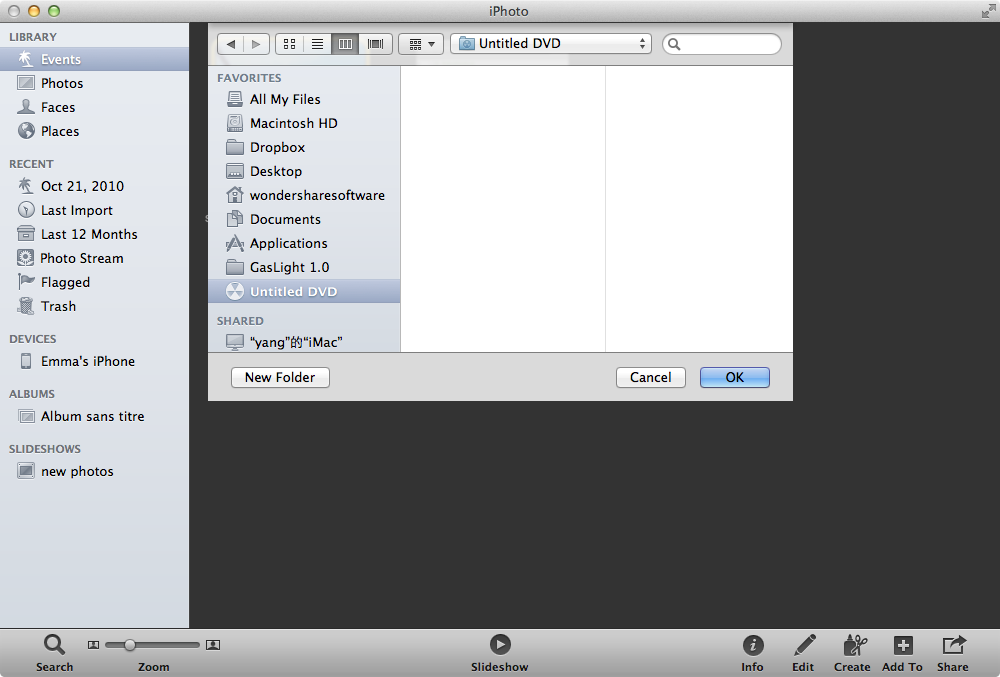
Step 3. Then click on the export button. After this, a pop up window will appear, asking you where to save your slideshow to. In the left hand side, go to the Places tab, and choose iDVD.
Burn iPhoto to iDVD:
After exporting the slideshow to iDVD, then you are ready to burn the slideshow onto a CD or a DVD. By following the given steps, you would be able to burn iPhoto to DVD in iDVD.
Step 1
Open the iDVD, and then select the slideshow.
Step 2
Then insert the blank disk, and select the “open finder” option, so that it appears on the desktop.
Step 3
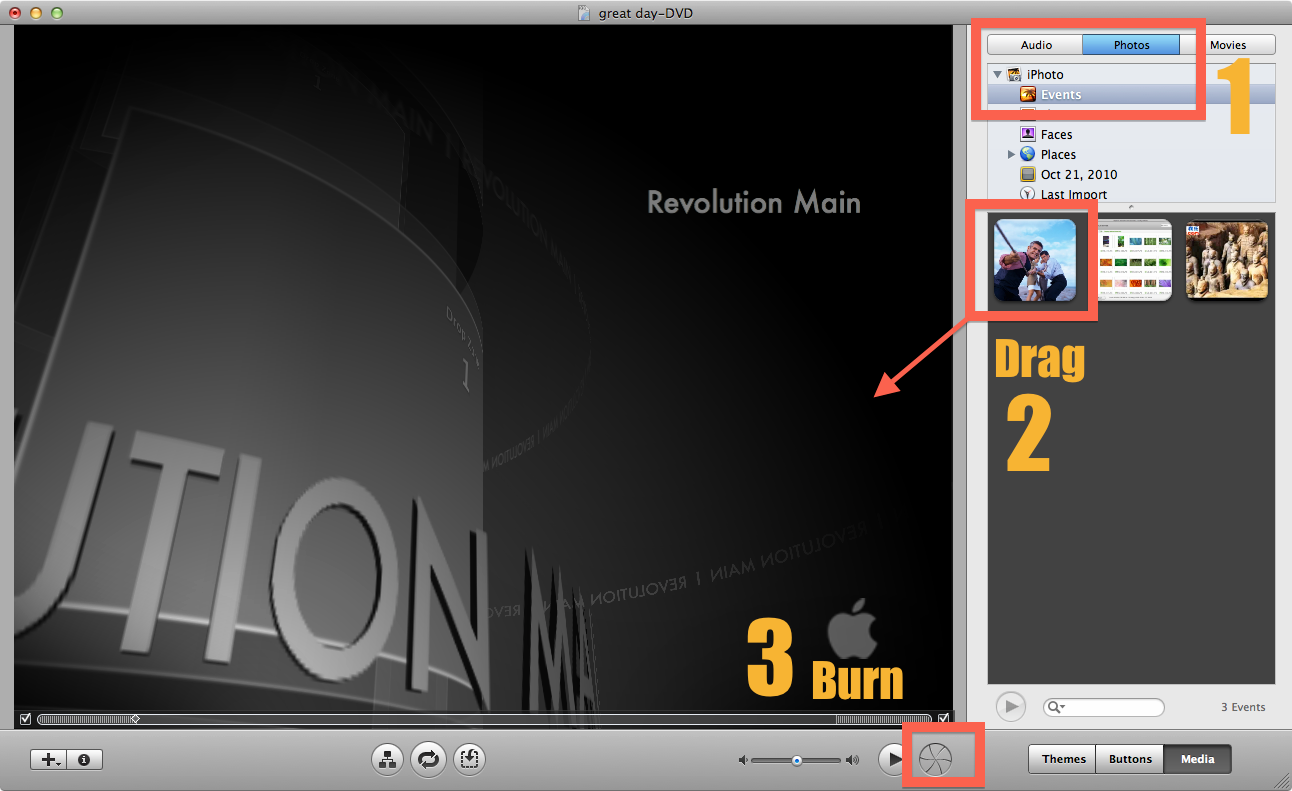
Then open the DVD, and drag the slideshow onto the window. Then click on the Burn button on the top right hand corner of the screen, and select the name, speed of writing the disk, and then click on burn.