Filmora User Guide
User Guide
- Add AR Stickers
- Auto Normalization
- Auto Reframe
- AI Portrait
Auto-Normalization
Auto-Normalization can automatically adjust the volume level of all the video and audio tracks to the loudness level at 23.0 LUFS. This is the European standard of volume loudness.
How to use Auto-Normalization
Drag your video to the timeline, and double-click the video. It will open a menu with a set of properties that can be adjusted. Go the Audio tab and you find Auto-Normalization.
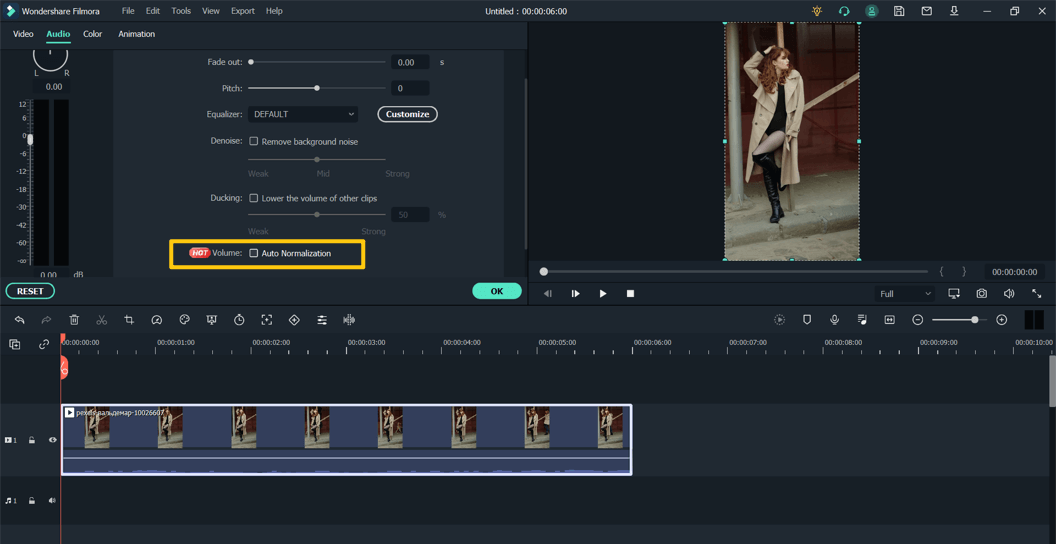
Check the box against the Auto-Normalization option and click OK. Filmora will analyze and uniform the volume of the entire clip to the standard volume.
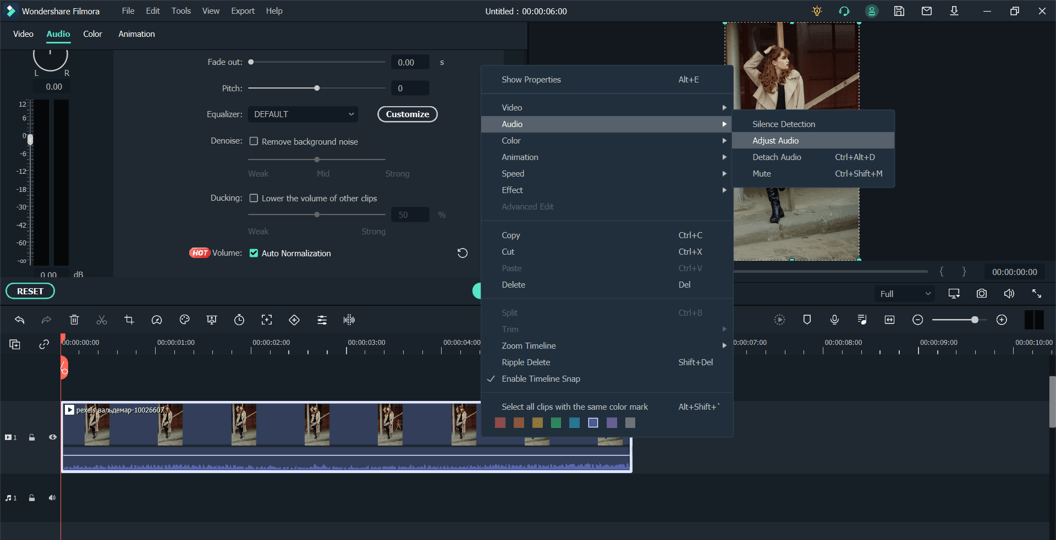
You can also access the Audio settings by right-clicking the track in the timeline, going to the Audio submenu and clicking Adjust. It will again open the same control panel for audio settings in which the option of Auto-Normalization is included.
If you don’t want to use Auto-Normalization anymore, just uncheck the box next to it and click OK. Filmora will remove the previously added volume normalization.
Clicking the Reset button in the Audio settings panel will reset all the audio settings.
Popular Products