Filmora Video Editor
User Guide
How to Use Keyframing?
Create custom animations by adding keyframes to change the clip's position, rotation, scaling, and opacity.
You create keyframes to specify which animatable quality values should be on a particular frame of the video. For example, if you set a scale (size) value on the 0:30 timestamp and a more considerable scale value on the 1:00 timestamp, the media you want to keyframe will be in these two keyframes between growth.
You can set the scale (size), position, rotation, and opacity of the keyframe.
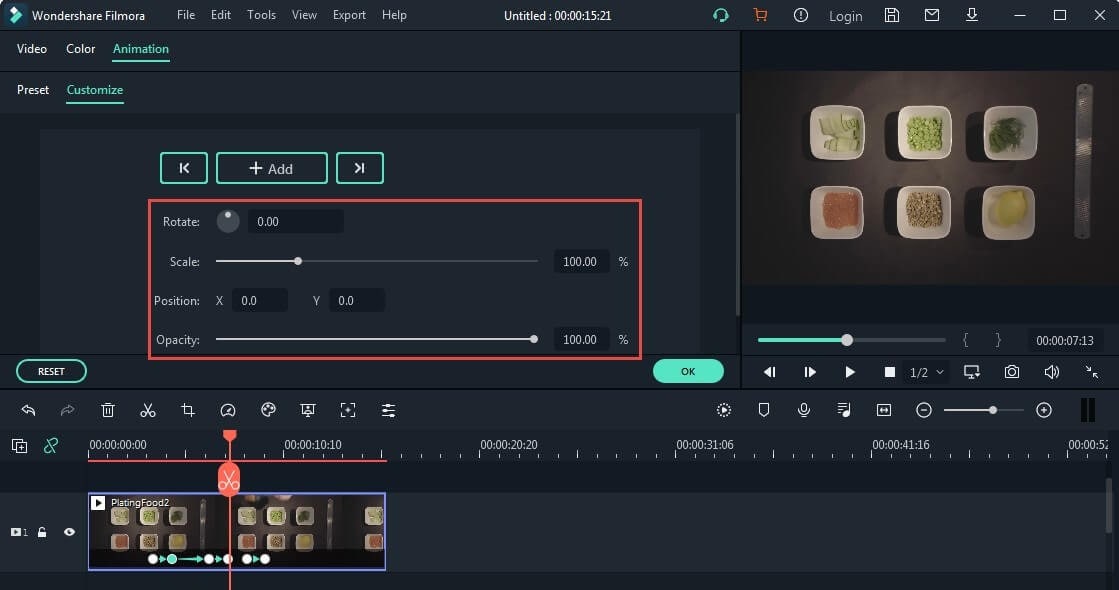
1. Add and Edit Keyframes
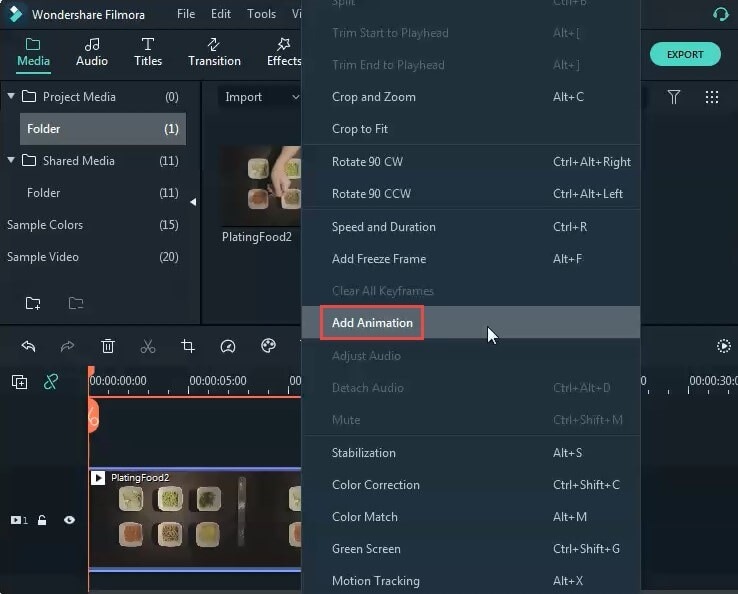
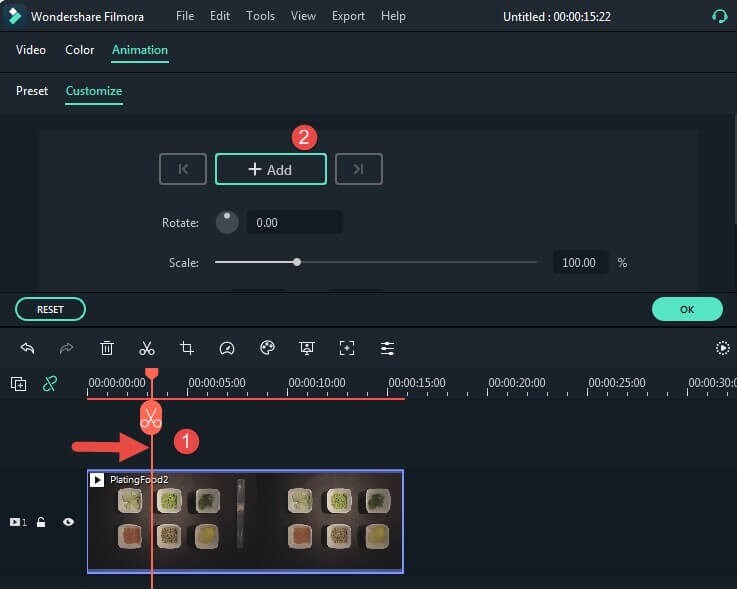
Add video clips, images, or motion elements to the timeline. Then right-click on it and choose to add animation as shown in the image below.
In the menu that opens, click to enter the Animation tab, and then select Customize.
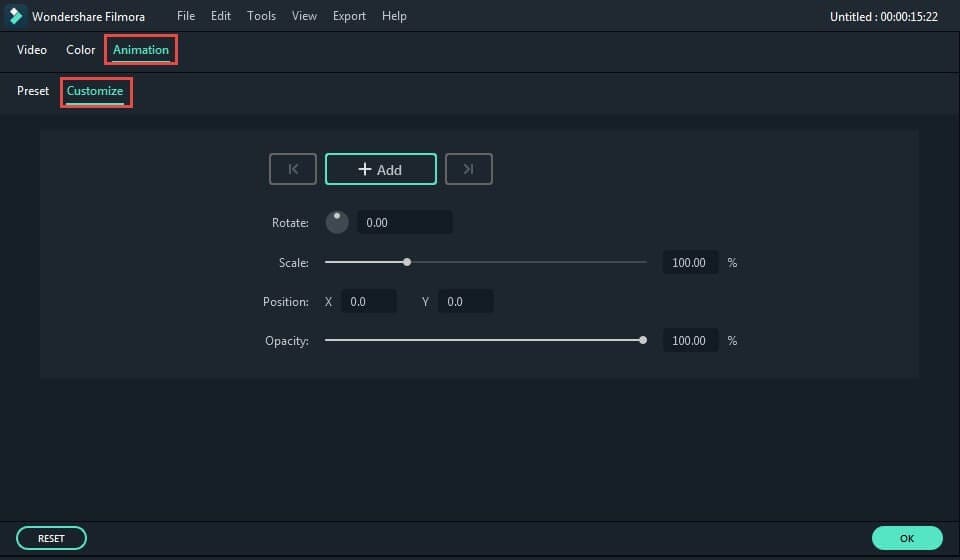
Move the indicator to the timestamp where you want to create the keyframe, and click Add.
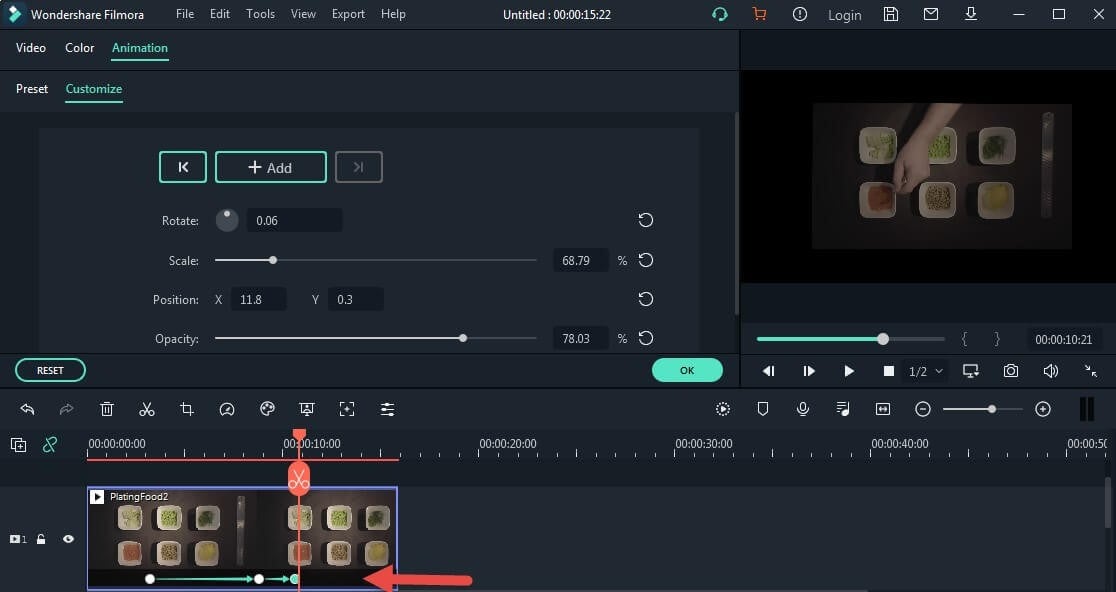
Then, you will see the keyframes added to the video clip, as shown in the figure. You can set the value in the keyframe menu, and you can also drag the media in the preview to adjust its size, position, and rotation of the keyframe.
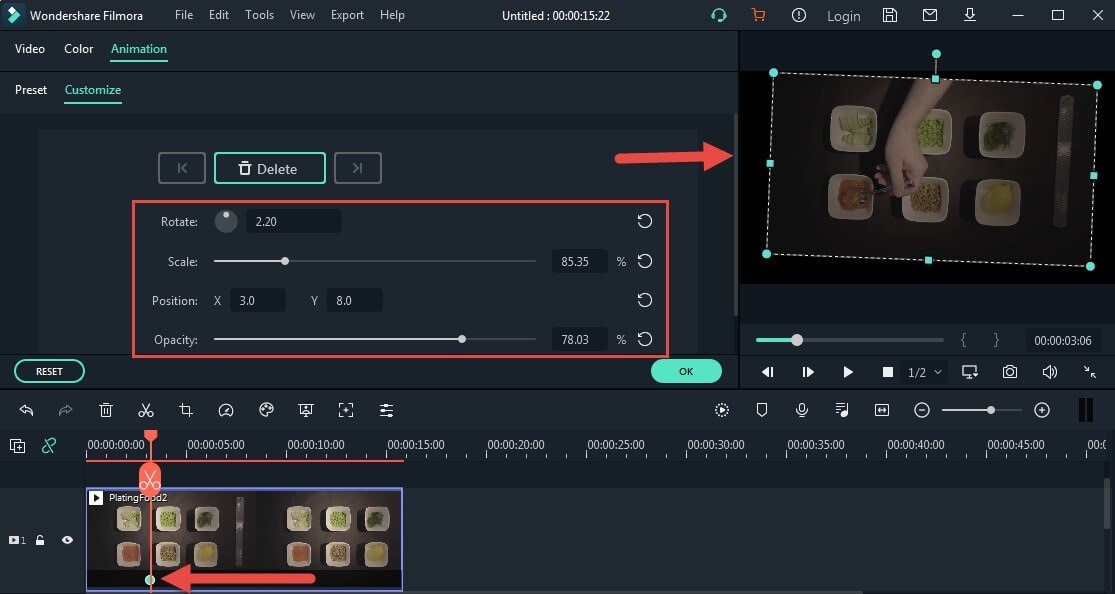
Move the indicator to the second or third timestamp again, and click "Add" to add more keyframes and adjust the rotation, zoom, position, and opacity values as you need.
Note:
You need at least two keyframes to create an animation. The reason is that the first keyframe you make will be used for the current state of the media you are animating, and then the second keyframe will be set later in the changed clip.
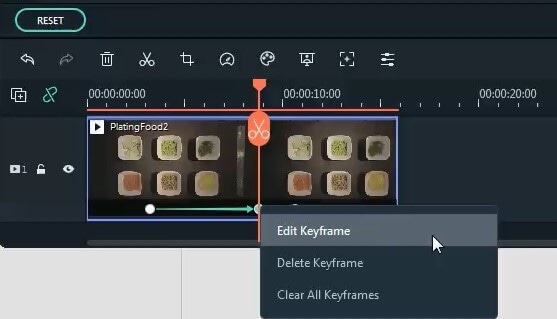
Play the video on the timeline and check the animation you created. You can also right-click the video clip's keyframe to edit, delete or clear the keyframe you made.
2. Preset Animations
In addition to creating custom animations, you can also save time by setting preset animations.
Double-click the clip, element, or image in the timeline to open the edit menu. Then click into the Animation tab and select Presets.
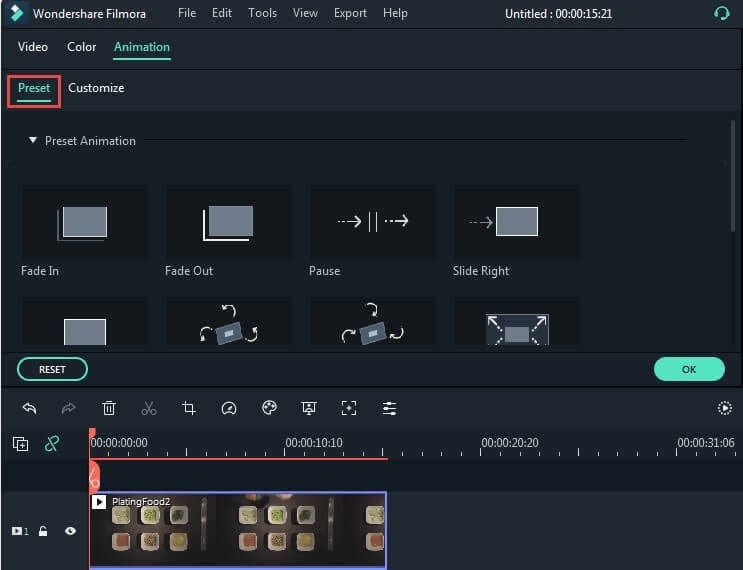
Find the desired preset and drag it to the timeline, double-click, or right-click to apply it.
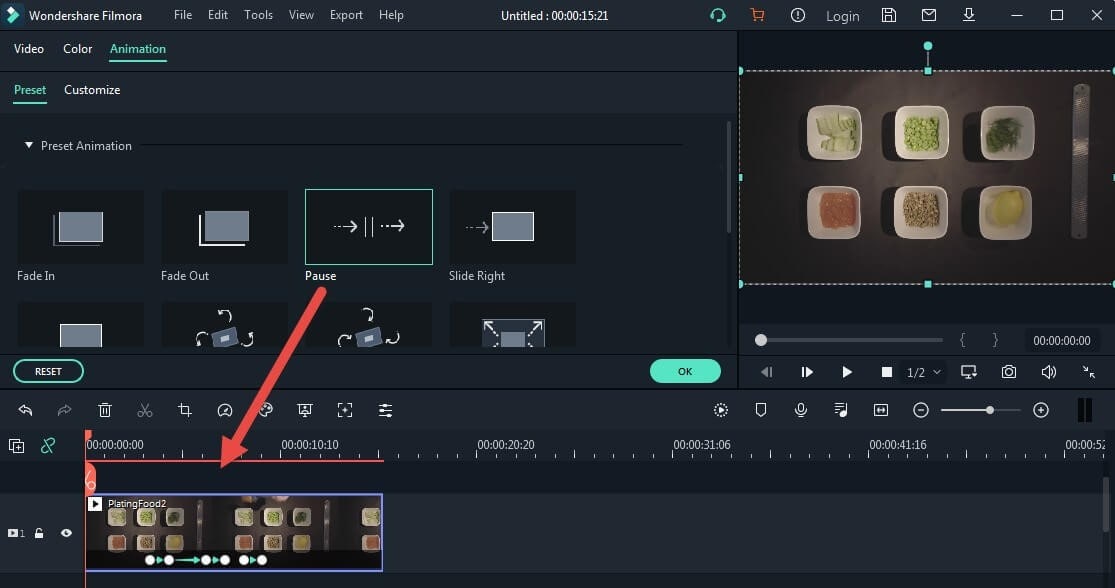
Suppose you want to edit or delete your preset animation. In that case, you can do it by clicking the Keyframe on the video clip and customize the desired rotation, zoom, position, and opacity value.
Popular Products