


Contents
- 1.1 Delete Photos on iPhone
- 1.2 Delete Pictures from iPhone
- 1.3 Delete Camera Roll iPhone
- 2. Delete AV Files on iPhone
- 3.1 Delete Apps on iPhone
- 3.2 Delete Icons on iPhone
- 3.3 Delete Updates on iPhone
- 3.4 Delete App Store
- 4.1 Delete Contacts on iPhone
- 4.2 Delete Messages on iPhone
- 4.3 Delete All Email on iPhone
- 4.4 Delete Calendar Events on iPhone
- 5.1 Delete Downloads on iPhone
- 5.2 Delete Other on iPhone
- 5.3 Delete Everything on iPhone
- 5.4 Delete Info from iPhone
- 5.5 iPhone Delete Button Not Working
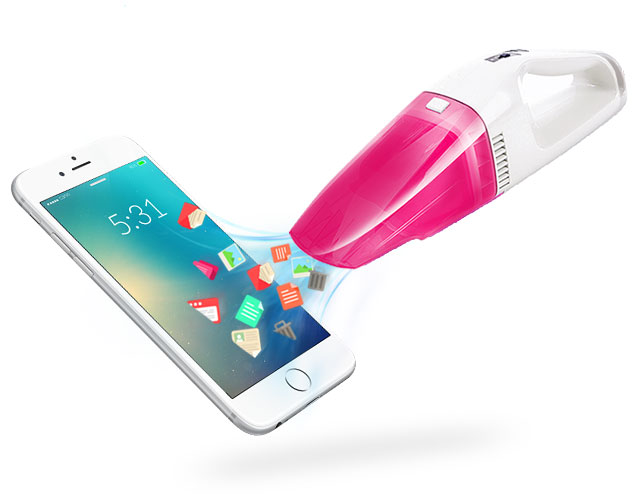
How do I delete photos from my iPhone? Any time you think about deleting photos from iPhone, you need to consider completely deletion. Even if you delete your personal files including photos from your iPhone, there is always a pro out there that can recover all your deleted data and read some of your embarrassing messages. This is one of the reasons why data shedding tools have continued to earn popularity. Most people in the modern world keep vital information in their Smartphones. Android users have very many data shedding tools including SHREDroid among others but there was none for iOS. Fortunately, in this guide, we will share tips on how to delete photos from iPhone permanently, so that you can protect your private information or save more space on your iPhone.
Part 1: The Easiest Way for Deleting Photos from iPhone
We highly recommend dr.fone (Mac) - Data Eraser (IS) (or dr.fone - Data Eraser (IS)) to delete all photos iPhone iOS 9, iOS 8 and iOS7 permanently. It is a powerful iPhone data eraser that allows you to erase any data on your iPhone in 5 mode.
You can erase everything including deleted data completely. And it has the ability to help you to clean junk files on your iPhone to free up your device space. If you want to delete imported photos from iPhone, then dr.fone - Data Eraser (IS) will make the process as easy as a breeze. Just take trial.
Step-By-Step Guide to Delete Photos on iPhone Easily
Step 1 Launch the dr.fone - Data Eraser (IS)
Once you have downloaded the data eraser, install it on your Mac or Windows PC and then launch it so that you can get started. And plug the your iPhone into your Mac. The application will automatically detect the gadget and then display all the relevant information such as memory usage stats and OS version among others.
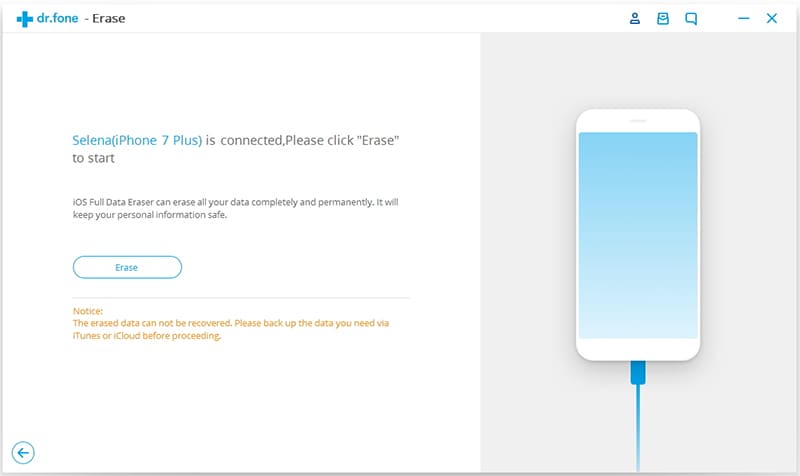
Step 2 Choose "Erase Private Data" Mode
In the main interface of the program, select "Erase Private Data" mode. And click "Erase Now" to go to the erasing process.
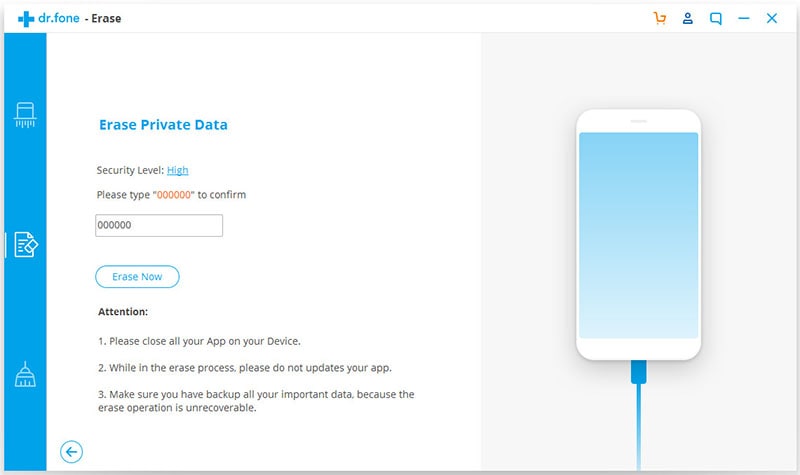
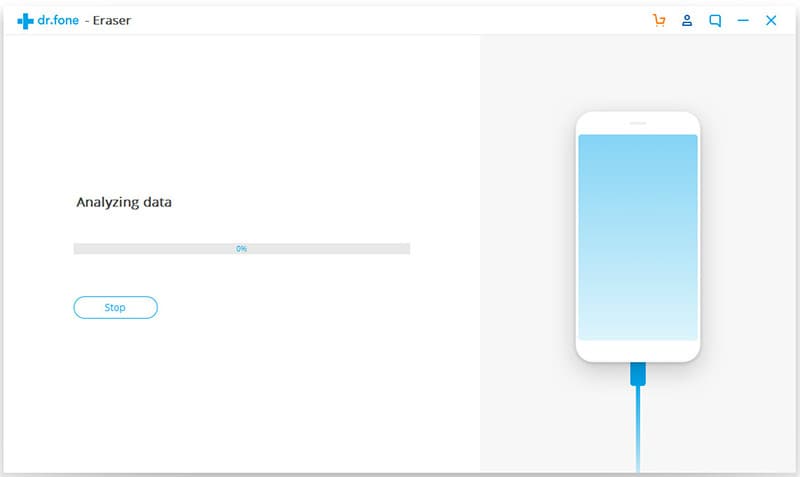
Step 3 Scan Your iPhone and Select Photos
Once you click "Erase Now", the program will start scanning your iPhone. After that, you will see all your private data list. If you want to delete all photos on your iPhone, check "Photos".
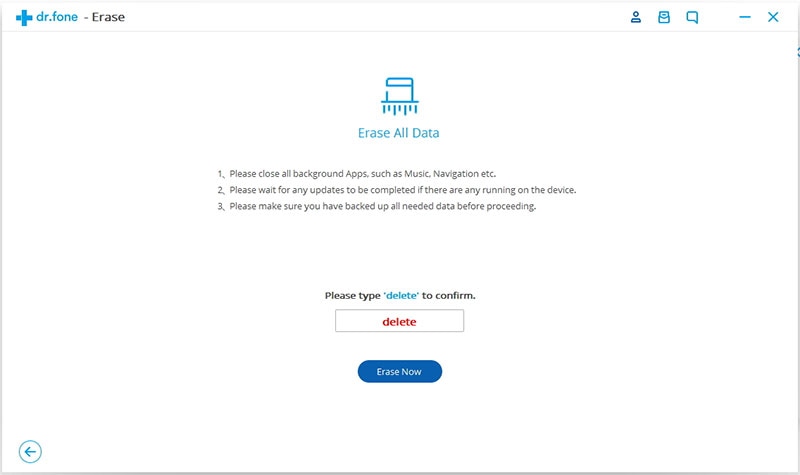
Step 4 Start to Delete All iPhone Photos
And then click "Erase Now". You will get a popo-up window for confirming the deletion. Type "delete" as prompt and start removing photos from iPhone. Keep your phone connected during the process to ensure the deletion is successfully completed. If the deletion is successful, the screen will inform you that the erasing process is complete.
Why Choose dr.fone - Data Eraser (IS)
dr.fone - Data Eraser (IS) allows you to delete iPhone in different mode.
- Erase all data: Unlike factory resetting, erase all data option completely erases all data you had stored on your IPhone using the Mil- Spec DOD 5220-22M standard.
- Erase deleted data: Erase deleted data option allows you to detect any data remains from your device from the already deleted date so that you can delete it
- Erase Private Data: The erase private data option allows you to manage your data easily. With this option, you can select the files you want to erase from those you want to retain. This will help to remove data necessarily leaving behind trails of removal.
- Express Cleanup: dr.fone - Data Eraser (IS) also acts a device optimizer since it comes with features that allow users to save space as well as speed up performance. Express Cleanup that accompanies the application allows you to erase cache data that tends to slow down the performance of your IPhone.
- Photo compressor: Photo Compressor allows you to create more storage space within your device. This feature will help you to backup photos in your iPhone as well as compress photos remaining on your device.
Part 2: How to Select All Photos on iPhone
Selecting multiple photos from your iPhone can be one of the most daunting experiences. It does not make sense to waste your day tapping different photos to delete them when there is a simple way to go about it. Here are some simple steps you need to follow when you want to select all photos from your iPhone.

- Open your Photos application on the home screen
- Tap the album containing the pictures you want to delete
- Once you have accessed the album, tap the section indicated select at the top right hand side of your screen
- Tap on any of the pictures and then swipe any of your fingers to the right
- Once you have reached the end of the row, swipe the same finger downwards. This will allow you to select all photos found in the second row
- Continue that way until you select everything
Part 3: Can't Delete Photos from iPhone? Fixed!
The photos app that accompanies an iPhone is not only helpful when it comes to editing photos but can also assist you organize them into different albums according to your preference. However, your IPhone can experience confusion thus making it hard to delete the photos. While a great percentage of IPhone users sync data using the cloud, we cannot ignore the fact that some of us still prefer using iTunes, which can be one of the reasons why your device is having issues.
iCloud Photo management
After iCloud photo gallery in iOS was launched, there was a change in file permission to manage files as well as movies on your iPhone. After these changes, you can no longer delete pictures and other data from your device. To solve this problem simply disable your iCloud picture management on your gadget so that you manually manage your files or use a third party application.
Albums automatically generated in IOS
Some new versions of iOS tend to automatically sort different photos in your IPhone. Currently, you cannot delete such albums however hard you tried.
Photos album created in your iOS
Deleting an album does not delete all the photos from your IPhone. Instead, it will only delete the album you are targeting.
In conclusion, if you have been looking for the best eraser, then your search should end with dr.fone - Data Eraser (IS). One of the common problems among iOS device users involves how to get rid of deleted files permanently. Removing data is necessary when you want to speed up your iPhone, create more space and deleting all your files before you put your the device on sell. However, removing all your files will only eliminate the data but the entire information will remain on your device’s memory. To avoid this, simply download and install dr.fone (Mac) - Data Eraser (IS) (or dr.fone - Data Eraser (IS)) and you will be good to go.


