


The ken burns effect, previously known as animantics, is named after the award-winning documentarian Ken Burns. The ken burns effect is an animated transition to a still image to create motion pictures. It allows virtual camera scans and zooms to engage viewer attention. This effect is widely used to focus the objects for YouTube video.
- Part 1. Best Video Editing Software to add a ken burns effect - Filmora Video Editor
- Part 2. How to Make a ken burns effect with popular video editors
- Part 3. Conclusion
Part 1. Best Video Editing Software to add a ken burns effect - Filmora Video Editor
Filmora is the best video editing software that balances powerful features to create stunning videos with impressive effects. It does not show the entire frame on the screen. Instead, it only shows a section of the video by zooming in and gradually pans to the remaining section. In this way, you can add movement to still pictures, keeping the audience engaged.
Key Features
- Best video editing software for beginner and semi-professional, that comes with powerful editing skills like trimming, splitting, rotating, editing, etc.
- Advanced video effects like kens burn effect, glitch effect, green screen, audio mixercan also be found and applied to your video within few clicks.
- 500+ free special video effects to customize and create an awesome movie by yourself.
- 1000+ standalone effects downloading resources to make videos in all kinds of styles.
- Record voice in real-time: you can have you voices recorded in realtime and instantly add them to the video files.
Step-by-Step Guide on How to add Ken Burns effects using Filmora
Follow this step by step guide to add the Ken Burns effect using Filmora:
Step 1: Download Filmora Video Editor
The first step is to download Filmora on your device and it supports both Windows and Mac platforms. Once you have completed the download, install the software. Just click the button here to have a try!
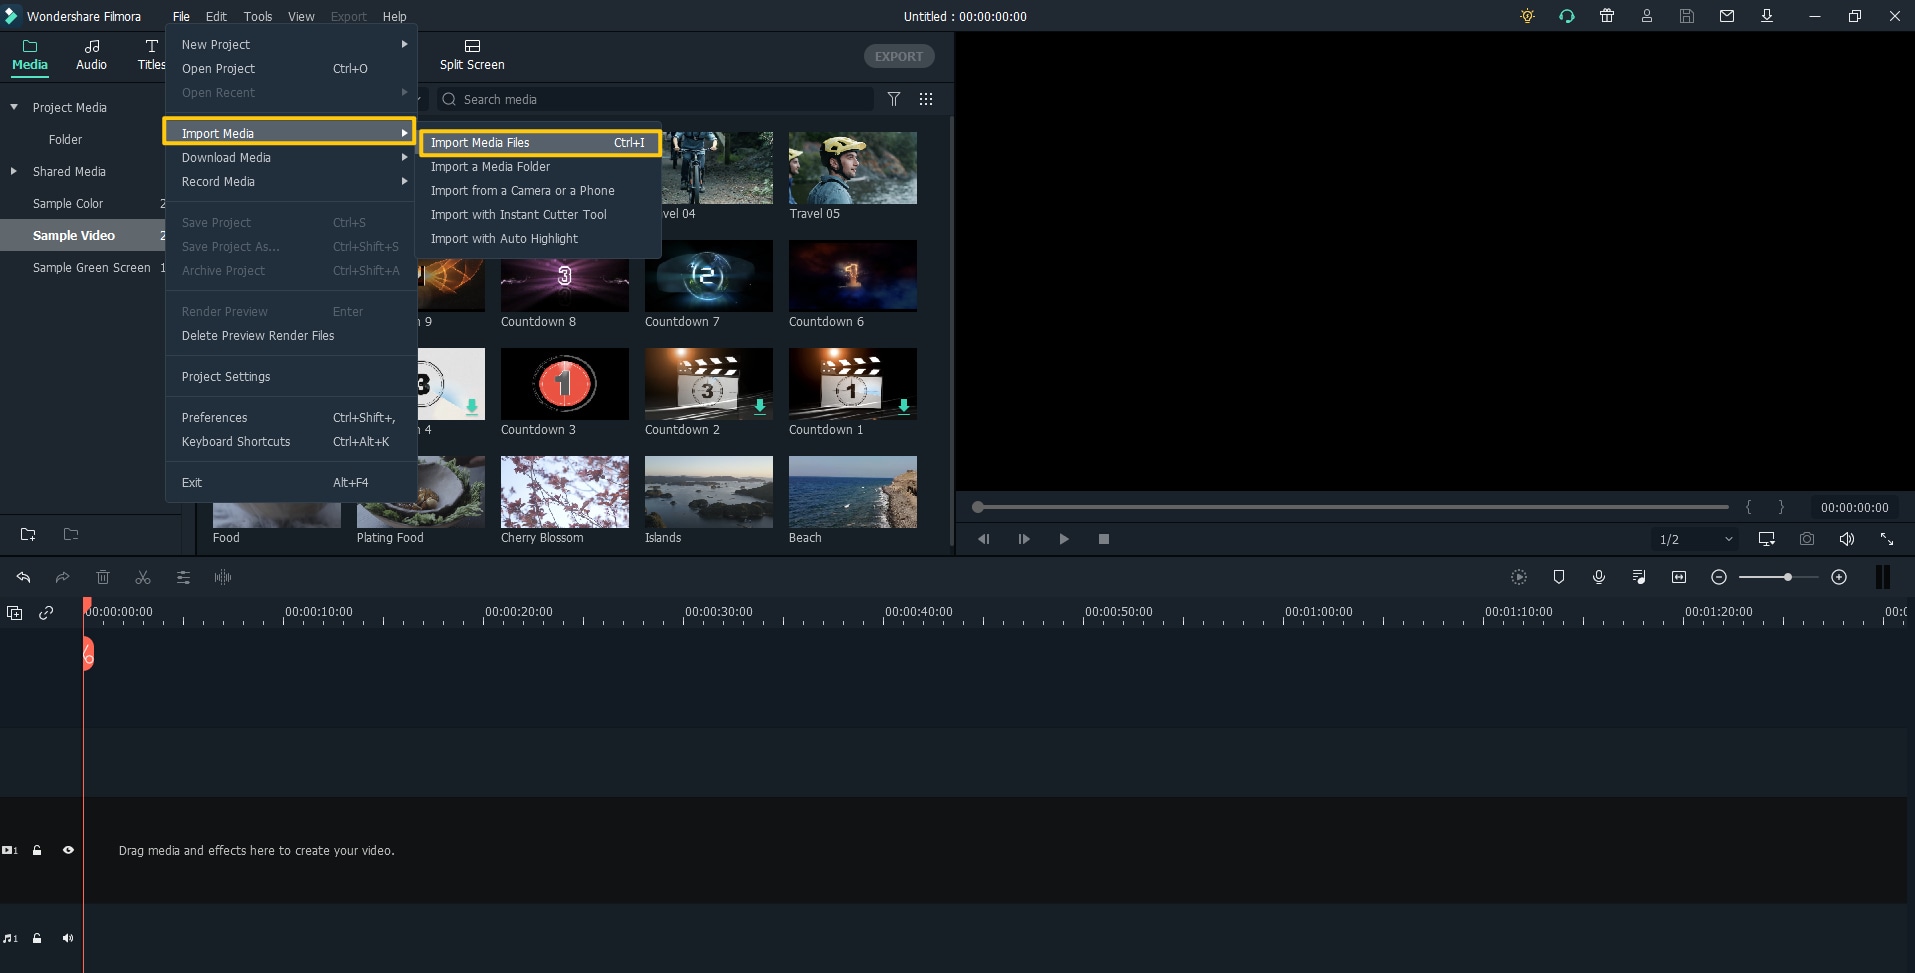
Step 2: Import the Video into the Filmora Video Editor
Now you have installed Filmora, the next step is to import the videos that you want to have the Ken Burns Effect. Just open the program and import the videos.
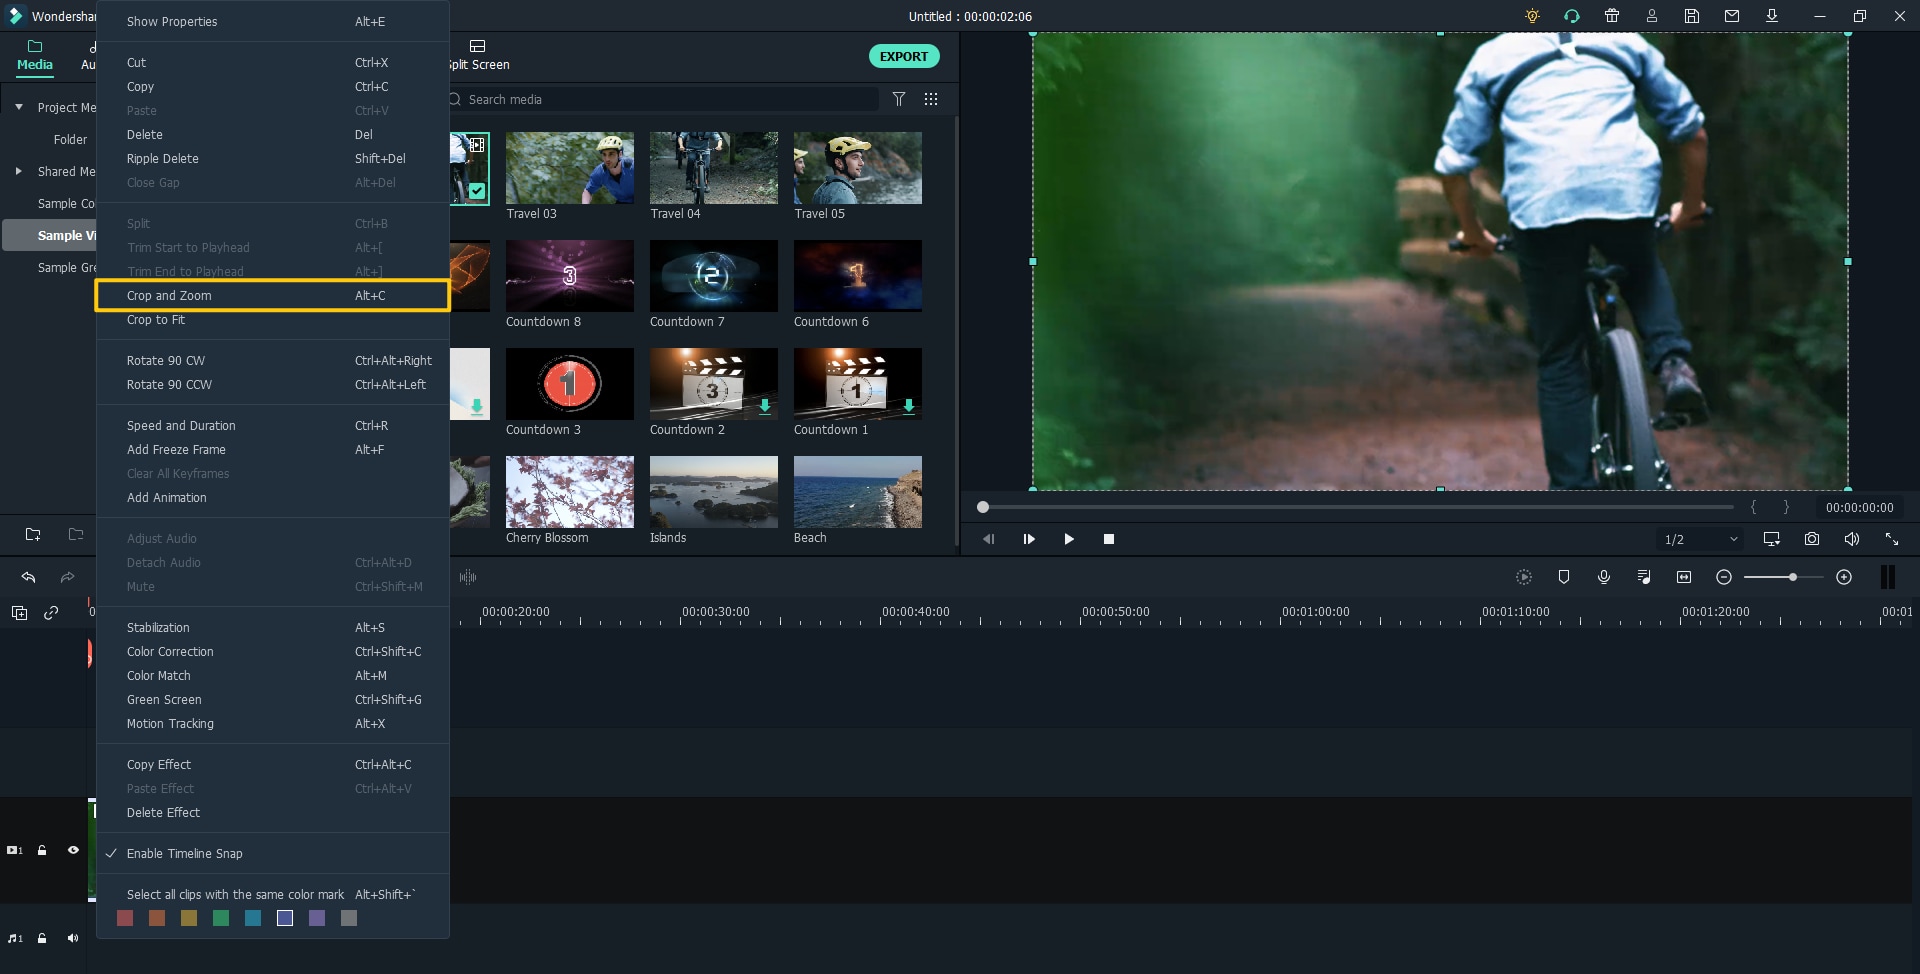
Step 3: Use Crop and Zoom Feature to Easily Add Ken Burns Effect
Click the Crop icon displayed on the timeline to use the Crop and Zoom feature. Or you can also right-click on your clip and choose the Crop and Zoom option on the pop-up menu.
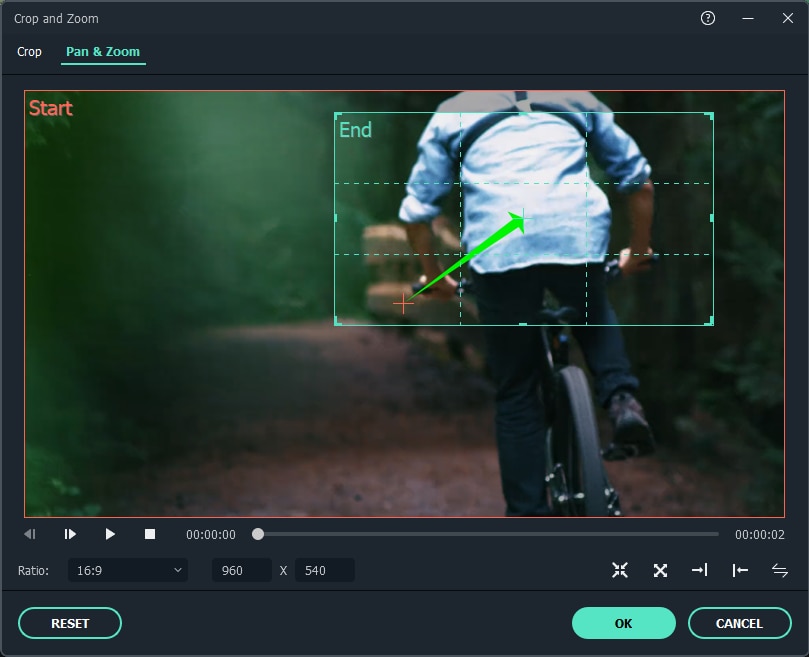
Then, the Crop and Zoom window will pop up. Choose the Pan and Zoom option and you will see two frames on the viewer separately marked as Start in green color and End in red.
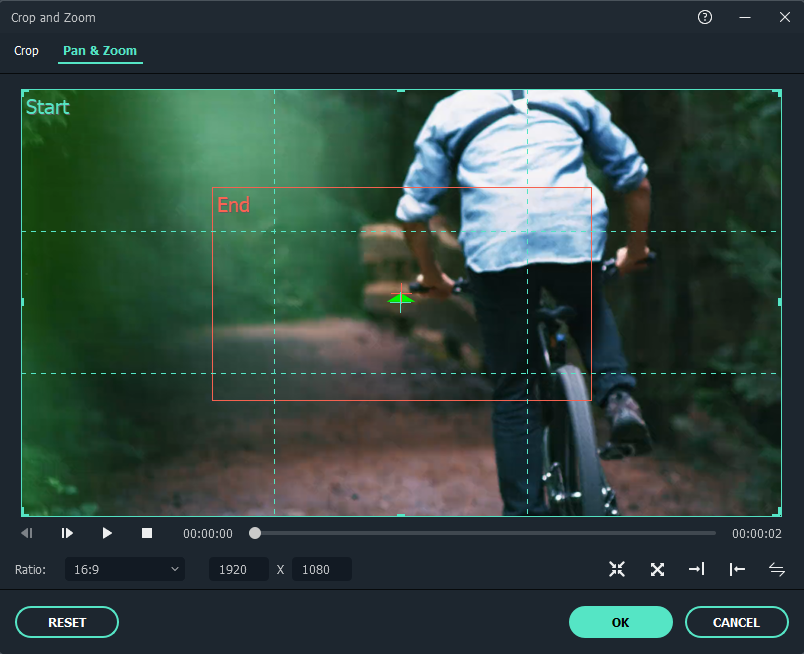
Now select the Start frame, resize it and drag it to any direction you want, as to make the beginning of the frame as your need. Then, resize and drag the End frame in the same way.
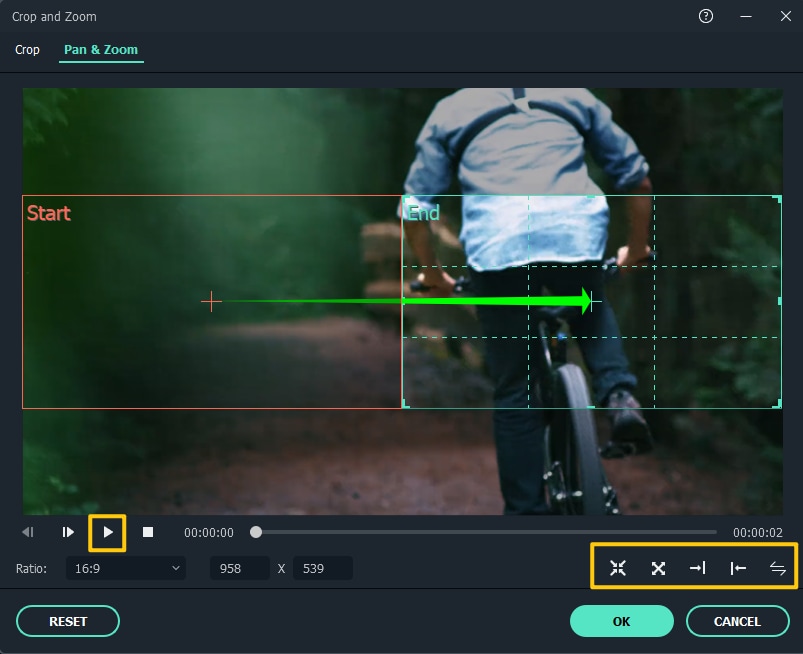
Step 4: Preview the Ken Burns Effect and Adjust it
After you're done, click the "Play" icon to check the effect. Also, you can reset the effect or click "OK" to save the change. What's more, there are also multiple options for adding effects more conveniently as you like: from far to near, from left to right, swap the start and end points. Find these options at the right corner and discover more!
Apart from the Ken Burns effect, Filmora provides some other effects to make eye-catching content for your audience, including: glitch effect, picture-in-picture (PIP), green screen, motion tracking, key framing, color match.
Part 2. How to create a ken burns effect with 5 other popular video editors
Let's deeper dive to find other ways to add ken burns effect to videos with other popular video editors.
#1. Final Cut Pro
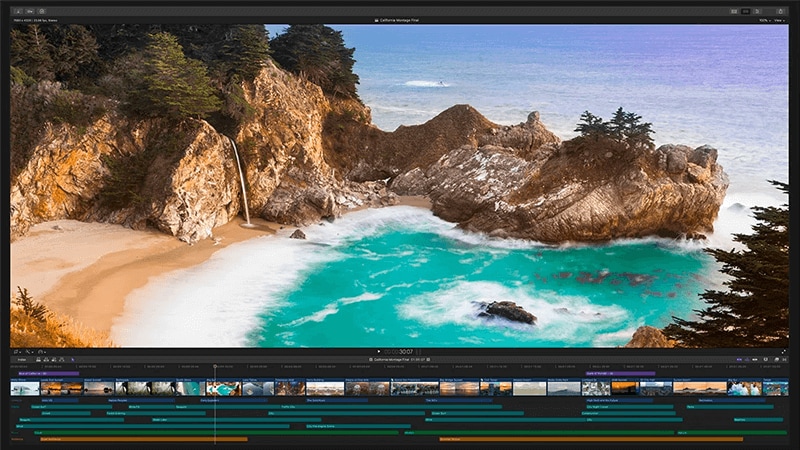
Final Cut Pro is professional-level video editing software by Apple. Originally designed by Macromedia in the mid-90s, the software has gained immense popularity. It provides users the power to create eye-catching visual effects and easily export videos to multiple formats. Final Cut Pro allows you to add the ken burns effect to the whole clip using the incredible Blade tool.
Step-by-step guide of adding the ken burns effect with Final Cut Pro
Step 1: Edit Image Duration
By default, a still image appears as a 4-second clip when added to the timeline. You can edit the image duration for longer or shorter clips. Choose Final Cut Pro - Preferences from the menu bar. Under the Editing panel, there is an option of Still Image Duration. To change the duration, use arrowhead buttons or type it as per your requirements.
Step 2: Add Multiple Movements
Add the first camera motion to the photo. Make a copy of the clip by copy-pasting. Use the Swap button from ken burns settings so the Start and End positions are reversed.
Step 3: Copy and Paste the Effect
Copy the clip with desired ken burn effect. Select the image you what to apply effect, and from the Menu bar, choose Edit - Paste Attributes. Check the Video Attributes column, select Scale from the list. Click Paste.
#2. Adobe Premiere Pro
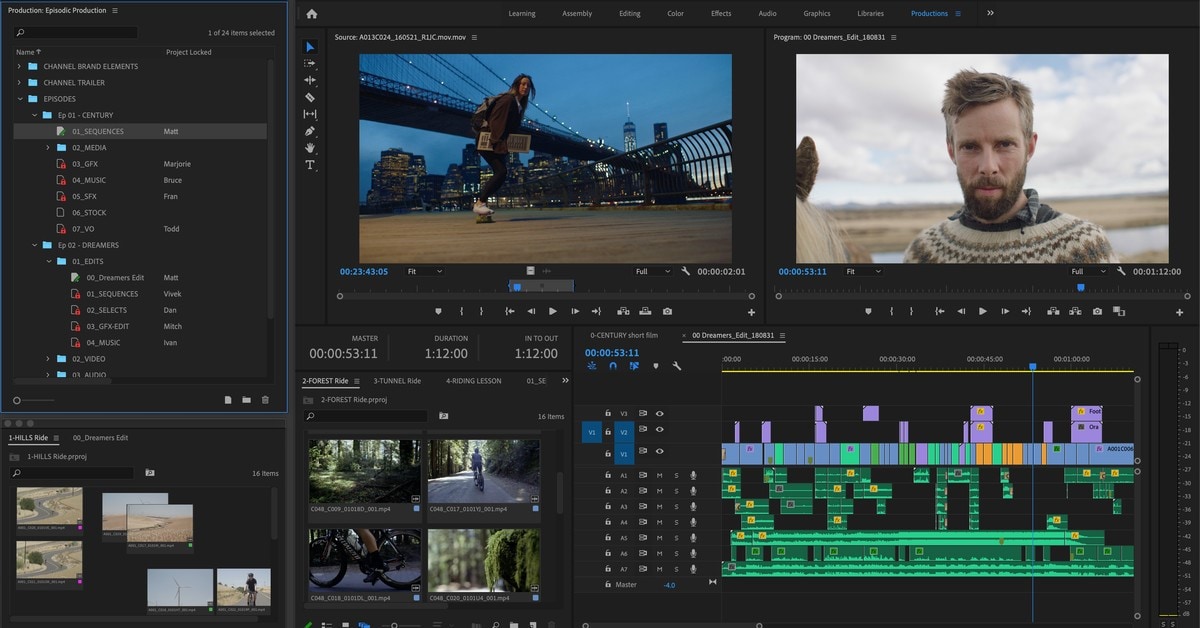
Adobe Premiere Pro is timeline-based editing software that offers powerful non-linear editing tools. This software is a part of the Adobe creative suite. Professionals and amateurs use this video editing program to edit videos including films.
Step-by-step guide of adding the ken burns effect with Adobe Premiere Pro
Step 1: Import images
From the menu bar, access the Assembly workspace (Window - Workspaces - Assembly).Import all the images from File - Import menu include desired images. Select File - New - Sequence and choose a Digital SLR preset from the New Sequence dialog box.
Step 2: Change Image Duration
By default, Premiere Pro allows still images to appear as five-second clips. If you want a longer or shorter clip, you can change the image duration for your slideshow. Select all images in the Project panel, right-click, and choose Speed/Duration. Set the image duration in the Clip Speed/Duration dialog box.
Step 3: Adjust the clips order
Click the Icon View button at the bottom of the Project panel to preview image thumbnails. Select the clips in the order you want them to appear and then click the Automate to Sequence button at the bottom of the panel. Accept the default settings and tap OK.
#3. Magix
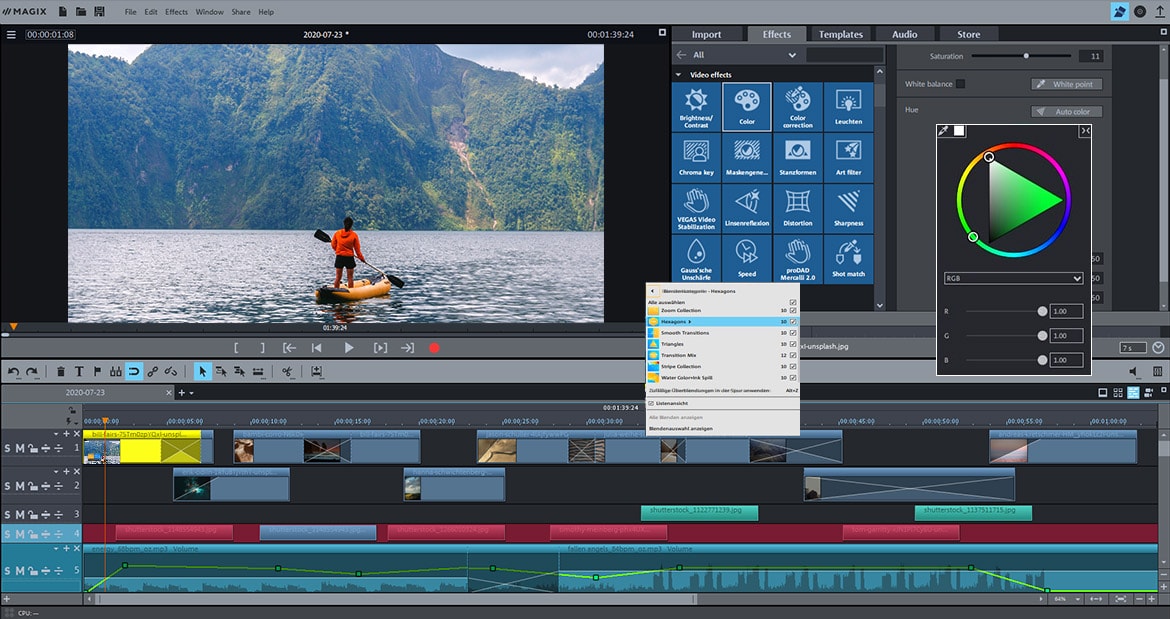
Magix is a free video editing software that allows its users to quickly edit videos. You can use this tool even if you have no prior experience of editing.
Step-by-step guide of adding the ken burns effect with Magix
Step 1: Import Video
Drag and drop a video to import it into the project window.
Step 2: Select the video portion
If you want to apply zoom effects on a specific portion of a video, place the marker at the start of the video clip and then press "T" on your keyboard.
Step 3: Select the object
Select the object to which you want to apply the ken burns effect.
Step 4: Select Size/Position Effect
From the menu bar, click open Effects - Size/Position under Movement Templates. This media pool also has a folder of zoom templates.
Step 5: Preview Zoom Effects
Click the middle button with the right arrow to check zoom templates. Later on, you can try any of them to make your video more appealing.
Step 6: Apply a zoom effect
To apply a zoom effect, click on the left arrow in the pop-up window. Good News!! You have successfully applied the zoom template to the selected object. You can export this video to use on any of your sites to grab the attention of your viewer.
#4. iMovie
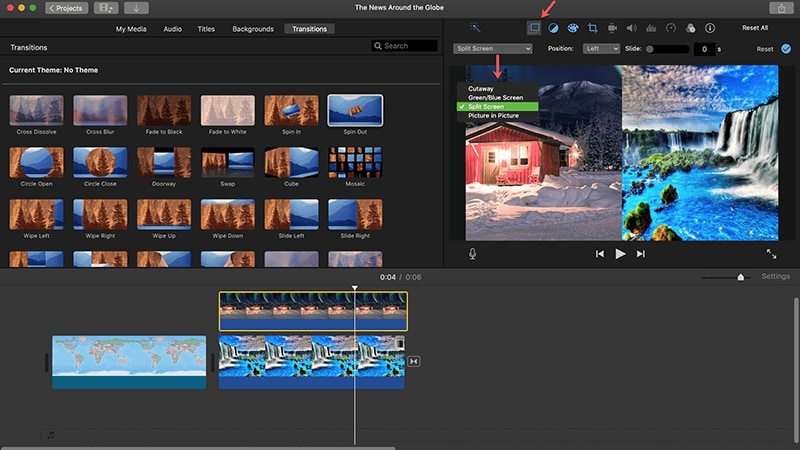
iMovie is a free video editing application introduced by Apple in 1999. It allows you to transform clips into movies, creating original, eye-catching content for social media sites.
Step-by-step guide of adding the ken burns effect with iMovie
Step 1: Drag photo in the timeline
Drag and drop a video clip or an image in the timeline.
Step 2: Click the Cropping button
Click the Cropping button to show the cropping option.
Step 3: Click the Ken Burns button
Click the Ken Burns button, two frames will appear labeled as End and End.
Step 4: Resize the Start frame
Drag and resize the selected Start frame until the beginning of the clip is framed as per your requirement
Step 5: Resize the End frame
Drag and resize the End frame until the end of the clip is framed as you want.
Step 6: Click Apply
From the cropping control, click Apply button to apply changes. You have successfully applied zoom in/out effects to make your content more appealing for your visitors.
Part 3. Conclusion
As you can see, Filmora is one of the best tool to apply Ken Burns Effect to videos. And the best thing about it is that you can download and use the trial version for free. It will allow you to apply the effect and a lot more. Now download it to have a try!
Frequently Asked Questions
1. What is ken burns effect?
The Ken Burns effect is an animated transition to a still image to create motion pictures. It allows virtual camera scans and zooms to engage viewer attention. Adding parallax, which results in the 3D Ken Burns effect, enables significantly more eye-catching results for the audience.
2. Can I make ken burns effect on my iPhone?
You can use the iMovie app to make ken burns effects on your iPhone. iMovie is a free video editing application developed by Apple in 1999. It allows you to transform clips into movies, creating original, eye-catching content for social media sites like YouTube.
3. What are the Benefits of using ken burns effects on video?
1. Grabs the viewers’ attention. The smoothly zooming effect attracts viewers' eyes by keeping them engaged with the motion picture; 2. Looks Simple and Elegant; 3. Makes your images alive. The moving pictures immediately grab the attention of the audience by making your picture alive; 4. Gives the illusion of a movement. The Ken Burns video effect can make you feel that the background image is a video; 5. Focus on the main point. This effect will direct the attention of your visitors towards the most focused part of your content; 6. Not resource-heavy. The effect will not slow your website speed.


