


In 20th century, sound engineers noticed that placing the needle on the record and spinning it counter-clockwise actually reversed the recorded sound. And that, was how audio reversal was born!
We’re now in the 21st century and there’s a wealth of reason why people now play their audio backwards. For one, it creates distinctly different sound effects; something you don’t hear very often and as such, can add a new flair to your music or audio.
At one point in time, reverse tape effects were even the most popular music technique. You can take popular sound effects and reverse them to create new sounds and achieve remarkably great sounds, which of course can be used in music tracks or for other like purposes.
In this article we’ll learn how to reverse audio in modern audio playback software. We'll start with Logic Pro X.
How to Reverse Sound in Logic Pro X
Logic X Pro is one among the top MIDI sequencer software and professional digital audio workstations/audio production software. Built for the Mac platform/operating system, Logic turns your Mac device into a full-fledged “recording studio”.
Let’s quickly take a look at how to reverse audio in Logic Pro X: Simply follow the steps clearly listed below and you’ll reverse your audio using Logic Pro X. The steps are detailed and contains pictures –so you shouldn’t have issues following them. Get ready, launch the software and proceed with the following steps:
Step 1: Import the audio file to Logic Pro X
You just need to open Logic Pro X’s finder window and navigate to the folder containing the audio you want to reverse. You could also record sound directly on the software and reverse that too. So you either import one or record directly before apply the reverse effect.
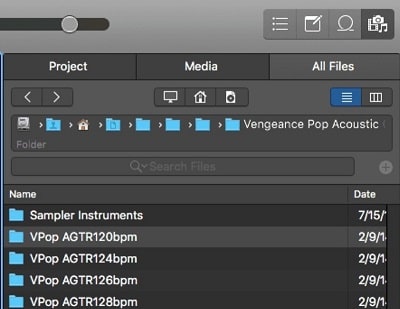
Apart from adding files created by you, you could also reverse a Logic Pro X built-in sound. It could be a loop or a cymbal—or whatever. Select the entire track or simply select a section of it as shown in the image below:

A section of a track was selected in the image above. You can either select a section or an entire track or sound file. Simply double-click on the track or section you want to reverse to open up the editor. At the editor, you’ll find numerous options and effects such as fade-in, fade-out, gain, etc. We’re concerned with the Reverse effect.
If you double-clicked the track and couldn’t find these options under File → Functions, simply go to Preferences → Advanced and enable the options from there.
Step 2: Reverse the audio
Now that you’ve imported or selected whatever it is you want to reverse, next you add the reverse effects from the editor. At the editor, under the Files tab, click Functions to display the available options as shown in the image below:
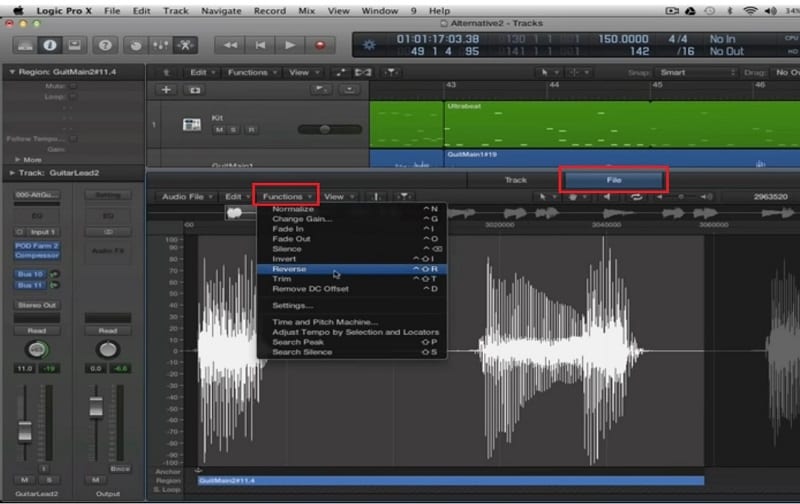
From the list of functions, you’ll find Reverse, simply click on it to apply the effect. After doing that, you can continue working on it or simply export your new sound!
NOTE: If you can’t find any of these functions in your Logic X Pro, you may need to enable the advanced options first. To do that, go to Preference and then the Advanced. You’ll see a list of items, just check/tick everything. You should now see the Reverse option among others even without restarting Logic Pro X. Try restarting the software if you don’t find them after enabling the features.
Tip: Region parameters can be viewed and edited in the Region Inspector which is located at the upper part of the Inspector in Logic Pro X.
Alternative Solution: Reverse Audio Using FilmoraPro
Though FilmoraPro is mainly a professional video editor, it has numerous, above-average audio filters you’re sure going to like. FilmoraPro is arguable the best alternative for easily reversing digital sounds. If you’re looking for easier, flexible and more convenient ways to reverse audio, then you should try this software! Here are a few audio editing features to this software:
• Audio reverser
• Echo, cathedral and other reverb options
• Equalizer
• Compressor
• Sound balancer
• Etc.
FilmoraPro comes in handy in cases where you want to balance sound, reverse or add cool effects to it or master it generally.
To reverse an audio track using FilmoraPro, please install the programe and follow the under-listed steps:
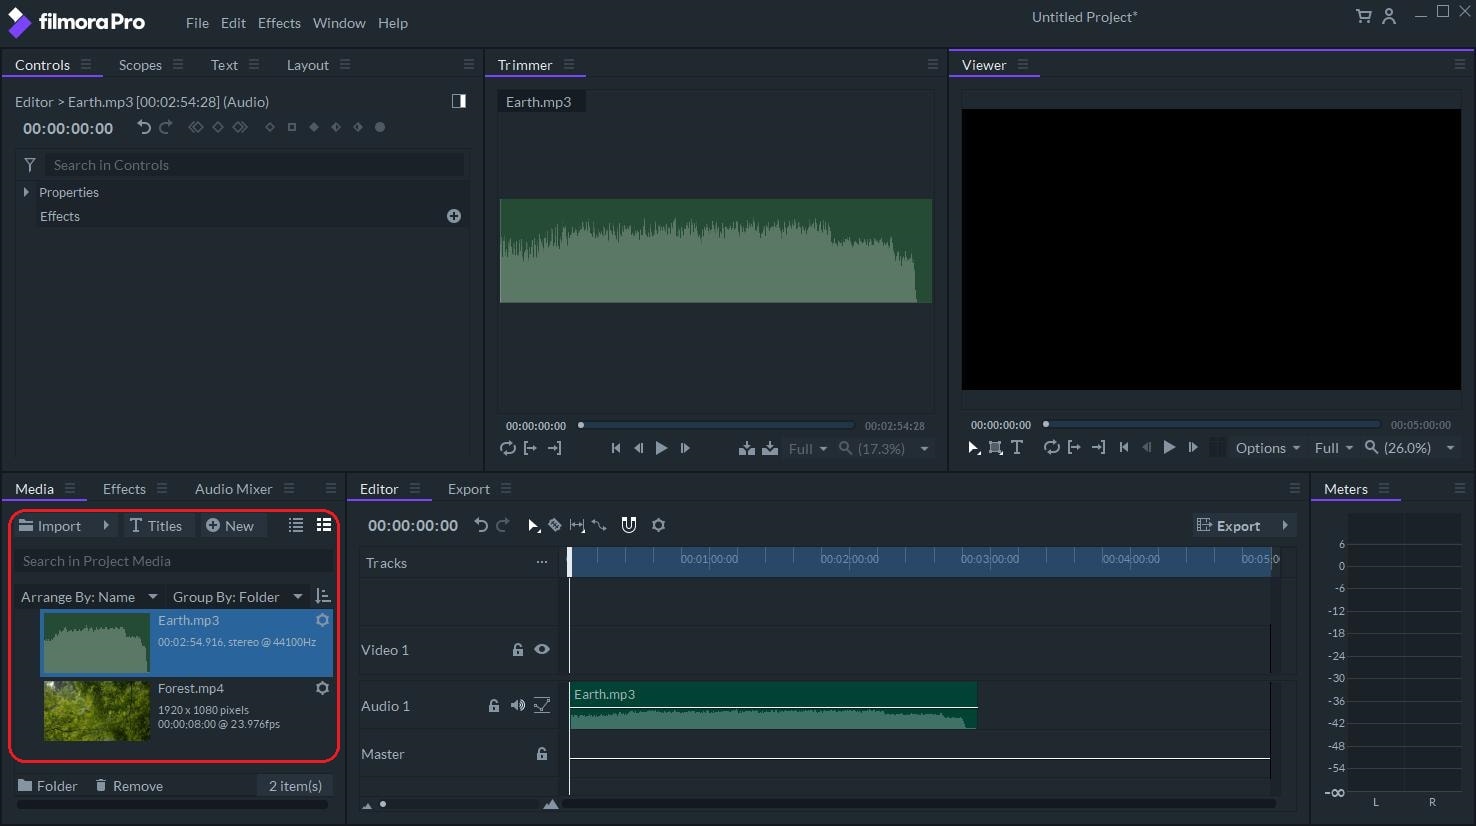
Step 1: Import/Add an audio file
You’ll need to create a project before importing a sound file. After importing your files to media panel, simply drag the audio file and drop it on the timeline to start working on it.
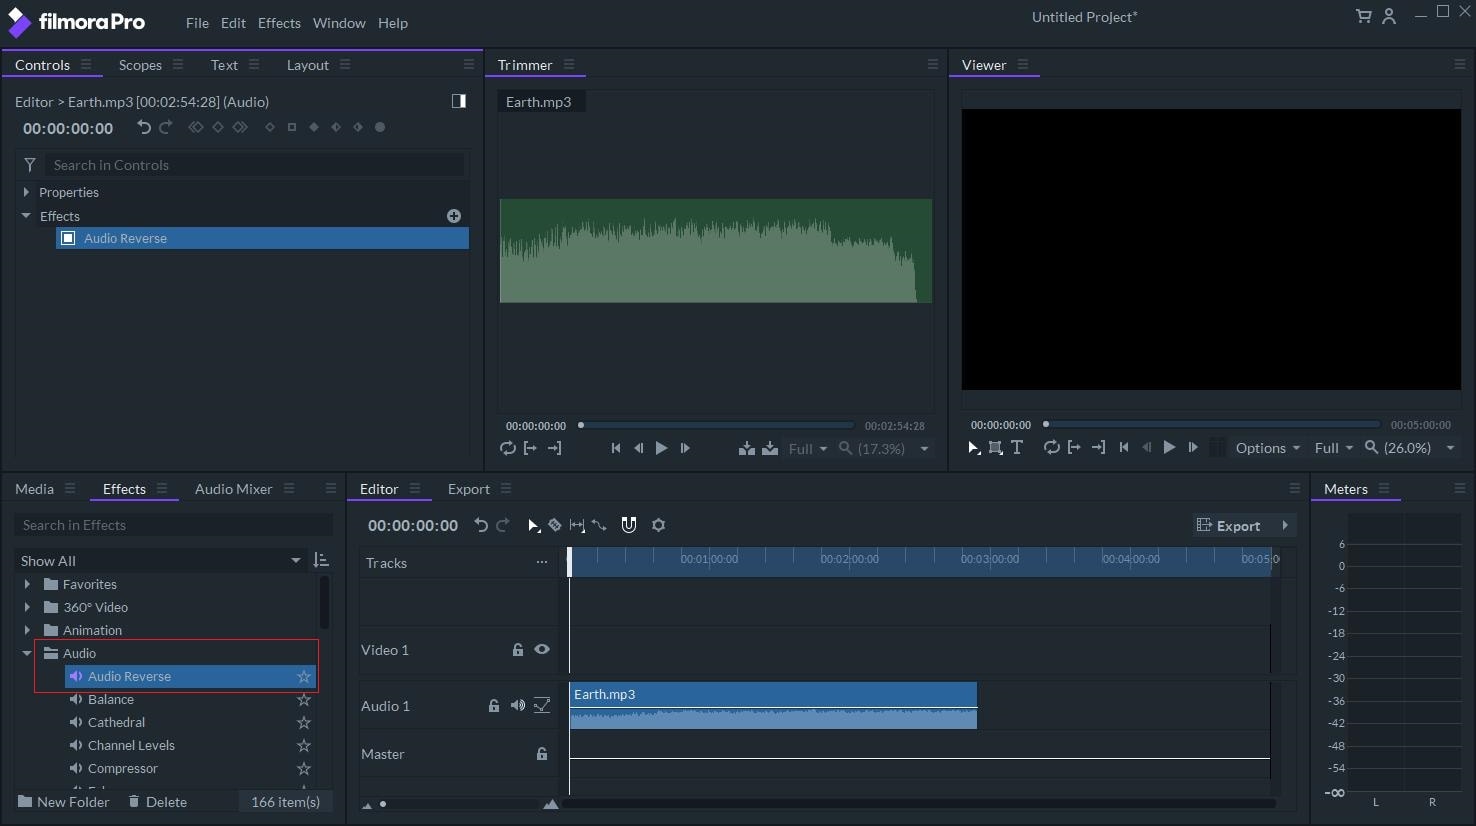
Step 2: Add effects to the audio
First, you’ll open the Effects by clicking the bouton next to Media and select Audio. This will display the available audio tools on FilmoraPro. Select Audio Reverse (our primary aim) and place it on the audio track on the timeline by simply dragging the effect there!
Step 3: Export/Save your reversed audio
Now, all you need is to preview and save the file to your device! To save, simply click Export. Clicking on any file on the timeline will display editing options. If you feel like speeding up the reversed sound or adding some echo to it, simply click on the track again and drag your next effect onto it. Pretty simple huh? Have fun!

Conlusion
Sometimes, you’ll just want to push your creativity a bit or simply have fun by creating unique sounds by reversing them. You can either do it the Logic Pro X way or the FilmoraPro way—which is quite easier to handle. Both ways are fine and definitely achieves an audio reversal effect. While Logic Pro X is a full-fledged audio production software, FilmoraPro is a professional/full-fledged Video/Audio editor quite popular amongst movie producers. Both of them can be used to reverse audio.
PS: If reversing Audio is not enough for you, FilmoraPro might be the editing software you want to explore more. Click the button below to learn more.


