


External hard drives are handy tools in storing files, data and documents. There are various reasons why you might need to format external hard drives. If you purchase an external hard drive as an addition to expand the storage space of your computer, most likely you would need to format it. More often than not, a lot of external hard drives are impacted by incurable virus infection. A lot of people would format their hard drives as soon as it is infected to avoid more damage. If there are errors or system failure where the external hard drives are not accessible, this would prompt for the action of formatting as well. This article will teach you how to format external hard drive for Mac and PC.
- Part 1. How to Format External Hard Drive on Mac
- Part 2. How to Format an External Hard Drive on Windows
- Part 3. How to Unformat External Hard Drive
Part 1. How to Format External Hard Drive on Mac
If you need to format your external hard drive, do not worry as you can do it as easy as the following steps:
Step 1. Launch Disk Utility
After you have connected your external hard drive on you Mac, launch the "Disk Utility" application which can be found under "Applications". Once the application is open, you would be able to see a list of available drives on the left side of the window. Identify and click the drive that you would like to format. Next, click the "Erase" button on the top of the window. It is located next to "First Aid" button.
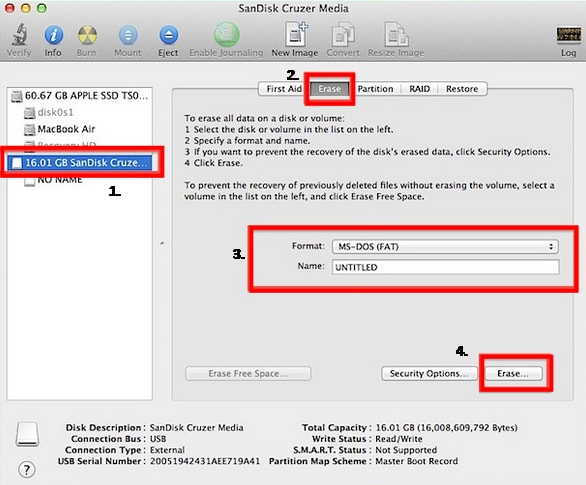
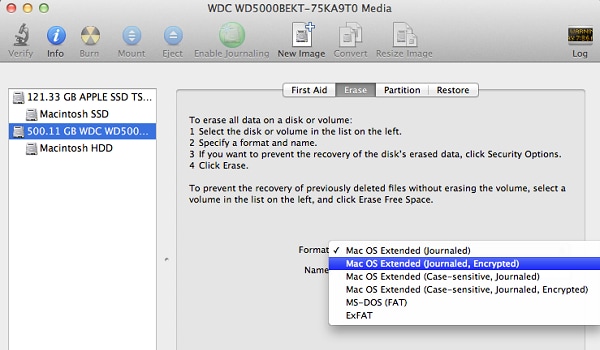
Step 2. Choose the Format Option
In the "Format" option, you can find that there are four options for formatting under its drop-down button. The "Disk Utility" function will automatically choose "Mac OS Extended (Journaled)" as the default format and this format is the most chosen format by users.
You can name your drive with any name that you like. You can change this at any point in time.
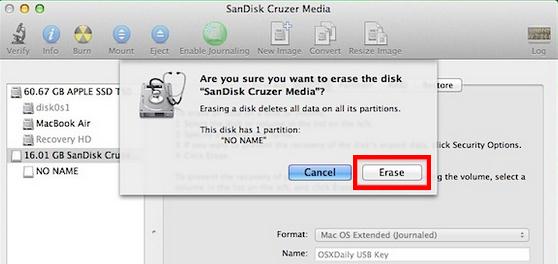
Step 3. Format the Drive
Finally, click the "Erase" button at the bottom of the window and confirm it again at the next pop-up window. This action will begin the formatting of the external hard drive and erases everything in it. A progress bar will appear and will show you how long it will take to complete.
Part 2. The Steps for Formatting an External Hard Drive on Windows
If you are a Windows user, formatting an external hard drive on your Windows is as easy. Simply follow the following steps:
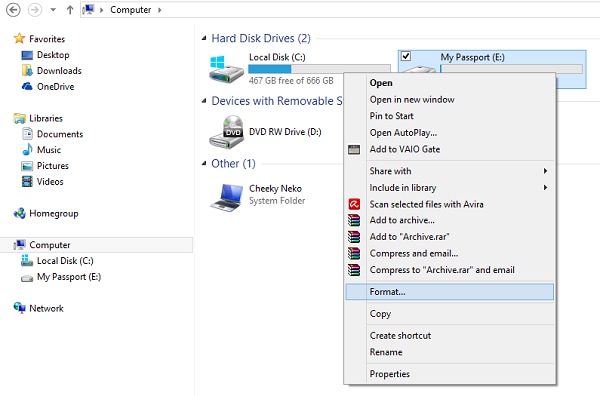
Step 1. Launch "My Computer" and Choose "Format"
After you have connected the external hard drive, launch "My Computer" and you would be able to see the list of drives on the left side of the window or in the main window. Right click on your external hard drive and click Format.
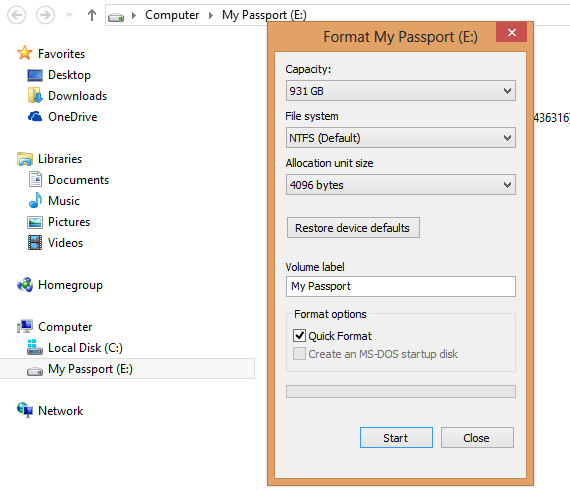
Step 2. Format the External Hard Drive
Another window will pop-out. Simply click the "Start" button and the formatting process will start and you are good to go!
Part 3. The Steps for Unformatting External Hard Drive on Mac and Windows Computer

I formatted my external hard drive on Mac by accident! The drive contains thousands of photos! Can I restore it back and retrieve my files again? Worry not, with Recoverit for Mac (or Recoverit for Windows) (macOS High Sierra supported), you can do just that and recover your precious photos and files. With powerful feature like the ease of use, flexible recovery settings and comprehensive "Deep Scan" mode, the chances of recovering your formatted files are heightened!
Step by Step Guide to Unformat External Hard Drive
Step 1. Launch the Software
Connect the newly formatted external hard drive on your Mac computer. Once this is completed launch Recoverit. Next, simply choose the right file type tabs from the main window interface and click "Next" button. This option will allow the quick and accurate retrieval of data from accidental reformatting activity.
Step 2. Choose the External Hard Drive
Select the hard drive that you have formatted after it has been detected by the software. If it does not detect your desired external hard drive, click the "Refresh" icon on the right of "External Removable Device". Thereafter, click the "Start" button at the bottom of the window to start scanning.

Step 3. Restore the Formatted Data
After scanning process is completed, a list of files that can be retrieved will be available for your preview. Highlight the file name and you should be able to see the content in the preview window. Once you are satisfied on which files you want, choose the files that you would like to recover by clicking on the boxes on the left side of the file names. Click "Recover" in order to retrieve them back and save it to your desired folder. Remember to save it locally in your Mac or in another removable drive, not in the newly formatted external hard drive. If needed, you can do this later.

As you can see, it is really easy to recover files that you once thought to be gone forever. Thanks to Recoverit, you can now breathe a sigh of relief that this will never be the case in the future.


