Do you want to edit M4V files for cutting the unnecessary parts or merging various segments of the video and many more things? Editing the videos usually results in the low quality video generation which is not acceptable. So, ending up with larger unedited M4V files in the computer is not satisfactory and here comes the merging of M4V files.
How to Merge M4V Files with Filmora Video Editor
Filmora Video Editor & Filmora Video Editor for Mac offers the users to join M4V files without compromising on the quality of the videos. It only takes small time to learn the use of the Filmora Editor in order to combine M4V files. To make things easy, we have come up with the step by step guide for helping users to learn the Filmora video editor to merge M4V files.
Merging of M4V files was never easy without help of Filmora Video Editor. It is an all in one editor that offers powerful functions with complete set of features. Due to the versatility, Filmora Video Editor is offering all the styles and features that were once limited to the expensive applications. With easy to use functionality, Filmora Video editor has come up with simple drop and drag interface that offers the freedom to its users so that they can easily create what they want.

Key Features of Filmora Video Editor:
- Easy joining of videos together without any compromise on quality.
- Easy to create picture in picture video for joining M4V files.
- Supports both macOS and Windows system.
- Uploading of the new videos directly to Facebook or YouTube.
Steps to merge M4V files with Filmora Video Editor
Step 1: Install and launch the program
In order to merge M4V files in the Filmora Video Editor, it is important to download the program first from any official website. After downloading of the Filmora Video Editor, install the program in your system. After successful installation, launch Filmora Video Editor and enjoy the ultimate experience of M4V files merging.

Step 2: Import M4V files to the program
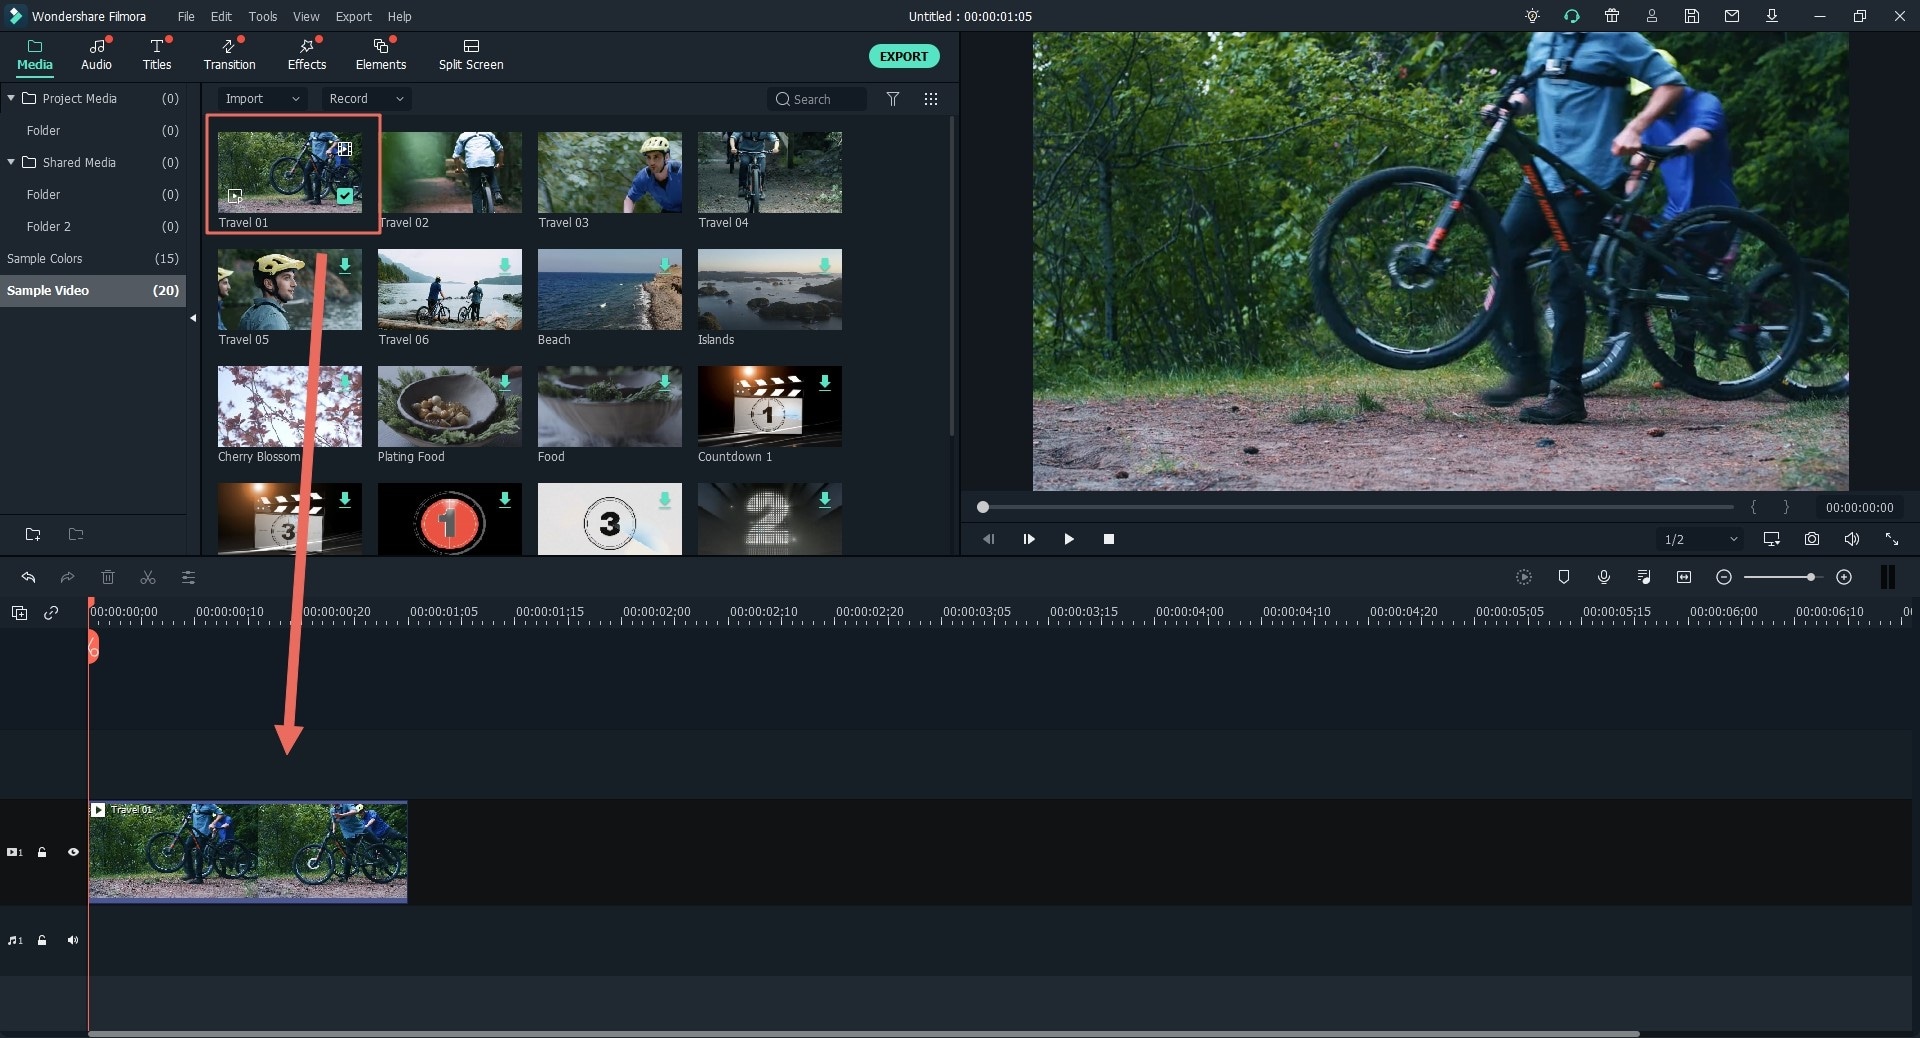
To start M4V files merging, there are two different ways to import the file to the Filmora Video Editor. First method is to click on the import option in the Filmora Video Editor in order to import all the M4V clips to be merged. The second method to import the files in the Filmora Video Editor is to drag and drop the M4V file directly into the Filmora album.

Step 3: Combine the M4V files
Within this step, you have to drag M4V files from the album to Timeline at the bottom. In order to do it, arrange the M4V files within timeline in accordance with the play order that you want. Don’t put one M4V file to the other as it can cause problem in file merging. In order to find out the correct arrangement of the merge M4V files, it is important to press Play button in Preview window before export. You can also remove unwanted clips from the file before merging them. Simply drag red time indicator to place that you want and click on scissor to remove the unwanted portion.
Step 3: Add Transitions between M4V Videos
After the merging of files, you can also add transitions to the videos in order to make them stylish and unique. It wasn’t an easy step without help of Filmora Video Editor. In order to add transitions between M4V videos, you just have to click on the "Transition" button above the timeline. Drag the liked transition between the clips and if you want to apply the same transition to all videos, then select "Apply to all".
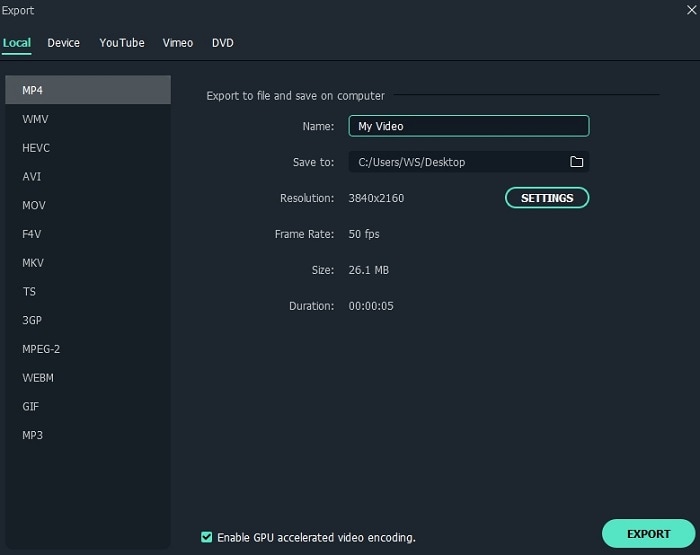
Step 5: Save or Export file
After successful addition of transitions to all the videos, click on the "Export" button in order to start the Output window. Click on "Format" button and select the output format. Click Ok in order for the export of new file. After the conversion, the merge M4V file is going to be listed in the output folder. You can also export it directly to the other social media platforms such as YouTube.