


You might not always have a dedicated digital camera around and ready for use each time you want to record a video, or you just don't feel like the inconvenient and slow process of importing the video which is recorded by your phone/camera. In a situation like that, you may take advantage of iMovie’s built-in video recording feature. iMovie can access your device’s camera for the purpose of recording video or sound.
Let’s quickly take a look at how to record audio/voice on iMovie.
- Part 1. How to Record Video in iMovie
- Part 2. How to Record Audio in iMovie
- Part 3. Record Video/Audio/Screen with Filmora Video Editor
How to Record a Video on iMovie (Record on iMovie from Webcam)
No digital camera? No problem. You can record on iMovie (directly). Use the simple step by step guide below and you’ll be done recording and editing in a jiffy. Here’s exactly how to record video on iMovie:
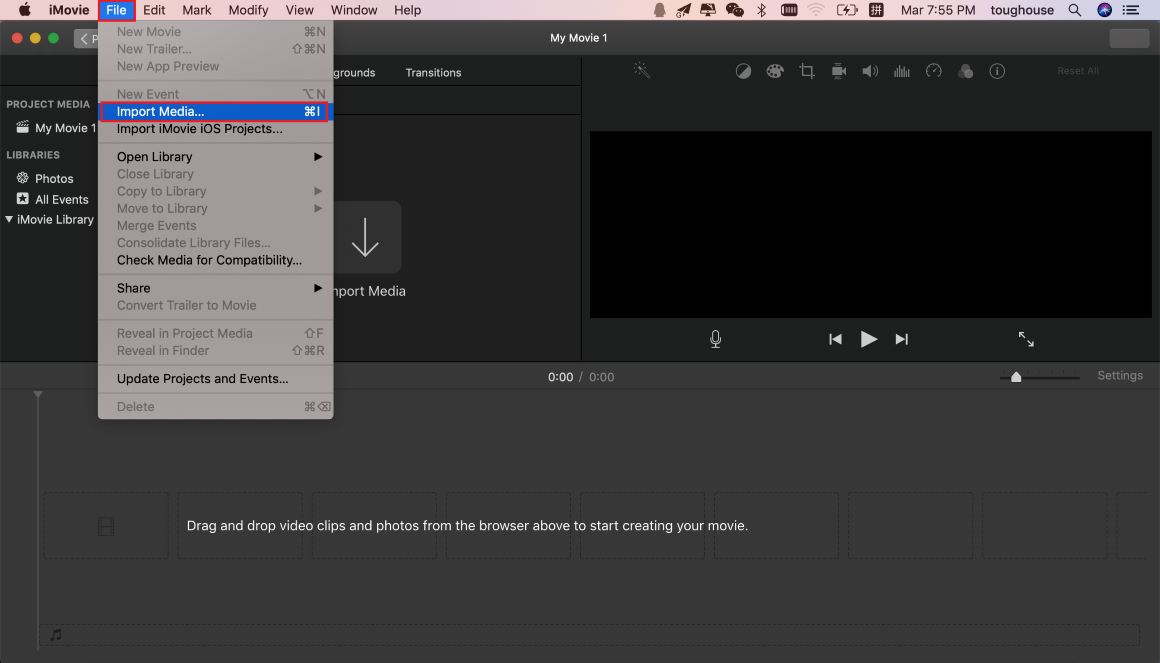
Step 1. Choose Import media.
As soon as you launch iMovie, you will be able to do this from File then select Import Media. But instead of importing a media file, you simply select one of the camera options.
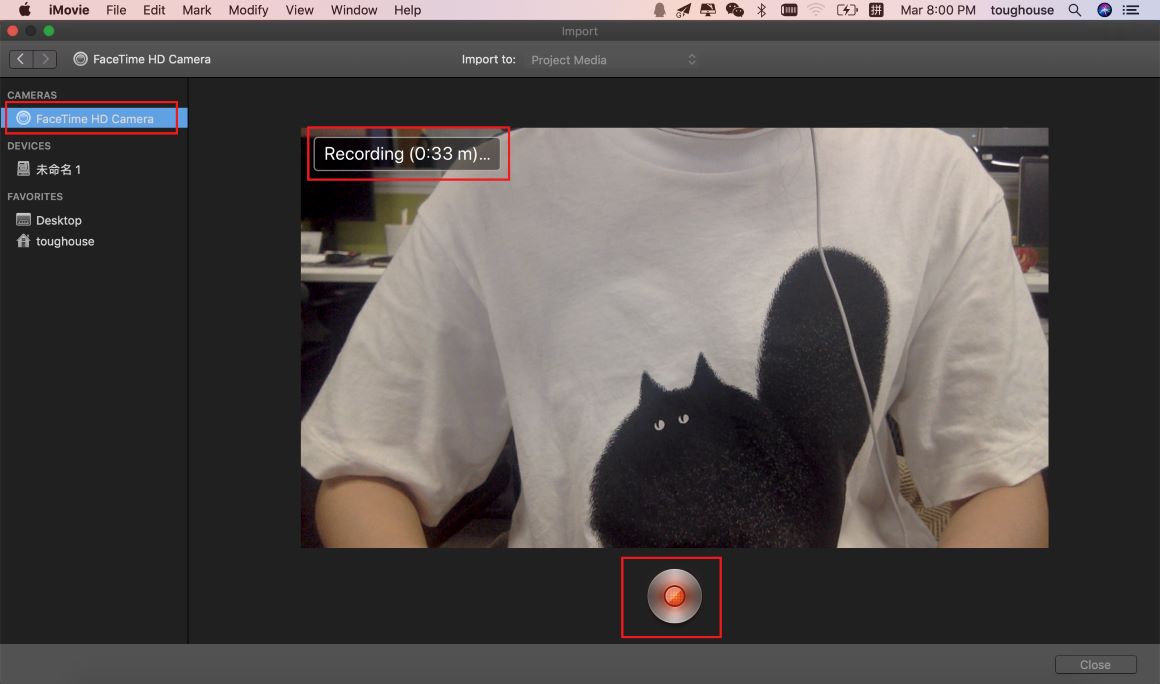
Step 2: Select FaceTime HD Camera.
You’ll find this option among other options in the sidebar. Simply select the FaceTime HD Camera option.
Step 3: Hit Start recording.
The start recording button is the typical red record button at the bottom of the window. Click on it to start recording your video using your Webcam or built-in camera.
Step 4: Stop recording.
The video clip will be stored automatically in iMovie’s library and ready for editing as soon as you stop recording.

There you have it; exactly how to record on iMovie. Please refer to last part of this article on how to record screen.
How to Record Audio/Voice on iMovie (Record Voiceover)
You do not always need a dedicated microphone whenever you want to record your voice/voiceovers on iMovie. You can record on iMovie (directly) without the need of an external mic—as long as your device has one built-in. iMovie can access your device’s built-in microphone (or an external one) for the purpose of recording sound directly into the software. Thereafter, the file is made available for editing. As simple as that.
Here’s exactly how to record audio/voice on iMovie:
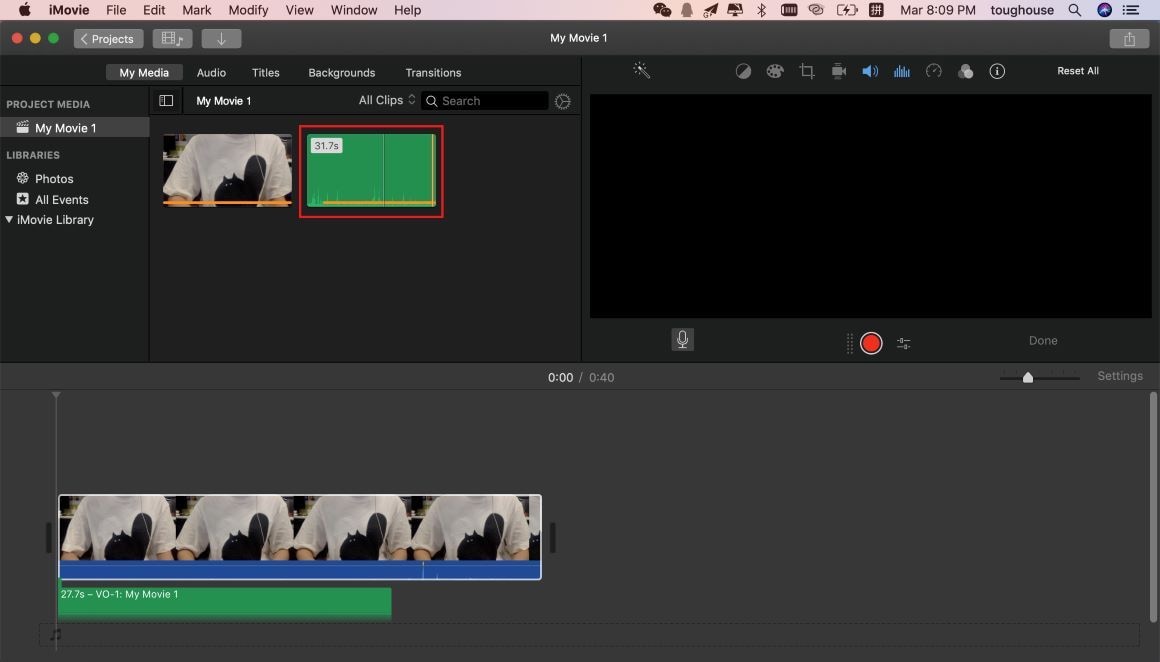
Step 1. Import a video.
To record your voiceover, simply import a video or drag and drop it directly on the iMovie. I.e. Drag it from photos, for instance, to desktop and from desktop to the iMovie project. However, files should be readily available in the explorer sidebar to the left of the software.
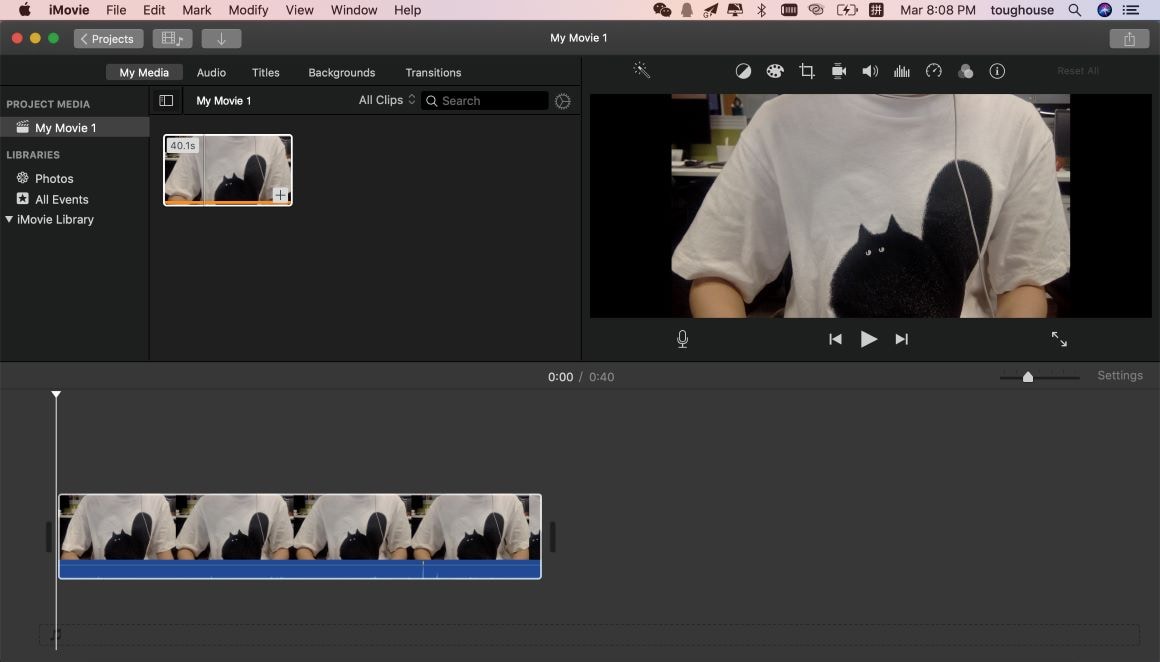
Step 2. Add to timeline.
Drag and drop the video (for Voiceover) on the timeline.
Step 3. Select the camera icon found above the preview window, and click the microphone icon there.
For modifying recording settings, click the settings option next to the red record button. You can make changes to input source and volume settings or mute the project —if there is a need.
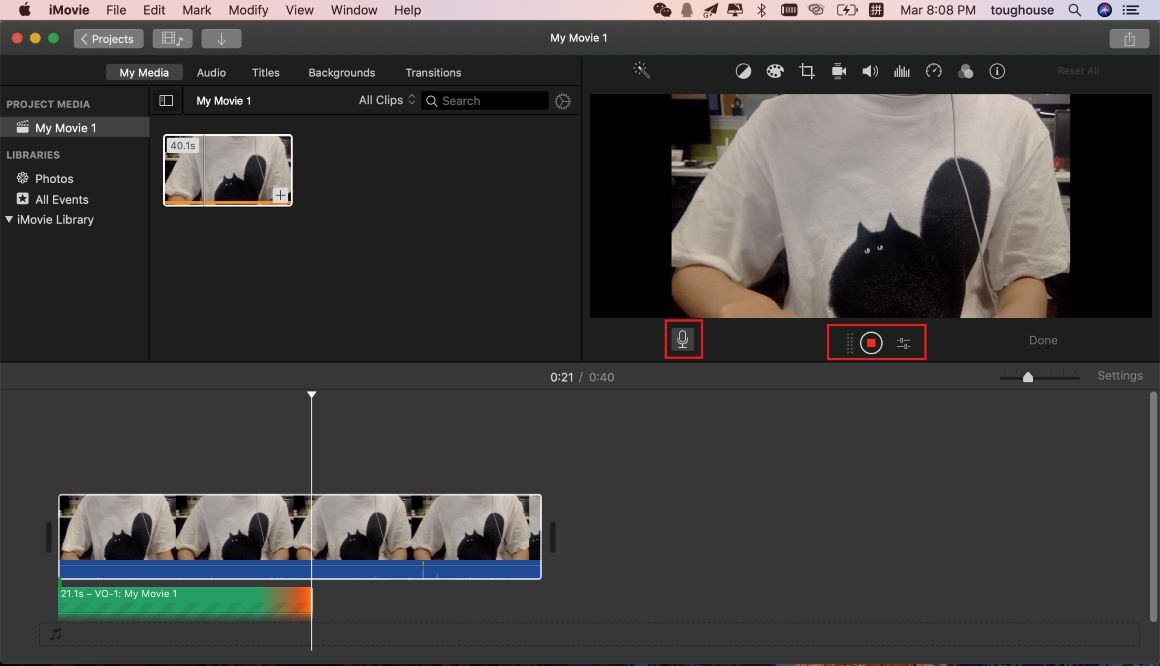
Step 4. Hit the red record button to start recording your Voiceover.
Voice recording will commence after the three-seconds countdown. Hit the record button again (which is now a stop record button) as soon as you’re recording don recording on iMovie. The sound clip will be automatically added to iMovie and ready for editing.
iMovie can’t record screen? Try Filmora Video Editor
As a filmmaker, recording your screen could just be the feature you need in certain occasions/scenarios —when you want to add a countdown timer to your video, for instance. But sadly, directly recording your screen isn’t supported on iMovie ... well, that’s just the way it is. So, to record your screen, you’ll have to use alternative software.

Filmora Video Editor
Talking of alternative software—alternatives that allow you to record your screen and also edit the result on the same software: Filmora Video Editor is the best alternative for video/audio/screen recording. It supports a wide range of features utilized by both amateur and professional filmmakers for modern film making.
In addition to recording video and recording voice, recording your screen is also done with just a click of a button in Filmora Video Editor. You hit the Record button and immediately after capturing the screen session, Filmora furthermore loads the video into your project files automatically.
Here’s a quick and simple guide on how to record screen using Filmora Video Editor:
Step 1. Launch Filmora, click Record.
As soon as you launch Filmora, you need not look farther than the first window. You’ll find a Record button. Simply click on it.
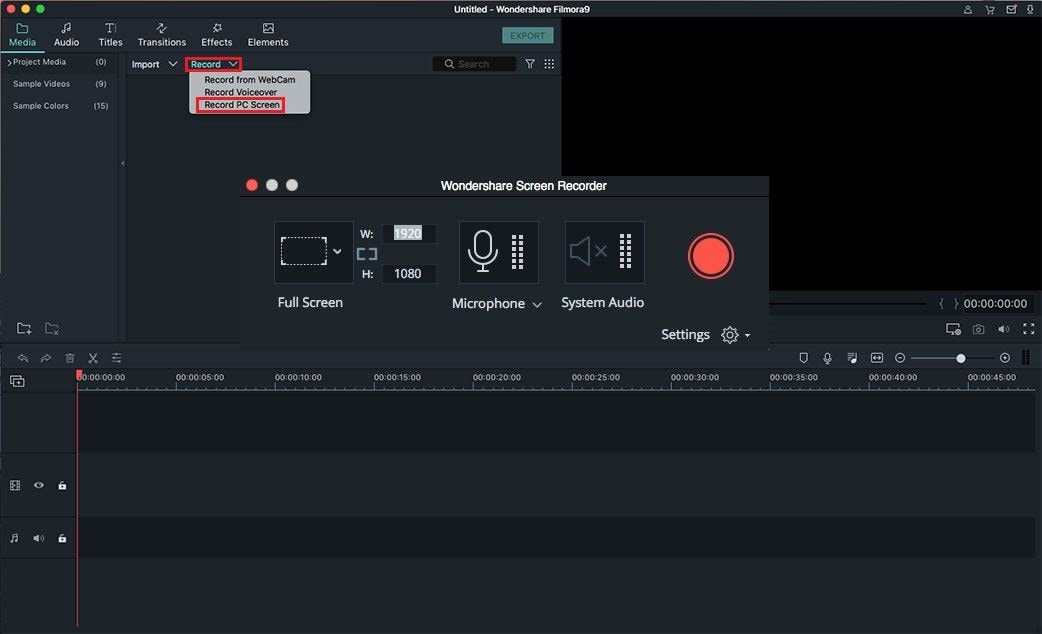
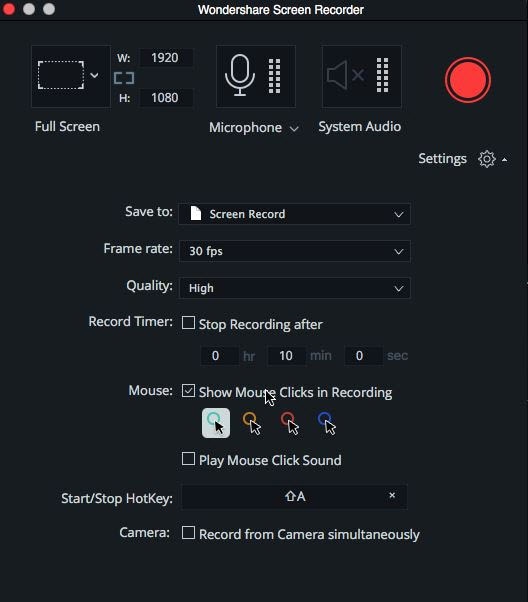
Step 2. Choose the recording mode you need and start recording.
Filmora offers various recording modes. You’ll find them: Record from Webcam, Record Voiceover, Record PC Screen. Click on the record button to start.
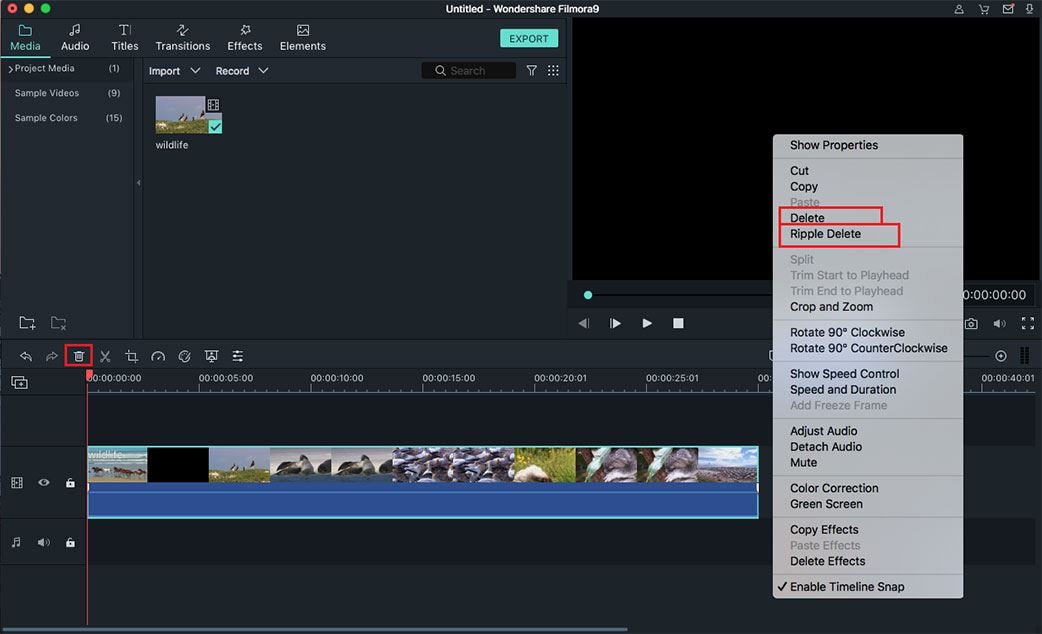
Step 3. Stop recording and add the clip to the timeline for editing.
When you’ve captured your screen, simply end the screen session by hitting the F9 key on your keyboard. Filmora will automatically load the video into your project files! That’s all you need to do to record your screen using Filmora Video Editor. And you can start making a video editing in Filmora.
Wrapping Up
Recording on iMovie isn’t that difficult ... and you don’t even need external mics and cameras for that—as long as your device has at least one built-in. Everything you need to know/do (step by step) to record on iMovie has been exposed in this article: how to record audio/voice on iMovie.
However, to record your screen, an alternative (Filmora Video Editor) was used due to the lack of support for screen recording on iMovie. Apart from screen recording, there are tons of modern video editing features made available by Filmora—typical of any world-class video editing software. The software is available on the major operating systems: Mac and Windows! It doesn’t matter what device you use, you could start creating awesome videos with Filmora today. Take your creativity to the next level.


