


The COVID-19 outbreak left everyone in shock. Thanks to technological advancements, schools, businesses, and other entities are slowly getting back to their feet. Among many other things that have kept everything going during the pandemic is Skype.
Skype is now the home for everything from online lectures and conferences to business meetings and more! As such, you might get into situations where you might need to record a Skype meeting to reference it or listen to it.
So, how to record a Skype meeting?
Well, there are many different ways to record Skype for Business meeting. In this article, we are going to talk about two top ways of recording a Skype meeting. Let’s begin!
- Part 1: Record Skype Meetings on Windows Using Skype for Business >
- Part 2: Record Skype Meetings on Mac >
Part 1: Record Skype Meetings on Windows Using Skype for Business
Those days are long gone when you could only record a Skype meeting using third-party tools. Skype for Business has an in-built recording setup for desktop, mobile, and even the web. The recordings of your Skype meetings last for 30 days max if you don't save it as an MP4 file explicitly.
The operating systems where the call recording features of Skype for Business works are Linux, Windows, and Android/iOS. If you are using Skype for Business web, the call recording feature is only available for select browsers such as Microsoft Edge and Google Chrome.
If you are using Skype for Business on your laptop/desktop, the process of using the call recording feature and managing the recordings are almost the same. For Skype for Business mobile apps, the process might differ a bit.
Now that we know about the feature, how to record Skype for Business meetings using its default feature!
Steps to use Skype for Business to record a Skype meeting on Windows Pcs
Just follow these simple steps to record Skype for Business meetings.
Step 1: Download the Skype for Business app on your Windows PC. Install and launch it.
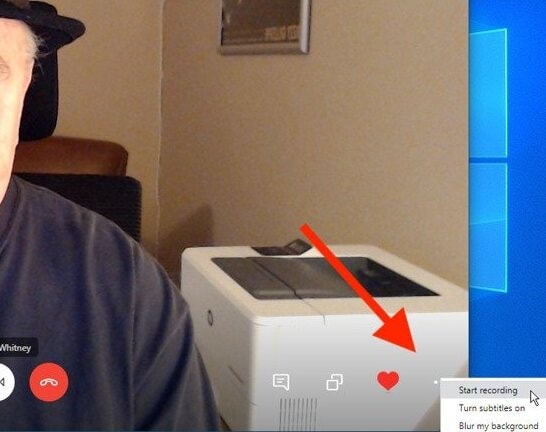
Step 2: Once you are connected on a Skype for Business call, click on the + sign at the bottom left corner of your screen. Select Start recording. The app will notify you and others on the call that the Skype meeting is being recorded.
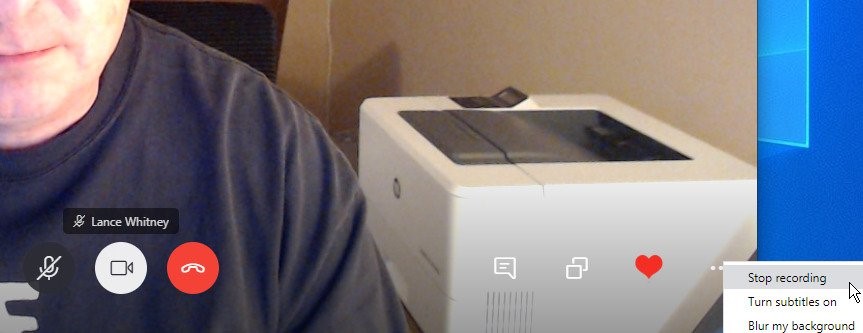
Step 3: Once you are ready to stop the meeting, repeat Step 2, and click on the Stop recording option. You can also end the call, and the call recorder will stop. The recording is sent in chat to the person you were on a call with. You can access it from there.
Now that you know how to record Skype meeting, we will look at how to manage your Skype for Business recordings.
Manage your recordings on Skype for Business
For your convenience, we have covered each aspect of managing Skype for Business recording.
Download: As mentioned earlier, the recording is sent in chat when your record Skype for Business meeting. Click on the three-dots that appear with your chat, and click on the Save to Downloads option. Your recorded Skype for Business meeting will now be downloaded.
View: Click on the three-dot, as you did for the previous step, and then click on the Show in folder option. The next screen will automatically display your downloaded videos in the downloaded folder.
Upload Online: You can upload the recorded MP4 file to create its backup as you do with any other file.
Play: After recording a Skype for Business meeting, you can play the recorded meeting on the chat page. Or you can also play it using your default video player once you have downloaded it.
Part 2: Record Skype Meetings on Mac
Another convenient way to record Skype for Business meetings on Mac is using Filmora Video Editor for Mac (or Filmora Video Editor for Windows). The default recording feature in Skype for Business is not yet released for Mac users.
Filmora X is a widely used video editor and screen recorder. You can use it to record Skype for Business meetings and use the editor to create highlights of a long meeting/webinar for your social media channels.

Filmora Video Editor – Best Skype Meetings Recorder on Mac
- It supports a wide variety of video formats.
- You can record a screen as well as a webcam using its built-in video recorder.
- It contains 300+ stunning effects for different niches of your choice.
- You can burn the edited / recorded video to DVD or upload to YouTube, or transfer to any popular portable devices.
How you can use Filmora X to record Skype for Business meetings
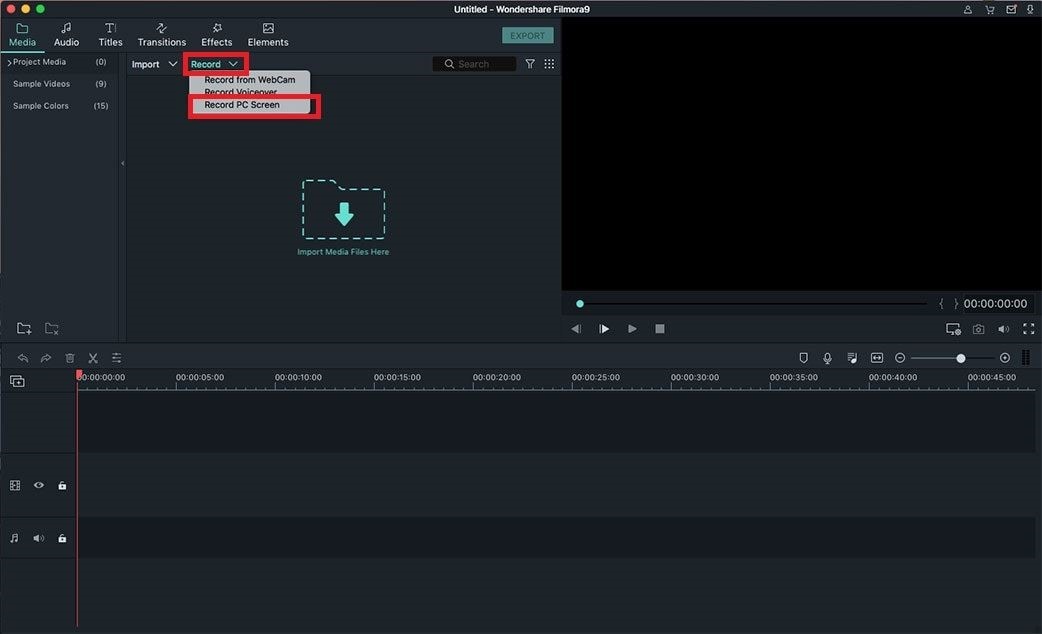
Step 1: Download Filmora X on your Mac. Install and launch the software. Click on the New Project option.

Step 2: Click on the Record button and then choose Record PC Screen.
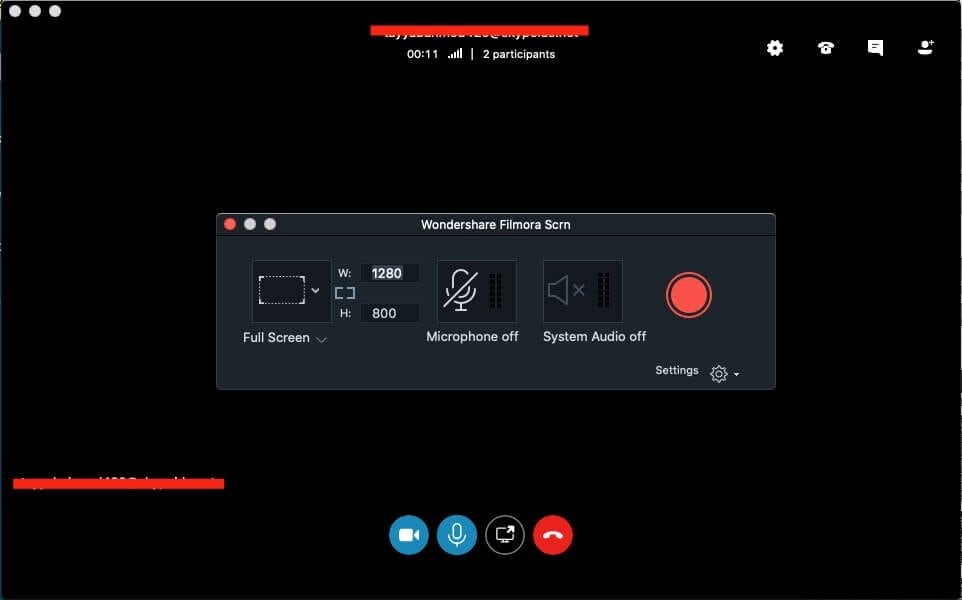
Step 3: Head over to your Skype for Business meeting. The tool will give you options of the screen size you want to record. After selecting an option and clicking the Red round button, the tool will display a countdown before the tool starts recording your meeting.
Step 4: Click on the Red button on the top menu bar of your back and click on the Stop Recording button when you want to stop the recording. You’ll be taken back to the interface of Filmora X, where you can make slight tweaks or edit your recorded video.
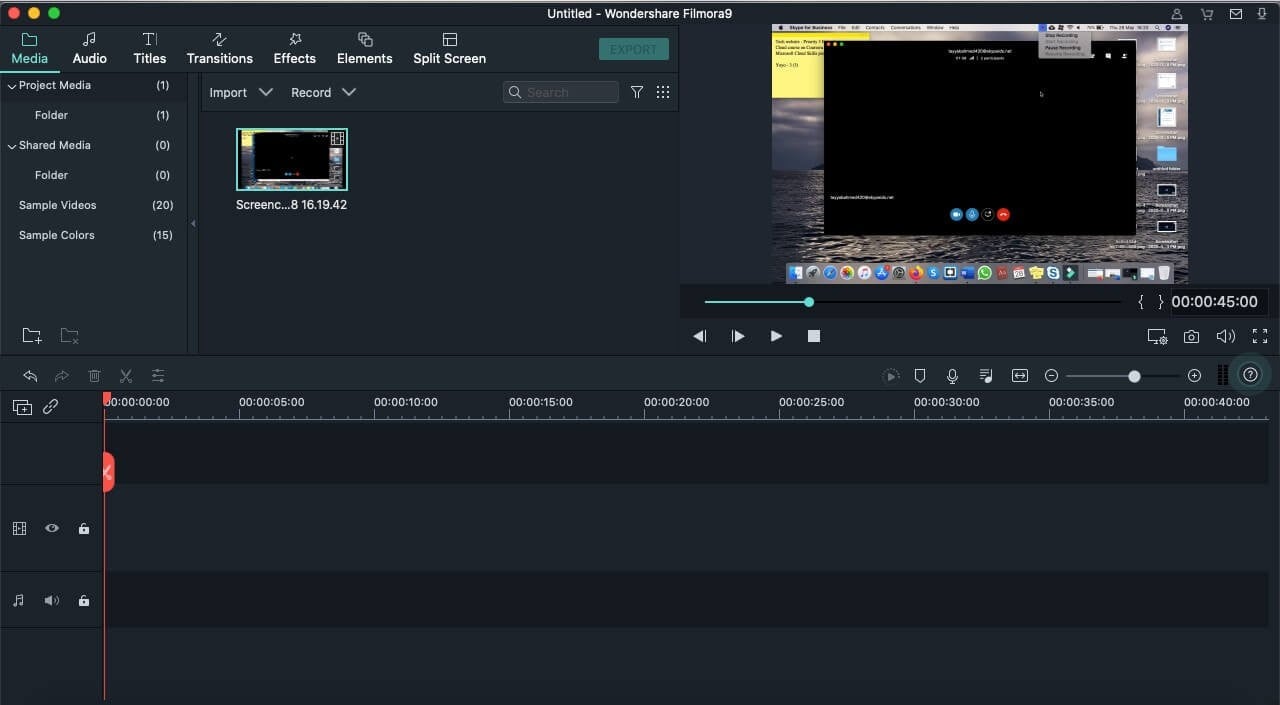
Step 5: You can use Filmora X to edit your recorded video using features like Trim, Cut, Add Effects, and much more. After finishing the editing part, click the "Export" button, select a video format, and save/share anywhere you like.
These were some of the cool perks to record Skype for Business meeting on Mac using Filmora X.
Conclusion
Skype for Business has become a lifeline for Business running during the pandemic and for all the right reasons. But as said earlier, you might need to record Skype for Business meeting for a plethora of reasons - be it to keep a record or to take notes from the meeting later or anything else!
The default feature of recording a meeting is only available for Windows users. We recommend that you use Filmora Video Editor for Mac (or Filmora Video Editor for Windows) to record Skype meetings for Mac as well as for Windows because it also allows you to instantly edit and share your recorded video wherever and however you want.


