


If you are a movie fanatic, then a Windows Movie Maker is a must-have tool. Besides having a flurry of useful tools for curating contents, it also has a user-friendly interface. More so, Windows Movie Maker is compatible with most of the operating systems in the market today. But unless you know the editing tips for windows movie maker and tricks to liven up your movie making sessions, Windows Movie Maker will just be another tool in your stock. Not to worry though. Here are 25 useful Windows Movie Maker tips and tricks you should not miss. Read on.
Part 1. Best Alternative to Windows Movie Maker
Filmora Video Editor , just like Windows Movie Maker, allows the user to add videos, photos, audio, record videos, and make a snapshot. It also allows the user to add a new title on the selected items, as well as captions and credits.

- There are many video editing tools you usually need when editing video, including trimming, rotating, cropping and much more.
- Supports wide range of video, photo and audio formats minimizing compatibility issues.
- The software has a broad array of video effects such as filters, overlays, transitions, motion graphics, animated titles and text, etc.
- A couple of sharing options which allow you to share your video to different platforms including YouTube, Facebook and Vimeo.
Part 2. 25 Cool Tips for Using Windows Movie Maker
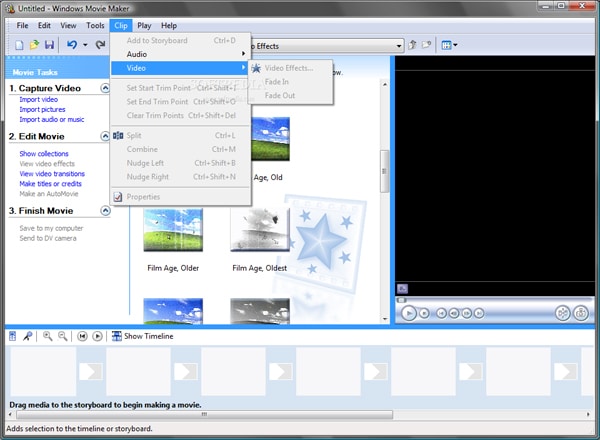
#1. Three key divisions
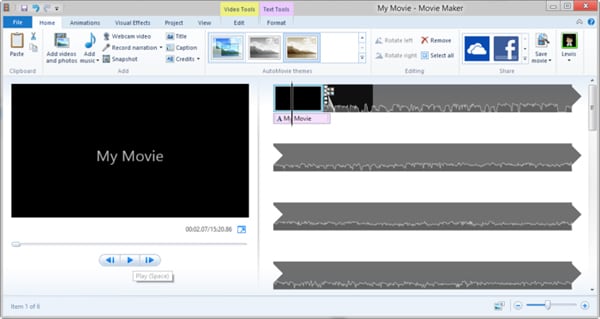
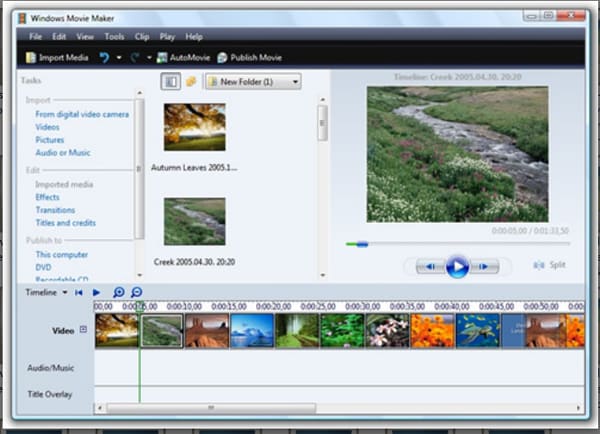
Movie maker's window has three key divisions mainly the panes, the preview monitor and the story board. The panes provide the working space and include the task, the collections and the contents pane. The storyboard and the time line allow users to create and edit projects. The preview monitor allows a user to view and analyze the progress of the movie in making.
#2. Setting aspect ratio
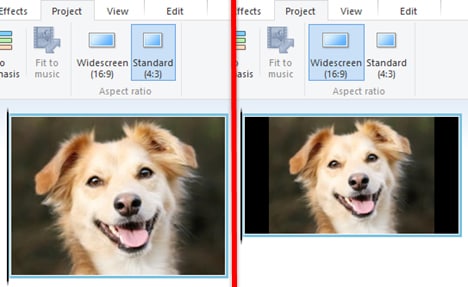
The aspect ratio determines how the published movies are displayed on the screen. Aspect ratio is quotient of length to width of the resulting movies. To set your preferred aspect ratio: click on "Options" from tools, and then click on advanced tab and then select preferred ratio. A ratio of 4:3 is best for full screen displays while the 16:9 is best for wide screens.
#3. Changing .wlmp file into other recognized video formats
All projectile files Window's movie maker have a .wlmp extension. Unfortunately, not many media players recognize this format. This simple process will help convert all .wlp files into other recognized formats. Click on “Open Project” from file tab on movie maker. Locate the .wlmp file. Go back to file, click on “Save Movie”. Choose your preferred output movie.
#4. Trimming videos
Open the Movie Maker. On the “Home” tab, proceed to “Add” group and click on “Add videos and photos”. From the resulting dialogue box, locate and open the folder that contains the video to be edited. Select video file and click “Open”. Under Video tools, navigate to edit tab. Then drag the slider to that position you want your video to start. Else drag the slider where you wish to end the movie.
#5. Arranging video clips on timeline
Simply click on the object to be moved and drag it to where you want it appear.
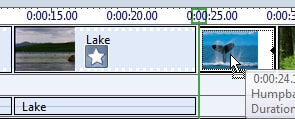
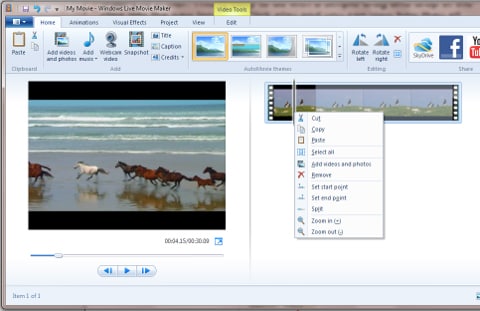
#6. Splitting a video into two
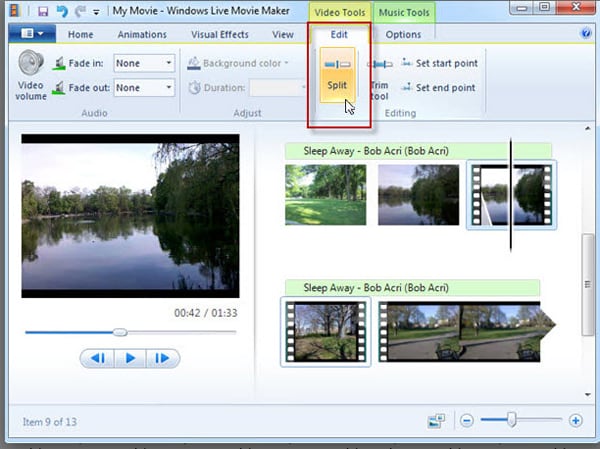
You can split a larger video into smaller bits. You can then reorganize the bits in a sequence. Open the Movie Maker and locate the video to be split. Click on the clip then drag the playback indicator up to the point where you wish to split the video. Under “Video Tools” on the Ribbon, click “Edit” tab under the “Editing group”. Navigate to split to complete the process.
#7. Adjust the volume in published video clips
Combining several videos into one can produce inconsistencies in sound level and quality. You can adjust the discrepancies as below: Click filmstrip of the video to adjust. From the Ribbon click “Video Tools”. Click video volume and drag the slider to adjust volume. This is one of the windows media maker tips and tricks that users usually don't know.
#8. Extracting audio from a given video
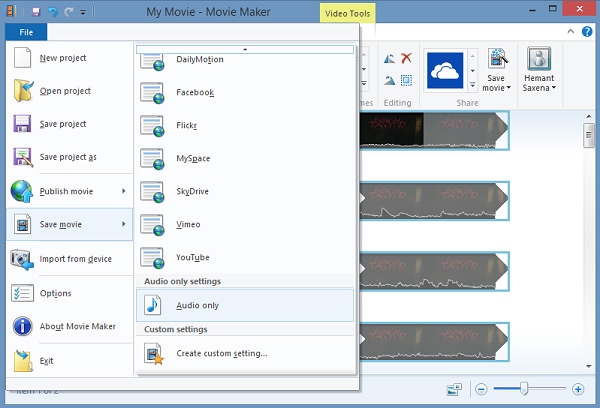
Movie maker can be used to extract an audio from a given clip. For starters, load your video into the movie maker storyboard. Proceed to click on “File” menu and navigate to “Select Movie”. On the adjacent pane, navigate to “Audio only” option. Click on “Extract the audio” and choose a suiting name for the resulting file. Wait for the process to run to completion.
#9. Combining two or more movies
Open a new project on storyboard. Load the two movies on the timeline workspace. Click on “Clip” then navigate to combine. Execute the command to initiate the process.
#10. Trim & split videos
To trim a clip, switch to Timeline view. Click on the clip to trim, hover a mouse over the edge of this clip. The mouse cursor turns into a red two-way arrow. Drag the edges of the clip to desired length.This windows live movie maker tip is used most often.
#11. Rotating disoriented videos
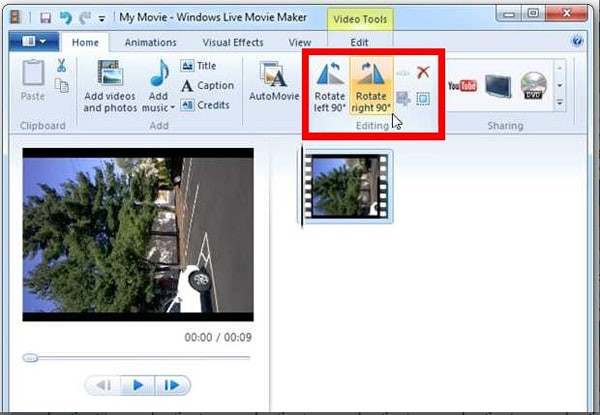
Drag video into the timeline. Next, tap on Rotate left or Rotate right depending on your needs.
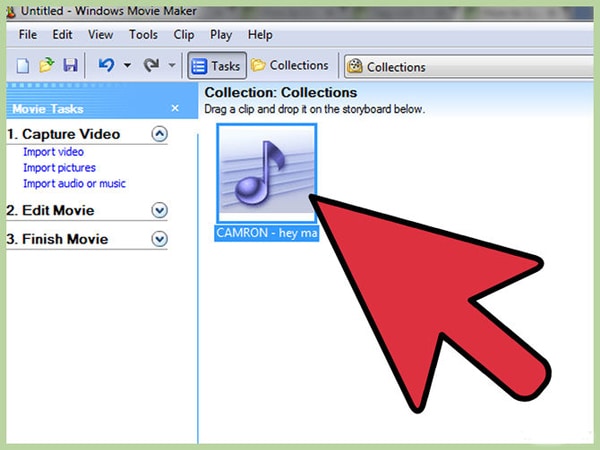
#12. Importing a video
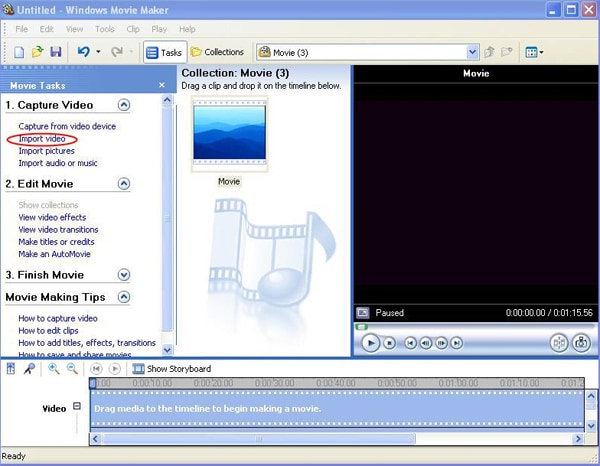
You constantly need to transfer video, audio and picture files from different locations into movie maker in the process of generating a movie. To important your files: click on “File” in the Movie Maker 's ribbon, and then click on Import video link from the movie tasks pane. Navigate to the location of the file in question.
#13. Adding multiple fades
Helps create digital videos that have fade in and fade out and such other effects between elements. Click on Import video. Then click and drag the video into the Video section on the timeline. A placeholder thumbnail pops up on the timeline. Repeat the process if you are working with several videos. Right-click on that thumbnail, select either “Fade In” or “Fade Out,” as per your liking. Click apply button then save the project on your computer through “Save to my computer button”.
#14. Adjust the quality of finished movies
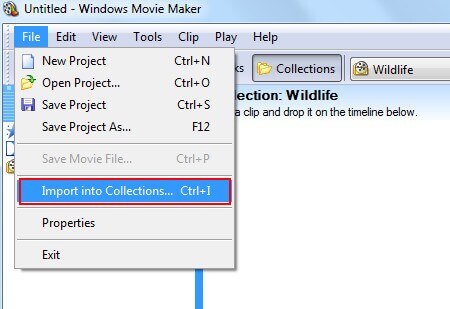
If you plan to watch finished movies on a different device such as a wide TV screen, adjust the quality of the videos appropriately. Click on file, and then go to "Import into Collections."
#15. Slow down or speed up your video
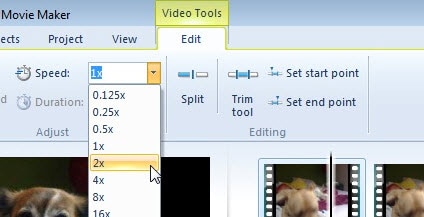
You can adjust your videos' play rate by the procedure below. Click on your video on the movie maker. Navigate to Video tools and then “Edit” tab. Scroll to “Adjust” and click on speed list. Choose your preferred speed.
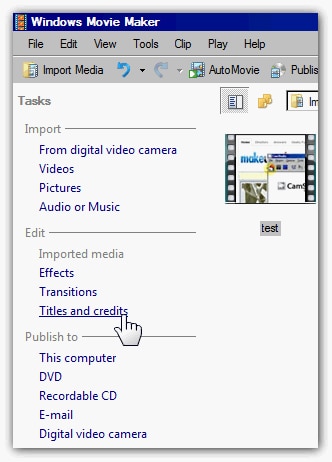
#16. Adding titles and captions

Titles and captions introduce persons or scenes in your movie. They can appear at the beginning, end or overlaying the scenes as the movie plays. To add title, click the location where you'd want it appear on the storyboard or timeline. Clock on “Tools” > “Titles and Credits”. Click a link which corresponds to the location you'd want the title to appear. This opens up an “Enter text for title” box. Type your preferred title in the box. Upon keying in your preferred title, its default animation and format pops up.
#17. Edit titles

To reset the defaults of your title, click Change the title animation. Proceed to select your preferred setting from the drop down menu. Further on, proceed to change the title, font and color by clicking “Change the text font and color” and selecting preferred settings for font, font color, font formatting, font size, background color, transparency, and favored position of the title.
#18. Adding credits
Starting from the “Movie Tasks” pane, navigate to “Edit Movie” then proceed to “Make titles or credits”. From the enter text page, enter preferred details. Follow the same procedure as inserting title.
#19. Removing black bars
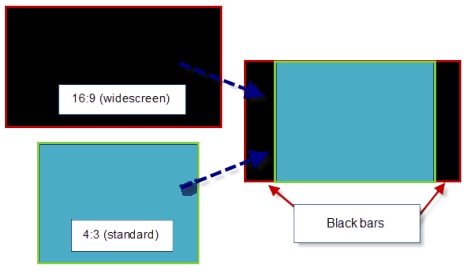
Black bars usually appear on the sides of the movie, along the top or at the bottom of the movie. To remove them, set your videos aspect ratio appropriately as outlined earlier.
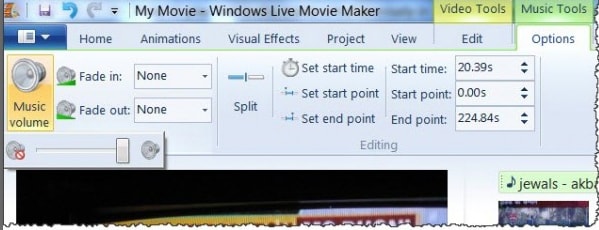
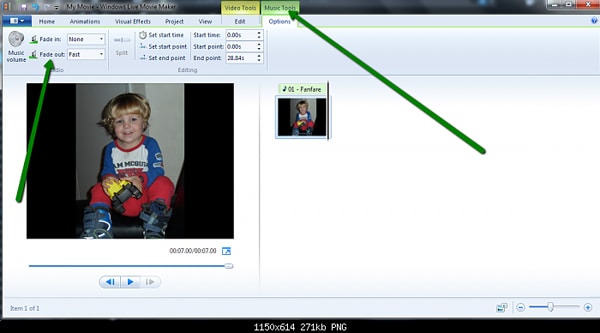
#20. How to fade music
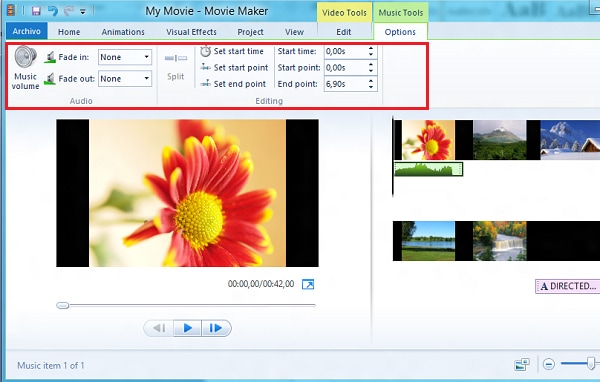
This one of the most popular windows movie maker tricks. You can add a Fade Out or Fade in audio effect to make your video clip more interesting. While on the timeline pane, go to “Audio” or “Audio/Music” track. Select the audio clip to fade. Click “Clip” then go to “Audio”. Click either Fade In or Fade Out to complete.
#21. Sync Audio & Video
Helps sync the audio and the video in a movie clip even if they are both from different locations. From movie maker, select file menu then "Open". Search for the project with the un-synched video and audio files. Seek for an episode in your video that produces clearly identifiable impact such as banging a door. Locate part of an audio that matches perfectly with video episode identified earlier. Drag that part of audio down your project timeline till it perfectly lines up with the selected visual episode. Click “Save” to complete. Click “Create Auto Movie”. The clips will be added to storyboard/timeline.
#22. Apply AutoMovie
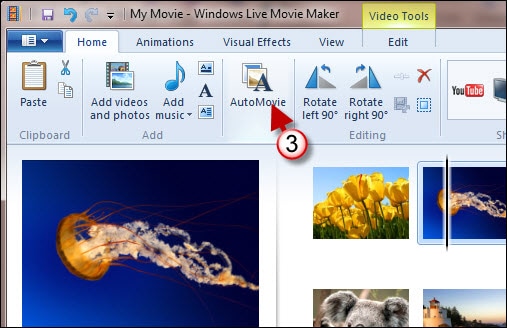
AutoMovie is an essential tool for those who want to produce video clips within a short span of time. To use AutoMovie, click tools and navigate to AutoMovie. A “Select an AutoMovie editing style” page pops up. Choose preferred editing style from this page. From “Under More options”, scroll to “Enter a title for movie”. Type the text which you wish to appear on the title. Choose preferred files from audio and music files.
#23. Adding channel logo on films
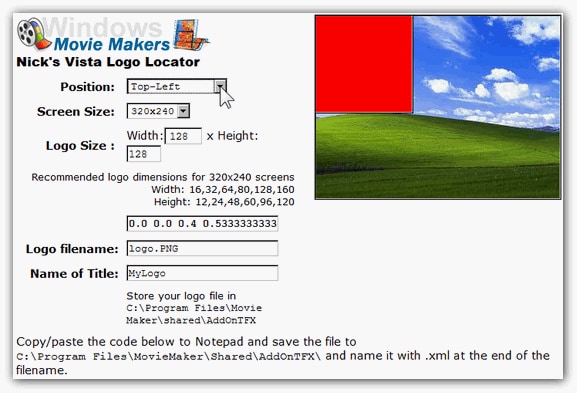
Import the logo clip into the timeline. From tools, click “Titles and Credits”. Click on “Add title to selected clip” from the timeline. Choose your preferred clip and click done. Extend logo to match your movie clip.
#24. Upload video clips to the Web
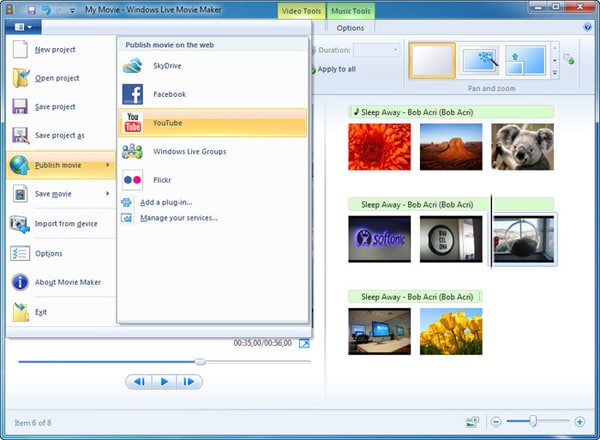
If you want to put your video online, you can leverage on media sharing sites such as Mydeo, YouTube or Neptune Mediashare. To start off, save the movie on your computer. Go to “Publish Movie” and select “YouTube” or whichever site you like. You can share your videos online in this way.
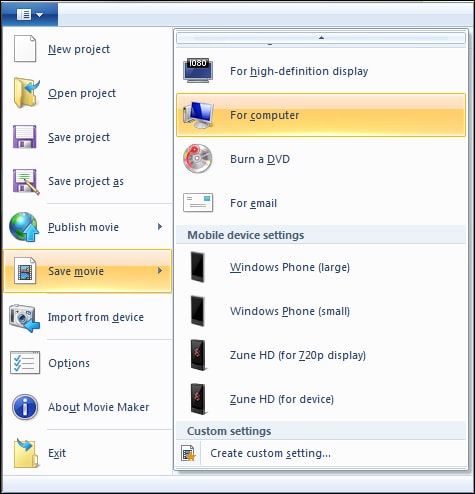
#25. Publishing your movies

Click on “File” > “Save Movie”. Click on “For Computer” tab. Click “Next”. This takes you to the “File Name” box. Type your preferred movie title. Select preferred storage location then click “Next”. Select settings then click “Publish”. Click “Finish”.


