There are many times when you watch videos online and wish you could one time have that for your own consumption. The secret hugely lies on editing and it's all about the software program that you choose to use. Adding a watermark to video is one of the editing that you can do to your video and enhance its appearance. This article will show you how to watermark your video using Windows Movie Maker.
- Part 1. How to Add Watermark to Videos Using Windows Movie Maker
- Part 2. How to Add Watermarks to Videos using the Best Alternative to Windows Movie Maker
Part 1. How to Add Watermark to Videos Using Windows Movie Maker
With this program, you will have the freedom of choosing to add a simple watermark that is based on text or add one with an image or logo. The choice you make will depend heavily on the needs that you want to satisfy. The following simple steps will guide you accordingly:

Step 1: Install the Program. This step will be very crucial if Windows Movie Maker is not pre-installed to your computer system. You have to follow all the installation procedures given in accomplishing this task so that the program can function properly.
Step 2: Launch Program. After a successful installation, you should go on to open the program and click on "Videos" which can be found below the "Import" section to import videos. Alternatively, press Ctrl+I on the keyboard to add videos to the program from your computer.
Step 3: Add to Timeline. When you have all the video files imported to the program, drag them to the timeline for easy editing. Click the "Title and Credits" button located in the "Edit" menu, and then hit the "Title on the Selected Clip" button.
Step 4: Add Content. After creating the section for your watermark, type in it words or text. Make sure you have used minimal words to fit into the watermark and in the right font size.
Step 5: Editing. Next, click the "Change the Title Animation" button and choose the "Subtitle" option from the selection box. To position the watermark in the right section of the video, click the "Change the Text font and Color" where you will get an icon for aligning the text either to the right or left. To alter the transparency or opaqueness or make your watermark bold or italicized at this step.
Step 6: Add to Title. Previewed your watermark, and once you are satisfied that everything is fine, click on the "Add Title" button and your watermark will be added to the video.
Step 7: Save Movie. Preview the file once more to be sure it has been added successfully. After that, click on "File" then "Publish Movie" and the video will be saved to the computer.
Part 2. How to Add Watermarks to Videos using the Best Alternative to Windows Movie Maker
Filmora Video Editor for Windows is the best alternative to Windows Movie Maker in the market and provides the best methods, tools and techniques to perform the video editing easily. Filmora Video Editor enables you to easily make movies , edit audio, apply effects and add watermark to video. You can directly share your new movie on YouTube, Facebook, Vimeo, DVD, TV, iPhone, iPad, iPod, and more!

- Supports almost all the popular video formats, audio files and images. No incompatibility issues;
- Hand-picked filters, overlays, motion graphics, titles, intro/credit. More effects are added regularly;
- Special effects, like green-screen, split-screen, face-off, etc. are available as well;
- Export video in multiple formats or directly optimize videos for YouTube, Facebook, Vimeo, etc.
How to Add Watermarks to Videos using the Best Alternative to Windows Movie Maker - Filmora Video Editor
Step 1. Download and Install Filmora Video Editor
To begin with, you have to download Filmora Video Editor. This will take a few minutes if not seconds. After that, you can then install the video editing software on your windows computer and finally open it.

Step 2. Import Video
Once you open the software, select full feature mode to explore all features of the software. Next, click on “Import” button on the home interface and then select “Import Media File” button. By doing so, you will be able to choose and open a video from your computer with this software. You also have to import the image that you want to add as a watermark. Alternatively, you can drag the files and drop them into the program window.

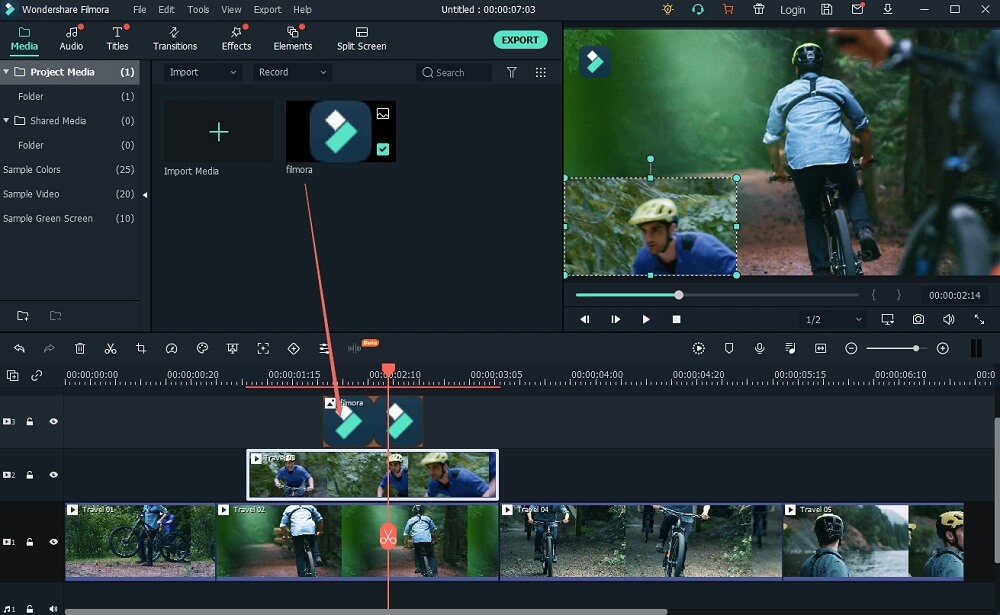
Step 3. Add Watermark
Next, you need to drag the video to the video timeline while for the image you need to drag it to the PIP timeline just below the audio timeline. By doing that, you will see the watermark image appear on top of the video. Head to the preview window and resize the watermark image. From there, you can position to the watermark to the desired position of the window.
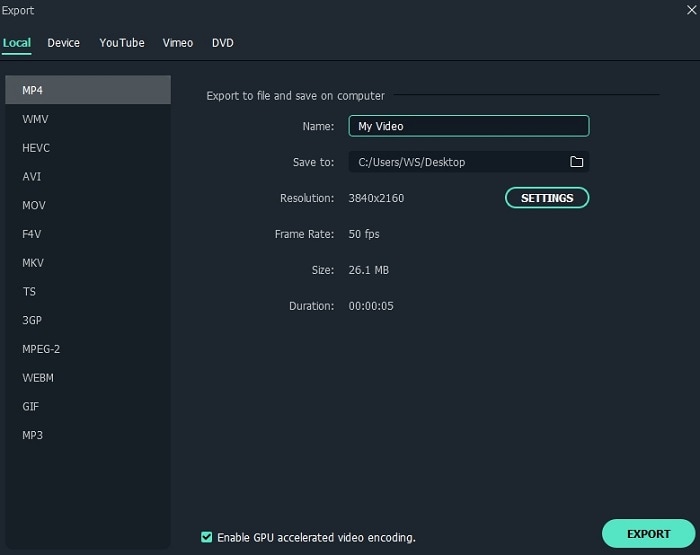
Step 4. Export Watermarked Video
Once you are satisfied with the position of the watermark, you can then export the video. Click on the “Export” button. From the window that will appear, you can choose the desired way that you want to output your video. You can opt to export it online, to the device or burn it to DVD. For this case, go for “Output” and the choose preferred video output format. Rename your video if you wish and finally click on “Export” button to save it on your computer.
There you go, as you can see it is very simple to add watermarks using Filmora Video Editor.