


A video’s aspect ratio is the ratio of the width to height (respectively) of the video. It is simply how the video appears on the screen. By default, the aspect ratio is set by the recording device—your phone, computer, digital camera, etc.
These days, 16:9 (widescreen aspect ratio) is the preferred ratio widely used in TVs, computers and smartphones.
Among other commonly used aspect ratios, 4:3 was mostly used in the past as screens were much smaller and almost squares. 1:1 is used for Instagram, 9:16 for TikTok, 21:9 for cinema.
Uploading an image or video to a platform that requires specific ratios (e.g. 16:9 for YouTube) will require you to crop it—leaving out important parts. Other times, you may just discover that files become abnormally cropped or stretched when viewing. Actually, you wouldn’t face such issues if you apply the appropriate aspect ratio.
— so, let’s quickly learn how to change aspect ratio in iMovie. Moving on…
- Part 1. How to Change Aspect Ratio in iMovie 10 on Mac
- Part 2. How to Change Aspect Ratio in Filmora - Best Alternative for iMovie on Mac
- Part 3. How to Change Aspect Ratio in iMovie on iPhone & FilmoraGo
Part 1: How to Change Aspect Ratio in iMovie 10
Want to change aspect ratio on Mac using iMovie? First, please note that the aspect ratio in iMovie 10 is fixed at 4:3 for SD videos and, 16:9 for HD videos. iMovie 10 users face a common issue when trying to achieve a standard aspect ratio—for example, square aspect's ratio on iMovie. Even if the video is cropped, one may not get the desired output as the area within the cropped frame fills the entire viewing device screen. The alternative solution suggested below (using Filmora) will do a better job as Filmora Video Editor has dedicated aspect ratio functions for video/photos. However, you could use the following steps to crop your video using iMovie:
Step 1. Launch iMovie and import your videos.
Create a project or open an existing project containing the video you want to crop. Browse and import/drag and drop the video on the timeline.
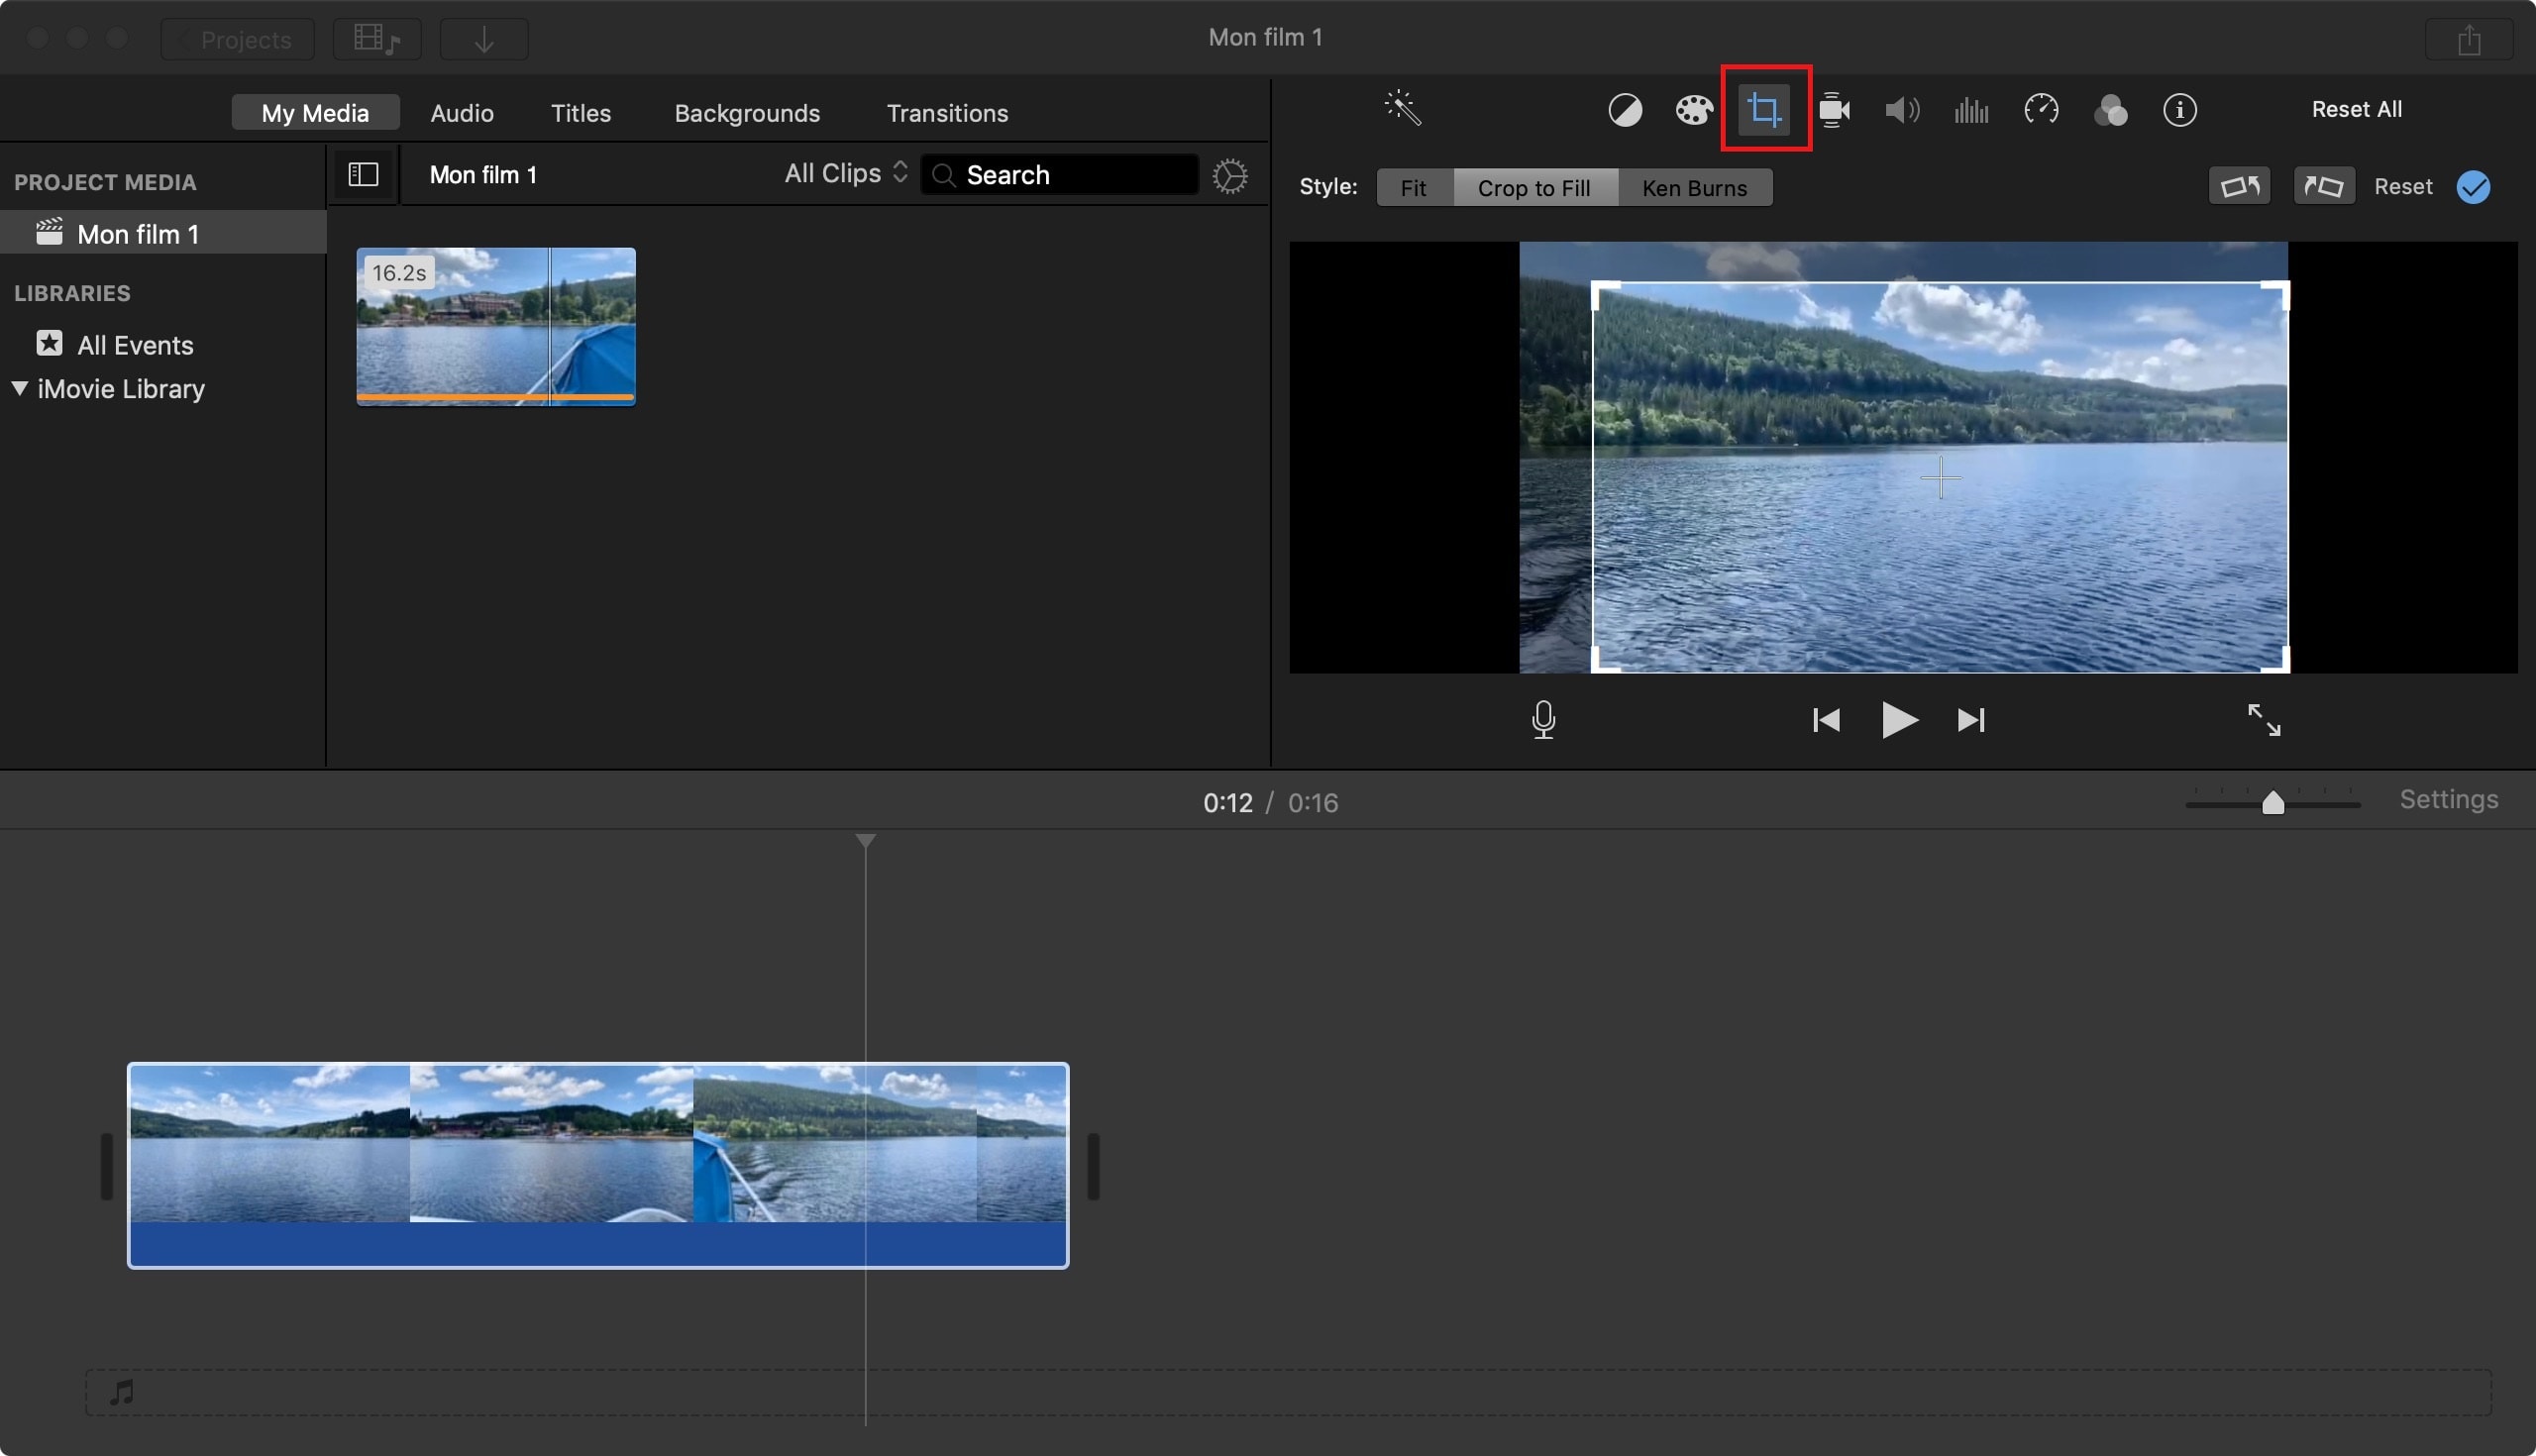
Step 2. Crop your media file to change aspect ratio.
Just above the timeline, you’ll find the crop icon (as in the image above). Click on it and adjust your video size. When you’re done, click on Reset.
Part 2: How to Change Aspect Ratio in Filmora - Best Alternative for iMovie on Mac
Filmora Video Editor for Mac (or Filmora Video Editor) is a powerful video editor which can help you easily edit and change aspect ratio of videos.

Recommendation: Filmora Video Editor
- Best video editing software for beginner and semi-professional, that comes with powerful editing skills like trimming, splitting, rotating, editing, etc.
- Advanced video effects like green screen, PIP, audio mixer, etc. can also be found and applied to your video within few clicks.
- 500+ free special video effects to customize and create an awesome movie by yourself.
- 1000+ standalone effects downloading resources to make videos in all kinds of styles.
- Export videos to Chromebooks compatible format with 1 simple click.
Step-by-Step Guide of Changing Aspect Ratio and Remove Black Bar with Filmora for Mac
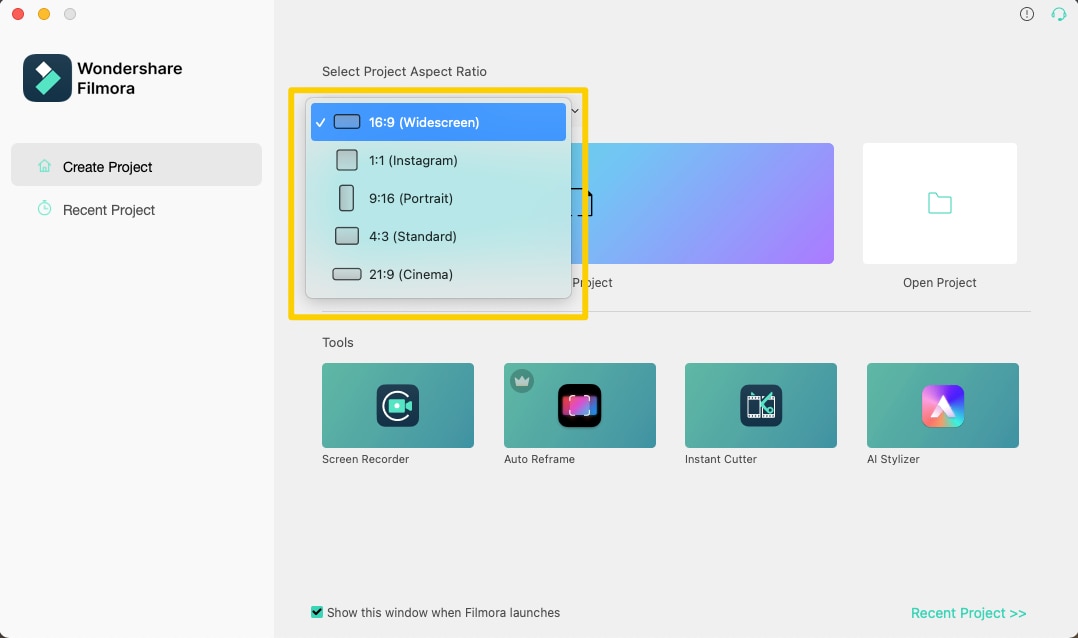
Step 1. Open Filmora Video Editor for Mac and select the aspect ratio for your project
Simply launch Filmora Video Editor for Mac, create a new project. Select the aspect ratio from the listed options: 16:9 (Widescreen); 1:1 (Instagram); 9:16 (Portrait); 4:3 (Standard); and 21:9 (Cinema). Of course, you can change the aspect ratio at any time during your editing through the "Project Settings" Menu.
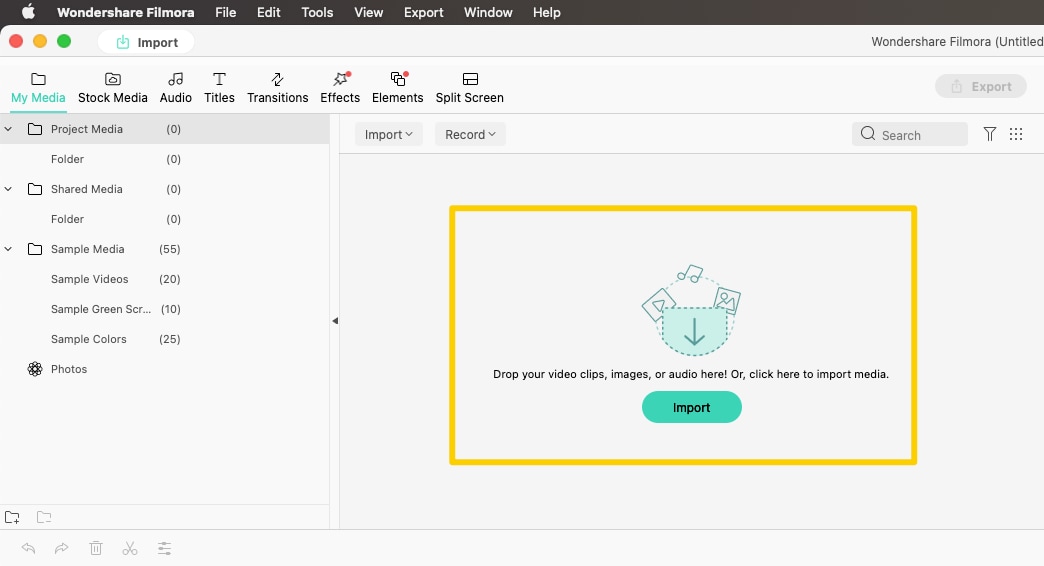
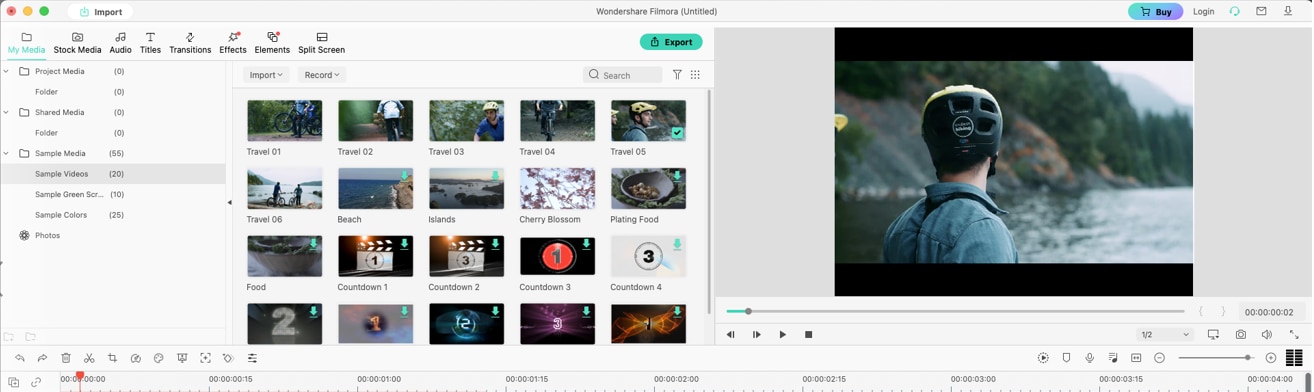
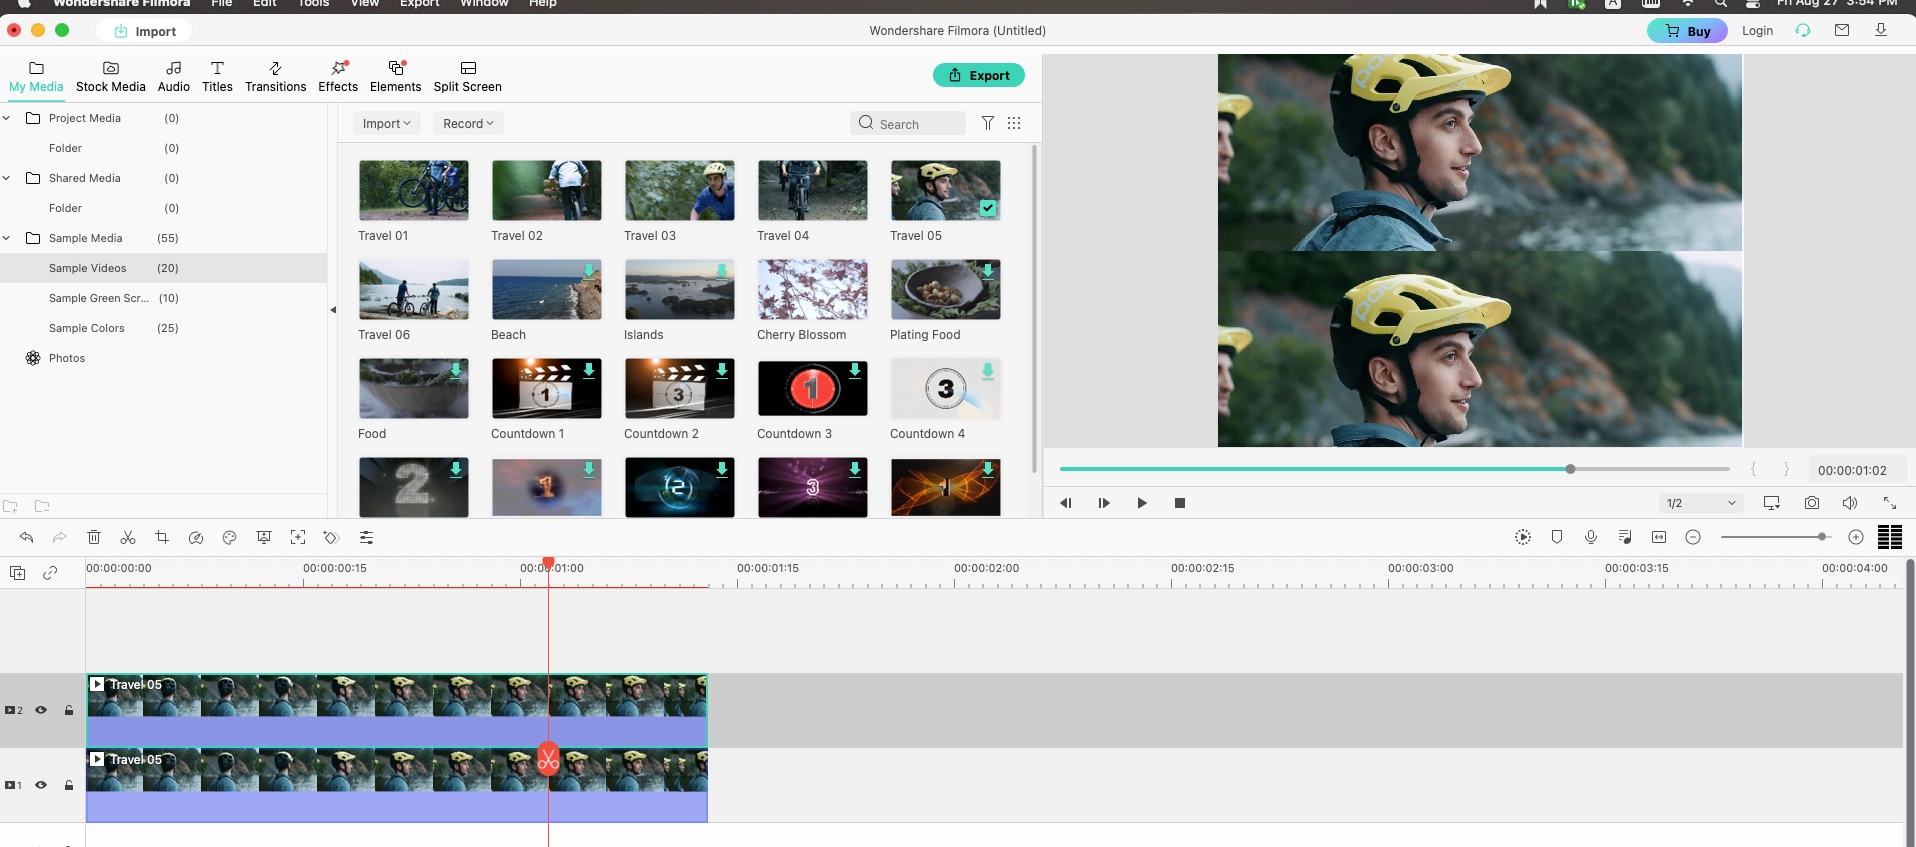
Step 2. Import your media file.
Import the media files you need by clicking the "Import" button on the main interface. Then, you're free to drag-and-drop the files to the timeline.
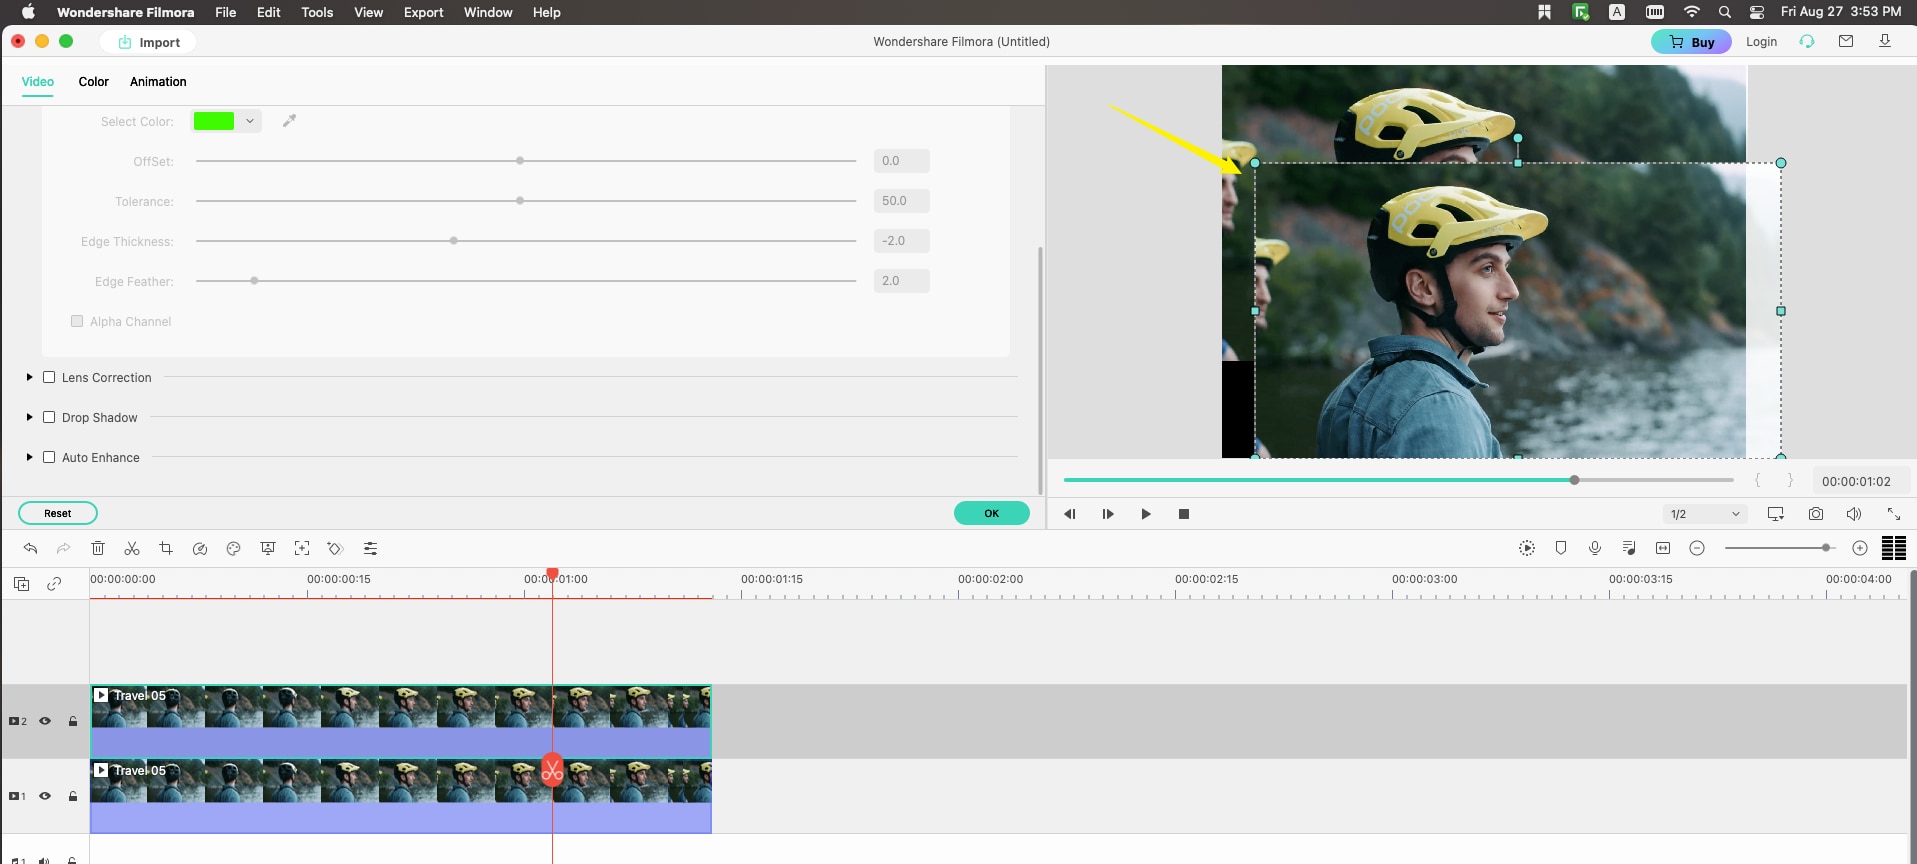
Step 3. Change aspect ratio
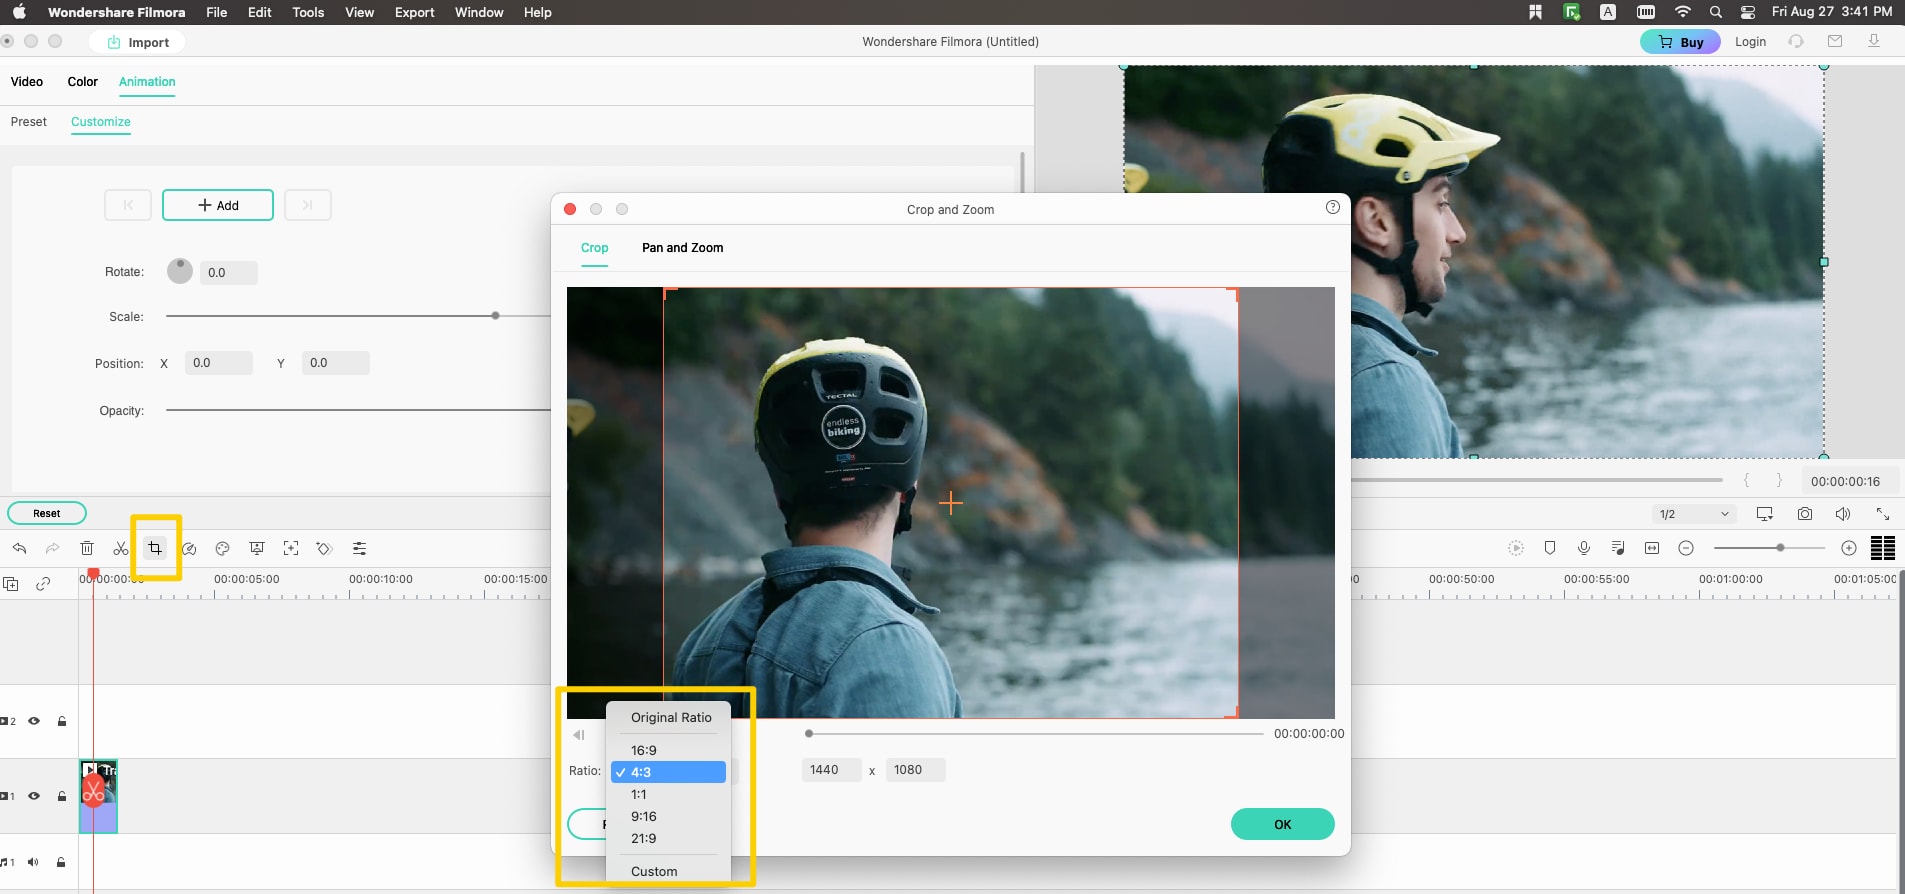
Double-click the clip on the timeline and choose the "Crop Icon" on the menu bar located right on top of the timeline. Then, you will enter the "Crop and Zoom" window and choose the Aspect Ratio you want for the video at the lower left corner. You can also move the orange-colored frame to preserve the part you want and leave out the part you don't want. Here I choose the 4:3 option (original ratio is 16:9).
Step 4. Remove the black bar of the video
Now the aspect ratio is changed but there are black bars on the sides of the image. To deliver a better watching experience, we need to remove black bars from the video. Here I will introduce 2 actionable and easy methods for you.
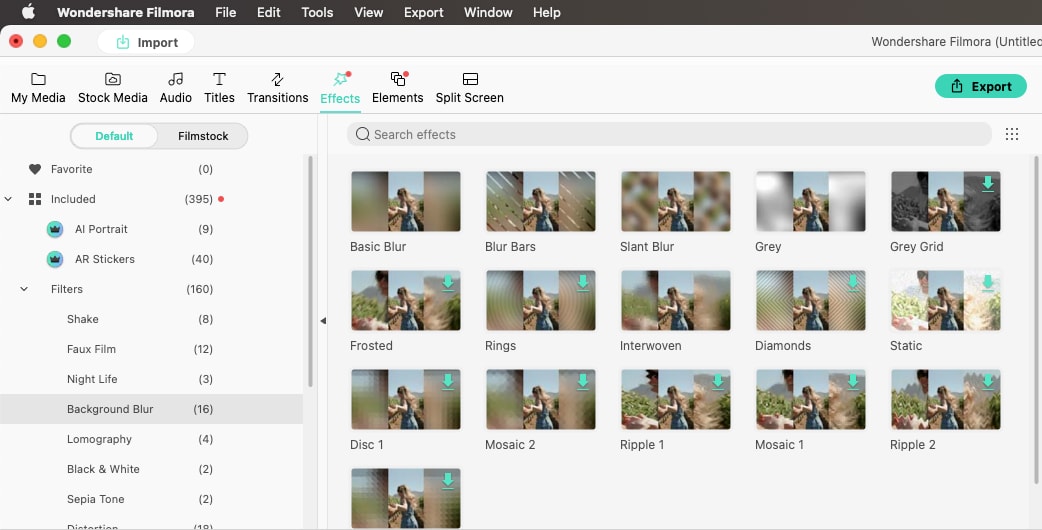
Method #1. Use Background Blur Effects to remove black bar.
The easiest way to remove it is to use the default blackground blur effects in Filmora. Choose it from Effects - Default- Background Blur -- the blur effects you like most (here I use the "Blur Bars" one). As you can see in the preview window, there are two transparent bars (with twill pattern) around the video, and it's better than the original black bar.

There are up to 16 different popular background blur effects in Filmora (as shown below), which are all well-designed. You can always find the one you like from them.
Method #2. Use multiple same clips to replace the black bar.
The second solution is to make several duplications of the orginal clip and use them to fill the black areas. Firstly, duplicate your video and put it on top of the original clip. As you can see in the picture below, now we've got Clip #1 and Clip #2.
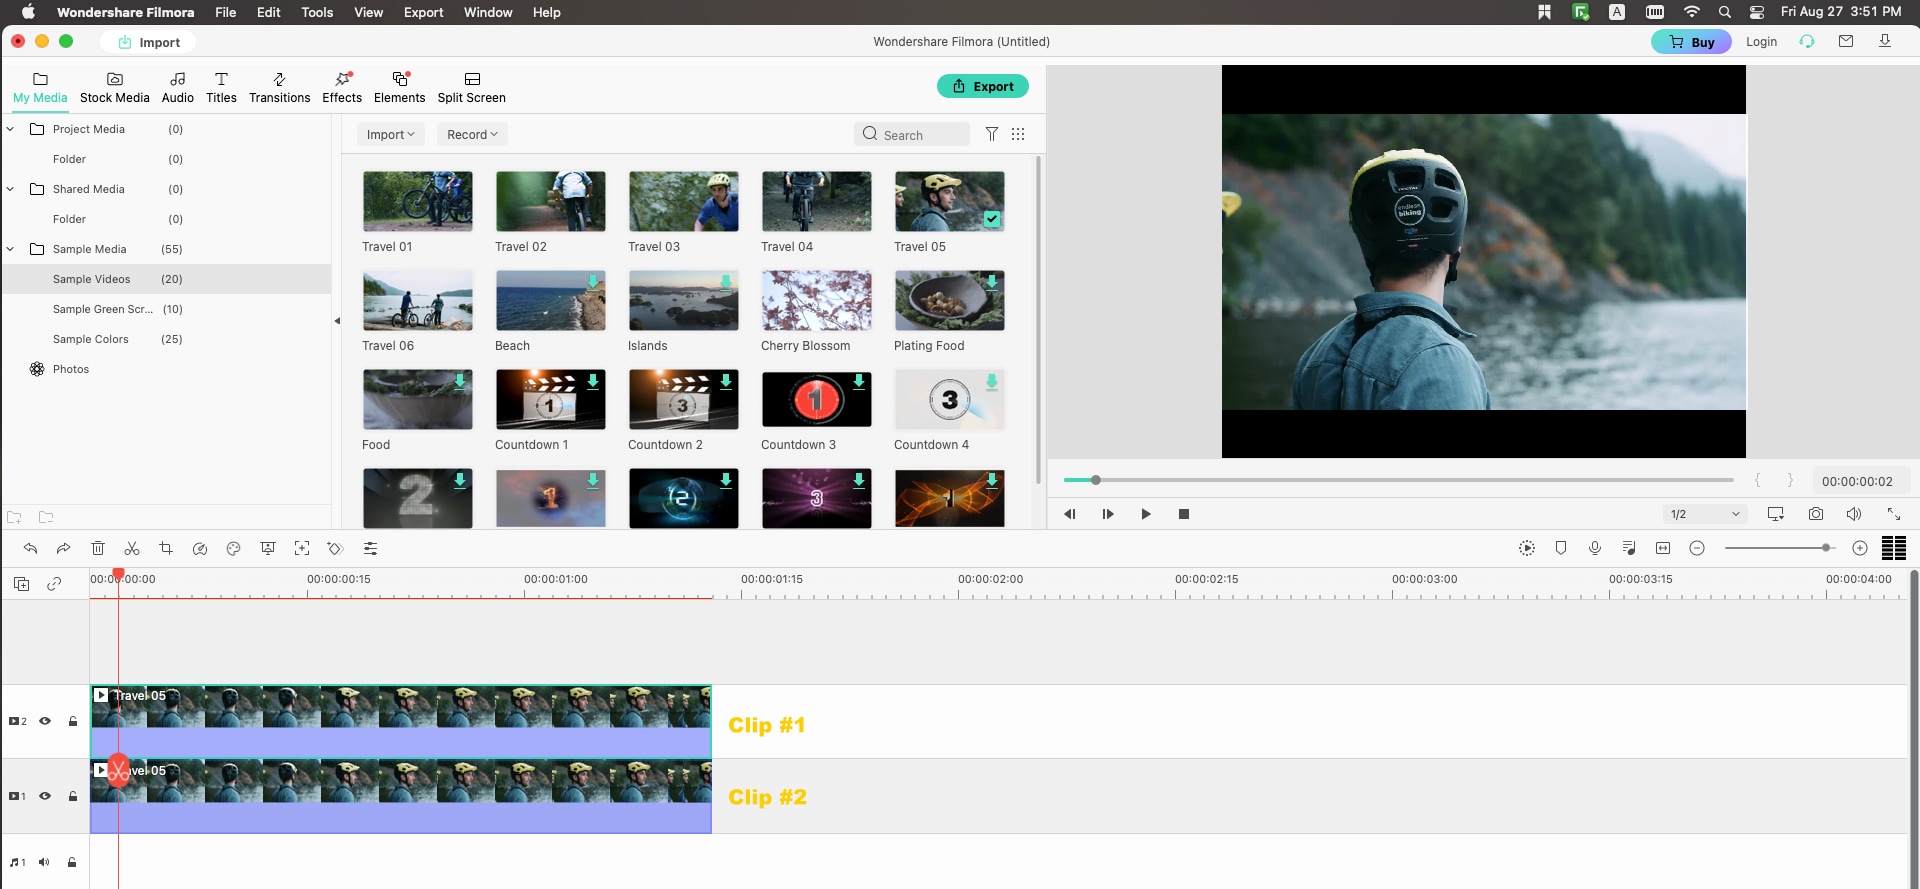
Secondly, click either clip to show the "adjustable frame" around the image. Now you can resize the video and relocate it.
Once you move the two clips into the right place, the black bar will disappear. And this is also one of the most popular methods that is used by TikTok, Instagramers.
Part 3: How to Change Aspect Ratio in iMovie on iPhone
Video editing can also be done on the iPhone using iMovie. However, just like iMovie for Mac, standard/pre-set values for video aspect ratio such as a square movie aspect ratio can’t be achieved on iMovie for iPhone—well, unless you achieve that manually.
Thankfully, an alternative method using FilmoraGo can be used to set standard video aspect ratios. If you want standard ratios, you can skip to the alternative solution below, otherwise use the steps below to change the video aspect ratio in iMovie for iPhone (crop):
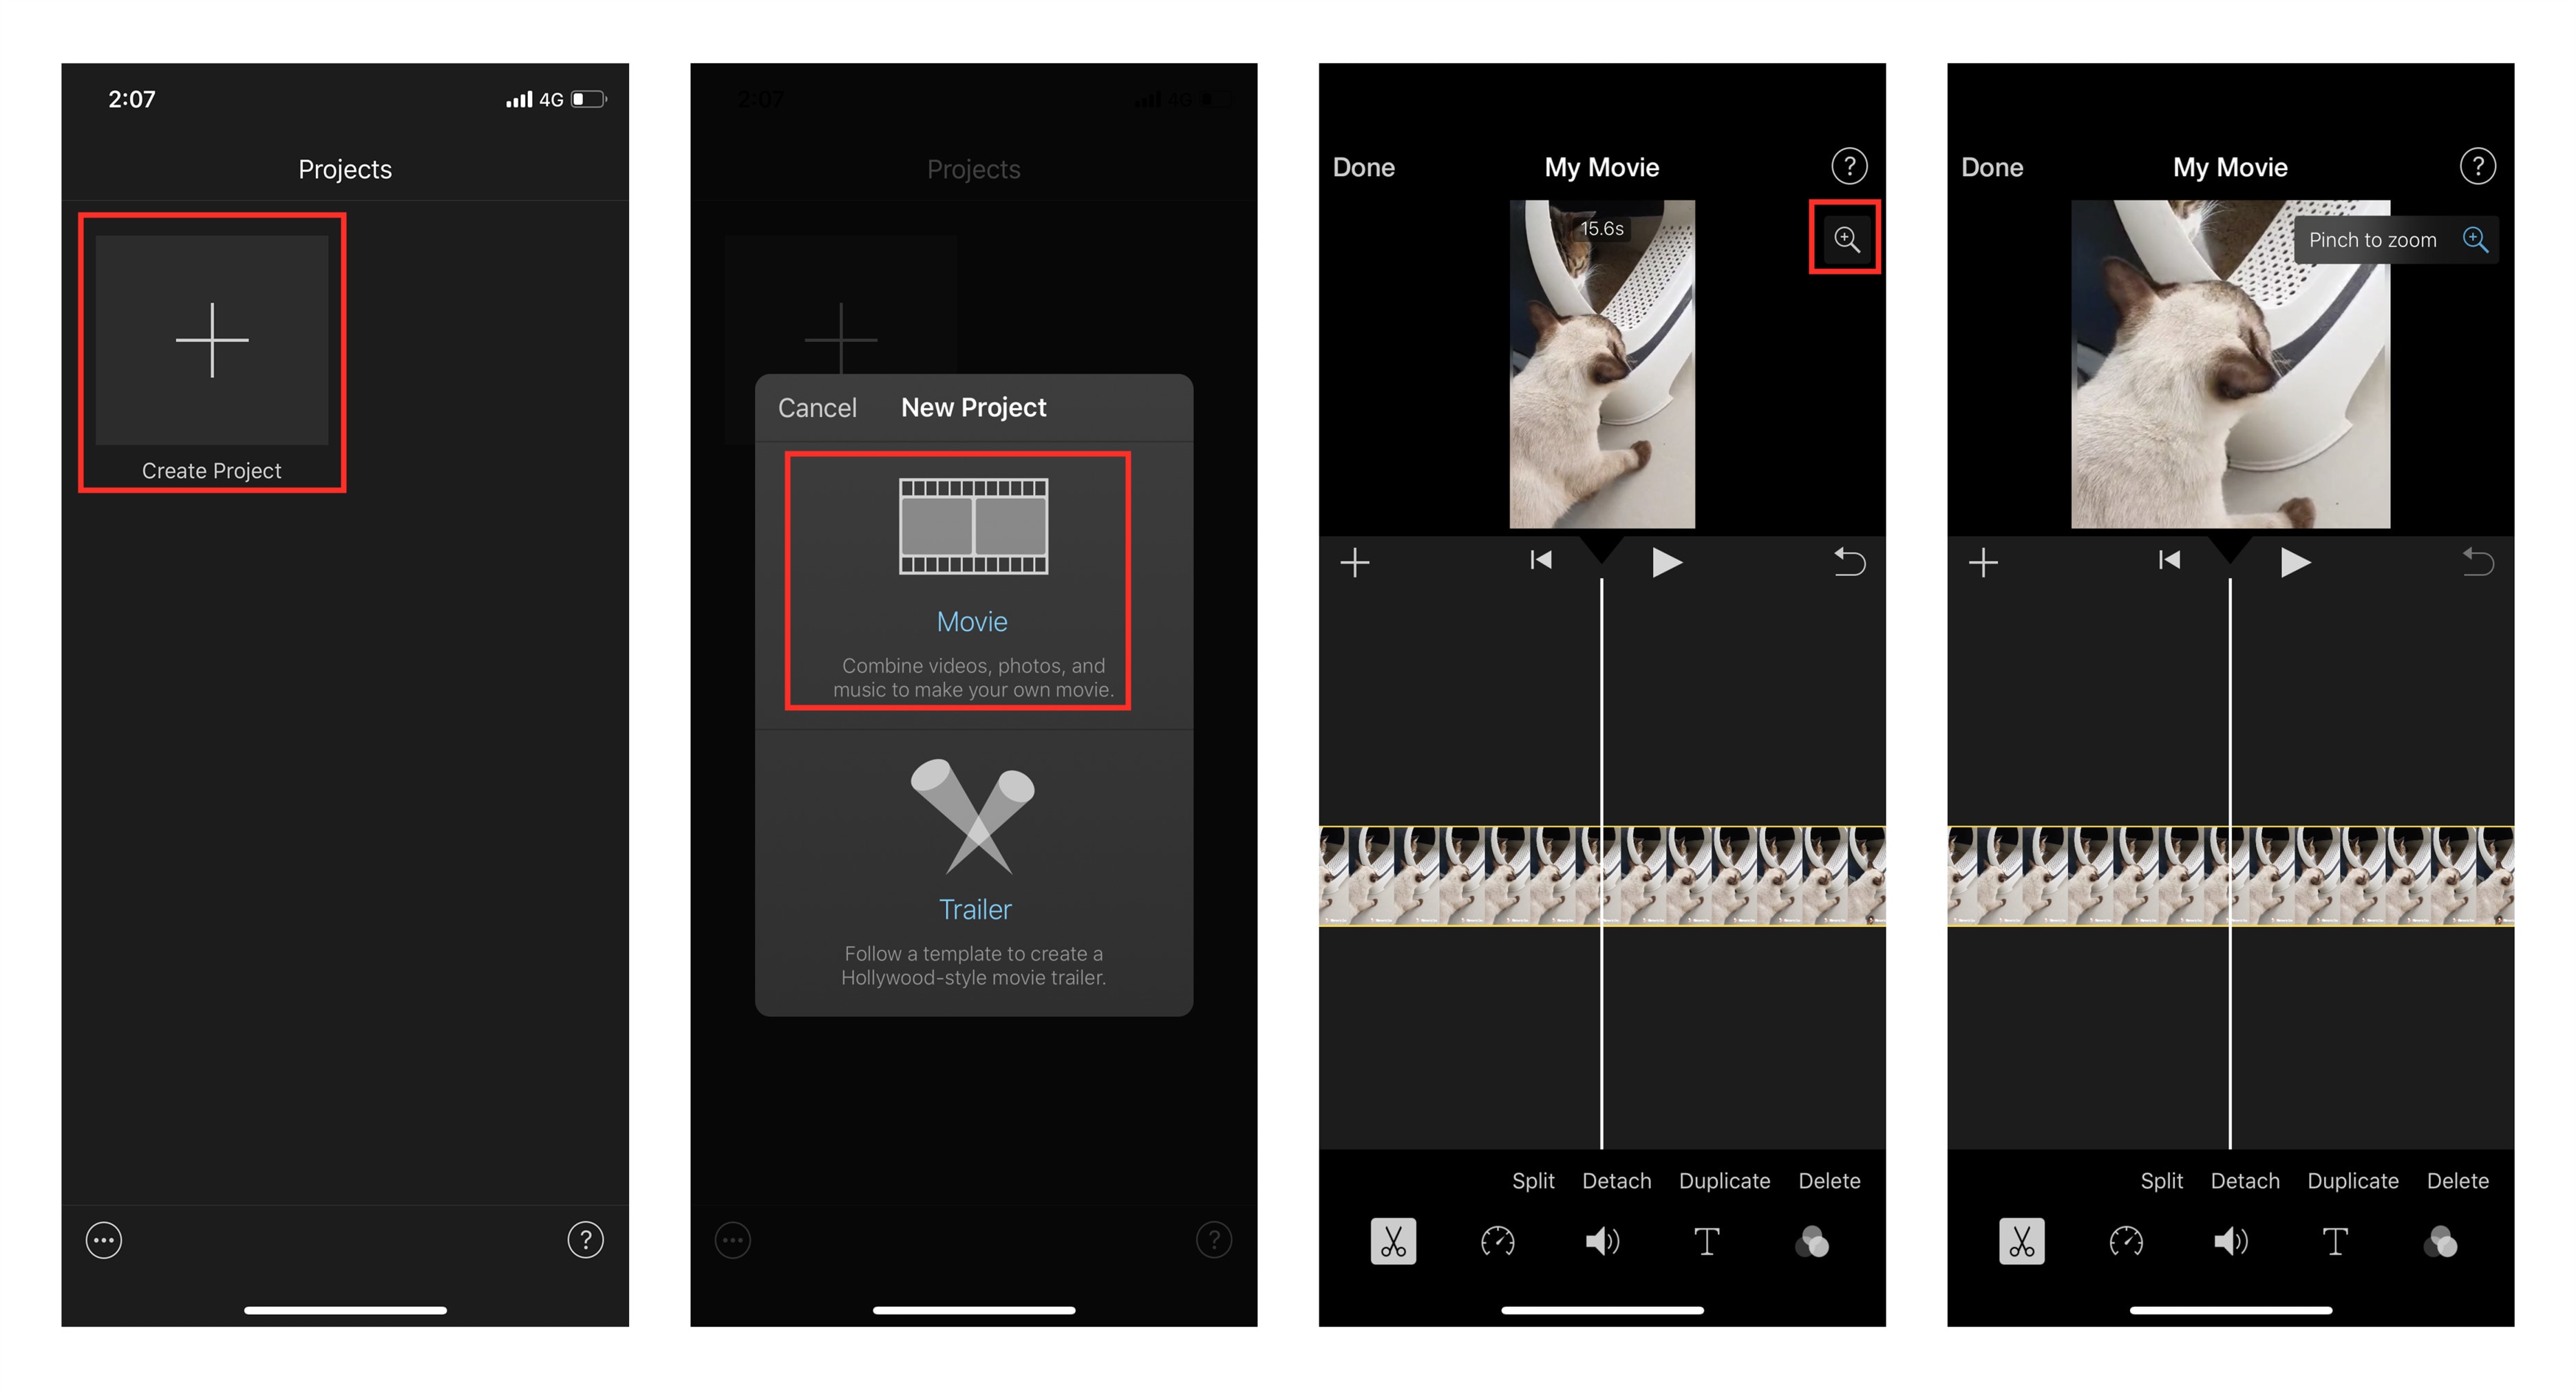
1. Open iMovie on your iPhone.
2. Click the Plus icon and select Movie.
3. Import your video(s).
4. Tap the video in the timeline and select the magnifying glass to start cropping.
5. Zoom/Crop your video as desired.
6. Click Done, and next Save Video.
Alternative Solution: Change Aspect Ratio using FilmoraGo
With FilmoraGo (available on iOS now) you can use standard and internationally recognized video aspect ratios for your videos. Please follow the simple steps below to change aspect ratio using FilmoraGo.
Step 1. Create a new project or open your recent project.
Step 2. Select Canvas: On the next screen after adding a video, select Canvas from the list at the bottom of the page.
Step 3. Select Format: You can select your desired ratio in format. 1:1 is a squared image/video—appropriate for profile photos on WhatsApp, for example.

Write in the end
Hopefully, you’ve learned how to change a video's aspect ratio to custom values using iMovie and custom/standard/pre-set values using Filmora Video Editor for Mac (or FilmoraGo). That was our major goal—the aim of this tutorial.
You see, setting the appropriate video aspect ratio is important as it helps compose better videos. It also helps you understand how to configure your camera to capture with the appropriate ratio so as to you upload or share your videos with zero or little editing.
Unsatisfied with the plain or boring videos you create? Choose an ideal template from our growing list of professionally made video resource packs and customize it to meet your needs. Bring every creative ideas to alive with our user-friendly editing features, from cool reaction video, to special zoom into eye effect, or memorable holiday video, romantic wedding video...Think out of the box and show it to the world!


