Apple has a wonderful video editor called iMovie. This tool comes with some great editing features, and will give you decent results of your project. You need to know how to split video in iMovie so you can edit long clips into shorter ones, or cut out parts that you do not need. This tutorial will show you how to cut clips on iMovie and its alternative solution.
Part 1. How to Split Video in iMovie
As mentioned above, iMovie is quite a capable video editor, but it does have its challenges. This is a program that is ideally suited for the Mac operating system. Here is a short tutorial on how to split clips on iMovie.
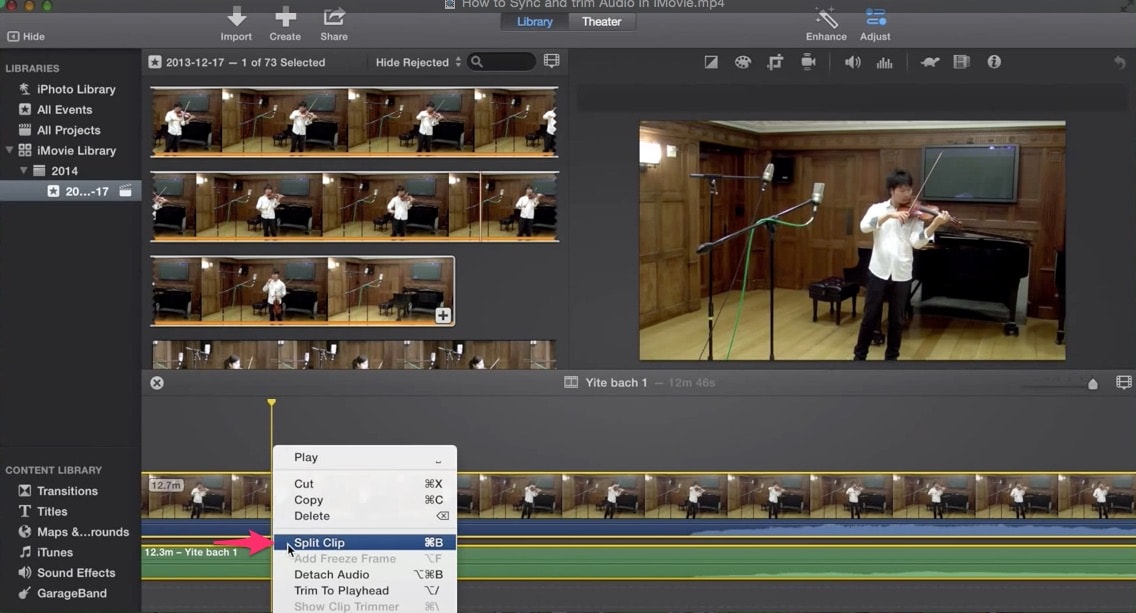
Step 1: After you have imported or opened your video, go to the timeline and select the clip that you want to split.
Step 2: now place the play head at the exact position where you would like the video split.
Step 3: Select “Modify > Split Clip”. The movie will now be split into two parts.
The split video iMovie process is very short and quick. There are certain challenges that you may get when splitting your video in iMovie.
Problems of Using iMovie to Split Video
• Once you have split a clip in iMovie and then exported it, you can no longer edit that project. You will have to start all over again should you realize you have another edit that you want to make.
• iMovie is limited to iOS and Mac, which makes it unworkable for Windows users.
• iMovie also takes a long time to render video that has been exported in a different format from the original.
Part 2. How to Split Video in iMovie Alternative
The Best iMovie Alternative Alternative
Filmora Video Editor is a video editor that you can use on both Mac (10.13 included) and Windows operating systems. This gives it universal use ad makes it ideal for splitting videos. The program has two simple modes. The first one allows you to do some basic editing tasks, which are based on presets that are found in the tool. The second is full capacity, which gives you full control of all the existing functions.
- It comes with fantastic features to enhance your videos – After splitting your video, you can now add transitions and titles to better capture the moment. Tell people where you were, or add funny text enhancements.
- Full control of editing functions – you can perform all editing functions when you use Filmora. You can Join, Split, Cut, Rotate, Crop and much more. You can also fully edit the audio channel, in case you want to remove some of it, or simply add some music.
- Stylize your videos – With more than 200 filters at your disposal, you can fully stylize your videos with clever effects and overlays. Now you can truly make a statement on your videos using these filters.
- Other features – You can record a voice over for your video and it will be recorded directly to the project. You can also record the screen, if you want to write a tutorial or share your screen. The final video can be viewed using the full screen player.
How to split a video in iMovie Alternative on Mac (macOS 10.13 High Sierra included)
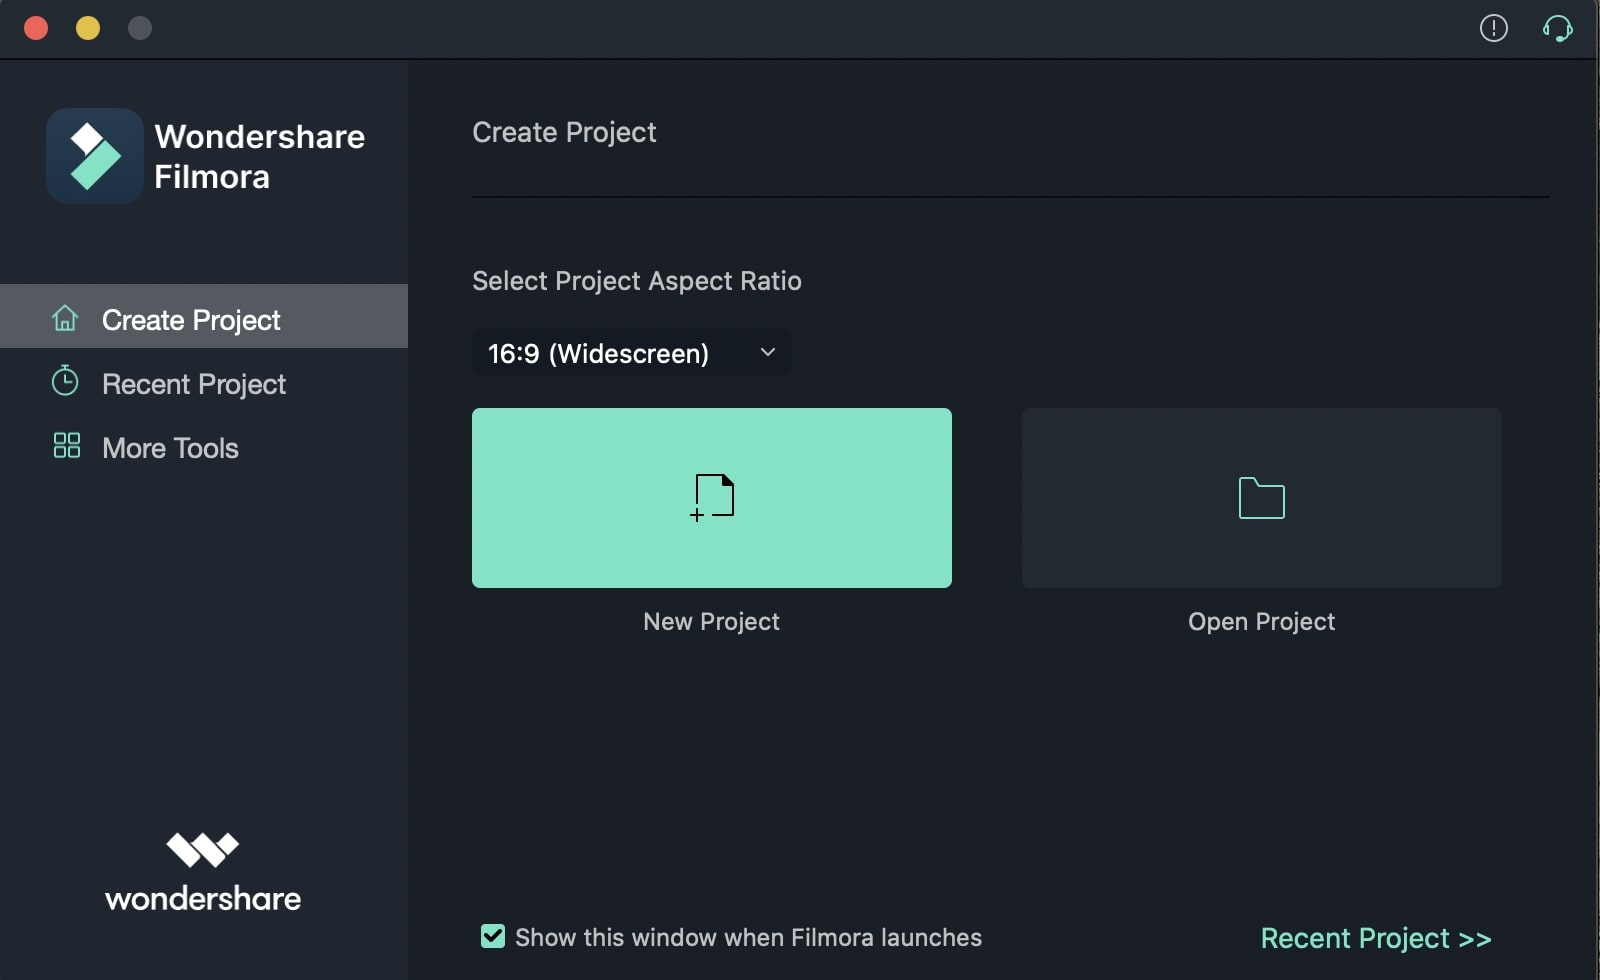
Step 1: Launch Filmora Video Editor
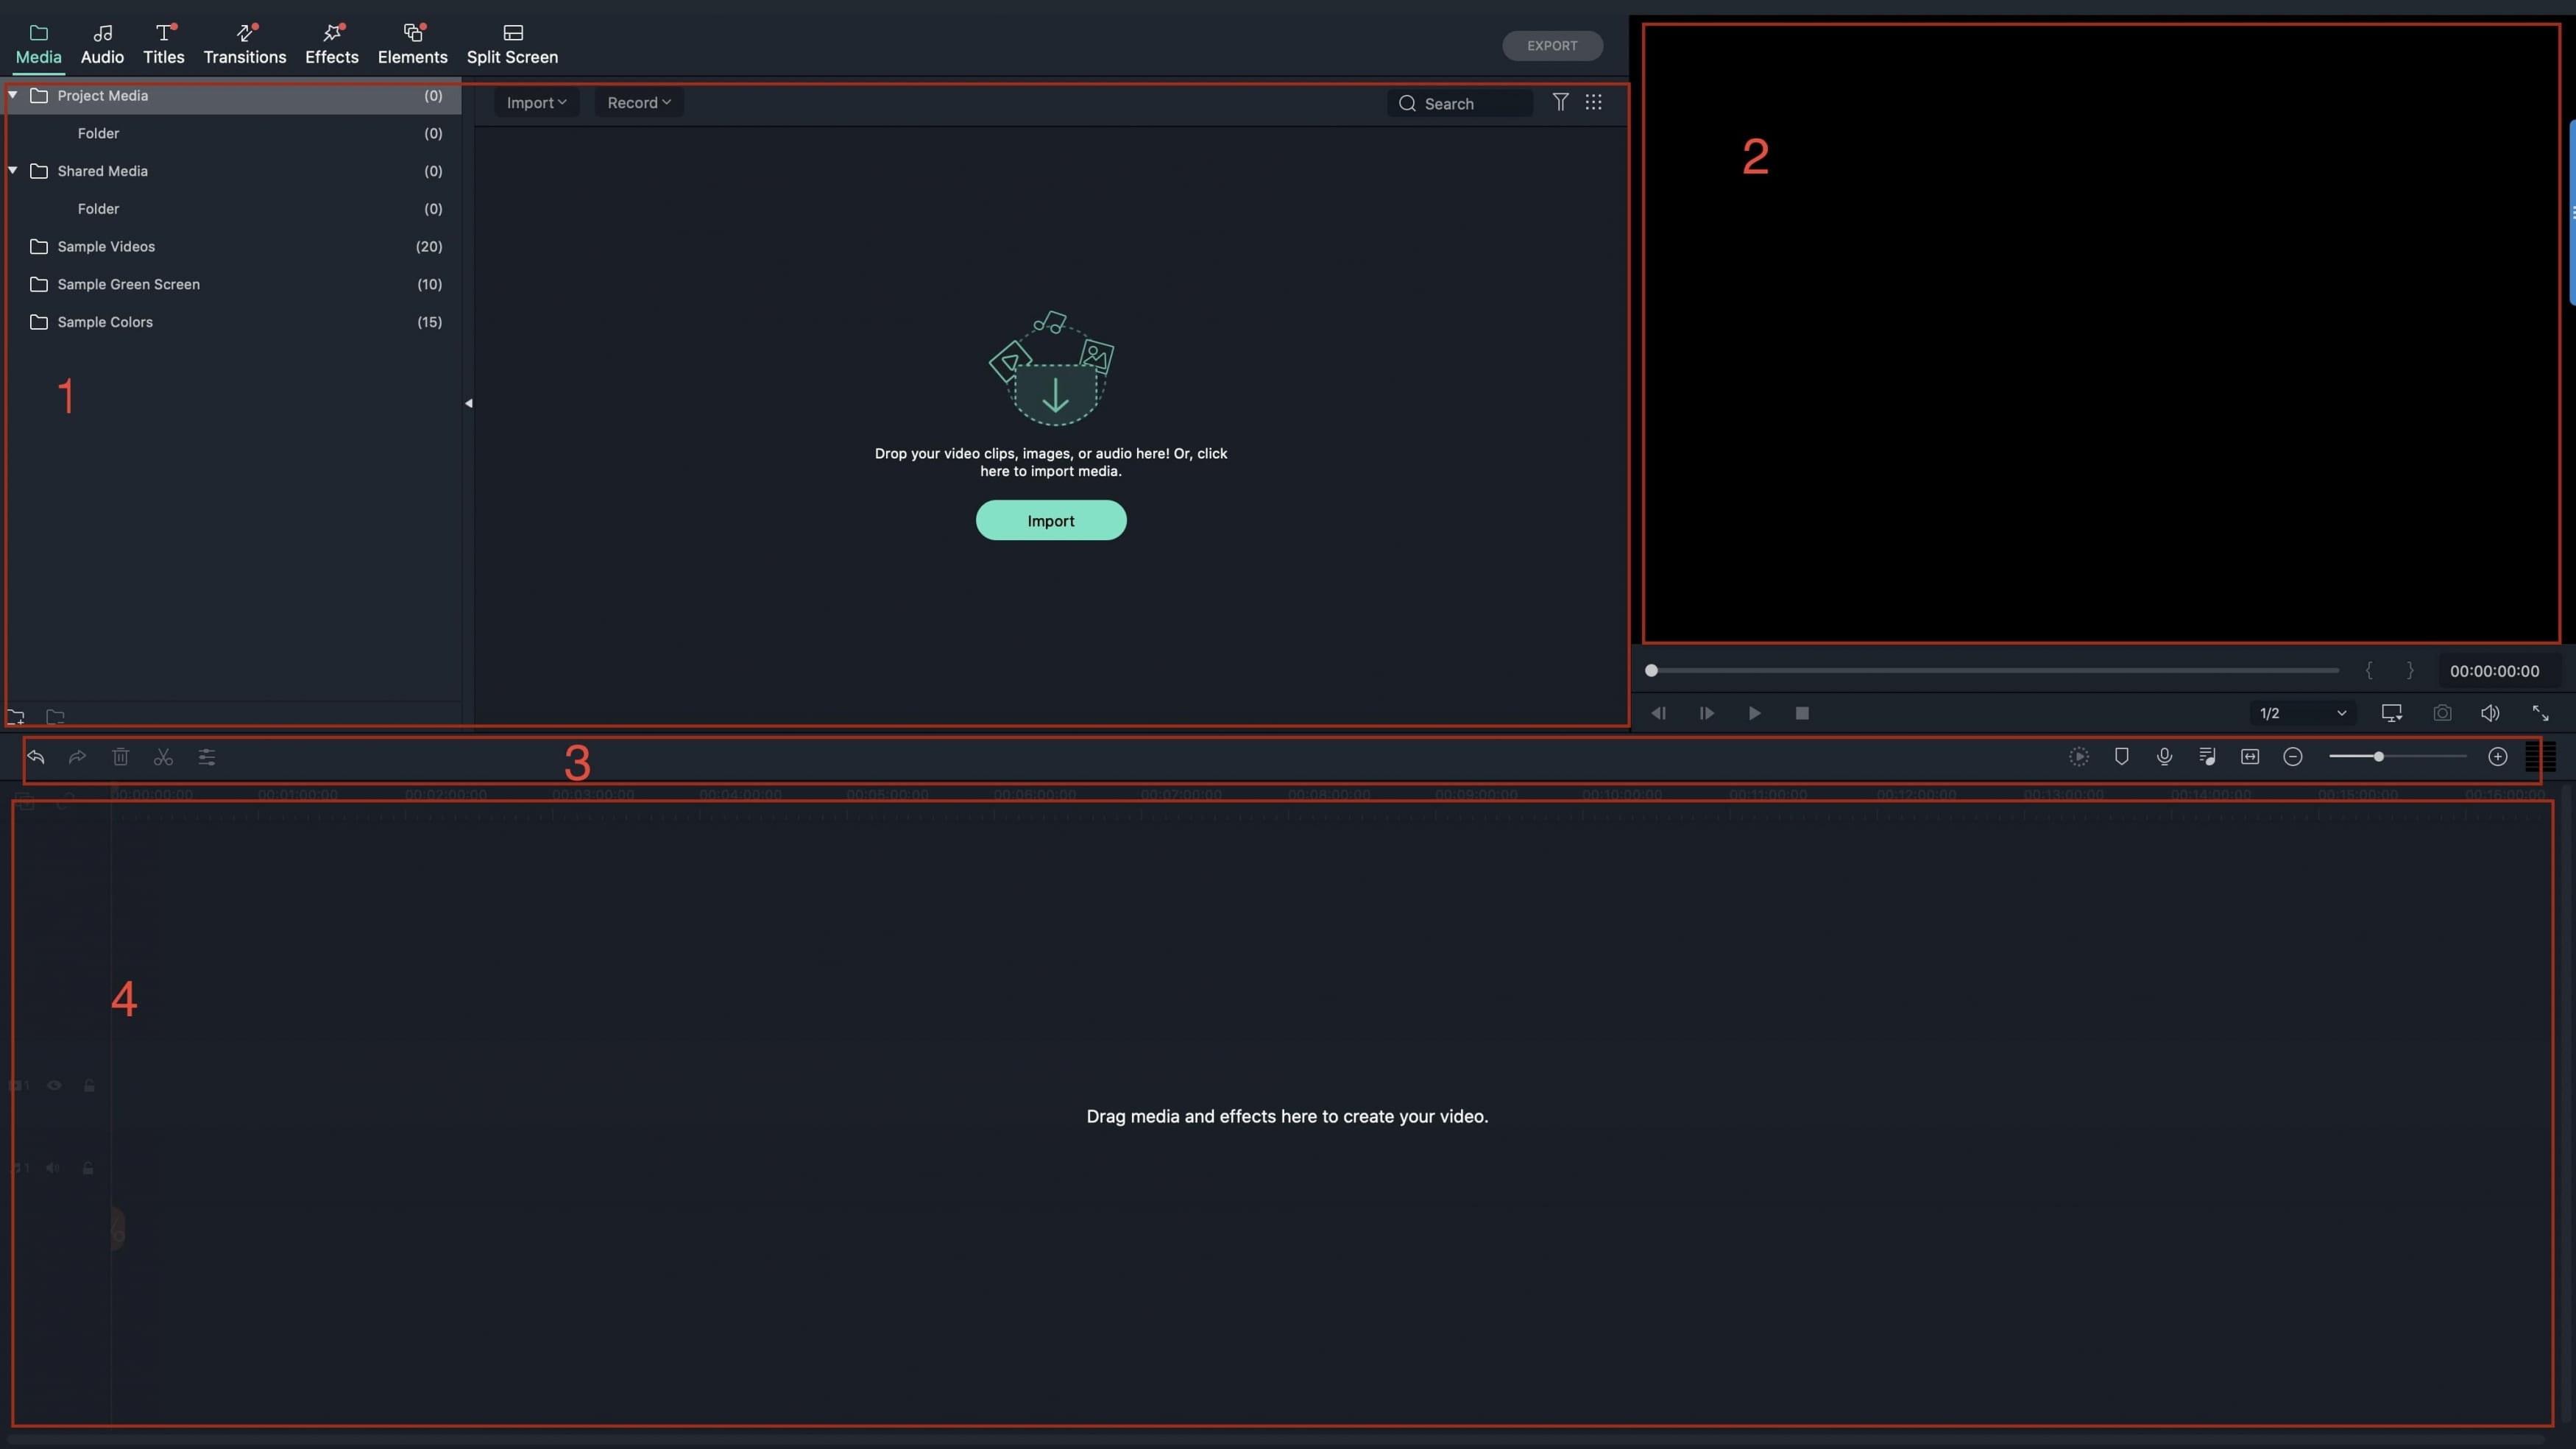
Download and install Filmora on your computer and then launch it to get to the main interface. And click on the “Create New Movie” to start video splitting.
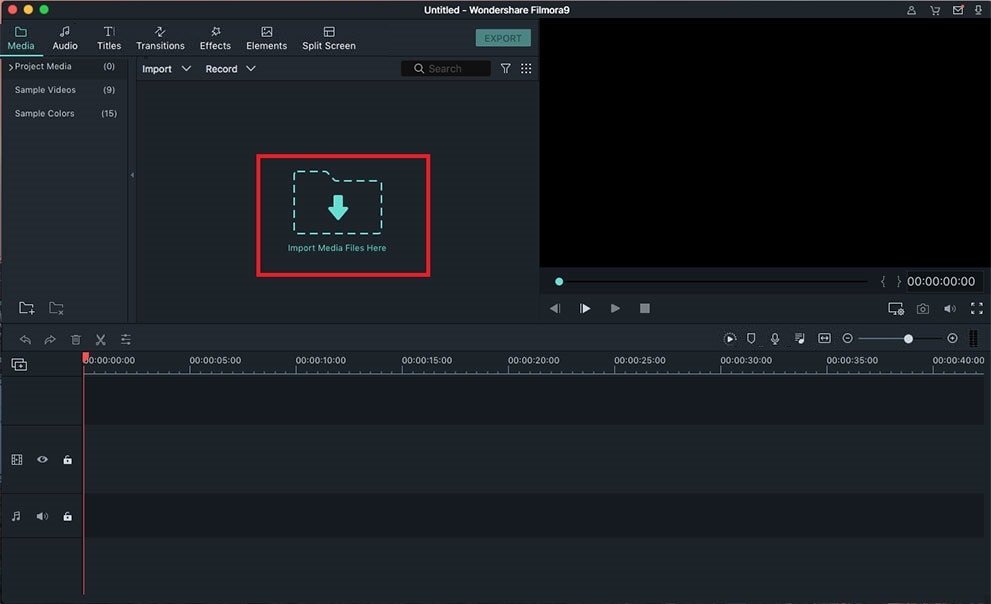
Step 2: Import video to the program
With Filmora, you can opt to search for your videos using explorer, and drag it into the media library to import the video, which will save time.
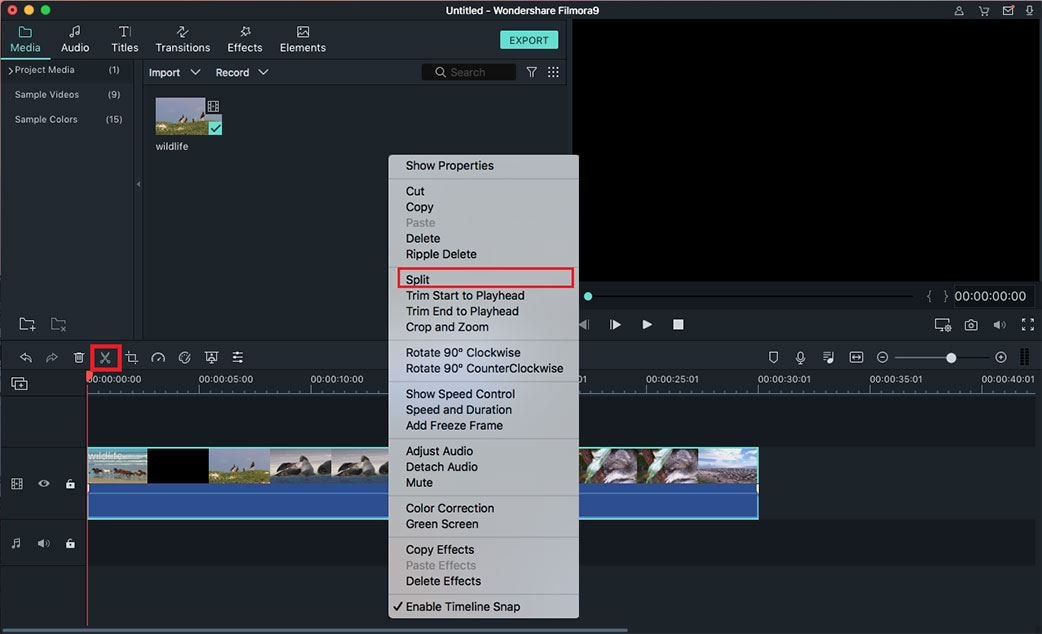
Step 3: Split the video into small clips
Drag the clip to the timeline that you want to be split and then move the play head to the point where you want the clip split. You can zoom in so you are better above to see the exact point for cutting the movie. If you know the exact time that the movie should be split, then you can manually input it and the play head will automatically go there.
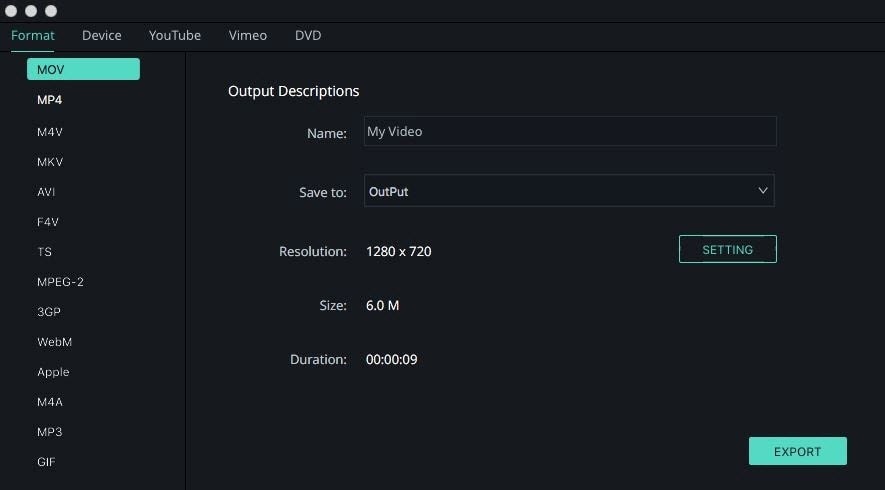
Step 4: Export the video file
Once you have previewed your project and are satisfied with the results, you can now export it according to your wishes. You can send the video to your mobile devices in the form of MP4. You can also log into your Facebook or YouTube accounts and upload the video with ease. Finally, you can burn the video directly to a DVD disk.