


A lot of computer users are confused about video editors in the internet. There are so many video editors around, but which one will be the best for a beginner? If you are an Apple computer user, you definitely have iMovie software installed on your computer from the beginning.
Video editing in iMovie has become increasingly famous because it has all kinds of features you will need to edit a video. It's easy to use and you don't need to be an expert when you want to edit a video by using iMovie, so it's a great video editor for you if you are a beginner.
A lot of people want to know how to trim video in iMovie, so this article will be a clear guide for you. With the help of this article, you can easily trim video in iMovie on your Mac. So without wasting anymore time, follow this article till the end.
- Part 1. How to Trim Video in iMovie on Mac
- Part 2. Filmora Video Editor - The Best Choice for You to Trim Your Video
How to Trim Video in iMovie on Mac
It's really easy to trim video in iMovie. All you need to do is follow the below guideline and perform the steps accordingly.
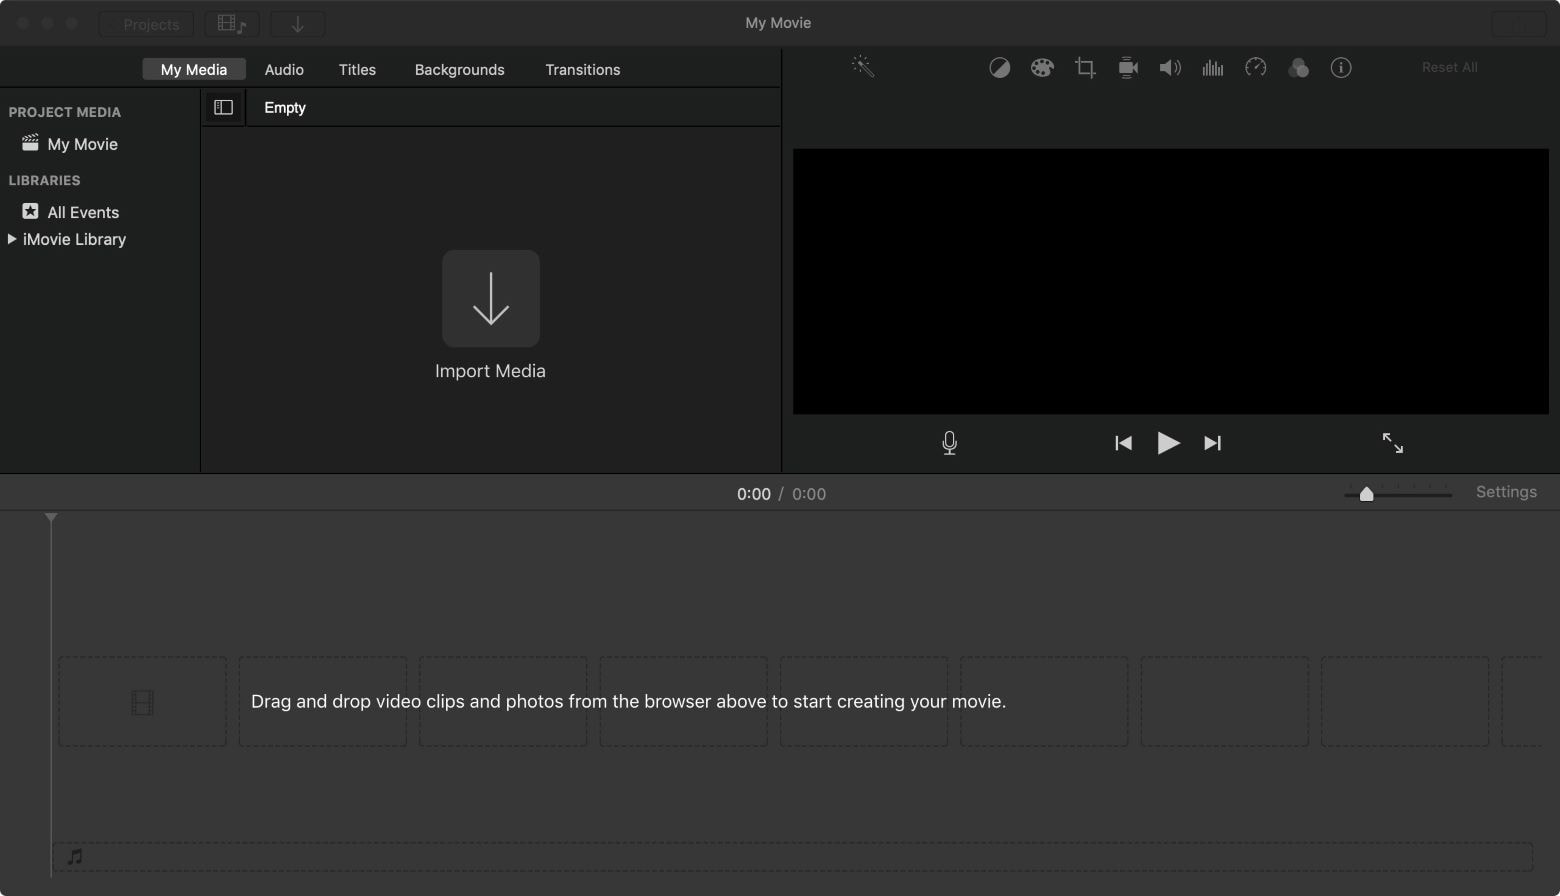
Step 1: First you need to launch iMovie in your Mac computer and go to the "Project" tab. Then click on Create New and select "Movie".
Step 2: Now select "Import Media" to import the video file that you want to trim in iMovie.
Step 3: Next you need to drag and drop the video in iMovie timeline, then start to trim your video.
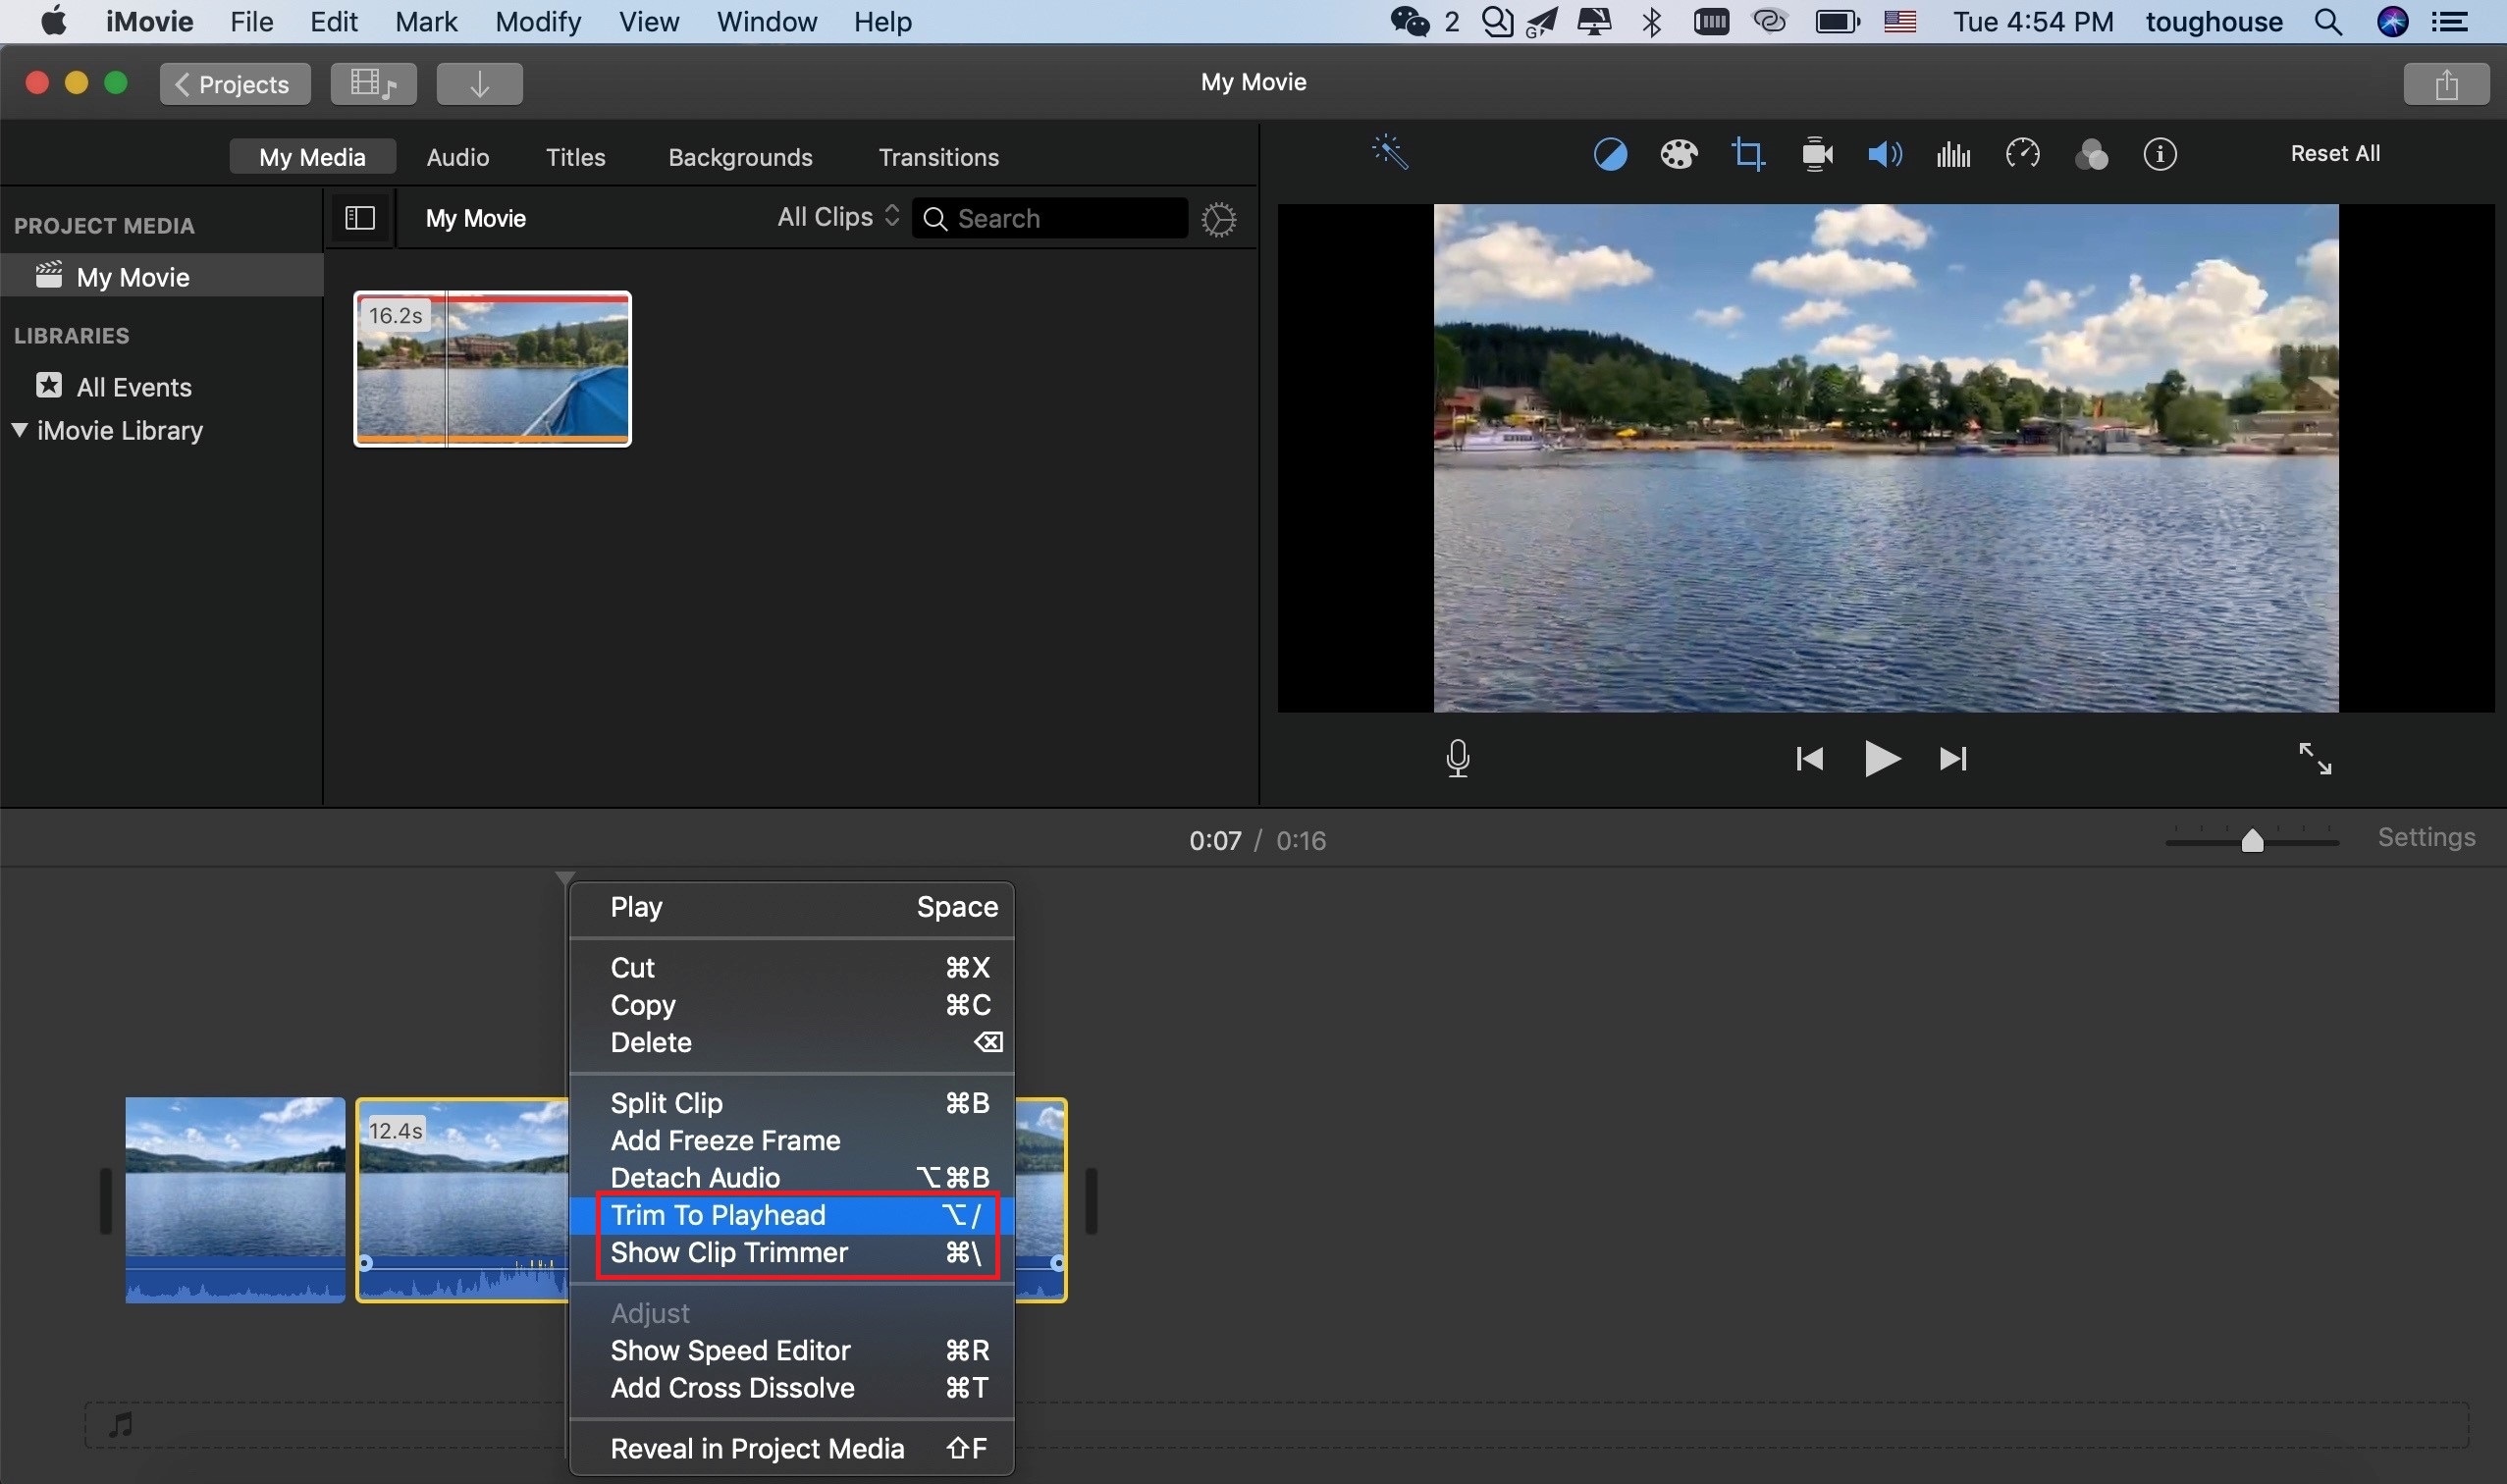
Option 1. Trim video directly in timeline:
Click and drag directly the head or the end of video on the timeline to trim it. Or you can move the cursor to the right position and right click on it, choose "Trim To Playhead" (option + / ).
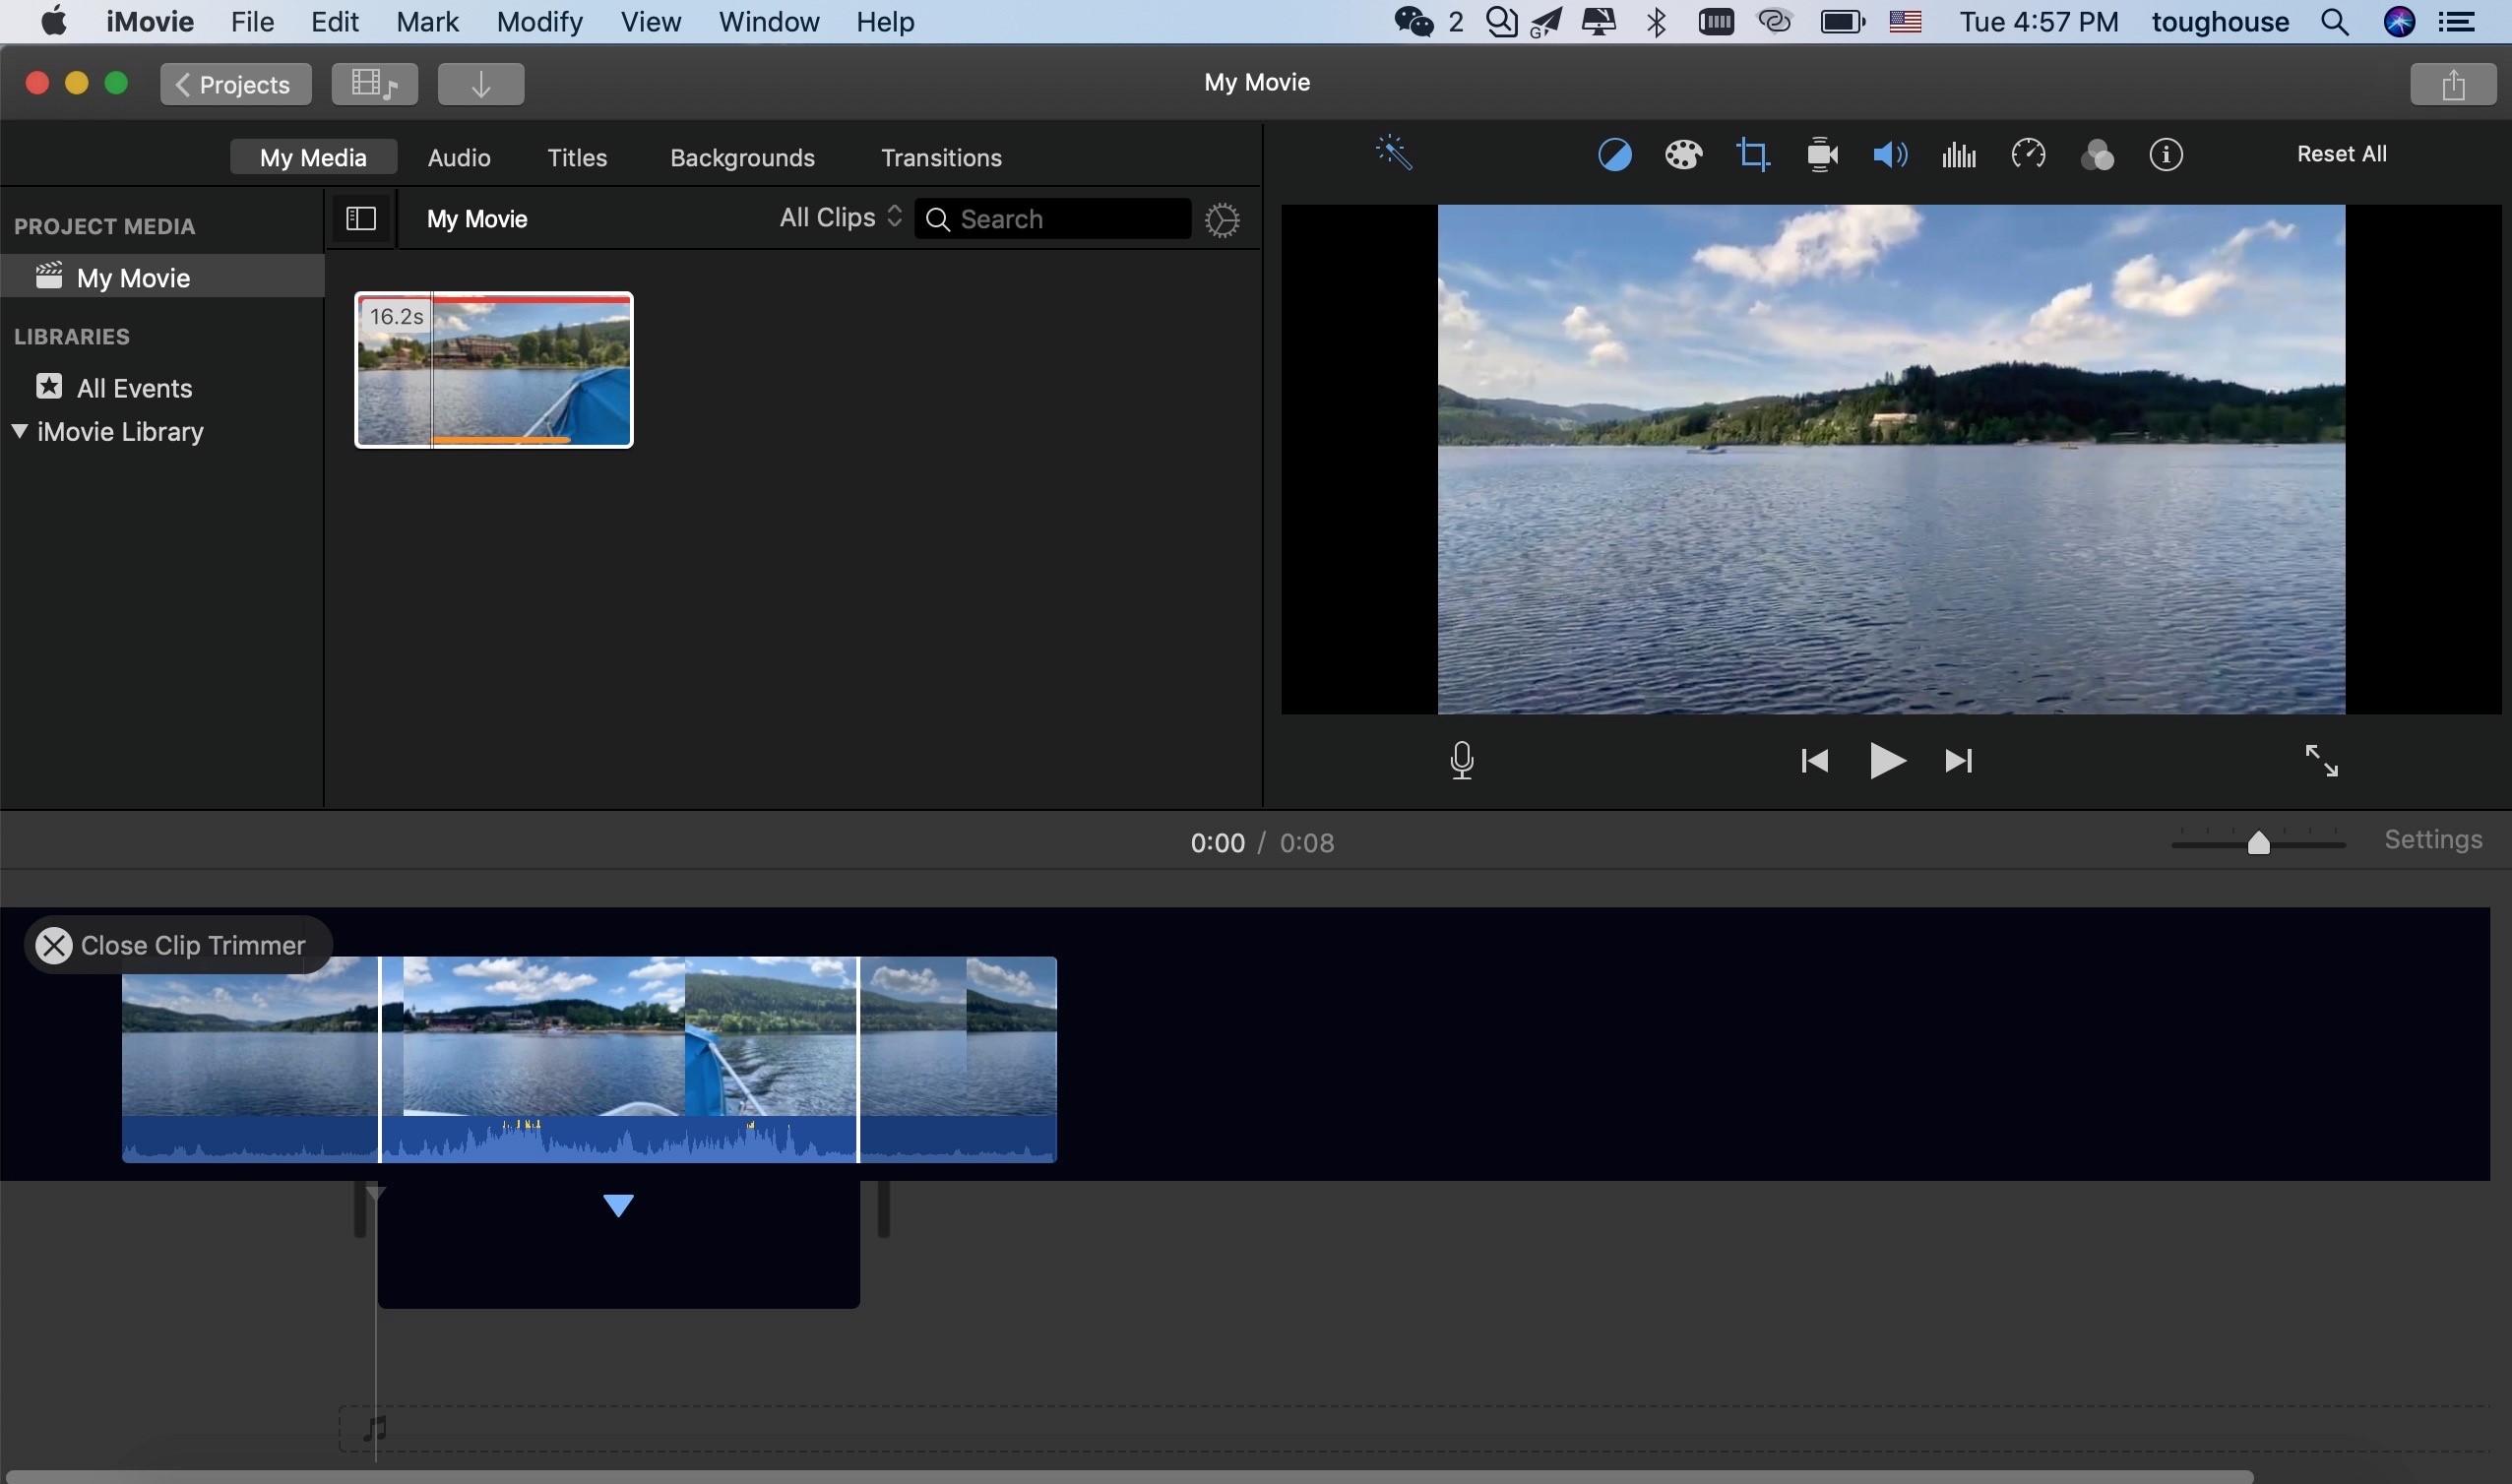
Option 2: Use "Clip Trimmer" in iMovie
Or you can select "Show Clip Trimmer" (command + /) to trim your video. With Clip Trimmer, you need to click on video and move the cursor to trim the head and the end of video. In this processus you can preview the head and end of your video at the same time in the preview window.
Step 4: Your video is finally trimmed. You can now edit the video in iMovie and export it when done.
Although iMovie is very easy to get started, for advanced editing, it's functions are limited. Sometimes people need advanced video editing for a big project which iMovie couldn't achieve, and you can only use iMovie in Mac operating system.
But don't worry, in this article, we will introduce the best alternative of iMovie– Filmora Video Editor, which are available for both Mac and windows computer with a lot of advanced editing tools.
And if you want to know more alternatives to imovie, please check this page.
Filmora Video Editor – The Best Choice for You to Trim Your Video
Filmora Video Editor for Mac or Filmora Video Editor for windows is the best alternative of iMovie on the internet and it’s a video editor that will help you whenever you need. It has all the best functionalities for you to edit your videos such as – rotating, trimming, splitting, cropping, joining, etc. and more. You can easily use this software to make great videos, edit audio, apply effects and share your new video in various social media websites and devices.

Key features:
- It can import video, photo and audio files from iPhone, iPad, Android, camcorder, cameras and other devices, also from various social media websites.
- Filmora brings a range of creative features such as the capability to add overlays and filters to enhance the appearance of your videos. The program also allows you to add titles, text, transition and motion elements.
- It allows you to adjust the aspect ratio, hue, brightness, speed, saturation, contrast etc. and many other things.
- It supports Mac iOS. and also Windows 10/8/7/Vista/XP .
- Create high quality videos with more than 200 filters and more effects resources.
How to Trim Video on Fimora Video Editor?
Filmora Video Editor is the best choice for anyone who doesn't know how to edit their videos easily. Anyone can start using this editor and learn using it within a few minutes. You can easily trim your videos on Filmora Video Editor in a few simple steps. Here is how you can do it.
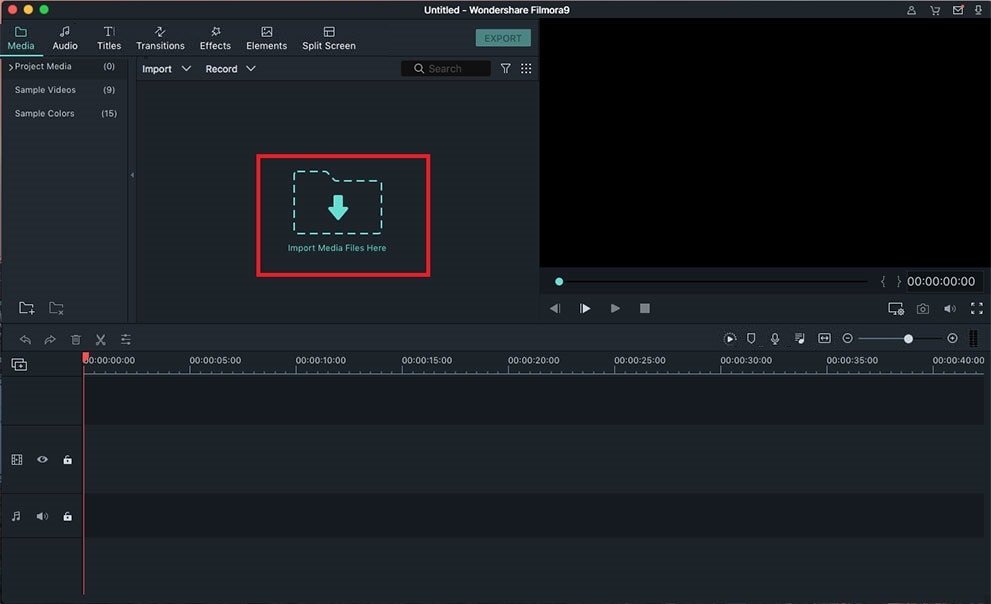
Step 1: Import Video for Trimming
To use Filmora Video Editor to trim videos, the first thing you should do is to import files to the program by clicking on the "Import Media Files Here" icon to import video clips into the software. Then drag and drop the file into the timeline.
Step 2: Trim Video
Now you need to set the starting and ending point of the video that you want to trim, then right click the video on the timeline and select "Trim Strat to Playhead" or "Trim End to Playhead".
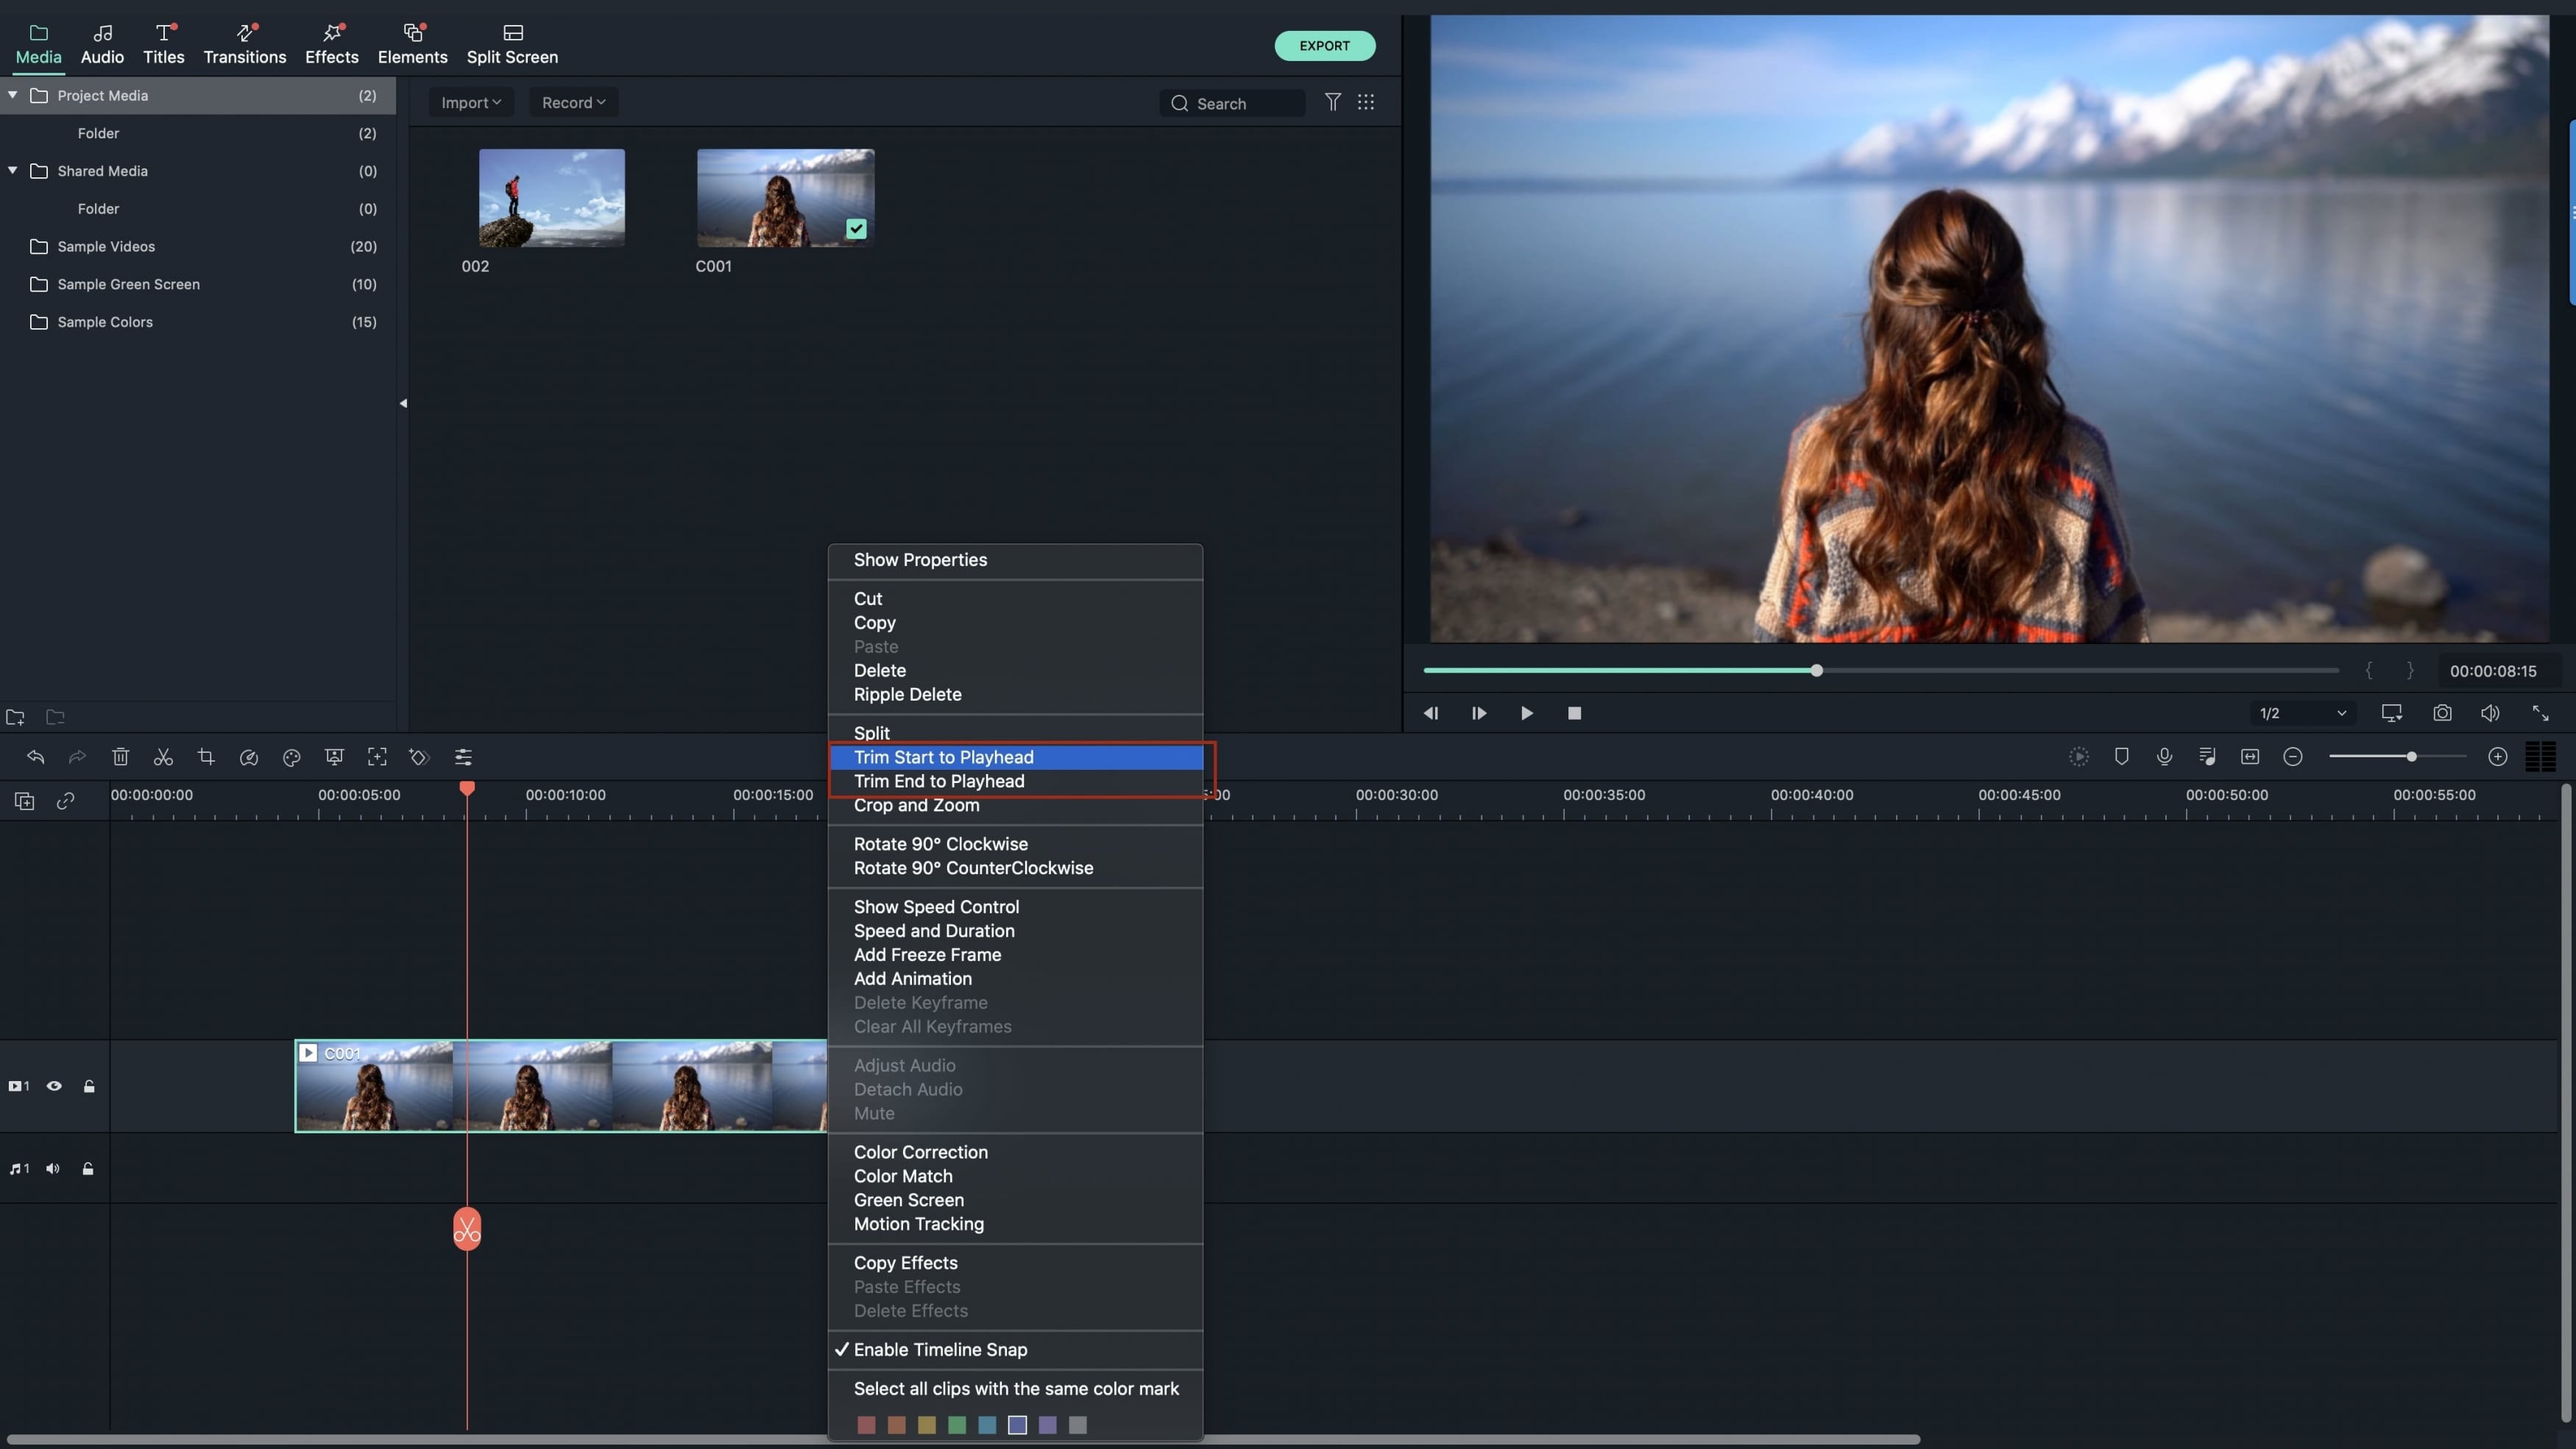
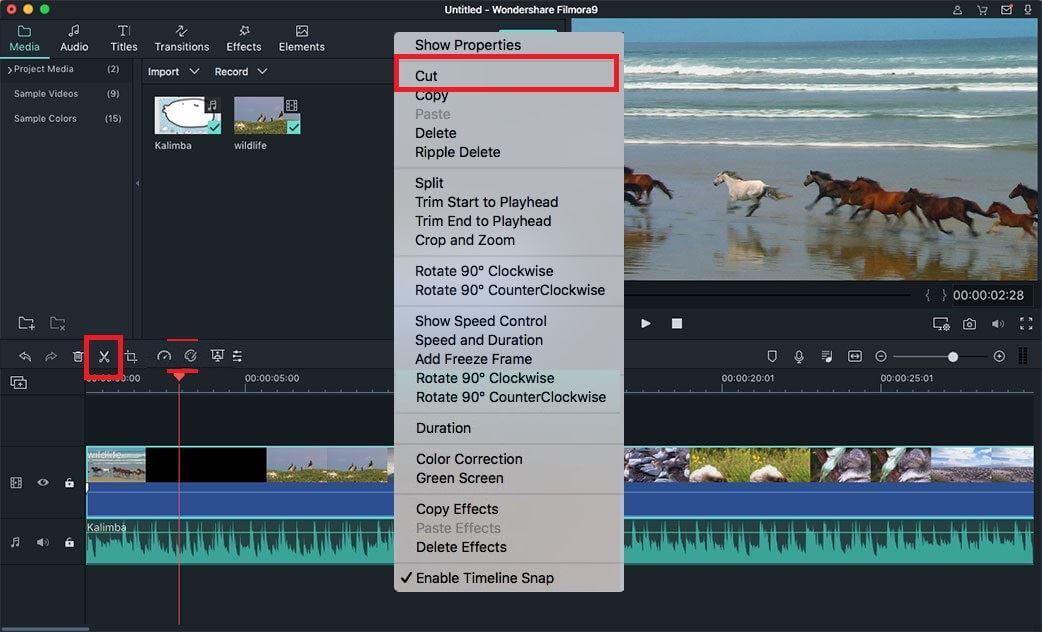
If you want to cut video, then double click on the scissors icon to cut the video. After that you can right click on the unwanted video clip and select "Cut" from options. The unwanted video portion will be removed from the timeline.
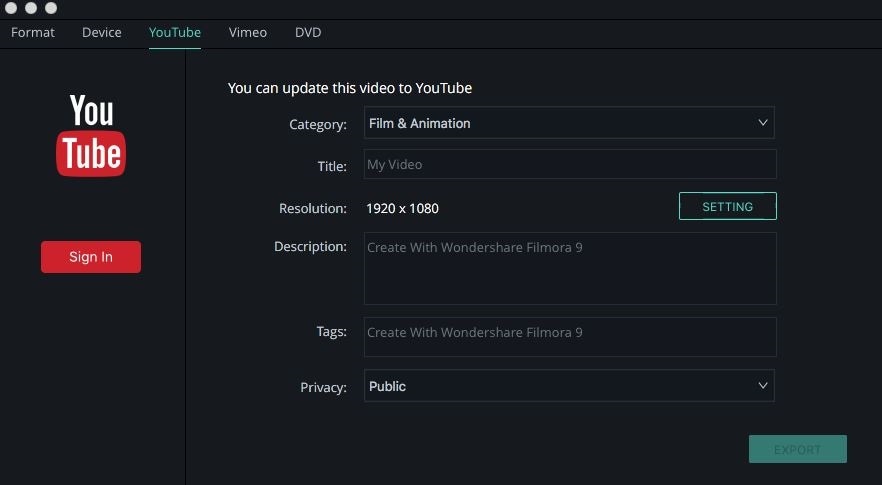
Step 3: Export Video
Finally you can click on "Export" and choose the output device or social media and video format. Then click on "Export" to save the video in your computer.
Conclusion
This article will not only help you to learn how to trim video in iMovie, but also in it's best alternative - Filmora Video Editor. Actually you can trim video in iMovie but iMovie has limited functions. So if you are a beginner but you want the taste of an advanced video editor without being an expert, then Filmora Video Editor is absolutely the best choice that you can make.
Compared with iMovie, the pros of Filmora Video Editor:
1. Easier to edit videos for beginners.
2. Supporte more operating systems and formats than iMovie.
3. Gives complete control on a video project.
4. Various videos exporting options available, including YouTube.


