


How do you prevent soundtracks from starting or ending abruptly? You apply the Fade-in/Fade-out audio effect. But actually, the fade transition effect is not only used at the beginning of music or to trail it; it can also be used in the middle—maybe to make voice-overs clearer—as you notice over the radio whenever the presenter is talking over a piece of background music. This sound effect has quite a number of ways it can be utilized and is quite popular amongst sound engineers.
When working with multiple soundtracks, for example, you could transit them by gradually fading out one and gradually fading in the next—doing this actually gives your work a smoother tone. Above all, using a fade-out effect isn’t a bad way to say goodbye to your audience. Right?
Alright. Let’s quickly take a look at how to fade music in iMovie.
- Part 1. Fade Music Using iMovie’s Fade Handles
- Part 2. Fade Music Using iMovie’s Audio Inspector
- Part 3. How to Fade-in/Fade-out Music with Ease [Recommended Method]
Option 1: Fade Music Using iMovie’s Fade Handles
Any good video/sound editor can apply a fade effect to your music/background music. Do you use iMovie and wondering how to fade-in or how to fade-out music in iMovie? Simply get the software ready and next, follow the detailed instructions/steps below:
Step 1: Import/Add the File to iMovie
Whether its a standalone music file or background music in a video, simply add the file to the “My Media” panel on iMovie. The easy way is by dragging the file and dropping it on the “My Media” panel in the software. The other way is to manually select the files from “Files” in “Import”.
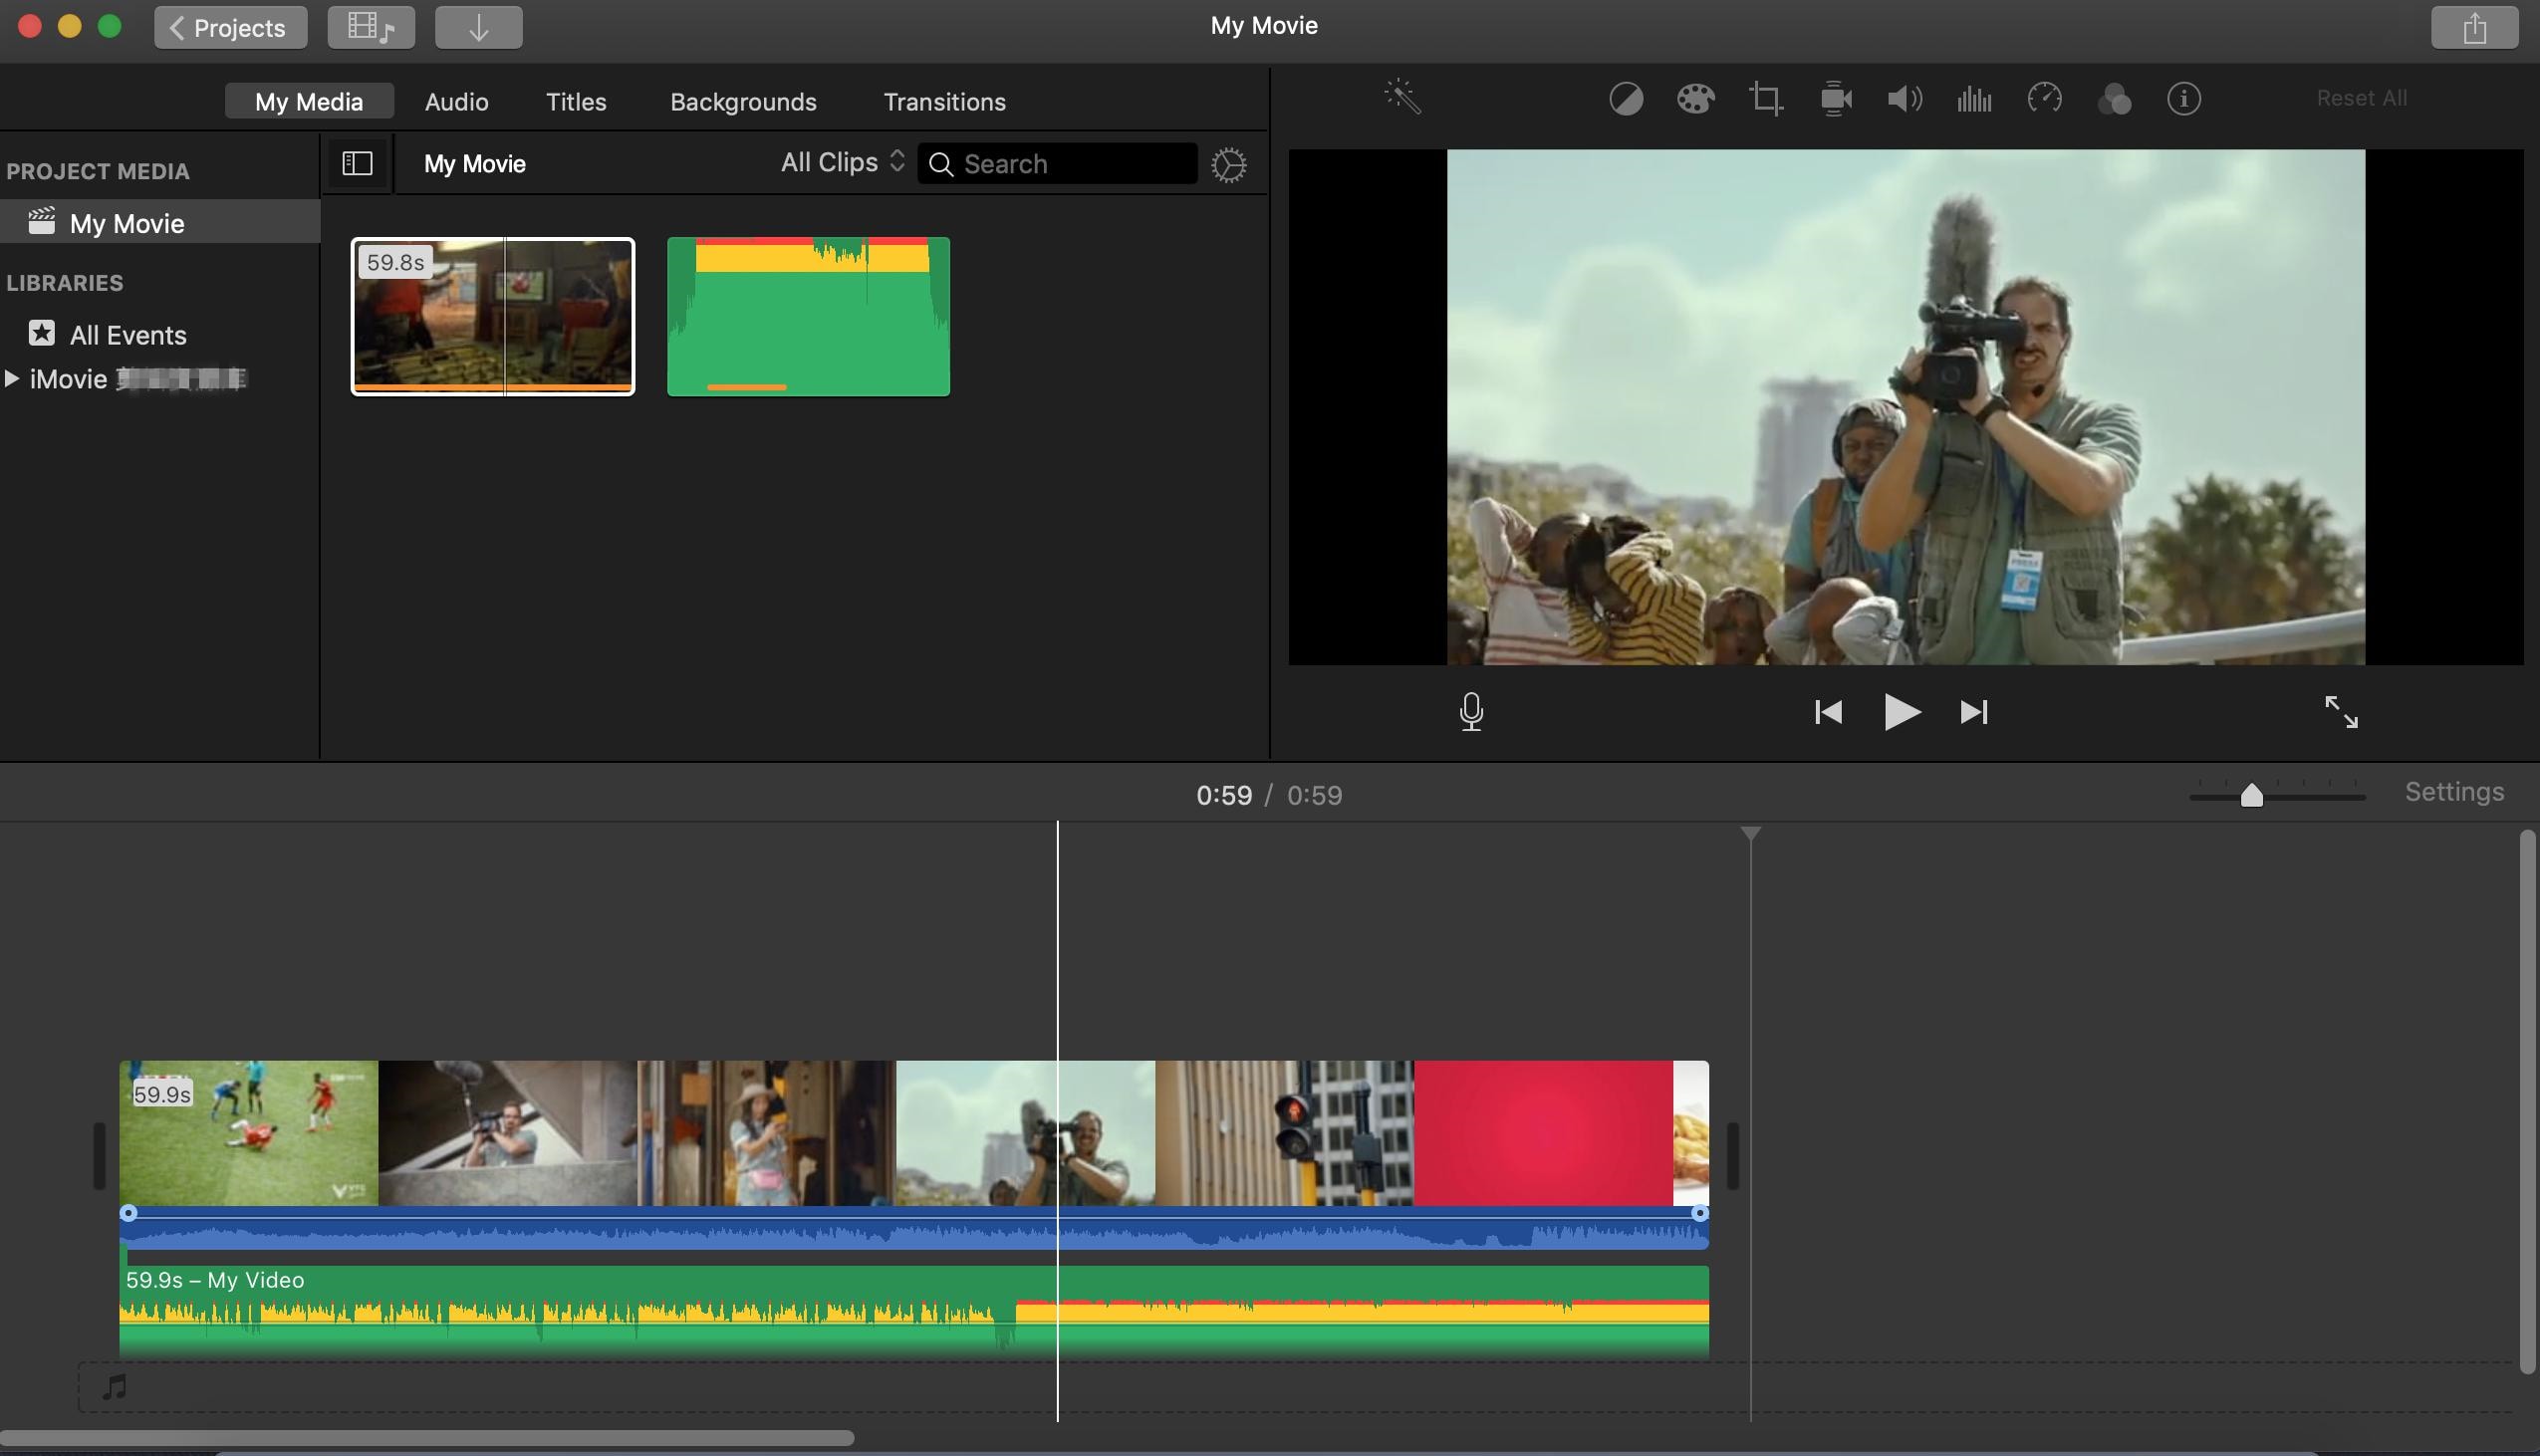
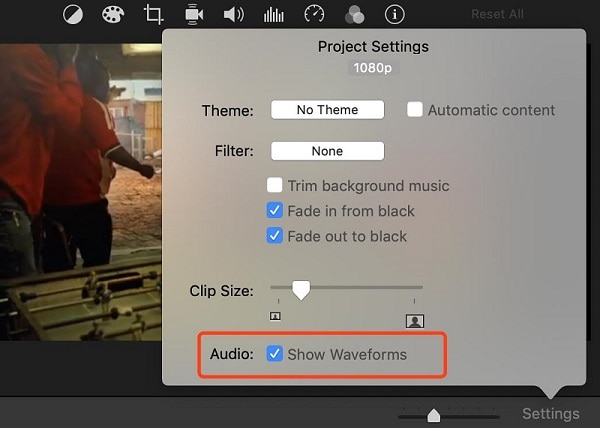
Step 2: Enable Audio Wave Form from Setting
Click settings and tick “Show Waveforms” in the panel. It’s important to do this as the fade handles are only shown on the audio waveform (yeah, those chocked up lines/curves associated with sounds). All sounds have a waveform and can be represented by it.
Step 3: Use the Fade Handle to Add a Fade Effect
On the sound’s waveform (displayed on a green background on iMovie), look closely, you’ll find certain white circles with black in the middle as shown in the image below.
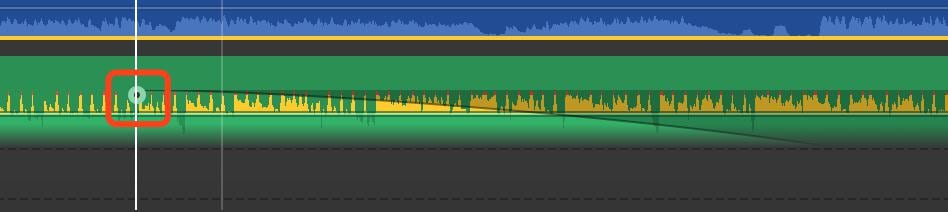
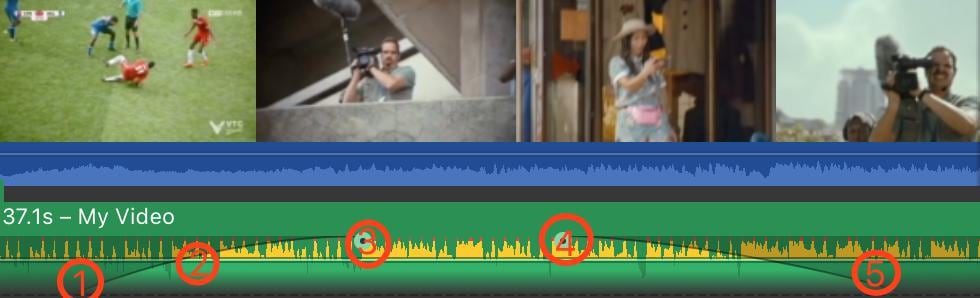
Click and drag this little friend, it is responsible for adding the fade-in/fade-out effect to your sound! It’s length directly affect the fade effect; it controls whether you want the fade effect to last over a long period of time or a short time. Think of the line generated by the fade handle as the volume of your music as it progresses. However, you should have something similar to the image below when you’re done:

The nature of the curve in the image above implies a long-lasting fade-in and fade-out effect. You’ll notice how it progresses from the bottom of the sound wave (at the beginning marked 1) and walks its way up through 2, and back down the spectrum after reaching maximum volume at 3 as the file approaches its end.
Step 4: Save Your Projet
Review your work before saving it. Changes you make to the waveform before saving aren’t permanent. You can always edit it if not satisfied.
Finally, save you work if satisfied and you’re good to go.
Make sure to read the second option if you’re in for more sound editing features.
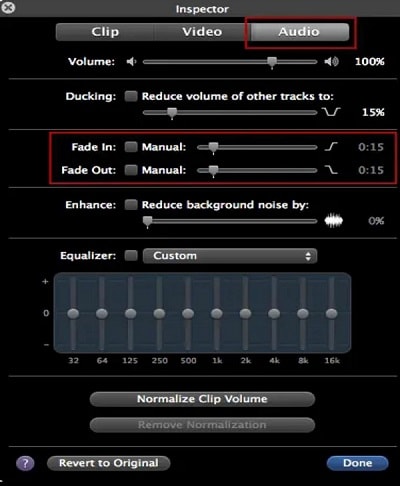
Option 2: Fade Music in iMovie using Audio Inspector
The Audio Inspector is packed with more sound editing options/features such as equalizer, background noise reduction, multiple track volume adjustment, and of course, fade-in/fade-out effects—but instead of using our little fade handle friends, the audio inspector provides automated fade-in/fade-out options and manually adjustable bars if you prefer rolling up your sleeves.
Please follow these simple steps to add a fade effect to your music using iMovie’s Audio Inspector.
Step 1: Add File
Drag and drop your file to the “My Media” panel and double click on it and select “Clip Adjustment” to open up the Inspector panel.
Step 2: Switch to Audio Inspector and Edit Music
At the Inspector, click “Audio” to switch to the audio panel. There, like in the image below, you’ll find many audio options. For the music fade-in/fade-out effect, you could easily adjust/slide the bars to suit your needs.
Ah... There’s something about equalizer knobs and bars right? If you’re the curious type, you might be tempted to play with the equalizer. To use the equalizer, simply tick the box beside it and the whole panel will come to life. You can also click “Custom” instead, to try out some pre-sets. Er... uncheck the box if you mess things up.
If you successfully created a nicer sound using the equalizer, congratulations, I now pronounce you a sound engineer.
Step 3: Save Your File
Preview your file before saving it. All clear? Go ahead and save it then.
You may also want to know: How to trim video/audio in iMovie?
Recommended Method:
Fade-in/Fade-out Music on Mac with Ease using Filmora
Looking for an easier and cleaner way to add these fade-in/fade-out effects to music? We’ll use Filmora for this. Filmora Video Editor is arguably the best alternative to iMovie. Here are some cool audio editing features of Filmora:
• Add fade-in/fade-out effects to any part of the audio (not just at the beginning and end)
• Replace or remove original video soundtrack and add yours
• Beat Detection help you sync video to music beat
• Adjust equalizer, speed and duration, volume, pitch of music
• Remove background noise
With Filmora, you’ll be done adding these effects in a jiffy. Before the start, just click the bouton below to download Filmora.
How to Fade-in/Fade-out Music using Filmora
Step 1: Import Files
Simply drag and drop your video and file on the timeline.
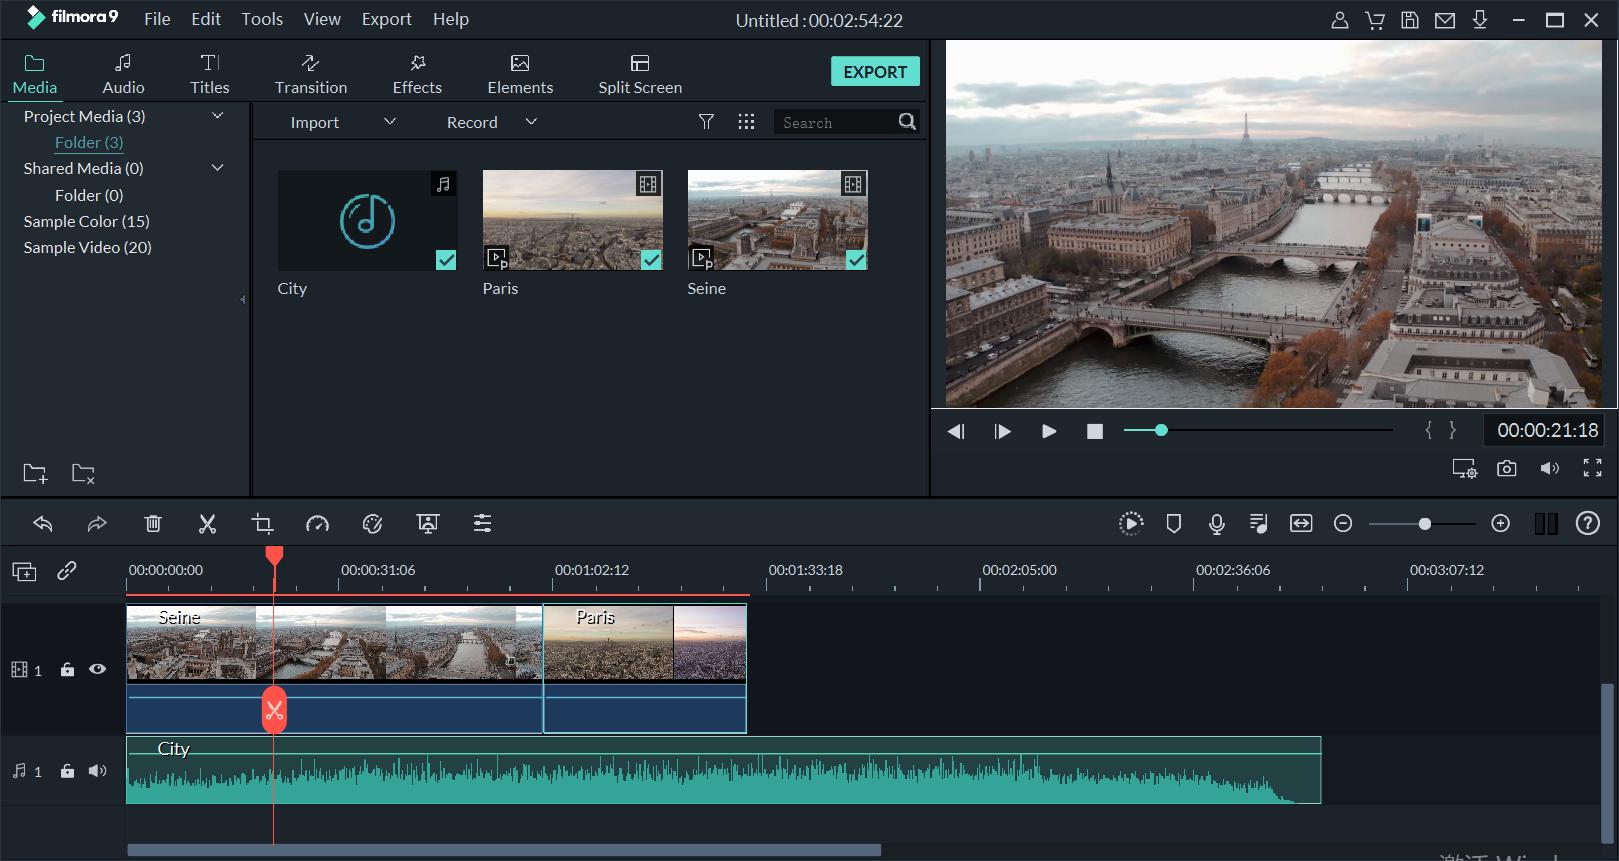
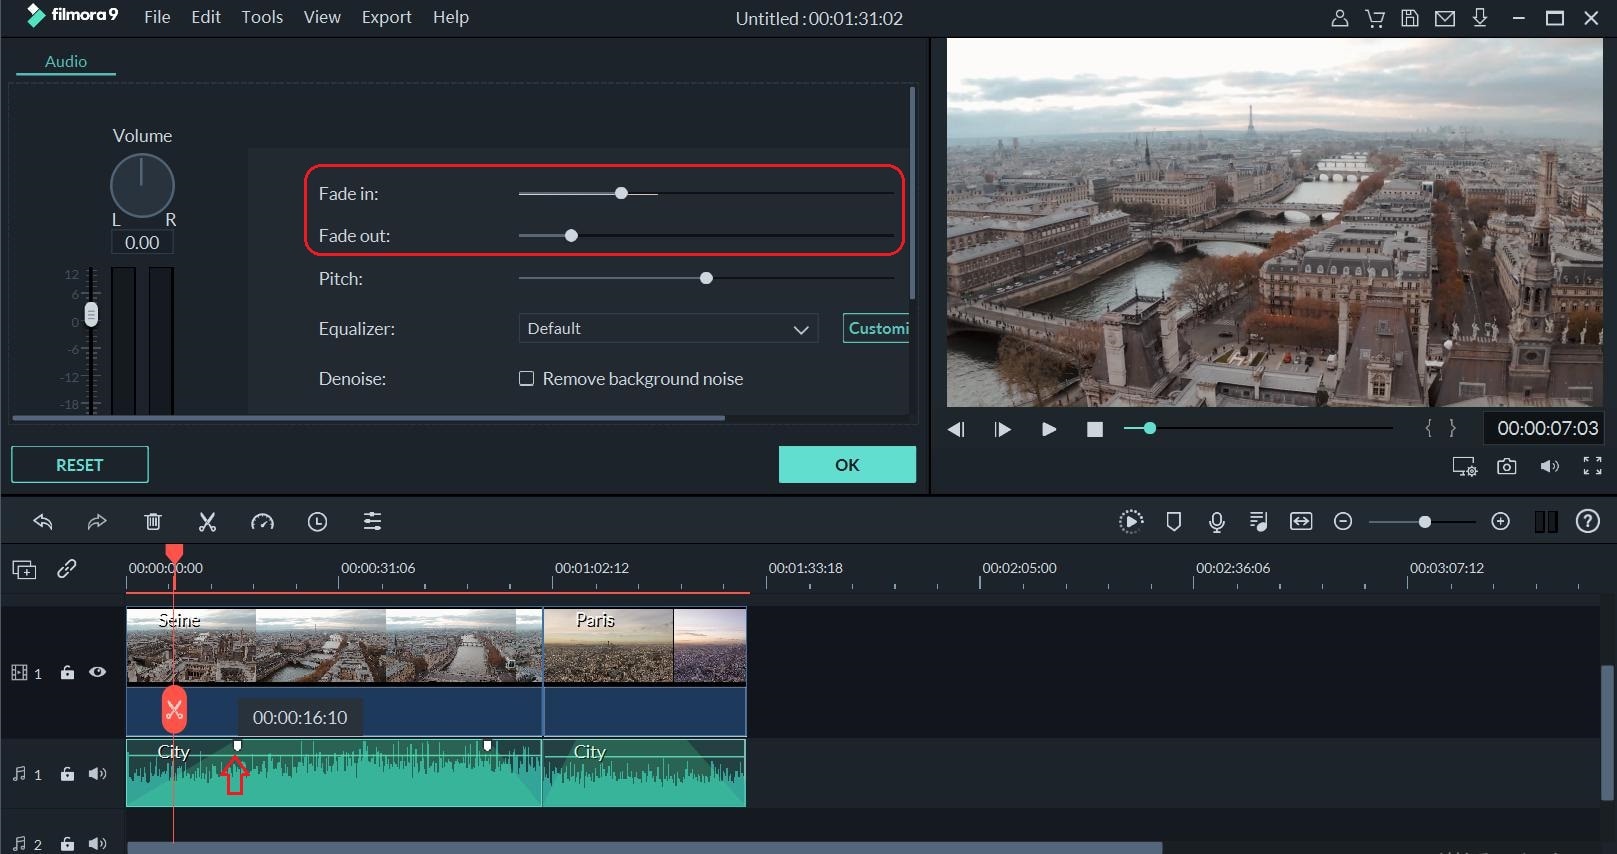
Step 2: Add the Fade-out/Fade-in Effects
Before applying the effect, you can cut out the part of the music you want to remove, and split where you want to add fade-in or fade-out effect.
Then double click on the audio file in the timeline and switch to the audio panel. From there, you’ll see available options. Move the fade-in/fade-out slide bar as desired. Or you can just move the slider bar on the music to add fade-in or fade-out.
Step 3: Export/Save Your File
To save your file, simply click on the Export button. In the next window, rename your video and select your desired format and click Export.
Conclusion
One can actually achieve basic sound engineering without having to pay an actual sound engineer. At the course of this tutorial, we used iMovie and Filmora to achieve music fade-in/fade-out effects. Cool videos/sounds never seem to be complete without these effects—and here you are; a pro at adding these effects, I guess ... at least, you now know of the three different methods used in this tutorial to fade music using iMovie and Filmora!
By the way, if you want to learn more about iMovie, here are some tutotials for you:
• How to Reverse Video in iMovie
• How to Overlay Vieo in iMovie


